'00.Flex,Flash,ActionScript'에 해당되는 글 131건

  1. 2013.04.12 Flex UX 40가지
  2. 2013.04.04 [펌] [Flex]Destination 못찾는 에러 (either does not exist or the destination has no channels defined)
  3. 2013.04.03 flex gauges 참고 싸이트
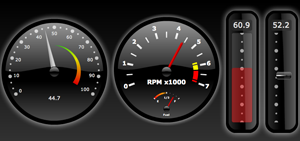
  4. 2013.04.03 flex Gauge Component
  5. 2013.04.03 flex 4 module alert error
  6. 2013.04.03 [펌] FlashVars 사용법
  7. 2013.04.03 flex Call to a possibly undefined method getStyleDeclarations through a reference with static type Class.
  8. 2013.04.01 flex 에서 동적 영역 생성시 넓이와 높이 100% 안먹힐경우
  9. 2013.03.28 [펌] Flash CS3, 4에서 간단한 Remoting 호출을 위한 클래스
  10. 2013.03.28 Embedding HTML in a Flex application using an IFrame
  11. 2013.03.28 [펌] flex chart examples
  12. 2013.03.27 flex 동적 panel 생성및 제어 (flexlib) 1
  13. 2013.03.21 [펌] flex dataGrid data 조건에 따른 글자 색상 변경
  14. 2013.03.21 flash 에서 flex swf loader 하기....
  15. 2013.03.21 LoaderInfo
  16. 2013.03.21 flash swf 에서 flex swf 파일 로드하기...
  17. 2013.03.20 [펌] Sprite의 width/height 프라퍼티에 숨겨진 비밀(?)
  18. 2013.03.20 blazeds remoteobject 예제
  19. 2013.03.19 [펌] Flex Builder 3에서 RemoteObject를 설정하고 사용하는 방법을 알아본다
  20. 2013.03.18 [펌] Linkage Class for 돌리기
  21. 2013.03.15 AdvancedDataGrid itemRenderer(2)
  22. 2013.03.15 AdvancedDataGrid itemRenderer
  23. 2013.03.12 Flex SWF <-> Flash SWF
  24. 2013.03.12 flash flex Local Connections
  25. 2013.02.25 [펌] actionscript 3.0 컴파일 에러
  26. 2013.02.05 Skinning Flex 4 Components – Skinning the Spark Panel Component
  27. 2013.02.05 mx:Panel
  28. 2012.11.09 flex 특수문자 처리
  29. 2012.10.02 [펌] 플렉스 에러 메시지와 해결 방법
  30. 2012.05.17 Enterprise Flex RIA 해부
00.Flex,Flash,ActionScript2013. 4. 12. 10:33
반응형

6 Tips for a Great Flex UX: Part 4

By Theresa Neil

Since the book focuses on rich interactions, I want to spend some time on Adobe Flex/AIR.

These tips are based on the best Flex resources I have found, and how you can use them to craft a great user experience. This is part 4 of 6:

Stock your Toolbox: 40+ Custom Flex Controls

Flex 3 includes a wide range of controls. Unfortunately, it doesn’t have all of the Essential Controls I use for RIA design. But fortunately, talented and industrious Flex developers have created numerous custom controls for Flex.
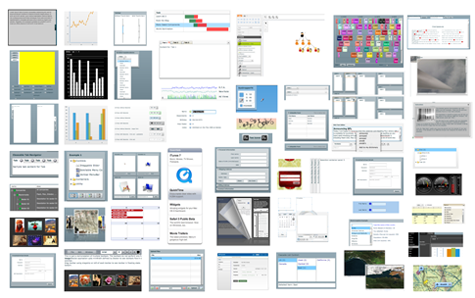
40_flex_custom_controls1

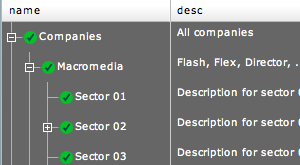
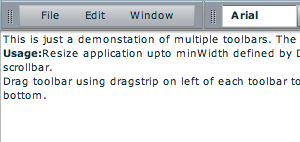
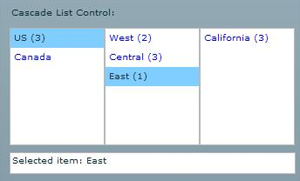
I pulled together a visual repository of custom Flex controls. Most of these controls were created to showcase certain functionality- not usability best practices. So some may need further refinement to comply with the usability principles discussed in the previous posts. Click on the picture for the demo.

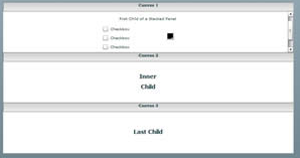
01. Accordions

accordion_with_custom_header
Complex Headers
accordion_horizontal
Horizontal Accordion
accordion_apple_style

Apple Style
More under ‘Collapsible Panels’

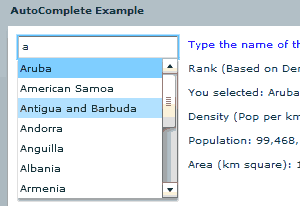
02. Auto Complete

auto_complete
More Examples

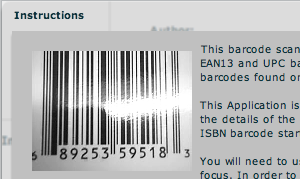
03. Bar Code Generator

barcode_reader

04. Build a List

build_a_list2

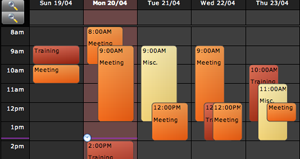
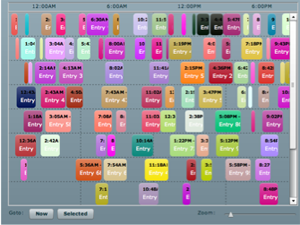
05. Calendar/Scheduler

calendar1
ILog Elixir
calendar
Ely Greenfield’s early Scheduler
calendar_scheduling
Adobe’s Scheduler on flexlib see flexlib.scheduling package

06. Captcha

captcha

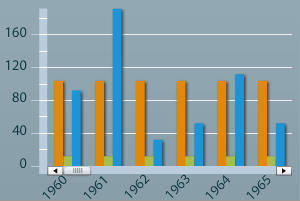
07. Charts & Graphs

chart
3D charts by iLog Elixir
graph_drill
Chart Drill Down with Animation
dash
Dashed Line Series
graph_compress
Chart Offest
legend
Advanced Legend
scroll_zoom
Scroll and Zoom

08. Collapsible Panels
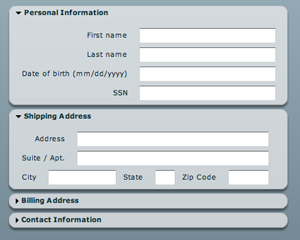
collapsible_panels
Window Shade- panels roll up and down
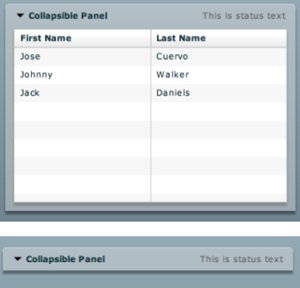
collapsible
Arc90’s Collapsible Panel
stacked_panels
Early Stacked Panels

09. Cover Flow

coverflow1
Doug McCune’s updated Cover Flow

10. Data Visualization

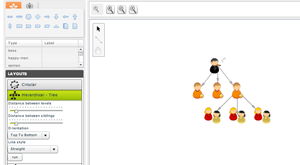
diagrammer
gauge
Kap IT Lab
ILog Elixir
BirdEye

11. Docking

dockable

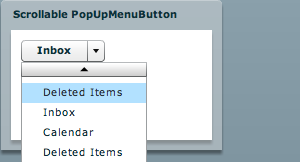
12. Drop Down Menu with Scrolling

menu_scrolling

13. Find and Highlight Text

highlight
In flexlib as Highlighter

14. Fisheye Menu (like Mac Dock)

dock

15. Flip Card

flip

16. Floating

floating

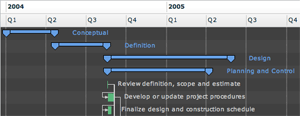
17. Gantt Chart

gantt
ILOG Elixir Gantt
gantt
Doug McCune’s Early Gantt Chart

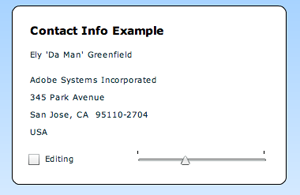
18. Inline Edit (Fields)
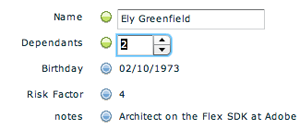
inline_edit
Early example by Ely Greenfield
inplace_edit
Modal editing variation by Ryan Swanson
* The hover invitation to edit on a field by field basis (like Flickr) works best for infrequent edits

19. Icon Loader

image_converter
On flexlib under Icon Loader

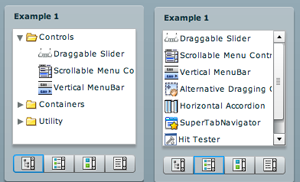
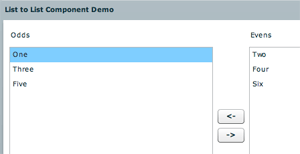
20. List/Tree Converter

list_tree
On flexlib under Convertible Tree List

21. Mask (text input and validation)

mask
On Adobe Flex Exchange

22. Multiple Document Interface (MDI)

mdi1
On flexlib under flexlib.mdi

23. Magnify

magnify1
magnify_big

24. Map Callouts

map_callouts

23. Pan and Zoom

pan_zoom

24. Page Turn

page_turn
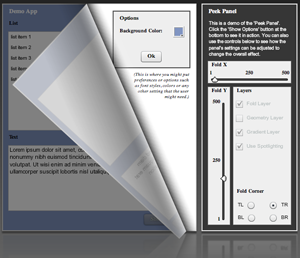
Peek Panel by Bill White (nice blog)
Ely Greenfield’s early FlexBook

Didier Braun’s PageFlip

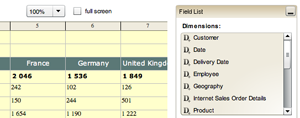
25. Pivot Table
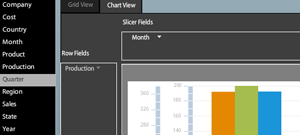
pivot
Satish’s Pivot Table
pivot_flexmonster
Flex Monster product

26. Resize

resize1
Resizeable and moveable window
resize
Resize Objects with ResizeManagerFX

27. Scrolling-Internal
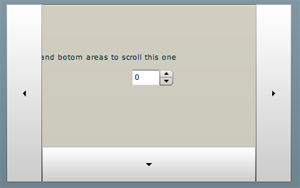
scroll_panel
In flexlib as Drag Scrolling Canvas

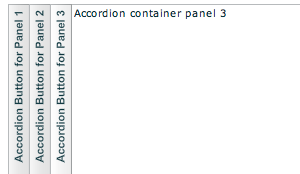
28. Side Tabs/Vertical Tabs
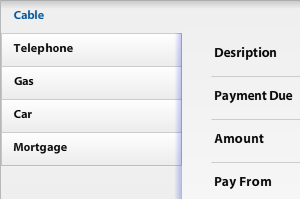
side_tabs
Degrafa ToggleButtonBar vertical tabs
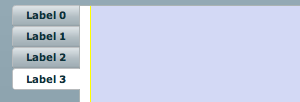
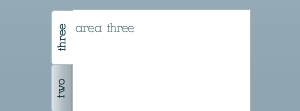
side_tabs_2
side_tabs_3
Vertical Tab Navigator

29. Sliders

slider_dual

30. Sliding Panel

slide_panel

Early example
Slide out menu with effects instead of states

31. Sparklines
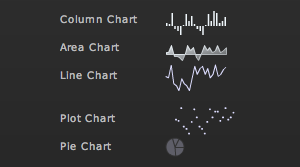
sparkline
More examples:
Fusion Charts
Sherlock Informatics
Birdeye
19nates

32. Spell Check
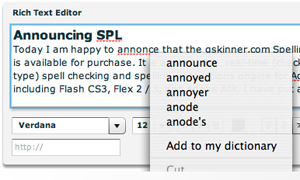
spell_check
There is also a Spell Check component on Flex Exchange

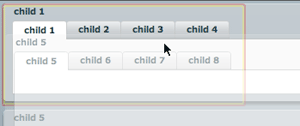
33. Tabs (configurable)

tab_2

34. Text Prompt/ Watermark Fields

watermark
At flexlib under prompting TextInput

35. Tree Table

tree_table
Early Tree Grid

36. Time Picker

time
Alternate one on Flex Exchange as Time Chooser

37. Toolbars

toolbars

38. Trees

tree
Open branches by clicking on the row
Adding leaf notes
Showing XML
Rearranging nodes with drag and drop
Drag from a Grid to a Tree
39. Upload Files

upload

40. Vertical Browse

vertical_browse

Comment with your custom Flex controls

Posted by 1010
반응형

출처 : http://blog.naver.com/PostView.nhn?blogId=dennis0203&logNo=140133999738&redirect=Dlog&widgetTypeCall=true

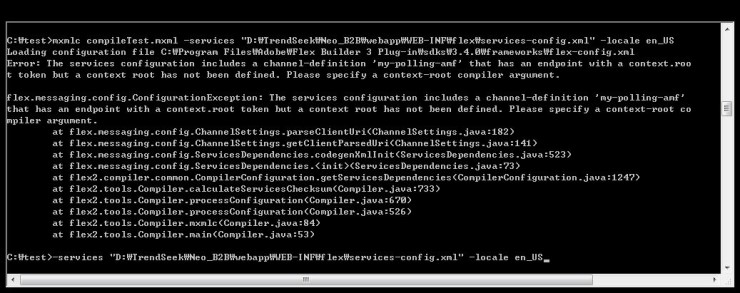
에러내용

faultCode:InvokeFailed faultString:'[MessagingError message='Destination 'memberDao' either does not exist or the destination has no channels defined (and the application does not define any default channels.)']' faultDetail:'Couldn't establish a connection to 'memberDao''

이런 애러가 나는 이유는 플렉스 컴파일러가 services-config.xml을 못찾기 때문이다.

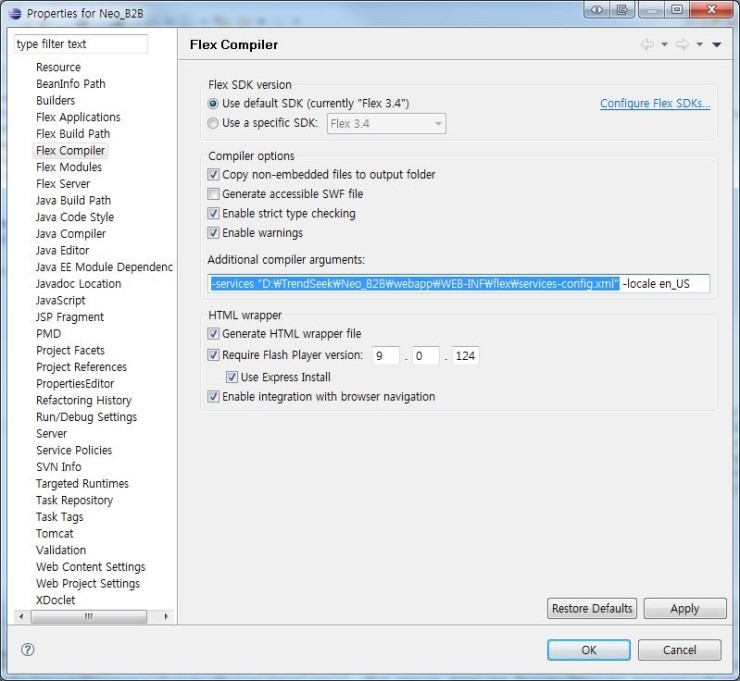
Properties - Flex Compiler - Additional compiler arguments 에 다음과 같이

-services "절대경로\service-config.xml" 을 추가해주면 문제는 해결된다.

또는 Navigator로 프로젝트 루트에 .actionScriptProperties 파일을 직접 수정해도 된다.

<compiler additionalCompilerArguments="-services & quot;/프로젝트 절대경로/services-config.xml&quot; -locale en_US" copyDependentFiles="true" enableModuleDebug="true" generateAccessible="true" htmlExpressInstall="true" htmlGenerate="true" htmlHistoryManagement="true" htmlPlayerVersion="9.0.124" htmlPlayerVersionCheck="true" outputFolderPath="bin-debug" sourceFolderPath="flex_src" strict="true" useApolloConfig="false" verifyDigests="true" warn="true">

추가로

그래도 컴파일이 되지 않는 경우가 있다.. 머가 하나 빠뜨린게 있어서..

콘솔로 컴파일 해보니 다음과 같은 에러가 난다. '...context root has not been defined...'

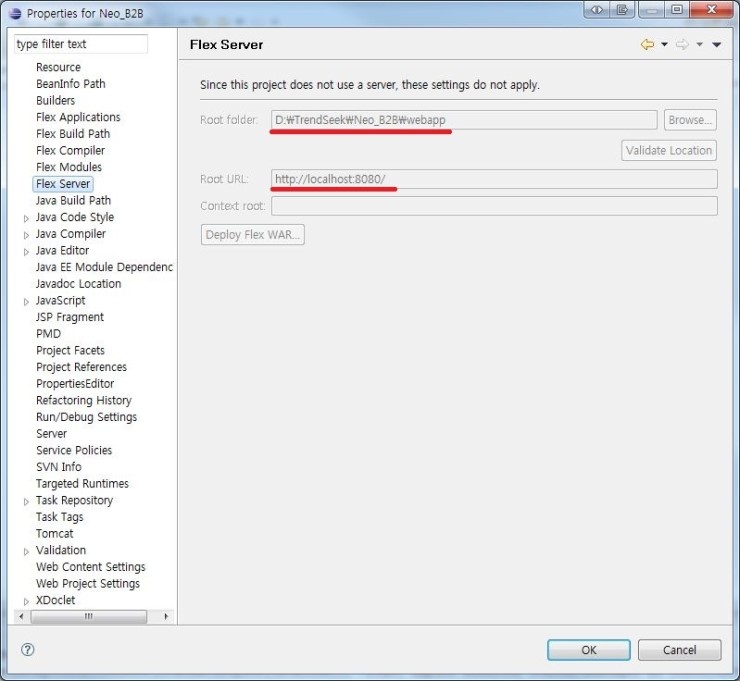
Properties - Flex Server 에 다음과 같이 입력하거나

Navigator로 프로젝트 루트에 .flexProperties 파일을 직접 수정하면 된다.

<flexProperties flexServerType="0" serverContextRoot="" serverRoot="D:/TrendSeek/Neo_B2B/webapp" serverRootURL="http://localhost:8080/" toolCompile="true" useServerFlexSDK="false" version="1"/>
Posted by 1010
반응형
Posted by 1010
반응형

Source Code:
BrightPoint Flex Library - This contains the complete collection of BrightPoint source code used in many of the projects that have been open sourced on this website
Coming Soon. Email support [at] brightpointinc [dot] com if you need a copy immediately.
Micro Charts - Source code for the Micro Charts that can be seen in the Gallery.
Coming Soon. Email support [at] brightpointinc [dot] com if you need a copy immediately.
Gauge Component - Source code for the Gauge Component that can be seen in the Gallery.
Coming Soon. Email support [at] brightpointinc [dot] com if you need a copy immediately.
Google Finance - Source code for the Google Finance Demo that can be seen in the Gallery.
Coming Soon. Email support [at] brightpointinc [dot] com if you need a copy immediately.

Posted by 1010
반응형

밑에 내용은 참고하고...중요한건...

Application 안에


/* Create dummy variables. */
   private var dragManager:DragManager;
   private var popUpManager:PopUpManager;

더미 객체 생성해주고...


Module 안에서

Alert.show("더이상 띄우지마세요~","module",4,null,null,null,4 , this.moduleFactory);


해주면됨..


------------------


If you use modules/sub apps and pop ups(Alert, ToolTip, TitleWindow, etc.) then you probably would be interested in some of the api changes that were introduced by the “Per-Module Style Management” feature in Flex 4. As I mentioned in my previous posts that StyleManager is no longer a singleton class and all modules and sub apps have their own instance of the Style Manager. So when you define a style in a module or sub app, the style definition is managed by the style manager instance of the module/sub app. This works well for most components but pop ups are a special case (all pop ups depend on the PopUpManager)

PopUpManager is a singleton and hence it lives in the top level application domain. When a component is displayed using the PopUpManager it will try to get its styles via the StyleManager in the top level application domain and so the styles that are defined in your module/sub app will be ignored. In order to provide a solution for this situation some apis were modified to accept a new optional parameter. Via the optional parameter the module factory can be specified (which is then internally used to locate the correct style manager). Some apis that were modified are:

  • mx.controls.Alert – show() method was modified to take an optional moduleFactory parameter
  • mx.manager.PopUpManager- createPopUp() and addPopUp() methods were modified to take an optional moduleFactory parameter

So if you are defining styles in your modules/sub apps, you should then pass the moduleFactory parameter to these methods. Lets look at some examples:

Following the code for a main app that loads one module(which shows Alert and TitleWindow) and one sub application (which shows ToolTip).

<?xml version="1.0" encoding="utf-8"?>
<s:Application xmlns:fx="http://ns.adobe.com/mxml/2009" xmlns:s="library://ns.adobe.com/flex/spark"
			   xmlns:mx="library://ns.adobe.com/flex/mx" width="600" height="500" >
	<fx:Style>
		@namespace s "library://ns.adobe.com/flex/spark";
		@namespace mx "library://ns.adobe.com/flex/mx";
 
		s|TitleWindow
		{
			chromeColor: #FF0000;
		}
	</fx:Style>
	<fx:Script>
		<![CDATA[
			import mx.events.FlexEvent;
			import mx.managers.PopUpManager;
 
			import spark.components.TitleWindow;
 
			private var placeHolder: PopUpManager;
			private var placeHolder2: TitleWindow;
 
			protected function popup_load_clickHandler(event:MouseEvent):void {
				if(mod_loader_pop.url == null) {
					mod_loader_pop.url = "PopUpModule.swf";
				} else {
					mod_loader_pop.loadModule();
				}
			}
 
			protected function popup_unload_clickHandler(event:MouseEvent):void {
				mod_loader_pop.unloadModule();
			}
 
			protected function toolTip_load_clickHandler(event:MouseEvent):void {
				swfLoader.load("ToolTipSubApp.swf");
			}
 
			protected function toolTip_unload_clickHandler(event:MouseEvent):void {
				swfLoader.unloadAndStop();
			}
		]]>
	</fx:Script>
	<s:layout>
		<s:VerticalLayout paddingTop="5" paddingLeft="5" />
	</s:layout>
	<s:HGroup>
		<s:Button id="popup_load" label="Load PopUp Module" click="popup_load_clickHandler(event)"/>
		<s:Button id="popup_unload" label="Unload PopUp Module" click="popup_unload_clickHandler(event)" />
		<s:Button id="toolTip_load" label="Load ToolTip App" click="toolTip_load_clickHandler(event)"/>
		<s:Button id="toolTip_unload" label="Unload ToolTip App" click="toolTip_unload_clickHandler(event)" />
	</s:HGroup>
	<s:HGroup>
		<mx:ModuleLoader id="mod_loader_pop"/>
		<mx:SWFLoader id="swfLoader" />
	</s:HGroup>
</s:Application>

If you notice, the above app sets the chromeColor for the TitleWindow to #FF0000. Also it does not use any Alert.

Let’s look at the code for the module (PopUpModule.mxml):

<?xml version="1.0" encoding="utf-8"?>
<mx:Module xmlns:fx="http://ns.adobe.com/mxml/2009" 
		   xmlns:s="library://ns.adobe.com/flex/spark" 
		   xmlns:mx="library://ns.adobe.com/flex/mx" >
	<fx:Style>
		@namespace s "library://ns.adobe.com/flex/spark";
		@namespace mx "library://ns.adobe.com/flex/mx";
 
		s|TitleWindow
		{
			fontSize: 32;
		}
	</fx:Style>
	<fx:Script>
		<![CDATA[
			import mx.events.CloseEvent;
			import mx.managers.PopUpManager;
			import spark.components.TitleWindow;
			import mx.controls.Alert;
 
			public var titleWindow: TitleWindow;
 
			protected function btn1_clickHandler(event:MouseEvent):void {
				Alert.show("clicked","module",4,null,null,null,4);
			}
 
			protected function btn2_clickHandler(event:MouseEvent):void
			{
				Alert.show("clicked","module",4,null,null,null,4 , this.moduleFactory);
			}
 
			protected function btn1_1_clickHandler(event:MouseEvent):void {
				titleWindow = PopUpManager.createPopUp(DisplayObject(systemManager),TitleWindow, true, null) as TitleWindow;
				titleWindow.title ="Title Window";
				titleWindow.width = 136;
				titleWindow.addEventListener(CloseEvent.CLOSE, closeMe, false, 0, true); 
			}
 
			protected function btn2_1_clickHandler(event:MouseEvent):void {
				titleWindow = PopUpManager.createPopUp(DisplayObject(systemManager),TitleWindow, true, null, moduleFactory) as TitleWindow;
				titleWindow.title ="Module Title Window";
				titleWindow.width = 426;
				titleWindow.addEventListener(CloseEvent.CLOSE, closeMe, false, 0, true); 
			}
 
			private function closeMe(e:CloseEvent):void {
				PopUpManager.removePopUp(titleWindow);
				titleWindow.removeEventListener(CloseEvent.CLOSE, closeMe);
			}
		]]>
	</fx:Script>
	<s:Panel width="100%" height="100%" title="PopUp Module ">
		<s:layout>
			<s:VerticalLayout paddingTop="5" paddingLeft="5" />
		</s:layout>
		<s:Button label="Show alert" id="btn1" click="btn1_clickHandler(event)" />
		<s:Button label="Show alert (with moduleFactory)" id="btn2" click="btn2_clickHandler(event)" />
		<s:Button label="show title window" id="btn1_1" click="btn1_1_clickHandler(event)" />
		<s:Button label="show title window (with moduleFactory)" id="btn2_1" click="btn2_1_clickHandler(event)" />
	</s:Panel>
</mx:Module>

The module defines the fontSize for the TitleWindow. Also it has two calls to Alert.show() (with and without the moduleFactory parameter). Similarly two calls to PopUpManager.createPopUp() (with and without the moduleFactory parameter). When you run the example code, you will notice the only the Alert and TitleWindow displayed with the moduleFactory parameter are able to pick the correct styles.

Before looking at the running swf, lets also look at the code for the sub application (ToolTipSubApp.mxml):

<?xml version="1.0" encoding="utf-8"?>
<s:Application xmlns:fx="http://ns.adobe.com/mxml/2009" height="200" width="200" 
			   xmlns:s="library://ns.adobe.com/flex/spark">
	<fx:Script>
		<![CDATA[
			import flash.events.MouseEvent;
 
			import mx.core.IToolTip;
			import mx.managers.ToolTipManager;
 
			public var mytoolTip:IToolTip;
 
			protected function panel1_mouseOverHandler(event:MouseEvent):void {
				if(useContext.selected) {
					mytoolTip = ToolTipManager.createToolTip("This is a custom tooltip in a sub App", 100, 100, null,this);
				} else {
					mytoolTip = ToolTipManager.createToolTip("This is a custom tooltip in a sub App", 100, 100, null);					
				}
			}
 
			protected function panel1_mouseOutHandler(event:MouseEvent):void {
				ToolTipManager.destroyToolTip(mytoolTip);
			}
		]]>
	</fx:Script>
	<fx:Style>
		@namespace ns "library://ns.adobe.com/flex/mx";
		@namespace s "library://ns.adobe.com/flex/spark";
 
		ns|ToolTip
		{
			color: blue;
			fontSize: 22;
		}
	</fx:Style>
	<s:layout>
		<s:VerticalLayout />
	</s:layout>
	<s:Panel width="100%" height="90%" mouseOver="panel1_mouseOverHandler(event)" mouseOut="panel1_mouseOutHandler(event)" title="Sub App">
	</s:Panel>
	<s:CheckBox label="pass context" id="useContext" />
</s:Application>

The sub app contains a Panel and a CheckBox, it also contains a style declaration for the ToolTip. When you move the mouse over the panel it displays a tooltip. By default it does not passes the context to the createToolTip method, but when the checkbox is selected it passes the content parameter. In the previous releases the context parameter was not used, but starting from Flex 4 it is being used to locate the current moduleFactory. Only when you pass the context (by selecting the checkbox) the styles for ToolTip defined in the sub app are picked.

Let’s look at the running swf now:


If you load the PopUp Module and click on the “Show alert” button, you would notice that the Alert doesn’t show up with the proper window or title bar. This reason for this broken appearance of Alert is that when the module factory is *not* passed, Alert will try to get its style from the top level style manager. But the main app does not use Alert, so the styles for Alert are not available in the main app. The solution is to pass the moduleFactory to the Alert.show() method. When you click on the “Show Alert (with moduleFactory)” button, you would see an Alert with correct Styles.

Also when you click on the “Show title window” button, you would notice that the title window shows up with chromeColor red but the fontSize style defined in the module is ignored. This reason for this is same (i.e. when the module factory is *not* passed, TitleWindow will try to get its style from the top level style manager. But the main app only sets chromeColor to red, and the modified fontSize style is not available in the main app) . The solution is to pass the moduleFactory to the PopUpManager.createPopUp() method. And when you click on the “Show title window (with moduleFactory)” button, you would see an TitleWindow with correct fontSize and chromeColor.

You would also notice similar behavioral difference when you load the Tool Tip app and play with the tool tip. The ToolTip styles defined in the sub app will only be picked when you pass the context (by selecting the checkbox) to the ToolTipManager.createToolTip() method. Passing the context sets the correct moduleFactory (which is then used to get to the correct style manager).

So, I hope you find this information useful and continue to create awesome looking and mind blowing apps.


Posted by 1010
반응형

출처 : http://hmjkor.tistory.com/323


flex 3.x

html
<object id="paramTest" classid="clsid:D27CDB6E-AE6D-11cf-96B8-444553540000" width="300" height="120">
<param name="movie" value="Example.swf" />
<param name="flashVars" value="
type=typevar&name=namevar" />
<object type="application/x-shockwave-flash"
data="Example.swf" width="300" height="120"
flashVars="type=typevar&name=namevar">
</object>


flex
creationComplete="init()"

private function init():void{
var type:String = Application.application.parameters.type as String;
var name : String = Application.application.parameters.name as String;
}


flex 4.x

html

var flashvars = {};

flashvars.type = "타입변수";
flashvars.name = "이름변수";


flex
creationComplete="init()"

private function init():void{
var type:String =
parameters.type as String;
var name : String = parameters.name as String;
}


flex 4.5

html

var flashvars = {};

flashvars.type = "타입변수";
flashvars.name = "이름변수";


flex
creationComplete="init()"

private function init():void{
var type:String =
FlexGlobals.topLevelApplication.parameters.type as String;
var name : String = FlexGlobals.topLevelApplication.parameters.name as String;
}
Posted by 1010
반응형

I haven't seen this well documented before, but if you're component was using the style manager and is throwing a bunch of warnings in Flex 4, you need to get the "global" style manager now. You probably see this error:
"3608: 'getStyleDeclaration' has been deprecated since 4.0. Please use 'IStyleManager2.getStyleDeclaration on a style manager instance'."

This is really easy to fix, but not extremely well documented. StyleManager is no longer a global singleton, but there is an instance of it running already at the top of your app. Flex 4 has a new static class called FlexGlobals. You can use that to get a reference to the top of your app and then get the instantiated one.

//Flex 3 code
StyleManager.getStyleDeclaration("someStyle");
//Flex 4 code
FlexGlobals.topLevelApplication.styleManager.getStyleDeclaration("someStyle");

출처 : http://www.jonathanrowny.com/journal/migrating-flex-4-stylemanager

Posted by 1010
반응형

flex


Note: You can specify a percentage value in the MXML width attribute, such as width="100%", but you cannot use a percentage value in the width property in ActionScript. Use the percentWidth property instead.


mxml 에서는 width 를 100% 로 줄수 있지만 ActionScript 에서는 100% 가 먹지 않으니...


percentWidth  이걸로 주면됨 (0~100) 으로...

ex:


_SWFLoader.percentWidth = 100;
_SWFLoader.percentHeight = 100;

Posted by 1010
00.Flex,Flash,ActionScript2013. 3. 28. 18:46
반응형

출처 : http://blog.jidolstar.com/527


Flash에서는 Remoting 호출을 위한 클래스가 존재하지 않는다. NetConnection을 가지고 할 수 있으나 Remoting 호출을 위한 전용 클래스가 아니기 때문에 실용적이지 못하다.

Flex에서는 Remoting 호출을 위해서 RemoteObject 클래스가 있다. 하지만 Flex 전용이라 Flash CS3, 4 개발자는 쓸 수 없다.

여기서는 NetConnection을 한번 wrapping하여 Remoting 호출을 구현한 Service 클래스를 소개한다. 이 Service 클래스는 byteArray.org 블로그 운영자가 만든 것으로 필요할 때 사용하면 매우 유용할 것이라 생각한다.

mport org.bytearray.remoting.Service;
import org.bytearray.remoting.PendingCall;
import org.bytearray.remoting.events.FaultEvent;
import org.bytearray.remoting.events.ResultEvent;

var service:Service=new Service("HelloRemoting",
"http://localhost:8001/amfphp/gateway.php");

var pendingCall:PendingCall=service.sayHello("remoting");
pendingCall.addEventListener(ResultEvent.RESULT,onResult);
pendingCall.addEventListener(FaultEvent.FAULT,onFault);

function onResult(e:ResultEvent):void{
trace(e.result);
}

function onFault(e:FaultEvent):void{
trace(e.fault);
}

사용법은 위처럼 너무 간단하다. AMFPHP, OpenAMF등으로 Remoting 서비스를 위한 서버를 구축하고 클라이언트는 Flash를 통해 개발하려는 사람에게 매우 유용할 듯 싶다. 또는 Flex가 아닌 순수 ActionScript 3.0 으로만 개발하려는 사람에게도 괜찮을 것 같다.


더 자세한 내용은 아래에 이 코드를 만든 원저자의 글을 보길 바란다.


Making Flash Remoting easier in Flash CS3

Posted by 1010
00.Flex,Flash,ActionScript2013. 3. 28. 18:36
반응형

Finally Updated: Embedding HTML in a Flex application using an IFrame

I've updated to Flex 2 (and which can also be used in Flex 3) the code by Christophe Coenraets for embedding HTML in a Flex application using an iframe.

You can see a demo of it here.

You can download the code here.

To run locally, first compile IFrameDemo.mxml. If you are using Flex Builder, unclick "Generate HTML wrapper file" in the Flex Compiler settings before publishing, since there is an existing HTML wrapper. After this, you can view IFrameDemo.html. If you get a "Security sandbox violation" error, you need to put the IFrameDemo directory in the local-trusted sandbox. See the Flex documentation for information on updating FlashPlayerTrust files.

There's been some comments below that say these instructions are no longer valid in Flex Builder 3. So check out the comments if these instructions don't work for you.

The one cause for limitations in this code is the use of opaque for wmode. I've seen reports of tabbing problems in the player, and running more than one player when using opaque wmode seems to degrade performance.

Check below the ad for some very important updates. The comments also have a lot of excellent details in them.

Update 1: see this post for an update to the code that needs less HTML changes, allows multiple HTML pages to be referenced at once, and controls the HTML visibility as needed.

Update 2 (an important update that I highly suggest you read): for my new views on iframes and Flex, read my post from July 2008: Don't Use IFrames for HTML in Flex

Posted by 1010
00.Flex,Flash,ActionScript2013. 3. 28. 16:05
반응형

컬럼차트
1. 컬럼에 라벨 넣기
http://blog.flexexamples.com/2008/01/23/displaying-the-labels-vertically-in-flex-columnchart-control/
2. Custom라벨
http://blog.flexexamples.com/2007/11/25/adding-custom-labels-to-a-flex-columnchart-controls-column-series/
3. 컬럼 width change
http://blog.flexexamples.com/2007/11/24/changing-the-default-column-width-ratio-of-a-columnchart-control-in-flex/
4. 컬럼 color mouseover change
http://blog.flexexamples.com/2007/11/24/setting-a-columnchart-controls-item-roll-over-color-and-item-selection-color-in-flex/
5. 컬럼 color gradient fill-in
http://blog.flexexamples.com/2007/11/22/creating-a-radial-gradient-fill-on-a-columnchart-controls-column-series-in-flex/
6. 컬럼 세부화
http://demo.quietlyscheming.com/drillDown/app.html


라인차트
1. 배경 격자
http://blog.flexexamples.com/2007/11/15/displaying-grid-lines-in-a-flex-linechart-control/
2. 라인 color change
http://blog.flexexamples.com/2007/11/13/changing-default-line-colors-in-a-flex-linechart-control/

3. 라인차트 레전드 체크박스

http://flexdevtips.blogspot.com/2009/10/linechart-with-checkbox-legend.html

4. 라인차트 동적으로 그리기

http://blog.daum.net/_blog/BlogTypeView.do?blogid=0AIhE&articleno=17147067#ajax_history_home

5. Add and remove lineseries - Flex LineChart

http://whatsmytitletoday.blogspot.com/2008/12/add-and-remove-lineseries-flex.html

6. 라인의 포인트에 동글뱅이, 네모등으로 표시기

http://thesunrises.tistory.com/58

7. Line Chart BackgroundElement color

http://kb.cnblogs.com/a/1587795/

8.레전드의 기준값을 여러개 주지

http://livedocs.adobe.com/flex/3/html/help.html?content=charts_types_12.html


파이차트
1. item클릭시 alert Display
http://blog.flexexamples.com/2007/11/15/displaying-a-pieseries-items-data-when-a-user-clicks-an-item-in-a-flex-piechart-control/
2. item mouseover시 value강조
http://blog.flexexamples.com/2007/11/10/exploding-wedges-in-a-flex-piechart-control-based-on-user-input/
3. PieChart Crea By Only AS3
http://blog.flexexamples.com/2007/11/07/creating-a-simple-piechart-in-flex-using-actionscript/
4. Custom Label Position
http://blog.flexexamples.com/2007/11/04/positioning-labels-in-a-flex-piechart-control/


바차트
1. Custom Label Axis
http://blog.flexexamples.com/2007/10/15/rotating-labels-in-a-flex-chart-axis-using-the-labelrotation-style/
2. Animate Bar Value
http://blog.flexexamples.com/2007/10/15/using-data-effects-to-animate-chart-data/
3. End of Bar Chart
http://blog.flexexamples.com/2007/10/11/creating-clustered-stacked-overlaid-and-100-bar-charts-in-flex-3/


CartesianDataCanvas 사용하여 차트에 선 그리기

1. FLEX 3 : Custom ColumnChart (adding display objects to chart)

http://www.codesofmylife.com/2011/03/02/flex-3-custom-columnchart-adding-display-objects-to-chart-2/

2. Drawing on chart controls

http://livedocs.adobe.com/flex/3/html/help.html?content=charts_eventsandeffects_13.html

3. Flex Chart Zoom Window

http://blog.ninjacaptain.com/tag/cartesiandatacanvas/


기타검색

Setting a ColumnChart control’s item roll over color and item selection color in Flex
: Chart 에 롤 오버 시, 색상이 변경
Adding a stroke around a ColumnSeries item in a Flex ColumnChart control
: 컬럼 시리즈에 외곽선 처리
Creating a radial gradient fill on a ColumnChart control’s column series in Flex
: 컬럼 색상에 그라데이션 처리
Animating a Flex PieChart control’s rotation when a user clicks on an item
: 파이 차트 클릭 시, 움직임 처리
Setting specific minimum and maximum ranges for a Flex LineChart control LinearAxis
: 라인 차트 최소, 최대값 범위 지정
Aligning data in a Flex LineChart control to horizontal and vertical tick marks
: 백그라운드에 색상 입력하기
Alternating background column colors in a Flex LineSeries chart
: 백그라운드에 색상 입력하기
Changing a chart legend’s direction
: 범례 표시
Creating a custom label function on a Flex LineChart control’s category axis
: 카테고리 축(X축) 라벨 표시
Changing the horizontal grid line frequency in a Flex LineChart control using the horizontalChangeCount style
: 수평 그리드 라인 처리
Displaying grid lines in a Flex LineChart control
: 그리드 라인 표시 처리
Alternating background row colors in a Flex LineSeries chart
: 백그라운드에 색상 입력하기
Customizing the horizontal grid lines in a Flex LineChart control
: 그리드 라인 색상 처리
Displaying a PieSeries item’s data when a user clicks an item in a Flex PieChart control
: 파이 차트 외곽선 및 아이템 클릭 시 표현
Changing default line colors in a Flex LineChart control
: 라인 차트 색상 바꾸기
Removing the default drop shadow from a LineChart chart in Flex
: 라인 차트 그림자 없애기
Controlling whether a LineChart should set its base value at zero
: 라인 차트 기준 값이 0일 때, 아닐 때
Drawing transparent pie wedges in a Flex PieChart control
: 파이 차트 부분 투명하게 만들기
Exploding all wedges in a Flex PieChart control using the explodeRadius property
: 파이 차트 아이템 간격 조정하기
Customizing radial strokes in a Flex PieChart control
: 파이 차트 아이템 간격 선색상, 굵기, Cap(?) 조정하기
Customizing callout strokes in a Flex PieChart control
: 파이 차트 아이템 지정 선색상, 굵기, Cap(?) 조정하기
Exploding wedges in a Flex PieChart control based on user input
: 파이 차트 아이템 선택 시, 선택된 아이템만 떨어져서 보여주기
Creating a simple PieChart in Flex using ActionScript
: ActionScript로 파이 차트 생성하기
Creating custom fills in a Flex PieChart control using the fillFunction property
: 파이 차트 아이템 색상 지정하기
Rotating a Flex PieChart control when a user clicks on an item
: 파이 차트 아이템 선택 시, 회전하며 표현하기
Exploding wedges in a Flex PieChart control
: 파이 차트 롤 오버 시, 음영 주기
Customizing strokes in a Flex PieChart control
: 파이 차트 외곽선 굵기 조정하기
Removing the drop shadow from a Flex PieChart control
: 파이 차트 그림자 없애기
Positioning labels in a Flex PieChart control
: 파이 차트 라벨 위치 조정하기
Creating a custom data tip function on a Flex PieChart control
: 롤 오버 시, Data Tip 한꺼번에 보여주기
Displaying all data tips at once on a Flex PieChart control
: Data Tip 한꺼번에 보여주기
Dropping labels in a Flex Chart
: 라벨(X 축) 드롭하여 보여주기
Rotating labels in a Flex chart axis using the labelRotation style
: 라벨(X, Y축) 회전 시키기
Changing the bar width ratio on a Flex Bar Chart
: 막대 차트 막대 넓이 조정하기
Using data effects to animate chart data
: 차트 표현 시, 효과 주기
Creating donut shaped Pie charts using the innerRadius style
: 파이 차트 도넛형태로 표현하기
Creating clustered, stacked, overlaid, and 100% Bar charts in Flex 3
: 막대 차트 표현 방법
Setting a Flex Pie Chart’s start angle
: 파이 차트 시작점(각도) 조정하기
Animating data changes in a Flex Pie Chart
: 파이 차트 변환 시, 효과 주기
Using special characters in your Flex applications
: 특수문자 표현하기

[출처] flex chart examples|작성자 고구 마

Posted by 1010
00.Flex,Flash,ActionScript2013. 3. 27. 13:15
반응형
Posted by 1010
00.Flex,Flash,ActionScript2013. 3. 21. 20:29
반응형

출처 : http://hks003.egloos.com/1957266


dataGrid 에서 아이템렌더(itemRenderer)를 사용하는 가장 기본적인 소스코드 인것같다. 아이템렌더 사용에 익숙해지기 위해서 많이 보아두어야 할듯 ^^

[결과물]


[Source file test.mxml]


[Source as file CustomComp.as ] 같은 디렉토리에


<원본출처: 바로가기>

Posted by 1010
00.Flex,Flash,ActionScript2013. 3. 21. 19:02
반응형
////////////////////////////////////////////////////////////////////////////////
//
//  Licensed to the Apache Software Foundation (ASF) under one or more
//  contributor license agreements.  See the NOTICE file distributed with
//  this work for additional information regarding copyright ownership.
//  The ASF licenses this file to You under the Apache License, Version 2.0
//  (the "License"); you may not use this file except in compliance with
//  the License.  You may obtain a copy of the License at
//
//      http://www.apache.org/licenses/LICENSE-2.0
//
//  Unless required by applicable law or agreed to in writing, software
//  distributed under the License is distributed on an "AS IS" BASIS,
//  WITHOUT WARRANTIES OR CONDITIONS OF ANY KIND, either express or implied.
//  See the License for the specific language governing permissions and
//  limitations under the License.
//
////////////////////////////////////////////////////////////////////////////////
package
{

import flash.display.Loader;
import flash.display.Sprite;
import flash.display.StageAlign;
import flash.display.StageScaleMode;
import flash.events.Event;
import flash.net.URLRequest;
import flash.system.ApplicationDomain;

/**
 *  Classes used by the networking protocols go here
 */
import mx.messaging.config.ConfigMap; ConfigMap;
import mx.messaging.messages.AcknowledgeMessage; AcknowledgeMessage;
import mx.messaging.messages.AcknowledgeMessageExt; AcknowledgeMessageExt;
import mx.messaging.messages.AsyncMessage; AsyncMessage;
import mx.messaging.messages.AsyncMessageExt; AsyncMessageExt;
import mx.messaging.messages.CommandMessage; CommandMessage;
import mx.messaging.messages.CommandMessageExt; CommandMessageExt;
import mx.messaging.messages.ErrorMessage; ErrorMessage;
import mx.messaging.messages.HTTPRequestMessage; HTTPRequestMessage;
import mx.messaging.messages.MessagePerformanceInfo; MessagePerformanceInfo;
import mx.messaging.messages.RemotingMessage; RemotingMessage;
import mx.messaging.messages.SOAPMessage; SOAPMessage;
import mx.core.mx_internal;

[SWF(width="600", height="700")]
public class air_Bootstrap_Managers extends Sprite
{
    /**
     *  The URL of the application SWF to be loaded
     *  by this bootstrap loader.
     */
    private static const applicationURL:String = "assets/zzaird_Bootstrap_Managers_Child.swf";

	public var portNumber : Number=80;
    /**
     *  Constructor.
     */
    public function air_Bootstrap_Managers()
    {
        super();

        if (ApplicationDomain.currentDomain.hasDefinition("mx.core::UIComponent"))
            throw new Error("UIComponent should not be in Bootstrap.");

        stage.scaleMode = StageScaleMode.NO_SCALE;
        stage.align = StageAlign.TOP_LEFT;

        if (!stage)
            isStageRoot = false;

        root.loaderInfo.addEventListener(Event.INIT, initHandler);
        
        if(root.loaderInfo != null && root.loaderInfo.parameters != null)
		{
			for (var ix:String in root.loaderInfo.parameters) 
			{
				if(ix == "port") 
				{
					portNumber = Number(root.loaderInfo.parameters[ix]);	
				}
			}
		}        
    }

    /**
     *  The Loader used to load the application SWF.
     */
    private var loader:Loader;

    /**
     *  @private
     *  Whether we are the stage root or not.
     *  We are only the stage root if we were the root
     *  of the first SWF that got loaded by the player.
     *  Otherwise we could be top level but not stage root
     *  if we are loaded by some other non-Flex shell
     *  or are sandboxed.
     */
    private var isStageRoot:Boolean = true;
    
	/**
	 *  @private
	 *  Whether the content is loaded
	 */
	private var contentLoaded:Boolean;    

    /**
     *  Called when BootstrapLoader.swf has been loaded.
     *  Starts loading the application SWF
     *  specified by applicationURL.
     */
    private function initHandler(event:Event):void
    {
        loader = new Loader();
        addChild(loader);
        loader.contentLoaderInfo.addEventListener(
            Event.COMPLETE, completeHandler);
        loader.load(new URLRequest(applicationURL));
        loader.addEventListener("mx.managers.SystemManager.isBootstrapRoot", bootstrapRootHandler);
        loader.addEventListener("mx.managers.SystemManager.isStageRoot", stageRootHandler);

        stage.addEventListener(Event.RESIZE, resizeHandler);
    }

    private function completeHandler(event:Event):void
    {
        contentLoaded = true;
    }

    private function bootstrapRootHandler(event:Event):void
    {
        // cancel event to indicate that the message was heard
        event.preventDefault();
    }

    private function stageRootHandler(event:Event):void
    {
        // cancel event to indicate that the message was heard
        if (!isStageRoot)
            event.preventDefault();
    }

    private function resizeHandler(event:Event):void
    {
		if (!contentLoaded)
			return;
			
        loader.width = stage.width;
        loader.height = stage.height;
        Object(loader.content).setActualSize(stage.width, stage.height);
    }
}

}


Posted by 1010
00.Flex,Flash,ActionScript2013. 3. 21. 14:36
반응형

패키지 flash.display
클래스 public class LoaderInfo
상속 LoaderInfo Inheritance EventDispatcher Inheritance Object

언어 버전 : ActionScript 3.0
Player 버전 : Flash Player 9

LoaderInfo 클래스는 로드된 SWF 파일 또는 로드된 이미지 파일(JPEG, GIF, PNG)에 대한 정보를 제공합니다. LoaderInfo 객체는 어떤 표시 객체에서도 사용할 수 있습니다. 제공되는 정보에는 로드 진행률, 로더의 URL 및 로드된 내용, 해당 미디어의 총 바이트 수, 미디어의 공칭 높이 및 폭이 포함됩니다.

두 가지 방법으로 LoaderInfo 객체에 액세스할 수 있습니다.

  • flash.display.Loader 객체의 contentLoaderInfo 속성 - contentLoaderInfo 속성은 모든 Loader 객체에서 언제든지 사용할 수 있습니다. load() 또는 loadBytes() 메서드를 호출하지 않았거나 제대로 로드되지 않은 Loader 객체의 경우, contentLoaderInfo 속성의 여러 속성에 액세스하려고 시도하면 오류가 발생합니다.
  • 표시 객체의 loaderInfo 속성

Loader 객체의 contentLoaderInfo 속성은 Loader 객체가 로드 중인 내용에 대한 정보를 제공하는 반면, DisplayObject 의 loaderInfo 속성은 해당 표시 객체의 루트 SWF 파일에 대한 정보를 제공합니다.

Loader 객체로 로드된 객체(SWF 파일 또는 비트맵)의 loaderInfo 속성은 Loader 객체의 contentLoaderInfo 속성과 동일한 LoaderInfo 객체를 가리킵니다. 즉, 로드된 객체 파일과 이를 로드한 Loader 객체가 하나의 LoaderInfo 객체를 공유합니다. SWF 파일의 기본 클래스 인스턴스에 Loader 객체가 없으므로 loaderInfo 속성이 SWF 파일 기본 클래스 인스턴스의 LoaderInfo에 액세스할 수 있는 유일한 방법입니다.

다음 다이어그램에서는 LoaderInfo 객체의 여러 가지 용도, 즉 SWF 파일의 기본 클래스 인스턴스, Loader 객체의 contentLoaderInfo 속성, 로드된 객체의 loaderInfo 속성으로 사용되는 것을 보여 줍니다.

로딩 작업이 완료되지 않았을 때 Loader 객체의 contentLoaderInfo 속성에서 일부 속성은 사용할 수 없습니다. bytesLoaded, bytesTotal, url, loaderURLapplicationDomain과 같은 일부 속성은 얻을 수 있습니다. loaderInfo 객체가 init 이벤트를 전달할 때 loaderInfo 객체 및 로드된 이미지 또는 SWF 파일의 모든 속성에 액세스할 수 있습니다.

참고: LoaderInfo 객체의 모든 속성은 읽기 전용입니다.

EventDispatcher.dispatchEvent() 메서드는 LoaderInfo 객체에 적용할 수 없습니다. LoaderInfo 객체에서 dispatchEvent()를 호출하면 IllegalOperationError 예외가 발생합니다.

예제를 통해 확인하십시오.

참고 사항


Public 속성
속성 다음에 의해 정의됨
actionScriptVersion : uint
[read-only] 로드된 SWF 파일의 ActionScript 버전입니다.
LoaderInfo
applicationDomain : ApplicationDomain
[read-only] 외부 SWF 파일을 로드할 때, 로드된 클래스에 포함된 모든 ActionScript 3.0 정의는 applicationDomain 속성에 저장됩니다.
LoaderInfo
bytes : ByteArray
[read-only] LoaderInfo 객체와 연관된 바이트입니다.
LoaderInfo
bytesLoaded : uint
[read-only] 해당 미디어에 대해 로드된 바이트 수입니다.
LoaderInfo
bytesTotal : uint
[read-only] 전체 미디어 파일에서 압축된 바이트 수입니다.
LoaderInfo
childAllowsParent : Boolean
[read-only] 내용(자식)의 로더(부모)에 대한 신뢰 관계를 표현합니다.
LoaderInfo
Inherited constructor : Object
지정된 객체 인스턴스의 클래스 객체 또는 생성자 함수에 대한 참조입니다.
Object
content : DisplayObject
[read-only] 이 LoaderInfo 객체와 연관된 로드된 객체입니다.
LoaderInfo
contentType : String
[read-only] 로드된 파일의 MIME 유형입니다.
LoaderInfo
frameRate : Number
[read-only] 로드된 SWF 파일의 공칭 프레임 속도(초당 프레임 수)입니다.
LoaderInfo
height : int
[read-only] 로드된 파일의 공칭 높이입니다.
LoaderInfo
loader : Loader
[read-only] 이 LoaderInfo 객체와 연관된 Loader 객체입니다.
LoaderInfo
loaderURL : String
[read-only] 이 LoaderInfo 객체가 설명하는 미디어의 로딩을 시작한 SWF 파일의 URL입니다.
LoaderInfo
parameters : Object
[read-only] 로드된 SWF 파일에 제공된 매개 변수를 나타내는 이름 값 쌍이 포함된 객체입니다.
LoaderInfo
parentAllowsChild : Boolean
[read-only] Loader(부모)의 내용(자식)에 대한 신뢰 관계를 표현합니다.
LoaderInfo
Inherited prototype : Object
[static] 클래스 또는 함수 객체의 프로토타입 객체에 대한 참조입니다.
Object
sameDomain : Boolean
[read-only] 로더와 내용 간의 도메인 관계를 표현합니다. 원래 도메인이 동일하면 true이고, 그렇지 않으면 false입니다.
LoaderInfo
sharedEvents : EventDispatcher
[read-only] 보안 경계선 너머로 이벤트를 교환하는 데 사용할 수 있는 EventDispatcher 인스턴스입니다.
LoaderInfo
swfVersion : uint
[read-only] 로드된 SWF 파일의 파일 형식 버전입니다.
LoaderInfo
url : String
[read-only] 로드 중인 미디어의 URL입니다.
LoaderInfo
width : int
[read-only] 로드된 내용의 공칭 폭입니다.
LoaderInfo
Public 메서드
메서드 다음에 의해 정의됨
Inherited
addEventListener(type:String, listener:Function, useCapture:Boolean = false, priority:int = 0, useWeakReference:Boolean = false):void
리스너에서 이벤트 알림을 받을 수 있도록 EventDispatcher 객체에 이벤트 리스너 객체를 등록합니다.
EventDispatcher
Inherited
이벤트를 이벤트 흐름으로 전달합니다.
EventDispatcher
[static] 객체로 정의된 SWF 파일과 연관된 LoaderInfo 객체를 반환합니다.
LoaderInfo
Inherited
EventDispatcher 객체에 특정 유형의 이벤트에 대한 리스너가 등록되어 있는지 여부를 확인합니다.
EventDispatcher
Inherited
지정된 속성이 객체에 정의되어 있는지 여부를 나타냅니다.
Object
Inherited
Object 클래스의 인스턴스가 매개 변수로 지정된 객체의 프로토타입 체인에 있는지 여부를 나타냅니다.
Object
Inherited
지정된 속성이 존재하고 열거 가능한지 여부를 나타냅니다.
Object
Inherited
removeEventListener(type:String, listener:Function, useCapture:Boolean = false):void
EventDispatcher 객체에서 리스너를 제거합니다.
EventDispatcher
Inherited
루프 작업에서 동적 속성을 사용할 수 있는지 여부를 설정합니다.
Object
Inherited
지정된 객체의 문자열 표현을 반환합니다.
Object
Inherited
지정된 객체의 프리미티브 값을 반환합니다.
Object
Inherited
이 EventDispatcher 객체 또는 조상 객체에 지정한 이벤트 유형에 대한 이벤트 리스너가 등록되어 있는지 여부를 확인합니다.
EventDispatcher
이벤트
이벤트 요약 다음에 의해 정의됨
Inherited Flash Player가 운영 체제에서 포커스를 얻어 활성화될 때 전달됩니다. EventDispatcher
데이터가 성공적으로 로드되면 전달됩니다. LoaderInfo
Inherited Flash Player가 운영 체제에서 포커스를 잃고 비활성화될 때 전달됩니다. EventDispatcher
HTTP를 통해 네트워크 요청이 이루어지고 Flash Player가 해당 HTTP 상태 코드를 감지할 수 있을 때 전달됩니다. LoaderInfo
로드된 SWF 파일의 속성 및 메서드에 액세스할 수 있을 때 전달됩니다. LoaderInfo
로드 작업 실패를 유발하는 입력 또는 출력 오류가 발생할 때 전달됩니다. LoaderInfo
로드 작업이 시작될 때 전달됩니다. LoaderInfo
다운로드 작업이 진행되어 데이터가 수신될 때 전달됩니다. LoaderInfo
Loader 객체의 unload() 메서드를 사용하여 로드된 객체를 제거할 때마다, 또는 동일한 Loader 객체를 통해 두 번째 로드를 수행하고 로드를 시작하기에 앞서 원본 내용을 제거할 때 LoaderInfo 객체에 의해 전달됩니다. LoaderInfo
속성 정보
actionScriptVersion 속성
actionScriptVersion:uint [read-only]

언어 버전 : ActionScript 3.0
Player 버전 : Flash Player 9

로드된 SWF 파일의 ActionScript 버전입니다. 언어 버전은 ActionScriptVersion.ACTIONSCRIPT2ActionScriptVersion.ACTIONSCRIPT3과 같이 ActionScriptVersion 클래스의 열거 유형을 사용하여 지정됩니다.

참고: 이 속성은 항상 ActionScriptVersion.ACTIONSCRIPT2 또는 ActionScriptVersion.ACTIONSCRIPT3 중 하나를 값으로 갖습니다. ActionScript 1.0 및 2.0 모두 ActionScriptVersion.ACTIONSCRIPT2(버전 2.0)로 보고됩니다. 이 속성에서는 ActionScript 1.0 및 2.0을 ActionScript 3.0과 구분할 뿐입니다.


구현
public function get actionScriptVersion():uint

오류
Error — 요청한 정보를 검색할 수 있을 만큼 파일이 다운로드되지 않은 경우입니다.
Error — 파일이 SWF 파일이 아닌 경우입니다.

참고 사항

applicationDomain 속성
applicationDomain:ApplicationDomain [read-only]

언어 버전 : ActionScript 3.0
Player 버전 : Flash Player 9

외부 SWF 파일을 로드할 때, 로드된 클래스에 포함된 모든 ActionScript 3.0 정의는 applicationDomain 속성에 저장됩니다.

SWF 파일의 모든 코드는 응용 프로그램 도메인에 존재하도록 정의됩니다. 현재 응용 프로그램 도메인은 주 응용 프로그램이 실행되는 위치입니다. 시스템 도메인에는 현재 도메인을 포함하여 모든 응용 프로그램 도메인이 포함되므로 모든 Flash Player 클래스가 들어 있습니다.

시스템 도메인을 제외한 모든 응용 프로그램 도메인에는 연관된 부모 도메인이 있습니다. 기본 응용 프로그램 applicationDomain의 부모 도메인은 시스템 도메인입니다. 로드된 클래스는 부모에서 아직 정의되지 않은 경우에만 정의됩니다. 로드된 클래스 정의를 새 정의를 사용하여 재정의할 수는 없습니다.

응용 프로그램 도메인 사용법 관련 예제는 ActionScript 3.0 프로그래밍의 "클라이언트 시스템 환경" 장을 참조하십시오.


구현
public function get applicationDomain():ApplicationDomain

오류
SecurityError — 호출자의 이 보안 샌드박스는 이 ApplicationDomain에 액세스할 수 없습니다.

참고 사항

bytes 속성
bytes:ByteArray [read-only]

언어 버전 : ActionScript 3.0

LoaderInfo 객체와 연관된 바이트입니다.


구현
public function get bytes():ByteArray

오류
SecurityError — 이 API에 액세스하는 객체가 보안 제한 사항 때문에 로드된 객체에 액세스할 수 없는 경우입니다. 예를 들어, Loader 객체가 contentLoaderInfo.content 속성에 대한 액세스를 시도하는데 로드된 내용에 액세스할 수 있는 보안 권한이 부여되지 않은 경우에 해당됩니다.

자세한 내용은 ActionScript 3.0 프로그래밍의 "Flash Player 보안" 장을 참조하십시오.

플레이어 버전: Flash Player 9 업데이트 3.

bytesLoaded 속성
bytesLoaded:uint [read-only]

언어 버전 : ActionScript 3.0
Player 버전 : Flash Player 9

해당 미디어에 대해 로드된 바이트 수입니다. 이 숫자가 bytesTotal 값과 동일하면 모든 바이트가 로드된 것입니다.


구현
public function get bytesLoaded():uint
bytesTotal 속성
bytesTotal:uint [read-only]

언어 버전 : ActionScript 3.0
Player 버전 : Flash Player 9

전체 미디어 파일에서 압축된 바이트 수입니다.

이 LoaderInfo 객체의 Loader 객체가 첫 번째 progress 이벤트를 전달하기 전에 bytesTotal은 0입니다. Loader 객체에서 첫 번째 progress 이벤트 발생 후 bytesTotal에서 다운로드할 실제 바이트 수가 반영됩니다.


구현
public function get bytesTotal():uint

참고 사항

childAllowsParent 속성
childAllowsParent:Boolean [read-only]

언어 버전 : ActionScript 3.0
Player 버전 : Flash Player 9

내용(자식)의 로더(부모)에 대한 신뢰 관계를 표현합니다. 자식이 부모의 액세스를 허용한 경우 true이며, 그렇지 않으면 false입니다. 자식 객체가 allowDomain() 메서드를 호출하여 부모 도메인에게 권한을 부여한 경우 또는 크로스 도메인 정책이 자식 도메인에 로드되어 부모 도메인에게 권한을 부여한 경우 이 속성은 true로 설정됩니다. 부모와 자식이 같은 도메인에 있으면 이 속성은 true로 설정됩니다.

자세한 내용은 ActionScript 3.0 프로그래밍의 "Flash Player 보안" 장을 참조하십시오.


구현
public function get childAllowsParent():Boolean

오류
Error — 요청한 정보를 검색할 수 있을 만큼 파일이 다운로드되지 않았을 때 발생합니다.
content 속성
content:DisplayObject [read-only]

언어 버전 : ActionScript 3.0
Player 버전 : Flash Player 9

이 LoaderInfo 객체와 연관된 로드된 객체입니다.


구현
public function get content():DisplayObject

오류
SecurityError — 이 API에 액세스하는 객체가 보안 제한 사항 때문에 로드된 객체에 액세스할 수 없는 경우입니다. 예를 들어, Loader 객체가 contentLoaderInfo.content 속성에 대한 액세스를 시도하는데 로드된 내용에 액세스할 수 있는 보안 권한이 부여되지 않은 경우에 해당됩니다.

자세한 내용은 ActionScript 3.0 프로그래밍의 "Flash Player 보안" 장을 참조하십시오.

contentType 속성
contentType:String [read-only]

언어 버전 : ActionScript 3.0
Player 버전 : Flash Player 9

로드된 파일의 MIME 유형입니다. Flash Player가 유형을 결정하기에 충분할 만큼 파일이 로드되지 않은 경우 이 값은 null입니다. 다음 목록에 나열된 값을 가질 수 있습니다.

  • "application/x-shockwave-flash"
  • "image/jpeg"
  • "image/gif"
  • "image/png"


구현
public function get contentType():String
frameRate 속성
frameRate:Number [read-only]

언어 버전 : ActionScript 3.0
Player 버전 : Flash Player 9

로드된 SWF 파일의 공칭 프레임 속도(초당 프레임 수)입니다. 이 숫자는 정수인 경우가 많지만 반드시 정수일 필요는 없습니다.

이 값은 실제 사용 중인 프레임 속도와 다를 수 있습니다. Flash Player에서는 모든 로드된 SWF 파일에 대해 한 번에 하나의 프레임 속도만 사용하며, 이 프레임 속도는 기본 SWF 파일의 공칭 프레임 속도에 의해 결정됩니다. 또한 하드웨어, 사운드 동기화 및 기타 요인에 의해 Flash Player가 기본 프레임 속도에 도달하지 못할 수도 있습니다.


구현
public function get frameRate():Number

오류
Error — 요청한 정보를 검색할 수 있을 만큼 파일이 다운로드되지 않은 경우입니다.
Error — 파일이 SWF 파일이 아닌 경우입니다.
height 속성
height:int [read-only]

언어 버전 : ActionScript 3.0
Player 버전 : Flash Player 9

로드된 파일의 공칭 높이입니다. 이 값은 내용이 표시되는 실제 높이와 다를 수 있습니다. 로드된 내용 또는 그 부모 표시 객체의 크기가 조절될 수 있기 때문입니다.


구현
public function get height():int

오류
Error — 요청한 정보를 검색할 수 있을 만큼 파일이 다운로드되지 않은 경우입니다.
loader 속성
loader:Loader [read-only]

언어 버전 : ActionScript 3.0
Player 버전 : Flash Player 9

이 LoaderInfo 객체와 연관된 Loader 객체입니다. 이 LoaderInfo 객체가 SWF 파일 기본 클래스 인스턴스의 loaderInfo 속성이면 연관된 Loader 객체가 없습니다.


구현
public function get loader():Loader

오류
SecurityError — 이 API에 액세스하는 객체가 보안 제한 사항 때문에 Loader 객체에 액세스할 수 없는 경우입니다. 예를 들어, 로드된 SWF 파일이 loaderInfo.loader 속성에 대한 액세스를 시도하는데 로드 중인 SWF 파일에 액세스할 수 있는 보안 권한이 부여되지 않은 경우에 해당됩니다.

자세한 내용은 ActionScript 3.0 프로그래밍의 "Flash Player 보안" 장을 참조하십시오.

loaderURL 속성
loaderURL:String [read-only]

언어 버전 : ActionScript 3.0
Player 버전 : Flash Player 9

이 LoaderInfo 객체가 설명하는 미디어의 로딩을 시작한 SWF 파일의 URL입니다. SWF 파일 기본 클래스의 인스턴스에서 이 URL은 SWF 파일 자체의 URL과 동일합니다.


구현
public function get loaderURL():String
parameters 속성
parameters:Object [read-only]

언어 버전 : ActionScript 3.0
Player 버전 : Flash Player 9

로드된 SWF 파일에 제공된 매개 변수를 나타내는 이름 값 쌍이 포함된 객체입니다.

for-in 루프를 사용하여 parameters 객체에서 모든 이름 및 값을 추출할 수 있습니다.

매개 변수의 두 가지 소스는 기본 SWF 파일 URL의 쿼리 문자열과 FlashVars HTML 매개 변수 값(기본 SWF 파일에만 영향을 미침)입니다.

parameters 속성은 ActionScript 1.0 및 2.0에서 SWF 파일 매개 변수를 기본 타임라인의 속성으로 제공하는 기법을 대체합니다.

ActionScript 1.0 또는 2.0을 사용하는 SWF 파일이 포함된 Loader 객체의 경우 parameters 속성 값이 null입니다. ActionScript 3.0을 사용하는 SWF 파일이 포함된 Loader 객체의 경우에만 이 값이 null이 아닙니다.


구현
public function get parameters():Object
parentAllowsChild 속성
parentAllowsChild:Boolean [read-only]

언어 버전 : ActionScript 3.0
Player 버전 : Flash Player 9

Loader(부모)의 내용(자식)에 대한 신뢰 관계를 표현합니다. 부모가 자식의 액세스를 허용한 경우 true이며, 그렇지 않으면 false입니다. 부모 객체가 allowDomain() 메서드를 호출하여 자식 도메인에게 권한을 부여한 경우 또는 크로스 도메인 정책이 부모 도메인에 로드되어 자식 도메인에게 권한을 부여한 경우 이 속성은 true로 설정됩니다. 부모와 자식이 같은 도메인에 있으면 이 속성은 true로 설정됩니다.

자세한 내용은 ActionScript 3.0 프로그래밍의 "Flash Player 보안" 장을 참조하십시오.


구현
public function get parentAllowsChild():Boolean

오류
Error — 요청한 정보를 검색할 수 있을 만큼 파일이 다운로드되지 않았을 때 발생합니다.
sameDomain 속성
sameDomain:Boolean [read-only]

언어 버전 : ActionScript 3.0
Player 버전 : Flash Player 9

로더와 내용 간의 도메인 관계를 표현합니다. 원래 도메인이 동일하면 true이고, 그렇지 않으면 false입니다.


구현
public function get sameDomain():Boolean

오류
Error — 요청한 정보를 검색할 수 있을 만큼 파일이 다운로드되지 않았을 때 발생합니다.
sharedEvents 속성
sharedEvents:EventDispatcher [read-only]

언어 버전 : ActionScript 3.0
Player 버전 : Flash Player 9

보안 경계선 너머로 이벤트를 교환하는 데 사용할 수 있는 EventDispatcher 인스턴스입니다. 로더 및 로드된 대상이 서로 신뢰하지 않더라도 양쪽 모두 sharedEvents에 액세스할 수 있습니다.


구현
public function get sharedEvents():EventDispatcher
swfVersion 속성
swfVersion:uint [read-only]

언어 버전 : ActionScript 3.0
Player 버전 : Flash Player 9

로드된 SWF 파일의 파일 형식 버전입니다. 파일 형식은 SWFVersion.FLASH7SWFVersion.FLASH9와 같이 SWFVersion 클래스의 열거 유형을 사용하여 지정됩니다.


구현
public function get swfVersion():uint

오류
Error — 요청한 정보를 검색할 수 있을 만큼 파일이 다운로드되지 않은 경우입니다.
Error — 파일이 SWF 파일이 아닌 경우입니다.

참고 사항

url 속성
url:String [read-only]

언어 버전 : ActionScript 3.0
Player 버전 : Flash Player 9

로드 중인 미디어의 URL입니다.

이 LoaderInfo 객체의 Loader 객체가 첫 번째 progress 이벤트를 전달하기 전에는 Loader 객체의 load() 메서드를 호출할 때 지정된 초기 URL만 url 속성 값에 반영될 수 있습니다. 첫 번째 progress 이벤트가 발생한 후 url 속성은 모든 리디렉션 및 상대 URL이 처리된 후 미디어의 최종 URL을 반영합니다.


구현
public function get url():String

참고 사항

width 속성
width:int [read-only]

언어 버전 : ActionScript 3.0
Player 버전 : Flash Player 9

로드된 내용의 공칭 폭입니다. 이 값은 내용이 표시되는 실제 폭과 다를 수 있습니다. 로드된 내용 또는 그 부모 표시 객체의 크기가 조절될 수 있기 때문입니다.


구현
public function get width():int

오류
Error — 요청한 정보를 검색할 수 있을 만큼 파일이 다운로드되지 않은 경우입니다.
메서드 정보
getLoaderInfoByDefinition () 메서드
public static function getLoaderInfoByDefinition(object:Object):LoaderInfo

언어 버전 : ActionScript 3.0

객체로 정의된 SWF 파일과 연관된 LoaderInfo 객체를 반환합니다.

플레이어 버전: Flash Player 9 업데이트 3.

매개 변수

object:Object — SWF 파일 객체입니다.

반환값
LoaderInfo — 연관된 LoaderInfo 객체입니다.
이벤트 정보
complete 이벤트
이벤트 객체 유형: flash.events.Event
Event.type property = flash.events.Event.COMPLETE

언어 버전 : ActionScript 3.0
Player 버전 : Flash Player 9

데이터가 성공적으로 로드되면 전달됩니다. complete 이벤트는 항상 init 이벤트 이후에 전달됩니다.

complete 이벤트 객체의 type 속성 값을 정의합니다.

이 이벤트에는 다음과 같은 속성이 있습니다.

속성
bubbles false
cancelable false; 취소할 기본 비헤이비어가 없습니다.
currentTarget 현재 이벤트 리스너를 통해 Event 객체를 처리하고 있는 객체입니다.
target 로드가 완료된 네트워크 객체입니다.

참고 사항

httpStatus 이벤트
이벤트 객체 유형: flash.events.HTTPStatusEvent
HTTPStatusEvent.type property = flash.events.HTTPStatusEvent.HTTP_STATUS

언어 버전 : ActionScript 3.0
Player 버전 : Flash Player 9

HTTP를 통해 네트워크 요청이 이루어지고 Flash Player가 해당 HTTP 상태 코드를 감지할 수 있을 때 전달됩니다.

httpStatus 이벤트 객체의 type 속성 값을 정의합니다.

이 이벤트에는 다음과 같은 속성이 있습니다.

속성
bubbles false
cancelable false; 취소할 기본 비헤이비어가 없습니다.
currentTarget 현재 이벤트 리스너를 통해 Event 객체를 처리하고 있는 객체입니다.
status 서버에 의해 반환된 HTTP 상태 코드입니다.
target HTTP 상태 코드를 수신하는 네트워크 객체입니다.

참고 사항

init 이벤트
이벤트 객체 유형: flash.events.Event
Event.type property = flash.events.Event.INIT

언어 버전 : ActionScript 3.0
Player 버전 : Flash Player 9

로드된 SWF 파일의 속성 및 메서드에 액세스할 수 있을 때 전달됩니다. 다음 두 조건이 존재할 경우 LoaderInfo 객체는 init 이벤트를 전달합니다.

  • 로드된 객체와 연관된 모든 속성 및 메서드, 그리고 LoaderInfo 객체와 연관된 모든 속성 및 메서드에 액세스 가능합니다.
  • 모든 자식 객체의 생성자가 완료되었습니다.

init 이벤트는 항상 complete 이벤트 이전에 전달됩니다.

init 이벤트 객체의 type 속성 값을 정의합니다.

이 이벤트에는 다음과 같은 속성이 있습니다.

속성
bubbles false
cancelable false; 취소할 기본 비헤이비어가 없습니다.
currentTarget 현재 이벤트 리스너를 통해 Event 객체를 처리하고 있는 객체입니다.
target 로드 중인 SWF 파일과 연관된 LoaderInfo 객체입니다.

참고 사항

ioError 이벤트
이벤트 객체 유형: flash.events.IOErrorEvent
IOErrorEvent.type property = flash.events.IOErrorEvent.IO_ERROR

언어 버전 : ActionScript 3.0
Player 버전 : Flash Player 9

로드 작업 실패를 유발하는 입력 또는 출력 오류가 발생할 때 전달됩니다.

ioError 이벤트 객체의 type 속성 값을 정의합니다.

이 이벤트에는 다음과 같은 속성이 있습니다.

속성
bubbles false
cancelable false; 취소할 기본 비헤이비어가 없습니다.
currentTarget 현재 이벤트 리스너를 통해 Event 객체를 처리하고 있는 객체입니다.
target 입력/출력 오류가 발생한 네트워크 객체입니다.
text 오류 메시지로 표시될 텍스트입니다.

참고 사항

open 이벤트
이벤트 객체 유형: flash.events.Event
Event.type property = flash.events.Event.OPEN

언어 버전 : ActionScript 3.0
Player 버전 : Flash Player 9

로드 작업이 시작될 때 전달됩니다.

open 이벤트 객체의 type 속성 값을 정의합니다.

이 이벤트에는 다음과 같은 속성이 있습니다.

속성
bubbles false
cancelable false; 취소할 기본 비헤이비어가 없습니다.
currentTarget 현재 이벤트 리스너를 통해 Event 객체를 처리하고 있는 객체입니다.
target 연결을 설정한 네트워크 객체입니다.

참고 사항

progress 이벤트
이벤트 객체 유형: flash.events.ProgressEvent
ProgressEvent.type property = flash.events.ProgressEvent.PROGRESS

언어 버전 : ActionScript 3.0
Player 버전 : Flash Player 9

다운로드 작업이 진행되어 데이터가 수신될 때 전달됩니다.

progress 이벤트 객체의 type 속성 값을 정의합니다.

이 이벤트에는 다음과 같은 속성이 있습니다.

속성
bubbles false
bytesLoaded 리스너가 이벤트를 처리할 때 로드된 항목 수 또는 바이트 수입니다.
bytesTotal 로드 프로세스가 완료되면 최종적으로 로드될 총 바이트 수 또는 항목 수입니다.
cancelable false; 취소할 기본 비헤이비어가 없습니다.
currentTarget 현재 이벤트 리스너를 통해 Event 객체를 처리하고 있는 객체입니다.
target 진행률을 보고하는 네트워크 객체입니다.

참고 사항

unload 이벤트
이벤트 객체 유형: flash.events.Event
Event.type property = flash.events.Event.UNLOAD

언어 버전 : ActionScript 3.0
Player 버전 : Flash Player 9

Loader 객체의 unload() 메서드를 사용하여 로드된 객체를 제거할 때마다, 또는 동일한 Loader 객체가 두 번째 로드를 실행하기 위해 먼저 원본 내용을 제거할 때 LoaderInfo 객체에 의해 전달됩니다.

unload 이벤트 객체의 type 속성 값을 정의합니다.

이 이벤트에는 다음과 같은 속성이 있습니다.

속성
bubbles false
cancelable false; 취소할 기본 비헤이비어가 없습니다.
currentTarget 현재 이벤트 리스너를 통해 Event 객체를 처리하고 있는 객체입니다.
target 언로드하거나 교체할 SWF 파일과 연관된 LoaderInfo 객체입니다.

참고 사항

LoaderInfoExample.as

다음 예제에서는 LoaderInfoExample 클래스를 사용하여 스테이지에 이미지를 표시합니다. 이는 다음 단계로 이루어집니다.
  1. 이미지의 이름과 위치를 나타내는 url 속성이 만들어집니다.
  2. 클래스 생성자가 loader라는 이름의 Loader 객체를 생성합니다.
  3. loader 객체가 이미지를 제대로 로드하기 위해 이벤트 리스너를 인스턴스화합니다.
  4. 생성자가 파일 이름 및 위치를 나타내도록 전달된 url이 있는 새 URLRequest 객체 request를 만듭니다.
  5. 그런 다음 request 객체가 loader 객체의 load() 메서드로 전달되며, 이 메서드는 이미지를 표시 목록으로 로드합니다.

중요: 이 예제에서는 컴파일된 SWF 파일과 같은 디렉토리에 Image.gif 파일이 있어야 합니다. 기본 SWF 파일의 크기에 알맞은 영역이 있는 이미지를 사용합니다.

package {
    import flash.display.Loader;
    import flash.display.LoaderInfo;
    import flash.display.Sprite;
    import flash.events.*;
    import flash.net.URLRequest;

    public class LoaderInfoExample extends Sprite {
        private var url:String = "Image.gif";

        public function LoaderInfoExample() {
            var loader:Loader = new Loader();
            loader.contentLoaderInfo.addEventListener(Event.INIT, initHandler);
            loader.contentLoaderInfo.addEventListener(IOErrorEvent.IO_ERROR, ioErrorHandler);
            var request:URLRequest = new URLRequest(url);
            loader.load(request);
            addChild(loader);
        }

        private function initHandler(event:Event):void {
            var loader:Loader = Loader(event.target.loader);
            var info:LoaderInfo = LoaderInfo(loader.contentLoaderInfo);
            trace("initHandler: loaderURL=" + info.loaderURL + " url=" + info.url);
        }

        private function ioErrorHandler(event:IOErrorEvent):void {
            trace("ioErrorHandler: " + event);
        }
    }
}
Posted by 1010
00.Flex,Flash,ActionScript2013. 3. 21. 12:43
반응형

var loader:Loader = new Loader();
addChild
(loader);
loader
.load(new URLRequest("my-flex-app.swf"));
loader
.addEventListener("mx.managers.SystemManager.isBootstrapRoot", systemManagerHandler);
loader
.addEventListener("mx.managers.SystemManager.isStageRoot", systemManagerHandler);

function systemManagerHandler(event:Event):void { event.preventDefault(); }


이거때문에 삽질했음...T.T


Posted by 1010
00.Flex,Flash,ActionScript2013. 3. 20. 18:38
반응형


출ㅊ: http://cafe.naver.com/flexcomponent.cafe?iframe_url=/ArticleRead.nhn%3Farticleid=3464


안녕하세요, 명랑늑대입니다. 이 카페에 가입한 후 첫 글을 남기게 되네요.

저는 최근에 Sprite을 상속한 클래스를 구현하다가 width, height(Sprite 클래스에 정의된 프라퍼티들)의 값을 생성자에서 변경하는 것이 잘 안 되는 문제를 겪었습니다.


카페를 검색해보니, 거친마루 님께서도 같은 문제를 겪으션던지 질문을 올리셨더군요.

http://cafe.naver.com/flexcomponent/2034

그런데 아직 해결되지 않은 의문인 건 같아서, 제가 좀더 파고 들어봤습니다.

Sprite 객체의 width/height 값을 변경하면 내부적으로 어떤 일이 일어나는가?

var aSprite:Sprite = new Sprite();

....

aSprite.width = 100;

위와 같이 Sprite 객체의 width 프라퍼티에 새 값을 대입하면, width의 값이 바뀌는 것으로 끝나지 않습니다.
Sprite에 정의된 scaleX, scaleY도 함께 변합니다(사실은 그 외에도 함께 바뀌는 프라퍼티들이 여럿 더 있습니다만, 이번 논의와는 직접적인 관련이 없으므로 언급하지 않겠습니다). 아시다시피 scaleX, scaleY는 스케일링에 관련된 놈들이죠.

그렇다면 width 값을 바꾸려고 했을 뿐인데, 왜 스케일링에 관련된 프라퍼티들이 *자동으로* 바뀌는가?

이는 전형적인 GUI 컴포넌트의 크기를 바꾸는 것과 Sprite의 크기를 바꾸는 행위가 전혀 다른 의미를 내포하고 있기 때문이라고 할 수 있습니다.

예를 들어, 여러 개의 하위 컴포넌트가 들어있는 컨테이너의 크기를 바꾸면 어떤 일이 일어나나요?

하위 컴포넌트들의 크기도 함께 변할 것입니다(아닐 수도 있지만). 심지어는 컴포넌트들의 배치가 달라지기도 합니다. 그래서 레이아웃의 개념이 들어가죠. 즉, 컨테이너의 크기가 바뀐 비율과는 상관없이 레이아웃 정책에 의해 너비만 늘어나거나 위치가 바뀌거나 합니다.

그러나 Sprite은 전통적인 의미에서의 GUI 컴포넌트가 아닙니다. 레퍼런스 문서에도 설명되어 있듯이 일종의 MovieClip이죠.
동영상 재생기의 윈도우 크기를 바꾸면 어떻게 됩니까? 재생하고 있는 동영상의 화면 크기가 그에 맞춰 스케일링 됩니다. 이건 상식적으로도 당연한 행동입니다.
Sprite의 행동도 이와 마찬가지입니다. Sprite의 크기를 바꾸면 그 자신이 화면에 그리는 내용은 물론이고 그 Sprite에 속해있는(아시다시피 Sprite은 DisplayObjectContainer입니다) 하위 DisplayObject들까지도 스케일링 됩니다.

즉, Sprite의 크기가 바뀌면 그 Sprite은 물론이고 다른 DisplayObject들의 스케일링까지 바꿔야 하므로, 크기가 얼마나 변했는지를 기억하고 있어야 합니다. 따라서 해당 프라퍼티인 scaleX, scaleY가 크기 변화와 함께 바뀌는 것이 당연하겠죠?

따라서 Sprite을 상속받은 클래스의 생성자에서 width/height의 값을 바꾸면 아무 소용이 없습니다.

왜냐하면, width/height의 초기값은 0이기 때문입니다.

예를 들어, width에 100을 대입하려고 하면 scaleX = newWidth / oldWidth이므로(정확한 공식은 아닙니다. scaleX의 이전 값을 고려해야 하죠 원래는) 100 / 0 = NaN, 즉 scaleX가 0이 됩니다.

그리고 width 값은 scaleX가 계산된 후에 scaleX * oldWidth가 되는 것 같습니다.

따라서 또한 0이 될 수 밖에 없죠.

(이 부분은 Sprite의 소스 코드가 없어서 확실하진 않습니다만, 개인적으로는 이렇게 추측합니다. 왜 그렇게 하는지는 모르겠구요. ㅎㅎ)

그리고 우리를 더 힘들게 만드는 문제점은 위와 같이 생성자에서 width/height에 값을 대입하고 나면, 이후에 무슨 짓을 해도 해당 Sprite이 화면에 나타나지 않는다는 점입니다.

scaleX 또는 scaleY가 0이 되므로 화면에 나타나지 않는게 당연합니다.

아시다시피 Sprite에 다른 DisplayObject를 add하거나 graphics에 뭔가를 그리면 Sprite의 width/height이 자동으로 바뀌지만, 스케일 팩터가 0이므로, 곱하고 나면 그릴 영역이 없습니다.

그렇다면 Sprite의 width/height 값은 언제 세팅하면 되는 것일까?

물론 width/height가 0이 아닐 때 세팅하면 되겠습니다. 즉, Sprite을 상속해서 만든 객체의 크기를 세팅하고 싶을 때에는 좀 귀찮지만 그 Sprite의 내용(하위 DisplayObject 또는 graphics에 직접 그린 내용)이 완성된 후에 하는 것이 가장 좋을 듯 합니다.

** 글을 쓰다보니 좀 길어졌네요.

혹시 UIComponent가 아니라 Sprite을 상대하다가 이런 비슷한 문제를 겪으신 분들께 조금이나마 도움이 됐으면 좋겠습니다.


Posted by 1010
00.Flex,Flash,ActionScript2013. 3. 20. 10:50
반응형


KB2TIMS_RemoteObject.zip


-- RemoteObjectTest.mxml --

<?xml version="1.0" encoding="utf-8"?>
<mx:Application xmlns:mx="http://www.adobe.com/2006/mxml" layout="absolute" creationComplete="init();">
 <mx:Script>
  <![CDATA[
   import mx.messaging.ChannelSet;
   import mx.messaging.channels.AMFChannel;
    import mx.rpc.events.FaultEvent;
    import mx.rpc.events.ResultEvent;
    import mx.controls.Alert;
  
 private function init():void{
//  var amfChannel:AMFChannel = new AMFChannel("my-amf","http://localhost:5050//messagebroker/amf");
//     var channelSet:ChannelSet = new ChannelSet();
//     channelSet.addChannel(amfChannel);
//     Alert.show("init~");
   }
  
   private function resultHandler(event:ResultEvent):void{
    var msg:String = event.result as String;
    Alert.show("원격객체호출성공, "+msg);
   }
   private function faultHandler(event:FaultEvent):void{
    Alert.show("실패!!!!!"+event.toString());
   }
   private function remotoObjectCall():void{
  ro.getMsg();
   }
  ]]>
 </mx:Script>
 
 <mx:RemoteObject id="ro" destination="HelloRO" showBusyCursor="true" fault="faultHandler(event)">
  <mx:method name="getMsg" result="resultHandler(event)" />
 </mx:RemoteObject>
 
 <mx:Panel y="19" width="250" height="200" layout="absolute" horizontalCenter="0">
  <mx:Button y="39" label="원격객체호출" horizontalCenter="0" click="remotoObjectCall()"/>
 </mx:Panel>
 
</mx:Application>


-- callJavaObject.java --


package flex.remote.object;

import org.apache.log4j.Logger;

public class callJavaObject {
 
 private Logger logger = Logger.getLogger( this.getClass() );
 
 public callJavaObject() {
  // TODO Auto-generated constructor stub
  logger.debug("callJavaObject go~");
 }
 public String getMsg(){
  return "callJavaObject 호출됨";
 }
}

-- messaging-config.xml


<?xml version="1.0" encoding="UTF-8"?>
<service id="message-service"
    class="flex.messaging.services.MessageService">

    <adapters>
        <adapter-definition id="actionscript" class="flex.messaging.services.messaging.adapters.ActionScriptAdapter" default="true" />
        <!-- <adapter-definition id="jms" class="flex.messaging.services.messaging.adapters.JMSAdapter"/> -->
    </adapters>

    <default-channels>
        <channel ref="my-polling-amf"/>
    </default-channels>

</service>


-- proxy-config.xml

<?xml version="1.0" encoding="UTF-8"?>
<service id="proxy-service"
    class="flex.messaging.services.HTTPProxyService">

    <properties>
        <connection-manager>
            <max-total-connections>100</max-total-connections>
            <default-max-connections-per-host>2</default-max-connections-per-host>
        </connection-manager>
        <allow-lax-ssl>true</allow-lax-ssl>
    </properties>

    <adapters>
        <adapter-definition id="http-proxy" class="flex.messaging.services.http.HTTPProxyAdapter" default="true"/>
        <adapter-definition id="soap-proxy" class="flex.messaging.services.http.SOAPProxyAdapter"/>
    </adapters>

    <default-channels>
        <channel ref="my-amf"/>
    </default-channels>

    <destination id="DefaultHTTP">
    </destination>

</service>

-- remoting-config.xml

<?xml version="1.0" encoding="UTF-8"?>
<service id="remoting-service"
    class="flex.messaging.services.RemotingService">

    <adapters>
        <adapter-definition id="java-object" class="flex.messaging.services.remoting.adapters.JavaAdapter" default="true"/>
    </adapters>

    <default-channels>
        <channel ref="my-amf"/>
    </default-channels>
   
    <destination id="HelloRO">
  <properties>
   <source>flex.remote.object.callJavaObject</source>
  </properties>
 </destination>

</service>


-- services-config.xml


<?xml version="1.0" encoding="UTF-8"?>
<services-config>

    <services>
        <service-include file-path="remoting-config.xml" />
        <service-include file-path="proxy-config.xml" />
        <service-include file-path="messaging-config.xml" />       
    </services>

    <security>
        <login-command class="flex.messaging.security.TomcatLoginCommand" server="Tomcat"/>
        <!-- Uncomment the correct app server
        <login-command class="flex.messaging.security.TomcatLoginCommand" server="JBoss">
  <login-command class="flex.messaging.security.JRunLoginCommand" server="JRun"/>       
        <login-command class="flex.messaging.security.WeblogicLoginCommand" server="Weblogic"/>
        <login-command class="flex.messaging.security.WebSphereLoginCommand" server="WebSphere"/>
        -->

        <!--
        <security-constraint id="basic-read-access">
            <auth-method>Basic</auth-method>
            <roles>
                <role>guests</role>
                <role>accountants</role>
                <role>employees</role>
                <role>managers</role>
            </roles>
        </security-constraint>
         -->
    </security>

    <channels>

        <channel-definition id="my-amf" class="mx.messaging.channels.AMFChannel">
            <endpoint url="http://{server.name}:{server.port}/messagebroker/amf" class="flex.messaging.endpoints.AMFEndpoint"/>
        </channel-definition>

        <channel-definition id="my-secure-amf" class="mx.messaging.channels.SecureAMFChannel">
            <endpoint url="https://{server.name}:{server.port}/{context.root}/messagebroker/amfsecure" class="flex.messaging.endpoints.SecureAMFEndpoint"/>
            <properties>
                <add-no-cache-headers>false</add-no-cache-headers>
            </properties>
        </channel-definition>

        <channel-definition id="my-polling-amf" class="mx.messaging.channels.AMFChannel">
            <endpoint url="http://{server.name}:{server.port}/{context.root}/messagebroker/amfpolling" class="flex.messaging.endpoints.AMFEndpoint"/>
            <properties>
                <polling-enabled>true</polling-enabled>
                <polling-interval-seconds>4</polling-interval-seconds>
            </properties>
        </channel-definition>

        <!--
        <channel-definition id="my-http" class="mx.messaging.channels.HTTPChannel">
            <endpoint url="http://{server.name}:{server.port}/{context.root}/messagebroker/http" class="flex.messaging.endpoints.HTTPEndpoint"/>
        </channel-definition>

        <channel-definition id="my-secure-http" class="mx.messaging.channels.SecureHTTPChannel">
            <endpoint url="https://{server.name}:{server.port}/{context.root}/messagebroker/httpsecure" class="flex.messaging.endpoints.SecureHTTPEndpoint"/>
            <properties>
                <add-no-cache-headers>false</add-no-cache-headers>
            </properties>
        </channel-definition>
        -->
    </channels>

    <logging>
        <target class="flex.messaging.log.ConsoleTarget" level="Error">
            <properties>
                <prefix>[BlazeDS] </prefix>
                <includeDate>false</includeDate>
                <includeTime>false</includeTime>
                <includeLevel>false</includeLevel>
                <includeCategory>false</includeCategory>
            </properties>
            <filters>
                <pattern>Endpoint.*</pattern>
                <pattern>Service.*</pattern>
                <pattern>Configuration</pattern>
            </filters>
        </target>
    </logging>

    <system>
        <redeploy>
            <enabled>false</enabled>
            <!--
            <watch-interval>20</watch-interval>
            <watch-file>{context.root}/WEB-INF/flex/services-config.xml</watch-file>
            <watch-file>{context.root}/WEB-INF/flex/proxy-config.xml</watch-file>
            <watch-file>{context.root}/WEB-INF/flex/remoting-config.xml</watch-file>
            <watch-file>{context.root}/WEB-INF/flex/messaging-config.xml</watch-file>
            <watch-file>{context.root}/WEB-INF/flex/data-management-config.xml</watch-file>
            <touch-file>{context.root}/WEB-INF/web.xml</touch-file>
             -->
        </redeploy>
    </system>

</services-config>

Posted by 1010
00.Flex,Flash,ActionScript2013. 3. 19. 17:06
반응형

출처 : http://micropilot.tistory.com/category/Flex/RemoteObject

Flex Builder 3에서 RemoteObject를 설정하고 사용하는 방법을 알아본다

..........................................................................................................................................................................................
준비사항
..........................................................................................................................................................................................

Flex Builder 3 Eclipse Plugin (adobe.com)
Blazeds (adobe.com)- 다운로드 안내
Tomcat 5.5 (apache.org)
JDK 6 (java.sun.com)
Eclips 3.4 (eclipse.org)

...............................................................................................................................................................................
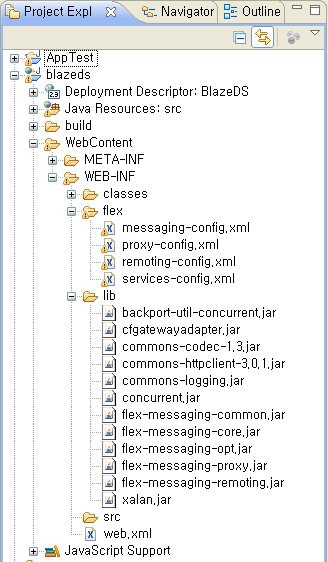
1. Blazeds를 adobe.com으로부터 다운로드하여 압축을 해제하면 blazeds.war 파일이 있는데, 이 파일은 완성된 웹컨텍스트이며 한개의 웹사이트를 웹컨테이너에 배포하기위한 포맷이므로 Eclipse에서 import하여 바로 편집이 가능한 상태이므로 RemoteObject기능을 설정하고 구현하기위한 매우 편리한 환경을 제공한다.

Blazeds는 Flex3에서 제공하는 서비스 중에서 LiveCycle Data Service 기능을 지원하는 라이브러리이며 freeware 상태로 배포되고 있고, 상용버전에 비해 Data Management Service 기능이 제거된 상태이다. 참고로, Data Management Service는 서버상의 데이터가 업데이트될 때 실시간으로 클라이언트 화면에도 변경된 데이터가 반영되게 할 수 있는 서비스이다.

아래의 그림은 blazeds.war 파일을 Eclipse로 import했을 직후의 프로젝트 상태이다.
WEB-INF/flex : RemoteObject를 구동하기 위한 설정파일들(*.xml)이 저장됨
WEB-INF/lib : RemoteObject를 구동하기 위한 자바 라이브러리들(*.jar)이 저장됨.
WEB-INF/web.xml : 톰캣이 요청을 받았을 경우에 blazeds 에 요청을 전달하여 flex.messaging.MessageBrokerServlet이 실행될 수 있도록 연결해 주는 역할을 한다


blazeds.war 파일을 임포트한 직후의 프로젝트 상태
...............................................................................................................................

사용자 삽입 이미지


...............................................................................................................................................................................

web.xml (WEB-INF/web.xml)

<!-- MessageBroker Servlet -->
<servlet>
<servlet-name>MessageBrokerServlet</servlet-name>
<display-name>MessageBrokerServlet</display-name>
<servlet-class>flex.messaging.MessageBrokerServlet</servlet-class>
<init-param>
<param-name>services.configuration.file</param-name>
<param-value>/WEB-INF/flex/services-config.xml</param-value>
</init-param>
<load-on-startup>1</load-on-startup>
</servlet>

<servlet-mapping>
<servlet-name>MessageBrokerServlet</servlet-name>
<url-pattern>/messagebroker/*</url-pattern>
</servlet-mapping>

<welcome-file-list>
<welcome-file>index.html</welcome-file>
<welcome-file>index.htm</welcome-file>
</welcome-file-list>

...............................................................................................................................................................................

service-config.xml (my-amf채널 확인)

<channels>

<channel-definition id="my-amf" class="mx.messaging.channels.AMFChannel">
<endpoint url="
http://{server.name}:{server.port}/{context.root}/messagebroker/amf"
class="flex.messaging.endpoints.AMFEndpoint"/>
</channel-definition>

<channel-definition id="my-secure-amf" class="mx.messaging.channels.SecureAMFChannel">
<endpoint url="https://{server.name}:{server.port}/{context.root}/messagebroker/amfsecure" class="flex.messaging.endpoints.SecureAMFEndpoint"/>
<properties>
<add-no-cache-headers>false</add-no-cache-headers>
</properties>
</channel-definition>

위의 내용 중에서 {server.name}:{server.port}/{context.root} 부분은 브라우저의 요청 URL이며, 이 곳으로 요청을 하면 AMFChannel클래스가 실행되어 AMF(Action Message Format)프로토콜이 적용된다. 이 부분은 Flex Project를 생성할 때 프로젝트 설정창에서 입력하여 지정해 주면 된다. 참고로, AMF 프로토콜은 HTTP 프로토콜을 기반으로 하지만 XML포맷으로 응답하는 형식이 아니라 AMF라는 바이너리 포맷으로 응답을 하기 때문에 성능면에서 일반 HTTP 프로토콜로 통신하는 것보다 빠른 장점을 가지고 있다.

...............................................................................................................................................................................

remoting-config.xml (RemoteObject로 사용할 클래스를 등록함)

<?xml version="1.0" encoding="UTF-8"?>
<service id="remoting-service"
class="flex.messaging.services.RemotingService">

<adapters>
<adapter-definition id="java-object" class="flex.messaging.services.remoting.adapters.JavaAdapter" default="true"/>
</adapters>

<default-channels>
<channel ref="my-amf"/>
</default-channels>

<!-- This is added -->
<destination id="HelloRO">
<properties>
<source>test.HelloWorld</source>
</properties>
<channels>
<channel ref="my-amf"/>
</channels>
</destination>


</service>

위와같이 설정하여 Flex 클라이언트에서 'HelloRO' 라는 이름으로 요청을 할 때 my-amf 채녈을 경유하여 test.HelloWorld클래스가 실행되도록 설정한다.
...............................................................................................................................................................................


HelloWorld.java (WEB-INF/classes/HelloWorld.java)
Flex 클라이언트의 요청에 의해 실행될 원격객체

package test;

import java.io.*;
import java.util.*;

public class HelloWorld implements Serializable
{
public String getMsg()
{
return "Hello from Remot Object!";
}

public int add(int a, int b)
{
return a+b;
}

public java.util.ArrayList<Hashtable> getList(){
ArrayList<Hashtable> al = new ArrayList<Hashtable>();
Hashtable<String,String> ht = new Hashtable<String,String>();
ht.put("empno", "100");
ht.put("ename", "홍길동");
ht.put("phone", "2345-5468-9657");
al.add(ht);
ht = new Hashtable();
ht.put("empno", "200");
ht.put("ename", "홍범도");
ht.put("phone", "645-065-2345");
al.add(ht);
return al;
}
}

...............................................................................................................................................................................

RemoteObjectTest.mxml
원격객체의 getMsg() 메소드를 호출하는 Flex Application

<?xml version="1.0" encoding="utf-8"?>
<mx:Application xmlns:mx="http://www.adobe.com/2006/mxml" layout="absolute">
<mx:Script>
<![CDATA[
import mx.rpc.events.FaultEvent;
import mx.rpc.events.ResultEvent;
import mx.controls.Alert;

private function resultHandler(event:ResultEvent):void{
var msg:String = event.result as String;
Alert.show("원격객체호출성공, "+msg);
}
private function faultHandler(event:FaultEvent):void{
Alert.show("실패!!!!!");
}
]]>
</mx:Script>

<mx:RemoteObject id="ro" destination="HelloRO" showBusyCursor="true"
result="resultHandler(event)" fault="faultHandler(event)">
<mx:method name="getMsg"/>
</mx:RemoteObject>

<mx:Panel y="19" width="250" height="200" layout="absolute" horizontalCenter="0">
<mx:Button y="39" label="원격객체호출" horizontalCenter="0" click="ro.getMsg()"/>
</mx:Panel>

</mx:Application>

...............................................................................................................................................................................


Java Collection을 리턴하는 서버측 객체의 메소드(getList())를 Flex 클라이언트에서 호출하는 경우

<?xml version="1.0" encoding="utf-8"?>
<mx:Application xmlns:mx="http://www.adobe.com/2006/mxml" layout="absolute">
<mx:Script>
<![CDATA[
import mx.rpc.events.FaultEvent;
import mx.rpc.events.ResultEvent;
import mx.controls.Alert;

private function resultHandler(event:ResultEvent):void{
//var msg:String = event.result as String;
var arr:Array = Array(event.result);
for(var i:uint=0;i<arr.length;i++){
for(var n:uint=0;n<arr[i].length;n++){
Alert.show(arr[i][n].empno +":"+ arr[i][n].ename +":"+ arr[i][n].phone);
}
}
}
private function faultHandler(event:FaultEvent):void{
Alert.show("실패!!!!!");
}
]]>
</mx:Script>

<mx:RemoteObject id="ro" destination="HelloRO" showBusyCursor="true"
result="resultHandler(event)" fault="faultHandler(event)">
<!--<mx:method name="getMsg"/>-->
<mx:method name="getList"/>
</mx:RemoteObject>

<mx:Panel y="19" width="250" height="200" layout="absolute" horizontalCenter="0">
<mx:Button y="39" label="원격객체호출" horizontalCenter="0" click="ro.getList()"/>
</mx:Panel>

</mx:Application>


.............................................................................................................................................................................................
서버측의 파라미터를 가진 메소드(add(int a, int b))를 호출하는 Flex 클라이언트의 경우

<?xml version="1.0" encoding="utf-8"?>
<mx:Application xmlns:mx="http://www.adobe.com/2006/mxml" layout="absolute">
<mx:Script>
<![CDATA[
import mx.rpc.events.FaultEvent;
import mx.rpc.events.ResultEvent;
import mx.controls.Alert;

private function resultHandler(event:ResultEvent):void{
var sum:int = event.result as int;
mx.controls.Alert.show("SUM:"+sum);
}
private function faultHandler(event:FaultEvent):void{
Alert.show("실패!!!!!");
}
]]>
</mx:Script>

<mx:RemoteObject id="ro" destination="HelloRO" showBusyCursor="true"
result="resultHandler(event)" fault="faultHandler(event)">
<!--<mx:method name="getMsg"/>-->
<!--<mx:method name="getList"/>-->
<mx:method name="add">
<mx:arguments>
<a>5</a><b>7</b>
</mx:arguments>
</mx:method>
</mx:RemoteObject>

<mx:Panel y="19" width="250" height="200" layout="absolute" horizontalCenter="0">
<mx:Button y="39" label="원격객체호출" horizontalCenter="0" click="ro.add()"/>
</mx:Panel>

</mx:Application>


...........................................................................................................................................................................................
서버측에서 클라이언트로 전달된 Collection 데이터를 Flex 클라이언트에서 DataGrid등을 통해 출력하는 예
..................................................................................................................................................................................................

서버측 코드
.........................................................................................................................................................................................................

package test;

import java.io.*;
import java.util.*;

public class HelloWorld implements Serializable
{
public String getMsg()
{
return "Hello from Remot Object!";
}

public int add(int a, int b)
{
return a+b;
}

// 리턴타입은 Employee[], ArrayList<Employee>, ArrayList<Hashtable> 등으로 설정하면 된다.
public java.util.ArrayList<Employee> getList(){
ArrayList<Employee> al = new ArrayList<Employee>();
al.add(new Employee(100,"홍길동","2345-5468-9657"));
al.add(new Employee(200,"홍범도","645-065-2345"));
return al;
}
}


......................................................................................................................................................................................................................
위와같은 서버코드를 호출하여 수신한 데이터를 DataGrid에 출력하는 예

<?xml version="1.0" encoding="utf-8"?>
<mx:Application xmlns:mx="http://www.adobe.com/2006/mxml" layout="absolute">
<mx:Script>
<![CDATA[
import mx.collections.ArrayCollection;
import mx.rpc.events.FaultEvent;
import mx.rpc.events.ResultEvent;
import mx.controls.Alert;

private function resultHandler(event:ResultEvent):void{
dg.dataProvider = event.result;
}
private function faultHandler(event:FaultEvent):void{
Alert.show("실패!!!!!");
}
]]>
</mx:Script>

<mx:RemoteObject id="ro" destination="HelloRO" showBusyCursor="true"
result="resultHandler(event)" fault="faultHandler(event)">
<mx:method name="getList"/>
</mx:RemoteObject>

<mx:Panel y="19" width="328" height="200" layout="absolute" horizontalCenter="0">
<mx:Button y="7" label="원격객체호출" horizontalCenter="0" click="ro.getList()"/>
<mx:DataGrid id="dg" y="37" width="288" height="113" horizontalCenter="0"/>
</mx:Panel>

</mx:Application>

..............................................................................................................................................................................................................
서버측에서 DTO로 사용된 클래스

package test;

public class Employee implements java.io.Serializable{
public int empno;
public String ename;
public String phone;

public Employee(int empno, String ename, String phone){
this.empno=empno;
this.ename=ename;
this.phone=phone;
}
}


.............................................................................................................................................................................................................................

Eclipse에서 Flex 클라이언트에서 서버상의 원격객체(RemoteObject)에 접속하고자 한다면 Project를 생성할 때 다음과 같은 절차를 따른다

사용자 삽입 이미지

...............................................................................................................................................................................

사용자 삽입 이미지

...............................................................................................................................................................................

아래의 항목 중에서
Root folder : Flex Project가 컴파일되어 생성되는 실행파일들이 복사될 웹프로젝트의 루트를 지정(RemoteObject가 있는 웹프로젝트)
Root URL : service-config.xml 파일의 endpoint 태그 url속성을 설정하게 될 서버:포트/컨텍스트 입력
Context root : Flex Application에서 접속하고자 하는 사이트의 Context root

사용자 삽입 이미지
...............................................................................................................................................................................

위와같은 절차로 프로젝트가 완성된 후에도 다음과 같은 방법으로 연결하고자 하는 서버의 정보를 설정할 수 있다.

사용자 삽입 이미지

...............................................................................................................................................................................

사용자 삽입 이미지

...............................................................................................................................................................................

아래의 그림은 위와 같은 절차에 따라 Flex Application을 생성하고 mxml을 작성한 후 이상없이 컴파일되고 난 후의 웹 프로젝트의 상태이다. WEB-INF/classes/ 안에는 원격객체로 등록된 test.HelloWorld.java 가 들어 있다.

사용자 삽입 이미지

...............................................................................................................................................................................

웹프로젝트 안에서 SWF 파일을 포함하고 있는 html 파일을 실행하여 Flex Application을 브라우저에 나타나게 한다.
사용자 삽입 이미지

...............................................................................................................................................................................

다음과 같이 Flex Application이 실행되어 버튼을 누르면 위에서 설정한 서버상의 원격객체(RemoteObject)에 접속하여 메소드를 호출하게 된다.
사용자 삽입 이미지

...............................................................................................................................................................................

다음과 같이 원격객체(RemoteObject)의 getMsg()메소드 실행이 성공적으로 이루어진 것을 확인할 수 있다.
사용자 삽입 이미지


Posted by 1010
00.Flex,Flash,ActionScript2013. 3. 18. 09:20
반응형

FLA파일을 작성하고 라이브러리에 무비클립을 등록하고서, Linkage를 통해 Class를 지정해 주었을 때 이 무비클립들을 스테이지로 끌어낼 수가 있는데, 여러개가 일정한 규칙을 가지고 있을때 for문으로 사용하기 위한 방법 입니다.

기존 AS2.0에서는 Linkage 명 그대로 for문을 사용하여 attach 할 수 있었으나 AS3.0에서는 그 방법을 사용할 수가 없어서 처음에 무척 애를 먹었습니다. 그렇다고 하나하나 등록하여 사용하기에는 코드도 지저분해지고 복잡해집니다.

이때 사용할 수 있는 메소드가 있는데 getDefinitionByName() 입니다.

예) 라이브러리에 MC1 부터 MC5까지 Linkage 되어있다면 아래와 같은 방법으로 사용이 가능합니다.

import flash.utils.getDefinitionByName;
import flash.display.DisplayObject;

for(var i:Number = 1; i <= 5; i++)
{
var ClassReference:Class = getDefinitionByName("MC" + i) as Class;
var obj:Object = new ClassReference();
addChild(DisplayObject(obj));
}

출처 : http://blog.naver.com/applenamu3/70083260118


Posted by 1010
00.Flex,Flash,ActionScript2013. 3. 15. 19:32
반응형

<?xml version="1.0" encoding="utf-8"?>
<mx:Application
 xmlns:mx="http://www.adobe.com/2006/mxml"
 xmlns:s="library://ns.adobe.com/flex/spark"
 xmlns:fx="http://ns.adobe.com/mxml/2009"
 xmlns:c="component.*"
 layout="absolute" xmlns:local="*">
 <mx:Script>
  <![CDATA[
   [Bindable]public var initDG:Array = [
    {year:2006, t1:"t12", t2:"t33", test1:new MultiRowVO("a1","b1"), data1:new MultiRowVO("d1","t1"),data2:new MultiRowVO("df","wef")},
    {year:2007, t1:"t13", t2:"t43", test1:new MultiRowVO("a2","b2"), data1:new MultiRowVO("d2","t2"),data2:new MultiRowVO("df","wef")},
    {year:2008, t1:"t14", t2:"t53", test1:new MultiRowVO("a3","b3"), data1:new MultiRowVO("d3","t3"),data2:new MultiRowVO("df","wef")},
    {year:2009, t1:"t15", t2:"t63", test1:new MultiRowVO("a4","b4"), data1:new MultiRowVO("d4","t4"),data2:new MultiRowVO("df","wef")},
    {year:2010, t1:"t16", t2:"t73", test1:new MultiRowVO("a5","b5"), data1:new MultiRowVO("d5","t5"),data2:new MultiRowVO("df","wef")}
   ]
  ]]>
 </mx:Script>
 <mx:AdvancedDataGrid id="dataGrid" dataProvider="{initDG}" sortExpertMode="true" width="100%" height="100%">
  <mx:groupedColumns>
   <mx:AdvancedDataGridColumn headerText="year"  dataField="year"/>
   <mx:AdvancedDataGridColumn headerText="test1" dataField="test1">
    <mx:itemRenderer><mx:Component><local:rowVBox propertyName="test1"/></mx:Component></mx:itemRenderer>
   </mx:AdvancedDataGridColumn>
   <mx:AdvancedDataGridColumn headerText="data1" dataField="data1">
    <mx:itemRenderer><mx:Component><local:rowVBox propertyName="data1"/></mx:Component></mx:itemRenderer>
   </mx:AdvancedDataGridColumn>
   <mx:AdvancedDataGridColumn headerText="data2" dataField="data2">
    <mx:itemRenderer><mx:Component><local:rowVBox propertyName="data2"/></mx:Component></mx:itemRenderer>
   </mx:AdvancedDataGridColumn>
  </mx:groupedColumns>
 </mx:AdvancedDataGrid>
</mx:Application>


-- rowVBox.mxml

<?xml version="1.0" encoding="utf-8"?>
<mx:VBox xmlns:mx="http://www.adobe.com/2006/mxml" width="100%" height="100%" verticalGap="0">

<mx:Script>
    <![CDATA[

        [Bindable] private var _propertyName:String;
        [Bindable] private var mydata:Object;
       
        public function set propertyName(p:String):void {
            this._propertyName = p;
        }

        public function get propertyName():String {
            return this._propertyName;
        }
       
       
        public override function set data(value:Object):void {
            mydata = value;
        }
    ]]>
</mx:Script>
    <mx:Label text="{mydata[propertyName].p1}" width="100%" height="20" textAlign="center"/>
    <mx:HRule width="100%"/>                   
    <mx:Label text="{mydata[propertyName].p2}" width="100%" height="20" textAlign="center"/>
</mx:VBox>


Posted by 1010
00.Flex,Flash,ActionScript2013. 3. 15. 17:23
반응형

<?xml version="1.0" encoding="utf-8"?>
<mx:Application
 xmlns:mx="http://www.adobe.com/2006/mxml"
 xmlns:s="library://ns.adobe.com/flex/spark"
 xmlns:fx="http://ns.adobe.com/mxml/2009"
 xmlns:c="component.*"
 layout="absolute">
 <mx:Script>
  <![CDATA[
   [Bindable]public var initDG:Array = [
    {title:2006, test1:new MultiRowVO("aa","bb"), data1:new MultiRowVO("123","456"),data2:new MultiRowVO("df","wef")},
    {title:2007, test1:new MultiRowVO("aa","bb"), data1:new MultiRowVO("123","456"),data2:new MultiRowVO("df","wef")},
    {title:2008, test1:new MultiRowVO("aa","bb"), data1:new MultiRowVO("123","456"),data2:new MultiRowVO("df","wef")},
    {title:2009, test1:new MultiRowVO("aa","bb"), data1:new MultiRowVO("123","456"),data2:new MultiRowVO("df","wef")},
    {title:2010, test1:new MultiRowVO("aa","bb"), data1:new MultiRowVO("123","456"),data2:new MultiRowVO("df","wef")}
   ]
  ]]>
 </mx:Script>
 <mx:AdvancedDataGrid id="dataGrid" dataProvider="{initDG}" sortExpertMode="true" width="100%" height="100%">
  <mx:groupedColumns>
   <mx:AdvancedDataGridColumn  headerText="year" dataField="year"/>
   <mx:AdvancedDataGridColumn  headerText="data1" dataField="data1" id="data1" itemRenderer="co"/>
   <mx:AdvancedDataGridColumn  headerText="data2" dataField="data2" id="data2" itemRenderer="tttt"/>
   <!--<mx:AdvancedDataGridColumn  headerText="data2" dataField="data2">
    <mx:itemRenderer>
     <mx:Component>
      <mx:VBox width="100%" height="100%" verticalGap="0">
                            <mx:Label text="{data.data2.p1}" width="100%" height="20" textAlign="center"/>
                            <mx:HRule width="100%"/>                   
                            <mx:Label text="{data.data2.p2}" width="100%" height="20" textAlign="center"/>
                         </mx:VBox>
     </mx:Component>
    </mx:itemRenderer>
   </mx:AdvancedDataGridColumn>-->
  </mx:groupedColumns>

  
 </mx:AdvancedDataGrid>
</mx:Application>

-- co.mxml

<?xml version="1.0" encoding="utf-8"?>
<mx:VBox xmlns:mx="http://www.adobe.com/2006/mxml" width="100%" height="100%" verticalGap="0">
 <mx:Label text="{data.data1.p1}" width="100%" height="20" textAlign="center"/>
 <mx:HRule width="100%"/>                   
 <mx:Label text="{data.data1.p2}" width="100%" height="20" textAlign="center"/>
</mx:VBox>


-- tttt.mxml

<?xml version="1.0" encoding="utf-8"?>
<mx:AdvancedDataGridItemRenderer xmlns:mx="http://www.adobe.com/2006/mxml">
 <mx:Script>
  <![CDATA[
   override public function set data(data:Object):void{
    if(data != null){
     p1.text = data.p1;
     p2.text = data.p2;
    }
   }
  ]]>
 </mx:Script>
 
 <mx:VBox width="100%" height="100%" verticalGap="0">
 <mx:Label id="p1" text="{data.data1.p1}" width="100%" height="20" textAlign="center"/>
 <mx:HRule width="100%"/>                   
 <mx:Label id="p2" text="{data.data1.p2}" width="100%" height="20" textAlign="center"/>
</mx:VBox>

</mx:AdvancedDataGridItemRenderer>


Posted by 1010
00.Flex,Flash,ActionScript2013. 3. 12. 11:37
반응형

출처 : http://www.stevekamerman.com/2008/06/bidirectional-localconnections-in-actionscript-3-flex-2-flex-3-flash-cs3/


Although I use AMFPHP RemoteObjects with the Cairngorm Framework everyday, I never had a need for a simple LocalConnection. LocalConnections let you communicate between running SWFs, the only problem is that they are unidirectional. SWF A can make a new LocalConnection to SWF B and invoke it’s methods, but SWF B can’t contact SWF A. The way to get around this is to make another LocalConnection back from SWF B to SWF A. Trying to wrap my head around receiving and sending connections was starting to make me angry! They are annoyingly misleading – the receiving SWF needs to .connect() to a named connection, whereas the sending SWF doesn’t – it just calls .send() with the same named connection. I figured I could do the world a favor and abstract this confusion for you.

Here is the result (demonstrated with a Flex SWF and a Flash SWF):

Flex SWF


Flash SWF


In both the Flex MXML and the Flash FLA, I am including my BiDirLocalConnection class and it does all the hard work for me.

To make this bidirectional concept easier to handle, I introduced something called Roles. There are two roles available to your SWFs: Master and Slave. You must pick one of these roles when you instantiate the BiDirLocalConnection Object. If you have more than one running SWF in a given Role you will get an error on the newest one.

Here’s an example of how to use the class in Flex:

import net.teratechnologies.common.BiDirLocalConnection;

private var connection:BiDirLocalConnection;

private function init():void{
connection = new BiDirLocalConnection(BiDirLocalConnection.ROLE_MASTER,this);
connection.connect();
}

The constructor takes three arguments (the third is optional):

BiDirLocalConnection(role:String,callbackScope:Object,connectionBaseName:String="BiDirConnection")

- role: The role of this SWF (ROLE_MASTER or ROLE_SLAVE)
- callbackScope: When a SWF connects to this one and tries to invoke a method (call a function), where should it look to find the method? Normally you specify this so the remote SWF has access to the functions in your current scope.
- connectionBaseName: This optional argument is only required if you have more than one BiDirLocalConnection at the same time. You can use any string here and it will serve as the prefix for the two LocalConnection connectionNames that are used.

Here is the complete code from the Slave in Flash CS3 as seen above. There are three things on the stage: TextArea (receiveText), TextInput (sendText) and a Button (sendButton):

import net.teratechnologies.common.BiDirLocalConnection;

var connection:BiDirLocalConnection;

function init():void{
sendButton.addEventListener(MouseEvent.CLICK,send);
connection = new BiDirLocalConnection(BiDirLocalConnection.ROLE_SLAVE,this);
connection.connect();
}
function send(e:Event):void{
connection.send('showText',sendText.text);
}
function showText(t:String):void{
receiveText.text = "Received: "+t+"\n"+receiveText.text;
}

init();
stop();

Now here is the complete code for the Flex MXML file:

<?xml version="1.0" encoding="utf-8"?>
<mx:Application xmlns:mx="http://www.adobe.com/2006/mxml" layout="vertical" creationComplete="init()">
<mx:Script>
<![CDATA[
import net.teratechnologies.common.BiDirLocalConnection;

private var connection:BiDirLocalConnection;

private function init():void{
sendButton.addEventListener(MouseEvent.CLICK,send);
connection = new BiDirLocalConnection(BiDirLocalConnection.ROLE_MASTER,this);
connection.connect();
}
private function send(e:Event):void{
connection.send('showText',sendText.text);
}
public function showText(t:String):void{
receiveText.text = "Received: "+t+"\n"+receiveText.text;
}

]]>
</mx:Script>
<mx:Panel width="100%" height="100%" layout="absolute" title="Flex 2/3">
<mx:TextArea id="receiveText" right="10" bottom="39" left="10" top="10."/>
<mx:TextInput id="sendText" left="10" right="72" bottom="10"/>
<mx:Button label="Send" id="sendButton" right="10" bottom="10"/>
</mx:Panel>

</mx:Application>

It really is quite simple, the SWFs are calling each other’s “showText” functions with the text of the TextInput box as an argument. You can pass as many arguments as you want to connection.send(), and they don’t need to be simple Strings.

Finally, here is the ActionScript Code for the BiDirLocalConnection class itself:

package net.teratechnologies.common {
import flash.net.LocalConnection;

public class BiDirLocalConnection{

public static const ROLE_MASTER:String = "master";
public static const ROLE_SLAVE:String = "slave";

private var txConnName:String;
private var rxConnName:String;
private var txLC:LocalConnection = new LocalConnection();
private var rxLC:LocalConnection = new LocalConnection();
private var callbackScope:Object;

public function BiDirLocalConnection(role:String,callbackScope:Object,connectionBaseName:String="BiDirConnection"){
if(role == ROLE_MASTER){
txConnName = connectionBaseName + "_TX";
rxConnName = connectionBaseName + "_RX";
}else{
rxConnName = connectionBaseName + "_TX";
txConnName = connectionBaseName + "_RX";
}
this.callbackScope = callbackScope;
}
public function connect():void{
trace(rxConnName);
rxLC.connect(rxConnName);
rxLC.client = callbackScope;
}
public function send(methodName:String,...rest):void{
txLC.send(txConnName,methodName,rest);
}
}
}


Posted by 1010
00.Flex,Flash,ActionScript2013. 3. 12. 10:55
반응형
Posted by 1010
반응형

출처 : http://blog.naver.com/PostView.nhn?blogId=jjackkun81&logNo=60102395605

5007:An ActionScript file must have at least one externally vislble definition.

- 액션 스크립트 파일중 적어도 한 줄 이상은 코딩이 되어있어야 한다.

5000: The class "ActionScript File Name" must subclass "flash.display.MovieClip" since it is linked to a library symbol od that type.

- 작성된 액션스크립트파일에 MovieClip 의 import 가 선언되어있지 않다.

- 해결방안 : import flash.dispaly.MovieClip 선언

1180: Call to a possibly undefined method addFrameScript.

- DocumentClass 로 AS파일을 빼서 쓸 경우 fla 의 타임라인 1번에 script가 선언되어있어선 안된다.

1046: Type was not found or was not a compile-time constant: Timer.

- 작성된 액션스크립트파일에 Timer 의 import 가 선언되어있지 않다.

- 해결방안 : import flash.utils.Timer ;

1046: Type was not found or was not a compile-time constant: TimerEvent.

- 작선된 액션스크립트파일에 TimerEvent 의 import 가 선언되어있지 않다.

- 해결방안 : import flash.events.TimerEvent ;

1046: Type was not found or was not a compile-time constant: Point.
1180: Call to a possibly undefined method Point.

- 작성된 액션스크립트파일에 Point 의 import 가 선언되어있지 않다.

- 해결방안 : import flash.geom.Point () ;

1013: The private attribute may be used only on class property definitions.

- 작선된 액션스크립트파일에 2개 이상의 class가 선언 되었다.

- AS3 파일은 항상 한개의 class 파일만 존재해야 하니 나머지들을 지워준다.

1046: Type was not found or was not a compile-time constant: ColorTransform.

- 작성된 액션스크립트파일에 ColorTransform 의 import 가 선언되어있지 않다.

- 해결방안 : import flash.geom.ColorTransform ;

1067: Implicit coercion of a value of type int to an unrelated type flash.geom:ColorTransform.

- 작성된 액션스크립트파일에 해당타입의 사용이 잘못되었다.

- 해결방안 : ct = 0xFF0000 (x) ==> ct.color = 0xFF0000 (o)

1067: Implicit coercion of a value of type int to an unrelated type String.

- 작성된 액션스크립트파일에 언급되지 않은 String type을 강제적으로 사용하였다.

- 해경방안 : cir.no.text = sp.getChildIndex ( cir ) (x) ==> cir.no.text = String ( sp.getChildIndex ( cir ) ) ;

1021: Duplicate function definition.

- 작성된 액션스크립트파일에 중복되는 function 이 설정되어있다.

- 해결방안 : 중복된 function 의 이름을 수정하거나 삭제한다.

1180: Call to a possibly undefined method addFrameScript.

- 작성된 액션스크립트에서 addFrameScript() 메서드를 찾을 수 없다라는 뜻. 이 메서드는 MovieClip 전용이다.

- 해경방한 : 현재 작성된 액션의 파일이 MovieClip이 아닌것을 변경해야한다. ( ex: Sprite ==> MovieClip )

1180: Call to a possibly undefined method gotoAndStop.

- 작성된 액션스크립트가 MovieClip으로 확장되지 않았다. gotoAndStop 메서드는 MovieClip에만 존재할 수 있다.

- 해결방안 : 잘못 확장되어있는 메서드의 이름을 MovieClip 으로 변경해준다.

ex ) public class Name extends Sprite { (x) ==> publc class Name extends MovieClip { (o)

1136: Incorrect number of arguments. Expected 4.

- 작성된 액션스크립트의 속성이 잘못되어있다. 아규먼트가 4개 인 곳에 맞지 않게 작성 되어있다.

- 해결방안 : 정확한 아규먼트의 속성과 갯수에 맞춰 사용한다.

1180: Call to a possibly undefined method navigateToURL.

- 작성된 액션스크립트에 navigateToURL 속성이 선언되지 않았다.

- 해결방안 : import flash.net.navigateToURL 선언

1063: ArgumentError: Error #1063: ...() 에서 인수 개수가 일치하지 않습니다. 0개가 필요하지만 1개가 있습니다.

- 작성된 함수에 인수가 설정되지 않았다.

- 해결방안 : 필요한만큼의 인수를 작성한다.

ex ) public function Yaho () :void { ==> public function Yaho ( e:Event ) :void {

#2136 : swf에 유효하지 않은 데이터가 포함되어 있습니다. ( ex : at TextFormat ) ;

- 작성된 swf파일의 ActionScript에 고유의 이름이 들어가 있다.

- 해결방안 : 사용해서는 안되는 고유이름을 대체해준다.

ex ) as파일에서

public class TextFormat extends Sprite {} ==> public class TextFormats extends Sprite {}

[출처] AS3 컴파일 에러|작성자 jjackkun81

Posted by 1010
반응형

In this article I will create a custom Spark Panel component that will look something like this:

Spark Panel Component Skin

You can find the working example lower on this page.

There are five steps that you must take to create a new Flex 4 Skin (for any Spark component):

  1. Create a new MXML component that extends the SparkSkin class
  2. Define the states of the Skin. The default states for most of the components are normal and disabled
  3. Define the HostComponent between Metadata tags
  4. Specify all the graphical elements that are used by the custom Skin
  5. Define the skin parts for the skin

So the first thing that I did was to create a custom MXML component for the Spark Panel skin. I created this component in the skins folder and I named the custom skin PanelSkin.

The next step was to define the states of the skin. To see what states are available for any Spark component you should check out the Adobe ActionScript 3.0 Reference for the Adobe Flash Platform online documentation.

For the Spark Panel custom skin I used four states:

	<s:states>
		<s:State name="normal" />
		<s:State name="disabled" />
		<s:State name="normalWithControlBar" />
		<s:State name="disabledWithControlBar" />
	</s:states>

The normal and disabled states are the default states when the Panel does not have a Control Bar. The normalWithControlBar and disabledWithControlBar states are used when the Panel is defined with a Control Bar.

Next we need to specify the HostComponent between Metadata tags. The HostComponent will be the path to the Spark component that will be skinned. In this case: spark.components.Panel:

	<fx:Metadata>
		[HostComponent("spark.components.Panel")]
	</fx:Metadata>

Next I specified all the graphical elements of the skin:

	<s:BorderContainer color="0xAAAAAA" cornerRadius="7"
					   width="100%" height="100%">
		<s:Rect width="100%" height="45" 
				topLeftRadiusX="7" topLeftRadiusY="7" topRightRadiusX="7" topRightRadiusY="7"
				top="0">
			<s:fill>
				<s:LinearGradient rotation="90">
					<s:entries>
						<s:GradientEntry color="#bf0000" />
						<s:GradientEntry color="#ff0011" />
					</s:entries>
				</s:LinearGradient>
			</s:fill>
		</s:Rect>
 
		<s:Rect bottomLeftRadiusX="7" bottomRightRadiusX="7"
				y="45"
				width="100%" height="100%">
			<s:fill>
				<s:LinearGradient rotation="90">
					<s:entries>
						<s:GradientEntry color="#f8f8f8" />
						<s:GradientEntry color="#CCCCCC" />
					</s:entries>
				</s:LinearGradient>
			</s:fill>
		</s:Rect>
 
		<s:Rect width="100%" height="40" 
				excludeFrom="normal, disabled"
				bottomLeftRadiusX="7" bottomLeftRadiusY="7" bottomRightRadiusX="7" bottomRightRadiusY="7"
				bottom="0">
			<s:fill>
				<s:LinearGradient rotation="90">
					<s:entries>
						<s:GradientEntry color="#3f3f3f" />
						<s:GradientEntry color="#a5a5a5" />
					</s:entries>
				</s:LinearGradient>
			</s:fill>
		</s:Rect>
	</s:BorderContainer>

At a glance this looks like a lot of code, but it is actually pretty straight forward. I declared a BorderContainer and inside this another three Rect blocks for the Panel header, Panel body and Panel Control Bar.

Inside every Rect block I have LinearGradient with different colors for every Rect. In the last Rect I added this code excludeFrom="normal, disabled" which will exclude this Control Bar from the Skin when the panel is declared without the Control Bar.

The last step is to define the skin parts. The Spark Panel has three skin parts: contentGroup for the Panel body, controlBarGroup for the Panel Control Group and titleDisplay for the Panel Header:

	<s:Label id="titleDisplay" 
			 paddingLeft="15" paddingRight="15" paddingTop="15"
			 color="white"
			 fontSize="18"
			 fontWeight="bold"
			 fontStyle="italic"/>
 
	<s:Group id="contentGroup">
		<s:layout>
			<s:VerticalLayout paddingTop="55" paddingBottom="10" paddingLeft="15" paddingRight="15"
							  paddingBottom.disabledWithControlBar="55" paddingTop.disabledWithControlBar="55"
							  paddingBottom.normalWithControlBar="55" paddingTop.normalWithControlBar="55"/>
		</s:layout>
	</s:Group>
 
	<s:Group id="controlBarGroup" bottom="10">
		<s:layout>
			<s:HorizontalLayout paddingLeft="5" paddingRight="5"/>
		</s:layout>
	</s:Group>

Ok, that’s all as far as the Panel Custom Skin is concerned. Now I will focus on the applying the Custom Skin to a few Panel instance in the application. To apply a Custom Skin to a Spark component you will use skinClass property like this:

	<s:Panel id="myPanel1"
			 skinClass="skins.PanelSkin"
			 title="My first panel title">

Here is the resulting application:


View Source is enabled in the above example. To view the source files right click on the swf and choose “View Source” from the context menu.

Here is the complete source code for the main application:

<?xml version="1.0" encoding="utf-8"?>
<s:Application xmlns:fx="http://ns.adobe.com/mxml/2009" 
			   xmlns:s="library://ns.adobe.com/flex/spark" 
			   xmlns:mx="library://ns.adobe.com/flex/mx" 
			   viewSourceURL="srcview/index.html">
 
	<s:layout>
		<s:HorizontalLayout paddingTop="5" horizontalAlign="center" verticalAlign="middle"/>
	</s:layout>
 
	<s:Panel id="myPanel1"
			 skinClass="skins.PanelSkin"
			 title="My first panel title">
 
		<mx:Text text="Lorem Ipsum is simply dummy text of the printing and typesetting industry. Lorem Ipsum has been the industry's standard dummy text ever since the 1500s, when an unknown printer took a galley of type and scrambled it to make a type specimen book. " 
				 width="200" />
 
		<s:controlBarContent>
			<s:Button label="First Button"/>
			<s:Button label="Second Button"/>
		</s:controlBarContent>
 
	</s:Panel>
 
	<s:Panel id="myPanel2"
			 skinClass="skins.PanelSkin"
			 title="My second panel title">
 
		<mx:Text text="Lorem Ipsum is simply dummy text of the printing and typesetting industry. Lorem Ipsum has been the industry's standard dummy text ever since the 1500s, when an unknown printer took a galley of type and scrambled it to make a type specimen book. " 
				 width="200" />
 
	</s:Panel>
 
</s:Application>

And here is the complete source code for the Custom Skin Class:

<?xml version="1.0" encoding="utf-8"?>
<s:SparkSkin xmlns:fx="http://ns.adobe.com/mxml/2009" 
			 xmlns:s="library://ns.adobe.com/flex/spark" 
			 xmlns:mx="library://ns.adobe.com/flex/mx" 
			 alpha.disabled="0.5" 
			 blendMode="normal">
 
	<s:states>
		<s:State name="normal" />
		<s:State name="disabled" />
		<s:State name="normalWithControlBar" />
		<s:State name="disabledWithControlBar" />
	</s:states>
 
	<fx:Metadata>
		[HostComponent("spark.components.Panel")]
	</fx:Metadata> 
 
	<s:BorderContainer color="0xAAAAAA" cornerRadius="7"
					   width="100%" height="100%">
		<s:Rect width="100%" height="45" 
				topLeftRadiusX="7" topLeftRadiusY="7" topRightRadiusX="7" topRightRadiusY="7"
				top="0">
			<s:fill>
				<s:LinearGradient rotation="90">
					<s:entries>
						<s:GradientEntry color="#bf0000" />
						<s:GradientEntry color="#ff0011" />
					</s:entries>
				</s:LinearGradient>
			</s:fill>
		</s:Rect>
 
		<s:Rect bottomLeftRadiusX="7" bottomRightRadiusX="7"
				y="45"
				width="100%" height="100%">
			<s:fill>
				<s:LinearGradient rotation="90">
					<s:entries>
						<s:GradientEntry color="#f8f8f8" />
						<s:GradientEntry color="#CCCCCC" />
					</s:entries>
				</s:LinearGradient>
			</s:fill>
		</s:Rect>
 
		<s:Rect width="100%" height="40" 
				excludeFrom="normal, disabled"
				bottomLeftRadiusX="7" bottomLeftRadiusY="7" bottomRightRadiusX="7" bottomRightRadiusY="7"
				bottom="0">
			<s:fill>
				<s:LinearGradient rotation="90">
					<s:entries>
						<s:GradientEntry color="#3f3f3f" />
						<s:GradientEntry color="#a5a5a5" />
					</s:entries>
				</s:LinearGradient>
			</s:fill>
		</s:Rect>
	</s:BorderContainer>
 
	<s:Label id="titleDisplay" 
			 paddingLeft="15" paddingRight="15" paddingTop="15"
			 color="white"
			 fontSize="18"
			 fontWeight="bold"
			 fontStyle="italic"/>
 
	<s:Group id="contentGroup">
		<s:layout>
			<s:VerticalLayout paddingTop="55" paddingBottom="10" paddingLeft="15" paddingRight="15"
							  paddingBottom.disabledWithControlBar="55" paddingTop.disabledWithControlBar="55"
							  paddingBottom.normalWithControlBar="55" paddingTop.normalWithControlBar="55"/>
		</s:layout>
	</s:Group>
 
	<s:Group id="controlBarGroup" bottom="10">
		<s:layout>
			<s:HorizontalLayout paddingLeft="5" paddingRight="5"/>
		</s:layout>
	</s:Group>
 
</s:SparkSkin>
Posted by 1010
반응형

The <mx:Panel> tag inherits all of the tag attributes of its superclass and adds the following tag attributes:

  <mx:Panel
   Properties
   layout="vertical|horizontal|absolute"
   status=""
   title=""
   titleIcon="null"
  
   Styles
   borderAlpha="0.4"
   borderThicknessBottom="NaN"
   borderThicknessLeft="10"
   borderThicknessRight="10"
   borderThicknessTop="2"
   controlBarStyleName="null"
   cornerRadius="4"
   dropShadowEnabled="true|false"
   footerColors="null"
   headerColors="null"
   headerHeight="Based on style of title"
   highlightAlphas="[0.3,0]"
   horizontalAlign="left|center|right"
   horizontalGap="8"
   modalTransparency="0.5"
   modalTransparencyBlur="3"
   modalTransparencyColor="#DDDDDD"
   modalTransparencyDuration="100"
   paddingBottom="0"
   paddingTop="0"
   roundedBottomCorners="false|true"
   shadowDirection="center|left|right"
   shadowDistance="2"
   statusStyleName="windowStatus"
   titleBackgroundSkin="TitleBackground"
   titleStyleName="windowStyles"
   verticalAlign="top|middle|bottom"
   verticalGap="6"
  
   Effects
   resizeEndEffect="Dissolve"
   resizeStartEffect="Dissolve"
   >
      ...
      child tags
      ...
  </mx:Panel>
  

View the examples


Posted by 1010
반응형

restrict = "ㄱ-힣"            :  한글만 입력가능.
restrict = "A-z"              :  영어만 입력가능.
restrict = "0-9"               :  숫자만 입력가능.
restrict = "0-9\-"           : 숫자와 '-'만 입력가능.
restrict = "^a-z"             : 소문자 a부터 z까지 제외한 모든문자 입력가능.
restrict = "A-z0-9\@\." : 이메일 형식만 입력가능.
restrict = "\\\"           : '\' 문자만 입력가능.
restrict = "\^"               :  '^' 문자만 입력가능.


Posted by 1010
반응형

에러 메시지 : 에러 메시지는 플렉스 빌더 2의 콘솔로 나오는 메시지가 대부분이고 일부 Runtiome Exception이라고 되어 있는 것은

웹브라우저의 플레시 플레이어 에서 나오는 메시지 이다.

* 에러 레벨 : 에러 레벨은 Warning 과 Error 가 있는데 Warning 은 경고성 메시지로 SWF 파일로 컴파일 되어 실행은 가능한 반면

Error는 컴파일이 되지 않으므로 반드시 원인을 찾아 고쳐야 한다.

Warning은 flex - config.xml 파일의 컴파일 옵션 중 " Show - actionscript - warnings " 를 false 로 설정하면 없어진다.

* 발생 원인 : 발생 원인이 되는 코드 패턴을 설명한 부분이다.

* 코드 예 : 에러 메시지가 나오는 코드의 예를 보여준다

* 해결책 : 에러를 수정하기 위해 해야할 조치를 설명한다.

1) 1008 : Variable my Var 에 형식 선언이 없습니다.

* 에러 레벨 : Warning

* 발생 원인 : my Var에 데이터 타입을 지정하지 않았을 경우 발생

* 코드 예 : Private Var My Var;

* 해결책 : Private Var my var : String; 식으로 데이터 타입을 지정해줌

2) 1084 : var 'my Var' 메소드에 namespace 속성이 없습니다.

이 속성은 'Package - private' namespace 의 기본값을 구성합니다.

* 에러 레벨 : Warning

* 발생 원인 : 변수나 메소드명에 제한자를 지정하지 않았을 떄 발생

* 코드 예 : var myvar : String;

* 해결책 : private var myvar : String; 이런 식으로 제한자를 지정해줌

3) 1084 : identifier 가 xxx 앞에 있어야 합니다.

* 에러 레벨 : Error

* 발생 원인 : xxx 근처에 변수 선언이 잘못되어있거나 예약어로 변수명을 선언했을 경우

* 코드 예 : var 1 myVar : string;

* 해결책 : 변수명이 제한자 + var + 변수명의 식으로 정확히 선언되었는지,

변수명이 영문자나 $ 혹은 _ 로 시작하는지 확인

4) 1120 : Access of undefined property myButton

* 에러 레벨 : Error

* 발생 원인 : 정의되지 않은 속성, 변수명이나 id 값을 참조하려고 할 때

* 코드 예 : <mx : Button id = "myButn" label = "확인">

<mx : Label text = "{myButton.label}"/>

5) 1084 : Rightbrace 가 end of program 앞에 있어야 한다.

* 에러 레벨 : Error

* 발생 원인 : 코드 블록 {와} 표시가 제대로 열고 닫히지 않았을때

* 해결책 : 모든 괄호가 짝지어 있는지 확인한다.

6) 1087 : 프로그램 종료 이후에 문자가 추가로 발견 되었습니다.

* 에러 레벨 : Error

* 발생원인 : 함수 선언 다음에 { 표시가 없을때

* 해결책 : 모든 괄호가 짝지어 있는지 확인한다.

7) 1008 : Variable i 에 형식 선언이 없습니다.

* 에러 레벨 : warning

* 발생 원인 : 실행문 안에 변수의 타입이 선언이 되지 않았을 때

* 코드 예 : for (var i=0; i<1; i++)

* 해결책 : 타입을 선언해 준다. for (var i : int =0; i<1; i++)

8) The end - tag for element type "mx:Mode *" must end with a '>' delimiter

* 에러 레벨 : Error

* 발생 원인 : 태그가 정확히 열고 닫히지 않았을때

* 해결책 : 태그가 제대로 열고 닫혔는지 확인한다.

9) Encountered "<mx:Model>" at line 41, column5. Was expecting one of : /Model....

* 에러 레벨 : Error

* 발생 원인 : 태그가 정확히 열고 닫히지 않았을때

* 해결책 : 태그가 제대로 열고 닫혔는지 확인한다 ( 특히 종료 태그를 빼먹지는 않았는지 확인)

10) The element type "mx:Model: must ne terminated by the matching end-tag "</mx:Model>"

* 에러 레벨 : Error

* 발생 원인 : 태그가 정확히 열고 닫히지 않았을때

* 해결책 : 태그가 동일한 이름으로 열고 닫혔는지 확인한다.

11) invalid character or markup for found in script block. Try surrounding your code with a CDATA block.

* 에러 레벨 : Error

* 발생 원인 : 태그기호 " < " 가 하나 더 있을떄

* 코드 예 : <mx:Model> .... <</mx:model>

* 해결책 : 추가된 " < " 를 찾아서 제거 한다.

12) Encounterd " > \n " at line41, column16.

* 에러 레벨 : Error

* 발생 원인 : xorm rlgh " > " 가 하나 더 있을 때

* 코드 예 : <mx:Model> .... </mx:model>>

* 해결책 : 추가된 " > "를 찾아서 제거 한다.

13) 1120 : Access of undefined property "클래스명"

* 에러 레벨 : Error

* 발생 원인 : 에러메시지에 나오는 클래스명을 import 하지 않았을 떄

* 코드 예 : ArrayUtil.toArray (myXML.result)

* 해결책 : import mx.utils.ArrayUtil ; //문장을 스크립트 블록에 써줌

14) 1061 : 정의되지 ㅇ낳은 메소드 입니다.

* 에러 레벨 : Error

* 발생 원인 : 에러 라인의 객체에서 정의되어있지 않은 메소드를 호출 하려고 할 때

* 코드 예 : Arrayutil.toArrya 2 (myXML.result)

* 해결책 : 코드ㅡ 자동완성 기능이나 API 문서를 통해 그 클래스에서 사용가능한 정확한 메소드 명을 찾아서 정의함

15) Cannot resolve attribute 'titles' for component type mx.containers.Panel.

* 에러 레벨 : Error

* 발생 원인 : 에러라인의 객체에서 정의도어있지 않은 속성을 사용하려고 할 때

* 코드 예 : <mx : Panel titles = "Line Chart ">

* 해결책 : 코드 자동완성 기능이나 API 문서를 통해 그 클래스에서 사용가능한 정확한 속성명을 찾아서 정의함

16 ) Open quote is expected for attribute "title"

* 에러 레벨 : Error

* 발생 원인 : 에러라인의 태그에서 속성값의 시작 따옴표가 정의 되지 않았을 때

* 코드 예 : <mx : panel titles = Line Chart"> or <mx : panel titles = 'Line Chart">

* 해결책 : 속성값의 따옴표를 정확히 입력한다.

18) 1071 : 속성 뒤에 주석 사용이 가능한 지시문이 있어야 합니다.

* 에러 레벨 : Error

* 발생 원인 : 에러라인의 변수 선언이 제대로 되지 않았을 때

* 코드 예 : private; private var myVar : String;

* 해결책 : 해당라인 근처의 변수 선언을 정확히 해준다.

19) 1180 : Call to a possibly undefined method check.

* 에러 레벨 : Error

* 발생 원인 : 정의되지 않은 메소드를 호출하려고 할 떄

* 코드 예 : check ();

* 해결책 : 해당 함수를 호출하는 라인으로 가서 정확한 메소드명으로 고쳐준다.

20) 1084 : rightparen 이 콜론 " : " 앞에 있어야 합ㄴ디ㅏ.

* 에러 레벨 : Error

* 발생 원인 : " : " 근처에서 객체 관련 코드가 잘못 되었을 때 / var, function 등의 키워드를 설정하지 않았을 떄

* 코드 예 : <mx : Button label = "확인 " click = "showMenu(event:Event) " />

*해결책 : 클래스 타입 선언을 제거한다.

21) Data binding will not be able to detect assignments to :bindableVar"

* 에러 레벨 : Warning

* 발생 원인 : 변수가 바인딩 되어 있는데 [bindable] 표시를 하지 않아 발생

* 코드 예 : private var bindableVar : Number=0;

* 해결책 : 바인딩하는 변수를 찾아서 [bindable] private var bindableVar : Number=0; 표시를 해준다.

22) 다음 형식 주석이 컴파일 타입 상수가 아닙니다.

* 에러 레벨 : Error

* 발생 원인 : 컴피일 중에 참조하려는 객체나 속성이 없을때

* 코드 예 : 객체으 ㅣ이름이나 속성이 잘못 되었거나 import 문을 써주지 않았을 때

* 해결책 : 에러가 발ㄹ생한 객체를 찾아서 import 문, 클래스며으, 속성명 등이 정확한지 확인한다.

23 ) int가 관련없는 String 형식으로 암시적 강제 정의 되어있습니다.

* 에러 레벨 : Error

* 발생 원인 : 객체에 값을 설정하려고 하는데 타입이 맞지 않을 때

* 코드 예 : var test : String = "test"; test =1;

* 해결책 : 에러가 발생한 코드를 찾아서 세팅되는 객체의 타입을 맞게 수정해 준다 / test = "1";

24) Definition sub : SubClass could not be found .

* 에러 레벨 : Error

* 발생 원인 : 특정 패키지에 있는 클래스를 찾을 수 없을 때

* 코드 예 : import sub.subclass

* 해결책 : SubClass 에 대한 패키지명, 경로, 클래스명이 정확한지 확인한다.

25) ReferenceError : Error #1069 : String 에서 속성을 찾을 수 없습니다. 기본값이 없습니다.

* 에러 레벨 : Error

* 발생 원인 : 데이터 바인딩을 위해 데이터를 참조하려고 하는데 그 속성명이 없거나, 데이터 바인딩이 되지 않았을 때

* 코드 예 : <mx:LineChart dataProvider = "myAC } " 또는 showDataTips = true">

혹은 데이터 정의가 <apple> 100 </apple> 식으로 되어 있을때

26) typeError : Error #1009 : null 객체 참조의 속성이나 메소드에 액세스 할 수 없습니다.

* 에러 레벨 : Error (Runtime Exception)

* 발생 원인 : 실행중에 참조하려는 객체 속성이나 메소드가 없을때

* 코드 예 : mx.controls.Alert.show (event.result.xxx) ;

* 해결책 : 참조하려는 객체의 정확한 속성명이나 메소드명을 써 준다.

출처: http://blog.naver.com/PostView.nhn?blogId=injae0203&logNo=70071061714

Posted by 1010
반응형

출처 : http://blog.hanb.co.kr/100


오라일리(O'Reilly) InsideRia에 20회에 걸쳐 연재되었던 Tony Hiller의 Anatomy of an Enterprise Flex RIA가 드디어 한국어 번역이 완료되었습니다. 최근에 RIA(Rich Internet Application)와 Flex에 대한 관심이 많아지고 있는것 같습니다. 웹페이지를 마치 응용 프로그램 처럼 구현할수도 있고, 비디오, 오디오 등 다양한 매체들을 손쉽게 표현할 수 있다는게 장점이 아닌가 합니다.

아래 번역 기사들은 많은 한빛미디어 독자분들이 직접 번역해서 한빛 네트워크에 등록한 것입니다. 이 자리를 빌어 번역에 참여해 주신 독자분들께 감사드립니다.

RiA나 Flex 관련 서적들도 출간되었고, 앞으로도 많은 서적들이 출간될 거라 예상하지만, 아래 기사만으로도 충분히 Flex RIA를 시작하는데 좋은 자료가 될 것 같습니다 :)

Enterprise Flex RIA 해부

Posted by 1010