04.Anddoid2010. 6. 15. 09:35
반응형

1. Data Feed / RSS 예제

요즘 많은 종류의 데이터를 인터넷에서 공짜로 받을수있습니다. 이는 일반적으로 RSS 를 통해서 이루어지는데 여기서 데이터를 뽑아내는 핵심은 URL 을 던진후 돌아오는 문자의 스트림을 어떻게 XML parse 할수있느냐에 달려있습니다. 이 XML parser 는 몇가지가 있는데 여기에서는 org.xml.sax 에 있는 parser 를 이용해 봅니다.

1. 일단 이런 인터넷상에서 데이터를 가져오는 작업은 시간이 좀 걸리기에 이 예제에서는 ProgressDialog 를 무조건 화면에 뿌렸습니다.
2. 이후 데이타가 도착하고 parsing 이 끝나 화면에 뿌릴준비가되면 ProgressDialog 를 걷어내라는 신호를 Handler 에 보내고
3. Handler 는 이를 받아 ProgressDialog 를 없애고 화면을 뿌립니다.

private final Handler handler = new Handler() {
	@Override
	public void handleMessage(final Message msg) {

		progressDialog.dismiss();
		tv_nodata = (TextView) findViewById(R.id.tv_nodata);
		if ((mChannelItems == null) || (mChannelItems.size() == 0)) {
			tv_nodata.setText("No Data");
		}
		else {
			tv_nodata.setText(mURL);
			listview = (ListView) findViewById(R.id.listview01);

			ChannelBaseAdapter cba = 
			new ChannelBaseAdapter(RSSTester1.this,
			R.layout.channel_view_detail,
			mChannelItems);
			listview.setAdapter(cba);
			listview.setOnItemClickListener(new OnItemClickListener() {
				public void onItemClick(AdapterView parent, View v, int position, long id) {


				}
			});

		}
	}
};

/** Called when the activity is first created. */
@Override
public void onCreate(Bundle savedInstanceState) {
	super.onCreate(savedInstanceState);
	
	setContentView(R.layout.channel_view);

	progressDialog = ProgressDialog.show(this, " Working...", " Retrieving RSS feed", true, false);
	new Thread() {
		@Override
		public void run() {
			//mURL = "http://feeds.feedburner.com/usccb/zHqS";
			//mURL = "http://www.thetechtrader.com/rss/closing_commentary.rss";
			mURL = "http://blogs.wsj.com/marketbeat/feed/";
			getData(mURL);
			handler.sendEmptyMessage(0);
		}
	}.start();
}

public void getData(String urlString) {
	try {
		URL url = new URL(urlString);
		SAXParserFactory factory = SAXParserFactory.newInstance();
		SAXParser parser = factory.newSAXParser();
		XMLReader xmlreader = parser.getXMLReader();
		ChannelHandler theRssHandler = new ChannelHandler();
		xmlreader.setContentHandler(theRssHandler);
		InputSource is = new InputSource(url.openStream());
		is.setEncoding("ISO-8859-1");	// just for WSJ.
		xmlreader.parse(is);
		mChannelItems = theRssHandler.getChannelItems();
	}
	catch (Exception e) {
		e.printStackTrace();
	}
}

.
여기서 getData 를 주시해서 보기바랍니다.
이 부분이 밖의 인터넷에서 데이터를 요구하고 받아오는 부분입니다.
xmlreader.parse(is) 에 의해 parse 가 된 데이터는 ChannelHandler 로 보내집니다. 이 내부에서 저는 필요한 데이터만 뽑아내게 됩니다. ChannelHandler 는 DefaultHandler 를 상속받아만드는데, 이안에는 중요한 5개의 메소드가 있습니다.
1. startDocument
2. startElement
3. endElement
4. endDocument
5. characters
.
startDocument 는 들어오는 XML 의 시작입니다. 그러면 끝은 endDocument 이겠죠.
startElement 는 XML tag 의 시작입니다. 끝은 endElement 가 될겁니다.
character 는 문자 스트립을 받을수있는곳입니다.
.
startELement 에서 만약 title 이라는 tag 가 보이면 isTitle 를 true 로 셋합니다.
character 에서는 isTitle 이 true 인동안은 문자를 받아 mChannelItem.title 에 저장합니다.
endElement 에서 현재의 tag 가 title 인데 isTitle 이 true 라면 당연히 isTitle 을 false 로 만들어 character 가 Title쪽 문자를 받는일을 더이상하지 않도록 합니다.
.이와같은 일을 다른 tag 에 대해서도하면 원하는 tag 의 내용을 다받을수있습니다. 여기서는 간단히 title 과 날짜, link 정보만을 받아 화면에 뿌렸습니다.
.
그럼 이 다섯가지 메소드를 감상해보시죠.

@Override
public void startDocument() throws SAXException {
}

@Override
public void startElement(final String namespaceURI, final String localName, final String qName,
final Attributes atts) throws SAXException {
	if (localName.equals(ITEM)) {
		inItem = true;
		mChannelItem = new ChannelData();
	}
	if (inItem) {
		if (localName.equals(TITLE)) 			inTitle = true;
		else if (localName.equals(LINK)) 		inLink = true;
		else if (localName.equals(PUBDATE)) 	inPubDate = true;
		//else if (localName.equals(DESC)) 		inDesc = true;
		else if (localName.equals(LINK2)) 		inLink2 = true;
		else if (localName.equals(DURATION))	inDuration = true;
	}
}


@Override
public void endDocument() throws SAXException {
}

@Override
public void endElement(final String namespaceURI, final String localName, final String qName) throws SAXException {
	if (localName.equals(ITEM)) {
		inItem = false;
		mChannelItems.add(mChannelItem);
	}

	if (inItem) {
		if (localName.equals(TITLE)) 			inTitle = false;
		else if (localName.equals(LINK)) 		inLink = false;
		else if (localName.equals(PUBDATE)) 	inPubDate = false;
		else if (localName.equals(LINK2)) 		inLink2 = false;
		else if (localName.equals(DURATION))	inDuration = false;
	}
}

@Override
public void characters(final char ch[], final int start, final int length) {
	String chString = "";
	if (ch != null) {
		chString = new String(ch, start, length);
	}

	if (inTitle) {
		mChannelItem.title = chString;
	}
	
	if (inLink) {
		mChannelItem.link = chString;
	}

	if (inPubDate) {
		// hack to replace "UT" with GMT (UT won't parse)
		if (chString.contains("UT")) {
			chString = chString.replace("UT", "GMT");
		}
		mChannelItem.pubDate2 = chString;

		// try to handle the various date formats
		Date pubDate = null;
		try {
			pubDate = ChannelHandler.DATE_FORMAT_A.parse(chString);
		}
		catch (ParseException e) {
			// swallow
		}
		
		if (pubDate == null) {
			try {
				pubDate = ChannelHandler.DATE_FORMAT_B.parse(chString);
			}
			catch (ParseException e) {
				// swallow
			}
		}
		mChannelItem.pubDate1 = pubDate;
	}

	if (inLink2) {
		mChannelItem.link2 = chString;
	}
	
	if (inDuration) {
		mChannelItem.duration = chString;
	}

출처 : http://rsequence.com/android_blog/node/125
Posted by 1010
04.Anddoid2010. 5. 17. 13:23
반응형
출처 : http://www.kandroid.org/board/board.php?board=sourcecode&command=body&no=18

안녕하세요. 왕초보 신입생 사로자바입니다.
마소 잡지를 토대로 공부하고 있는데 SDK 1.0 에서 바뀐 부분이 좀 있어서...
내공이 부족한 저로서는 잘 나가다가 진도가 꽉 막힌답니다.
  
 
전화번호부 목록 불러오는 코드입니다.
마소 잡지랑 바뀐부분 비교해보면서 보셔도 좋을것 같네요.
제가 이해한대로 주석을 달아봤어요... 제대로 달았는지 의심이;;
 

public class HelloAndroid extends Activity {
	private static final String TAG = "HelloAndroid";
	
	/** Called when the activity is first created. */
	@Override
	public void onCreate(Bundle savedInstanceState) {
		super.onCreate(savedInstanceState);
		
		// 레이아웃 설정		
		LinearLayout layout = new LinearLayout(this);
		layout.setOrientation(LinearLayout.VERTICAL);
		
		// 주소록 URI		
		Uri people = Contacts.People.CONTENT_URI;
		// 검색할 컬럼 정하기
		String[] projection = new String[] {
				Contacts.People._ID,
				Contacts.People.NAME,
				Contacts.People.NUMBER
		};
		
		// 쿼리 날려서 커서 얻기
		Cursor cursor = managedQuery(people, projection, null, null, null);
		if(cursor.moveToFirst()) {
			// 컬럼명으로 컬럼 인덱스 찾기 
			int idIndex = cursor.getColumnIndex("_id");
			int nameIndex = cursor.getColumnIndex(Contacts.PeopleColumns.NAME);
			int numberIndex = cursor.getColumnIndex("number");
			
			do {
				// 요소값 얻기
				int id = cursor.getInt(idIndex);
				String name = cursor.getString(nameIndex);
				String number = cursor.getString(numberIndex);
				
				// 레이블에 기록			
				TextView tv = new TextView(this);
				tv.setText("id=" + id + ", name=" + name + ", number=" + number);				
				layout.addView(tv);
				
				// LogCat에 로그 남기기
				Log.i(TAG, "id=" + id + ", name=" + name + ", number=" + number);
			} while(cursor.moveToNext());
		}
		
		// 컨텐트에 뷰 등록
		setContentView(layout);
	}
}
 
참고로 AndroidManifest.xml 파일에는 전화번호부를 읽을 수 있는 권한을 줘야 하네요...
<uses-permission android:name="android.permission.READ_CONTACTS" />
 
그럼 모두들 열공합시다~
Posted by 1010
04.Anddoid2010. 5. 11. 13:52
반응형


출처 : http://www.androidside.com/bbs/board.php?bo_table=B46&wr_id=8966


res 폴더에 menu라는 폴더를 생성하고 xml 파일을 생성합니다.
예 ) menu.xml

<?xml version="1.0" encoding="utf-8"?>
<menu
  xmlns:android="http://schemas.android.com/apk/res/android">
  <item android:id="@+id/menu1"
        android:title="1번 메뉴"/>
    <item android:id="@+id/menu2"
        android:title="2번 메뉴"/>
    <item android:id="@+id/menu3"
        android:title="3번 메뉴"/>
     <item android:id="@+id/menu4"
        android:title="4번 메뉴"/>
</menu>


그다음 java파일에 onCreateOptionsMenu메소드를 생성하여 menu를 Override 해 줍니다.


 private Menu mMenu;

 @Override
 public boolean onCreateOptionsMenu(Menu menu) {
     mMenu = menu;        

        MenuInflater inflater = getMenuInflater();
         inflater.inflate(R.menu.menu, mMenu);

        menu.getItem(0).setIcon(R.drawable.icon); //icon 이미지 넣기

        menu.getItem(1).setTitle("메뉴이름 변환"); //title 변환하기

               return true;
   }

마지막으로 메뉴를 선택하였을때 이벤트를 주기위해 onOptionsItemSelected메소드를 Override 합니다.

public boolean onOptionsItemSelected(MenuItem item) {

        switch (item.getItemId()) {

        case R.id.menu1: //위에 xml에서 만든 메뉴에서 1번 메뉴 버튼이 눌러졌을때
          break;

         case R.id.menu2: //위에 xml에서 만든 메뉴에서 2번 메뉴 버튼이 눌러졌을때
          break;

         case R.id.menu3: //위에 xml에서 만든 메뉴에서 3번 메뉴 버튼이 눌러졌을때
          break;

         case R.id.menu4: //위에 xml에서 만든 메뉴에서 4번 메뉴 버튼이 눌러졌을때
          break;
        }

        return true;
     }


위와 같은 방법으로 menu를 생성해서 사용하 실 수 있습니다.


다른 방법으로는

@Override
    public boolean onCreateOptionsMenu(android.view.Menu menu) {

     super.onCreateOptionsMenu(menu);
     
     menu.add("menu1");
     menu.add("menu1");
     menu.add("menu1");
     menu.add("menu1");    

     return true;
    }

public boolean onOptionsItemSelected(MenuItem item) {

     if (item.getTitle().toString()== "menu1"){
      }
     
     else if (item.getTitle().toString()== "menu2"){
     }

     else if (item.getTitle().toString()== "menu3"){
      }

    else if (item.getTitle().toString()== "menu4"){
     }

     
     return true;
    }

위와 같은 방법으로 menu에 바로 추가하여 xml 파일을 이용하지 않고 사용할수 있습니다.

편하시는 방법을 사용하시면 됩니다.


안드로이드 공부에 도움이 되셨으면 좋겠습니다^^^

Posted by 1010
04.Anddoid2010. 5. 11. 09:32
반응형
[블로그 링크] http://onjo.tistory.com/2052


안드로이드에서 db(sqlite) 정보를
쉽게 보는 방법을 정리해 보았습니다.

(초보자를 위한 팁 이라고 생각합니다.)


핵심만 정리하면 아래와 같습니다.

(1) db 내보내기 (db export / data.sqlite)
=> 이클립스 혹은 Droid Explorer 이용


(2) db 보기
=> firefox 확장 도구인 SQLite Manager를 이용하여
    (1) 에서 추출한 db(data.sqlite)를 열면 됩니다.

    * mysql에서 mysqlyog를 사용하는 것과 비슷한 개념

================================================

안드로이드에서 db(sqlite) 쉽게 보기


1. Run Eclipse (이클립스 실행)


2. Select Project (프로젝트 선택)
   -> Run Android Emulator (안드로이드 에뮬레이터 실행)


3. Select "DDMS perspective" (DDMS 선택)
   -> File Explorer
   -> data - data - package name (패키지명)
      - databases - data 선택


4. select "pull a file from the device" (pull 선택)
   -> save the "data.sqlite" (db export / db 내보내기)


======================================================

5. View DB (DB 내용 보기)
  1) Firefox :: SQLite Manager
     http://code.google.com/p/sqlite-manager/

      => firefox browser, click the *.xpi (firefox에서 xpi 클릭하면 설치됨)
 

  2) click the "Connect Database" (DB 연결 버튼 클릭)


======================================================
※ Eclipse the not view "File Explorer"
(이클립스에서 File Explorer가 내용이 안보일 경우)

=> Droid Explorer 이용해 db export
- Droid Explorer : http://de.codeplex.com/


6. Conclusion (정리)
  1) db export (db 내보내기)
     - eclipse DDMS 혹은 Droid Explorer

  2) view db (db 보기)
Posted by 1010
04.Anddoid2010. 5. 4. 15:01
반응형
컨버전스님과 볼레노 님의 글을 바탕으로 몇일 삽질 좀 했습니다.   ( 두분 감사 드려요 )

K-1.png

일단 결과 화면 입니다. 노래 sdcard안에 몇곡 넣었구요
K-2.png

리스트 형식으로 정리 하도록 했습니다.

소스는 여기 >>>  Music Player.zip 

안에 보면 MusicUtils.java 파일은 오픈소스 music 안에서 이리저리 필요하거만 뽑아서 놨습니다.
저도 뭐가 뭔지는 모르겠구요.. mp3파일 안에서 사진 파일만 가져 올 수 있습니다. 그냥 파일 통채로 쓰시면 될꺼 같아요

그냥 main.java 안에서 보시고 필요한 함수만 뽑아서 쓰시면 될꺼 같아요

위에 tellme 노래는 mp3파일 안에 사진도 없고 가수이름도 없어서 그렇습니다.
저거는 그냥 파일이름 뜨도록 해주면 되겠죠..

 볼레노님 글 읽고 글씨는 뽑아와도 앨범 사진을 못뽑아와서 고생했는데 성공해서 기쁘네요 ;; ㅎ


출처 : http://www.androidpub.com/?mid=android_dev_info&category=108970&page=2&document_srl=91099
Posted by 1010
04.Anddoid2010. 5. 4. 14:41
반응형
상용
aiCharts
http://www.artfulbits.com/Android/aiCharts.aspx
상용 차트입니다.
갤러리 - http://www.artfulbits.com/Android/gallery/galleryCharts.aspx
우크라이나 회사 같습니다. 미국에서도 영업합니다.
온라인 결재 299달러 시작

오픈소스
achartengine
http://code.google.com/p/achartengine/
현재도 계속 개발중입니다.
종류
line chart
area chart
scatter chart
time chart
bar chart
pie chart
bubble chart
doughnut chart

chartdroid
http://code.google.com/p/chartdroid/
현재도 계속 개발중입니다.

androidchart
http://code.google.com/p/androidchart/
주식형 차트인데 2008년 이후로 업데이트 되지 않습니다.

http://shaffah.com/droid-analytic-google-analytics-for-android
이런 비슷한 오픈 소스 프로그램이 있나 해서 찾다가 본건데
개발자가 아니어서 사용성까지는 잘 모르겠습니다.


출처 : http://www.androidpub.com/?mid=android_dev_info&category=108970&page=2&document_srl=175571
Posted by 1010
04.Anddoid2010. 5. 4. 14:37
반응형
가끔 앱배포시에 DB파일을 함께 배포하는 방법을 문의하는 분들이 계셔서
제가 가지고 있는 정보를 공유하려고 합니다.
E-Book같은 것을 만들게 되면 DB도 함께 배포해야 합니다.

DB파일을 배포하는 방법에는 여러가지가 있겠지만(http://www.androidpub.com/7629 회색님 댓글 참조)
제가 공유하는 방법은 apk파일속에 넣어서 배포하는 방법입니다.

순서
1. 1MB가 넘는 DB파일은 900KB씩 잘라서 assets 폴더에 넣는다.
   (assets 폴더에 1MB이상 되는 파일을 넣고 읽으려면 에러가 발생합니다.)
2. 어플이 맨처음 실행될때 assets 폴더에 있는 DB파일을 순서대로 읽어서
   /data/data/패키지명/databases/DB파일명.db 로 하나의 DB파일을 만든다.

먼저 DB파일을 900KB씩 자르는 소스는

01.FileInputStream fis = new FileInputStream("경로/DB파일명.db");
02.BufferedInputStream bis  = new BufferedInputStream(fis);
03.          
04.FileOutputStream fos = fos = new FileOutputStream("경로/잘라진 DB파일명1.db");;
05.BufferedOutputStream bos = bos = new BufferedOutputStream(fos);;
06.          
07.byte[] b = new byte[1024];
08.int read = -1;
09.int count = 1;
10.int count2 = 1;
11.          
12.while((read = bis.read(b, 0, 1024)) != -1)
13.{            
14.    bos.write(b, 0, read);
15.    bos.flush();
16.              
17.    if(count2 % 900 == 0)
18.    {
19.        count++;
20.                  
21.        if(fos != null) fos.close();
22.        if(bos != null) bos.close();
23.                  
24.        fos = new FileOutputStream("경로/잘라진 DB파일명" + count + ".db");
25.        bos = new BufferedOutputStream(fos);
26.    }
27.              
28.    count2++;
29.}
30.          
31.fis.close();
32.bis.close();
33.if(fos != null) fos.close();
34.if(bos != null) bos.close();

위와 같이 900KB씩 자른 DB파일을 assets 폴더에 넣습니다.
그리고 어플이 맨처음 실행될때 아래와 같이 /data/data/패키지명/databases/생성될 DB명.db 로 만들어줍니다.

01.if(어플이 맨처음 실행이면)
02.{
03.    AssetManager am = null;
04.    InputStream[] arrIs = new InputStream[5]; // assets 폴더에 있는 DB파일 갯수 5개
05.    BufferedInputStream[] arrBis = new BufferedInputStream[5]; // assets 폴더에 있는 DB파일 갯수 5개
06.          
07.    FileOutputStream fos = null;    
08.    BufferedOutputStream bos = null;
09.          
10.    try
11.    {
12.        File f = new File("/data/data/패키지명/databases/생성될 DB명.db");
13.            
14.        // 혹시나 DB가 있으면 지우고 0바이트의 DB파일을 새로 만든다.
15.        if(f.exists())
16.        {
17.            f.delete();
18.            f.createNewFile();
19.        }
20.              
21.        am = this.getResources().getAssets();
22.             
23.        for(int i = 0; i < arrIs.length; i++)
24.        {
25.            arrIs[i] = am.open("assets 폴더에 있는 DB명" + (i + 1) + ".db");
26.            arrBis[i] = new BufferedInputStream(arrIs[i]);
27.        }
28.              
29.        fos = new FileOutputStream(f);
30.        bos = new BufferedOutputStream(fos);
31.              
32.        int read = -1;
33.        byte[] buffer = new byte[1024];
34.              
35.        for(int i = 0; i < arrIs.length; i++)
36.        {
37.            while((read = arrBis[i].read(buffer, 0, 1024)) != -1)
38.            {
39.                bos.write(buffer, 0, read);
40.            }
41.                  
42.            bos.flush();
43.        }
44.    }
45.    catch(Exception e){}
46.    finally
47.    {
48.        for(int i = 0; i < arrIs.length; i++)
49.        {
50.            try{if(arrIs[i] != null) arrIs[i].close();}catch(Exception e){}
51.            try{if(arrBis[i] != null) arrBis[i].close();}catch(Exception e){}
52.        }
53.              
54.        try{if(fos != null) fos.close();}catch(Exception e){}
55.        try{if(bos != null) bos.close();}catch(Exception e){}
56.              
57.        arrIs = null;
58.        arrBis = null;
59.    }
60.}

이상입니다.
그리고 assets 폴더에 있는 파일을 삭제하려고
여기저기 알아봤는데 결국에는 못찾았습니다.
불가능하다는 답변만......
불가능하지 않은 방법을 아시는 분은 말씀해주시면 감사드리겠습니다.

약 1년전쯤 SDK 1.0에서 만든 소스인데 2.0에서도 잘 돌아가고
모토로이에서도 잘 돌아가네요..^^


출처 : http://www.androidpub.com/?mid=android_dev_info&category=108970&document_srl=191797
Posted by 1010
04.Anddoid2010. 5. 4. 14:35
반응형
Intent intent = new Intent(Intent.ACTION_VIEW, Uri.parse("http://www.google.com"));
startActivity(intent);


하지만 문제가 좀 있는듯한데...
Posted by 1010
04.Anddoid2010. 5. 4. 14:18
반응형

As promised earlier, here is an example of how to add support for alert() function to a WebView in your Android application:

  1.  
  2. final WebView browser = (WebView)findViewById(R.id.browser);  
  3. /* JavaScript must be enabled if you want it to work, obviously */ 
  4. browser.getSettings().setJavaScriptEnabled(true);  
  5.  
  6. final Context myApp = this;  
  7.  
  8. /* WebChromeClient must be set BEFORE calling loadUrl! */ 
  9. browser.setWebChromeClient(new WebChromeClient() {  
  10.     @Override 
  11.     public boolean onJsAlert(WebView view, String url, String message, final android.webkit.JsResult result)  
  12.     {  
  13.         new AlertDialog.Builder(myApp)  
  14.             .setTitle("javaScript dialog")  
  15.             .setMessage(message)  
  16.             .setPositiveButton(android.R.string.ok,  
  17.                     new AlertDialog.OnClickListener()  
  18.                     {  
  19.                         public void onClick(DialogInterface dialog, int which)  
  20.                         {  
  21.                             result.confirm();  
  22.                         }  
  23.                     })  
  24.             .setCancelable(false)  
  25.             .create()  
  26.             .show();  
  27.  
  28.         return true;  
  29.     };  
  30. });  
  31.  
  32. /* load a web page which uses the alert() function */ 
  33. browser.loadUrl("http://lexandera.com/files/jsexamples/alert.html");  

Code for adding support for confirm() and prompt() is almost identical and can be found in Mosembro’s source code.


출처 : http://lexandera.com/2009/01/adding-alert-support-to-a-webview/

Posted by 1010
04.Anddoid2010. 5. 4. 14:13
반응형
java Source

 package lowmans.MySdcardWriteTest;
import java.io.File;
import java.io.FileOutputStream;
import java.io.IOException;
import android.app.Activity;
import android.os.Bundle;
import android.util.Log;
public class MySdcardWriteTest extends Activity {
	
	final String tag = "MySdcardWriteTest";
    /** Called when the activity is first created. */
    @Override
    public void onCreate(Bundle savedInstanceState) {
        super.onCreate(savedInstanceState);
        setContentView(R.layout.main);
        
        String path ="/sdcard/";
        File file = new File(path+"myTest.txt");
        try{
        	FileOutputStream fos = new FileOutputStream(file);
        	fos.write("this is test~!!\nThis Is Test~!!".getBytes());
        	fos.close();
        }catch(IOException e){
        	Log.i(tag , e.getMessage());
        }
    }
}

androidManifest.xml 에 use-permission 추가

 <?xml version="1.0" encoding="utf-8"?>
<manifest package="lowmans.MySdcardWriteTest"
      android:versionCode="1"
      android:versionName="1.0" xmlns:android="http://schemas.android.com/apk/res/android">
    <application android:icon="@drawable/icon" android:label="@string/app_name"
    >
        <activity android:name=".MySdcardWriteTest"
                  android:label="@string/app_name">
            <intent-filter>
                <action android:name="android.intent.action.MAIN" />
                <category android:name="android.intent.category.LAUNCHER" />
            </intent-filter>
        </activity>
    </application>
    <uses-sdk android:minSdkVersion="4" />
    <uses-permission android:name="android.permission.WRITE_EXTERNAL_STORAGE"></uses-permission>
	
</manifest> 


출처 : http://www.androidpub.com/?mid=android_dev_info&category=108970&document_srl=253486
Posted by 1010
04.Anddoid2010. 5. 4. 14:11
반응형

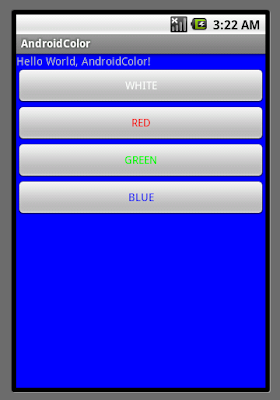
Using color in Android, by Java code

In last article, Using color in Android, by XML, described how to define color in XML file. Here, changing color using Java code will be described.


Keep using the main.xml and mycolor.xml

Modify Java code

package com.exercise.AndroidColor;

import android.app.Activity;
import android.os.Bundle;
import android.view.View;
import android.widget.Button;
import android.widget.LinearLayout;

public class AndroidColor extends Activity {
/** Called when the activity is first created. */
@Override
public void onCreate(Bundle savedInstanceState) {
super.onCreate(savedInstanceState);
setContentView(R.layout.main);

final LinearLayout backGround = (LinearLayout)findViewById(R.id.background);
Button whiteButton = (Button)findViewById(R.id.whitebutton);
Button redButton = (Button)findViewById(R.id.redbutton);
Button greenButton = (Button)findViewById(R.id.greenbutton);
Button blueButton = (Button)findViewById(R.id.bluebutton);

whiteButton.setOnClickListener(new Button.OnClickListener(){
@Override
public void onClick(View v) {
// TODO Auto-generated method stub
backGround.setBackgroundResource(android.R.color.white);
}});

redButton.setOnClickListener(new Button.OnClickListener(){
@Override
public void onClick(View v) {
// TODO Auto-generated method stub
backGround.setBackgroundColor(0xff000000 + 0xff0000);
}});

greenButton.setOnClickListener(new Button.OnClickListener(){
@Override
public void onClick(View v) {
// TODO Auto-generated method stub
backGround.setBackgroundResource(R.color.green);
}});

blueButton.setOnClickListener(new Button.OnClickListener(){
@Override
public void onClick(View v) {
// TODO Auto-generated method stub
backGround.setBackgroundResource(R.color.blue);
}});
}
}


Download the files.


출처 : http://android-er.blogspot.com/
Posted by 1010
04.Anddoid2010. 5. 4. 14:10
반응형

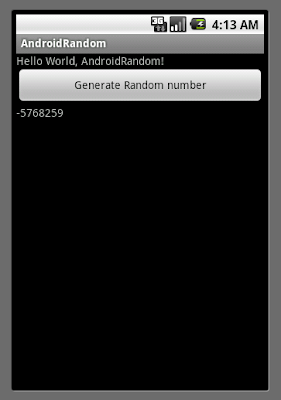
Generate random number in Android

To generate random number in Android, class java.util.Random can be used.

This class java.util.Random provides methods that generates pseudo-random numbers of different types, such as int, long, double, and float.

It support two public constructor:
Random() - Construct a random generator with the current time of day in milliseconds as the initial state.
Random(long seed) - Construct a random generator with the given seed as the initial state.

Generate random number in Android

main.xml

<?xml version="1.0" encoding="utf-8"?>
<LinearLayout xmlns:android="http://schemas.android.com/apk/res/android"
android:orientation="vertical"
android:layout_width="fill_parent"
android:layout_height="fill_parent"
>
<TextView
android:layout_width="fill_parent"
android:layout_height="wrap_content"
android:text="@string/hello"
/>
<Button
android:layout_width="fill_parent"
android:layout_height="wrap_content"
android:text="Generate Random number"
android:id="@+id/generate"
/>
<TextView
android:layout_width="fill_parent"
android:layout_height="wrap_content"
android:id="@+id/generatenumber"
/>
</LinearLayout>


AndroidRandom.java
package com.exercise.AndroidRandom;

import java.util.Random;

import android.app.Activity;
import android.os.Bundle;
import android.view.View;
import android.view.View.OnClickListener;
import android.widget.Button;
import android.widget.TextView;

public class AndroidRandom extends Activity {
/** Called when the activity is first created. */
@Override
public void onCreate(Bundle savedInstanceState) {
super.onCreate(savedInstanceState);
setContentView(R.layout.main);

final Random myRandom = new Random();

Button buttonGenerate = (Button)findViewById(R.id.generate);
final TextView textGenerateNumber = (TextView)findViewById(R.id.generatenumber);

buttonGenerate.setOnClickListener(new OnClickListener(){

@Override
public void onClick(View v) {
// TODO Auto-generated method stub
textGenerateNumber.setText(String.valueOf(myRandom.nextInt()));
}});
}
}
Posted by 1010
04.Anddoid2010. 5. 4. 14:09
반응형

Read XML Resources in Android, using XmlResourceParser: XML parsing interface

XmlResourceParser is the XML parsing interface returned for an XML resource. This is a standard XmlPullParser interface, as well as an extended AttributeSet interface and an additional close() method on this interface for the client to indicate when it is done reading the resource.

In this exercise, we read our own XML Resource (in /res/xml folder) using XmlResourceParser, and display the contents on screen.


First of all, create a folder /res/xml, and our own XML file myxml.xml

<?xml version="1.0" encoding="utf-8"?>
<rootelement1>
<subelement>
Hello XML Sub-Element 1
</subelement>
<subelement>
Hello XML Sub-Element 2
<subsubelement>Sub Sub Element</subsubelement>
</subelement>
</rootelement1>


Modify main.xml
<?xml version="1.0" encoding="utf-8"?>
<LinearLayout xmlns:android="http://schemas.android.com/apk/res/android"
android:orientation="vertical"
android:layout_width="fill_parent"
android:layout_height="fill_parent"
>
<TextView
android:layout_width="fill_parent"
android:layout_height="wrap_content"
android:text="@string/hello"
/>
<TextView
android:layout_width="fill_parent"
android:layout_height="wrap_content"
android:id="@+id/my_xml"
/>
</LinearLayout>


Finally, modify java code
package com.exercise.AndroidXmlResource;

import java.io.IOException;

import org.xmlpull.v1.XmlPullParser;
import org.xmlpull.v1.XmlPullParserException;

import android.app.Activity;
import android.content.res.Resources;
import android.content.res.XmlResourceParser;
import android.os.Bundle;
import android.widget.TextView;

public class AndroidXmlResource extends Activity {
/** Called when the activity is first created. */
@Override
public void onCreate(Bundle savedInstanceState) {
super.onCreate(savedInstanceState);
setContentView(R.layout.main);

TextView myXmlContent = (TextView)findViewById(R.id.my_xml);
String stringXmlContent;
try {
stringXmlContent = getEventsFromAnXML(this);
myXmlContent.setText(stringXmlContent);
} catch (XmlPullParserException e) {
// TODO Auto-generated catch block
e.printStackTrace();
} catch (IOException e) {
// TODO Auto-generated catch block
e.printStackTrace();
}
}

private String getEventsFromAnXML(Activity activity)
throws XmlPullParserException, IOException
{
StringBuffer stringBuffer = new StringBuffer();
Resources res = activity.getResources();
XmlResourceParser xpp = res.getXml(R.xml.myxml);
xpp.next();
int eventType = xpp.getEventType();
while (eventType != XmlPullParser.END_DOCUMENT)
{
if(eventType == XmlPullParser.START_DOCUMENT)
{
stringBuffer.append("--- Start XML ---");
}
else if(eventType == XmlPullParser.START_TAG)
{
stringBuffer.append("\nSTART_TAG: "+xpp.getName());
}
else if(eventType == XmlPullParser.END_TAG)
{
stringBuffer.append("\nEND_TAG: "+xpp.getName());
}
else if(eventType == XmlPullParser.TEXT)
{
stringBuffer.append("\nTEXT: "+xpp.getText());
}
eventType = xpp.next();
}
stringBuffer.append("\n--- End XML ---");
return stringBuffer.toString();
}
}


Download the files.
Posted by 1010
04.Anddoid2010. 5. 4. 14:09
반응형

A simple RSS reader, using Android's org.xml.sax package.

In the last article, "Read XML Resources in Android, using XmlResourceParser: XML parsing interface", Android application read XML resource inside application. In the current article, a external XML will be read using Android SAX APIs.

The source of XML is "http://feeds.feedburner.com/Android-er?format=xml", which is RSS feed of my blog.

SAX is the Simple API for XML, originally a Java-only API. SAX was the first widely adopted API for XML in Java, and is a “de facto” standard. The current version is SAX 2.0.1, and there are versions for several programming language environments other than Java.

org.xml.sax is a Android's package provides the core SAX APIs.

In order to make it simple, only the contents under "title" tag will be retrieved and appended as a string.


To allow the Android application, "android.permission.INTERNET" have to be granted to the application. Modify AndroidManifest.xml

<?xml version="1.0" encoding="utf-8"?>
<manifest xmlns:android="http://schemas.android.com/apk/res/android"
package="com.exercise.AndroidRssReader"
android:versionCode="1"
android:versionName="1.0">
<application android:icon="@drawable/icon" android:label="@string/app_name">
<activity android:name=".AndroidRssReader"
android:label="@string/app_name">
<intent-filter>
<action android:name="android.intent.action.MAIN" />
<category android:name="android.intent.category.LAUNCHER" />
</intent-filter>
</activity>

</application>
<uses-sdk android:minSdkVersion="4" />
<uses-permission android:name="android.permission.INTERNET" />
</manifest>


Modify main.xml to add a TextView to display the result.
<?xml version="1.0" encoding="utf-8"?>
<LinearLayout xmlns:android="http://schemas.android.com/apk/res/android"
android:orientation="vertical"
android:layout_width="fill_parent"
android:layout_height="fill_parent"
>
<TextView
android:layout_width="fill_parent"
android:layout_height="wrap_content"
android:text="@string/hello" />
<ScrollView
android:layout_width="fill_parent"
android:layout_height="wrap_content">
<TextView
android:layout_width="fill_parent"
android:layout_height="wrap_content"
android:id="@+id/result" />
</ScrollView>
</LinearLayout>


Java source code.
package com.exercise.AndroidRssReader;

import java.io.IOException;
import java.net.MalformedURLException;
import java.net.URL;

import javax.xml.parsers.ParserConfigurationException;
import javax.xml.parsers.SAXParser;
import javax.xml.parsers.SAXParserFactory;

import org.xml.sax.Attributes;
import org.xml.sax.InputSource;
import org.xml.sax.SAXException;
import org.xml.sax.XMLReader;
import org.xml.sax.helpers.DefaultHandler;

import android.app.Activity;
import android.os.Bundle;
import android.widget.TextView;

public class AndroidRssReader extends Activity {

String streamTitle = "";

/** Called when the activity is first created. */
@Override
public void onCreate(Bundle savedInstanceState) {
super.onCreate(savedInstanceState);
setContentView(R.layout.main);

TextView result = (TextView)findViewById(R.id.result);

try {
URL rssUrl = new URL("http://feeds.feedburner.com/Android-er?format=xml");
SAXParserFactory mySAXParserFactory = SAXParserFactory.newInstance();
SAXParser mySAXParser = mySAXParserFactory.newSAXParser();
XMLReader myXMLReader = mySAXParser.getXMLReader();
RSSHandler myRSSHandler = new RSSHandler();
myXMLReader.setContentHandler(myRSSHandler);
InputSource myInputSource = new InputSource(rssUrl.openStream());
myXMLReader.parse(myInputSource);

result.setText(streamTitle);

} catch (MalformedURLException e) {
// TODO Auto-generated catch block
e.printStackTrace();
result.setText("Cannot connect RSS!");
} catch (ParserConfigurationException e) {
// TODO Auto-generated catch block
e.printStackTrace();
result.setText("Cannot connect RSS!");
} catch (SAXException e) {
// TODO Auto-generated catch block
e.printStackTrace();
result.setText("Cannot connect RSS!");
} catch (IOException e) {
// TODO Auto-generated catch block
e.printStackTrace();
result.setText("Cannot connect RSS!");
}


}

private class RSSHandler extends DefaultHandler
{
final int stateUnknown = 0;
final int stateTitle = 1;
int state = stateUnknown;

int numberOfTitle = 0;
String strTitle = "";
String strElement = "";

@Override
public void startDocument() throws SAXException {
// TODO Auto-generated method stub
strTitle = "--- Start Document ---\n";
}

@Override
public void endDocument() throws SAXException {
// TODO Auto-generated method stub
strTitle += "--- End Document ---";
streamTitle = "Number Of Title: " + String.valueOf(numberOfTitle) + "\n"
+ strTitle;
}

@Override
public void startElement(String uri, String localName, String qName,
Attributes attributes) throws SAXException {
// TODO Auto-generated method stub
if (localName.equalsIgnoreCase("title"))
{
state = stateTitle;
strElement = "Title: ";
numberOfTitle++;
}
else
{
state = stateUnknown;
}
}

@Override
public void endElement(String uri, String localName, String qName)
throws SAXException {
// TODO Auto-generated method stub
if (localName.equalsIgnoreCase("title"))
{
strTitle += strElement + "\n";
}
state = stateUnknown;
}

@Override
public void characters(char[] ch, int start, int length)
throws SAXException {
// TODO Auto-generated method stub
String strCharacters = new String(ch, start, length);
if (state == stateTitle)
{
strElement += strCharacters;
}
}

}
}


Download the files.
Posted by 1010
04.Anddoid2010. 5. 4. 14:08
반응형

A simple RSS reader, in ListView

In the last exercise, "A simple RSS reader, using Android's org.xml.sax package", the RSS's titles are displayed as a single String. For sure it's not a good presentation in this way.

In this article, it will be modified to display it in ListView.


AndroidManifest.xml to grant "android.permission.INTERNET" to the application. (Refer to last article "A simple RSS reader, using Android's org.xml.sax package")

In order to use ListView, create a new file, /res/layout/rsslist.xml

<?xml version="1.0" encoding="utf-8"?>
<TextView
xmlns:android="http://schemas.android.com/apk/res/android"
android:id="@+id/rowtext"
android:layout_width="fill_parent"
android:layout_height="25px"
android:textSize="10sp" />


Modify main.xml to have a ListView
<?xml version="1.0" encoding="utf-8"?>
<LinearLayout xmlns:android="http://schemas.android.com/apk/res/android"
android:orientation="vertical"
android:layout_width="fill_parent"
android:layout_height="fill_parent"
>
<TextView
android:layout_width="fill_parent"
android:layout_height="wrap_content"
android:text="@string/hello" />
<ListView
android:id="@android:id/list"
android:layout_width="fill_parent"
android:layout_height="wrap_content" />
<TextView
android:id="@android:id/empty"
android:layout_width="fill_parent"
android:layout_height="wrap_content"
android:text="No Data" />
</LinearLayout>


Modify AndroidRssReder.java
package com.exercise.AndroidRssReader;

import java.io.IOException;
import java.net.MalformedURLException;
import java.net.URL;
import java.util.ArrayList;
import java.util.List;

import javax.xml.parsers.ParserConfigurationException;
import javax.xml.parsers.SAXParser;
import javax.xml.parsers.SAXParserFactory;

import org.xml.sax.Attributes;
import org.xml.sax.InputSource;
import org.xml.sax.SAXException;
import org.xml.sax.XMLReader;
import org.xml.sax.helpers.DefaultHandler;

import android.app.ListActivity;
import android.os.Bundle;
import android.widget.ArrayAdapter;

public class AndroidRssReader extends ListActivity {

private List<String> item = new ArrayList<String>();

/** Called when the activity is first created. */
@Override
public void onCreate(Bundle savedInstanceState) {
super.onCreate(savedInstanceState);
setContentView(R.layout.main);

try {
URL rssUrl = new URL("http://feeds.feedburner.com/Android-er?format=xml");
SAXParserFactory mySAXParserFactory = SAXParserFactory.newInstance();
SAXParser mySAXParser = mySAXParserFactory.newSAXParser();
XMLReader myXMLReader = mySAXParser.getXMLReader();
RSSHandler myRSSHandler = new RSSHandler();
myXMLReader.setContentHandler(myRSSHandler);
InputSource myInputSource = new InputSource(rssUrl.openStream());
myXMLReader.parse(myInputSource);

} catch (MalformedURLException e) {
// TODO Auto-generated catch block
e.printStackTrace();
} catch (ParserConfigurationException e) {
// TODO Auto-generated catch block
e.printStackTrace();
} catch (SAXException e) {
// TODO Auto-generated catch block
e.printStackTrace();
} catch (IOException e) {
// TODO Auto-generated catch block
e.printStackTrace();
}

ArrayAdapter<String> itemList = new ArrayAdapter<String>(this, R.layout.rsslist, item);
setListAdapter(itemList);
}

private class RSSHandler extends DefaultHandler
{
final int stateUnknown = 0;
final int stateTitle = 1;
int state = stateUnknown;

@Override
public void startDocument() throws SAXException {
// TODO Auto-generated method stub
}

@Override
public void endDocument() throws SAXException {
// TODO Auto-generated method stub
}

@Override
public void startElement(String uri, String localName, String qName,
Attributes attributes) throws SAXException {
// TODO Auto-generated method stub
if (localName.equalsIgnoreCase("title"))
{
state = stateTitle;
}
else
{
state = stateUnknown;
}
}

@Override
public void endElement(String uri, String localName, String qName)
throws SAXException {
// TODO Auto-generated method stub
state = stateUnknown;
}

@Override
public void characters(char[] ch, int start, int length)
throws SAXException {
// TODO Auto-generated method stub
String strCharacters = new String(ch, start, length);
if (state == stateTitle)
{
item.add(strCharacters);

}
}

}
}


Download the files.
Posted by 1010
04.Anddoid2010. 5. 4. 14:07
반응형

Tuesday, September 29, 2009

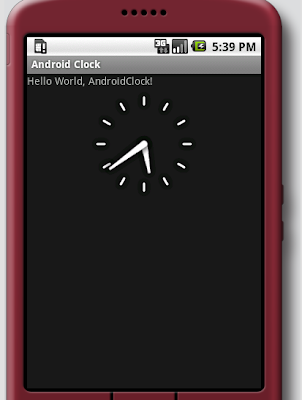
Android AnalogClock

It's very easy to add a Analog Clock in Android, Just add the code of AnalogClock in main.xml.


AnalogClock is a widget to display an analogic clock with two hands for hours and minutes.

main.xml

<?xml version="1.0" encoding="utf-8"?>
<LinearLayout xmlns:android="http://schemas.android.com/apk/res/android"
android:orientation="vertical"
android:layout_width="fill_parent"
android:layout_height="fill_parent"
>
<TextView
android:layout_width="fill_parent"
android:layout_height="wrap_content"
android:text="@string/hello"
/>
<AnalogClock
android:id="@+id/myAnalogClock"
android:layout_width="fill_parent"
android:layout_height="wrap_content"
/>


</LinearLayout>
Posted by 1010
04.Anddoid2010. 5. 4. 14:07
반응형

Sunday, September 6, 2009

Read Android system info., using System.getProperty

It's another exercise to read Android system information, using system provided method getProperty.


Create a new Android Application, with the Activity named AndroidSYSinfoActivity. Modify the main.xml and AndroidSYSinfoActivity.java:
main.xml

<?xml version="1.0" encoding="utf-8"?>
<LinearLayout xmlns:android="http://schemas.android.com/apk/res/android"
android:orientation="vertical"
android:layout_width="fill_parent"
android:layout_height="fill_parent"
>
<TextView
android:layout_width="fill_parent"
android:layout_height="wrap_content"
android:gravity="center_horizontal"
android:text="android-er.blogspot.com"
android:autoLink="web"
/>
<TextView
android:layout_width="fill_parent"
android:layout_height="wrap_content"
android:text="Android System:"
/>
<TextView
android:id="@+id/SYSinfo"
android:layout_width="fill_parent"
android:layout_height="wrap_content"
/>
</LinearLayout>

Download main.xml.

AndroidSYSinfoActivity.java
package com.exercise.AndroidSYSinfo;

import com.exercise.AndroidSYSinfo.R;

import android.app.Activity;
import android.os.Bundle;
import android.widget.TextView;

public class AndroidSYSinfoActivity extends Activity {
/** Called when the activity is first created. */
@Override
public void onCreate(Bundle savedInstanceState) {
super.onCreate(savedInstanceState);
setContentView(R.layout.main);


TextView SYSinfo = (TextView) findViewById(R.id.SYSinfo);
SYSinfo.setText(ReadSYSinfo());
}

private static StringBuffer SYSinfoBuffer;

private String ReadSYSinfo()
{
SYSinfoBuffer = new StringBuffer();

getProperty("os.name", "os.name", SYSinfoBuffer);
getProperty("os.version", "os.version", SYSinfoBuffer);

getProperty("java.vendor.url", "java.vendor.url", SYSinfoBuffer);
getProperty("java.version", "java.version", SYSinfoBuffer);
getProperty("java.class.path", "java.class.path", SYSinfoBuffer);
getProperty("java.class.version", "java.class.version", SYSinfoBuffer);
getProperty("java.vendor", "java.vendor", SYSinfoBuffer);
getProperty("java.home", "java.home", SYSinfoBuffer);

getProperty("user.name", "user.name", SYSinfoBuffer);
getProperty("user.home", "user.home", SYSinfoBuffer);
getProperty("user.dir", "user.dir", SYSinfoBuffer);

return SYSinfoBuffer.toString();
}

private void getProperty(String desc, String property, StringBuffer tBuffer)
{
tBuffer.append(desc);
tBuffer.append(" : ");
tBuffer.append(System.getProperty(property));
tBuffer.append("\n");
}
}

Download AndroidSYSinfoActivity.java.


출처 : http://android-er.blogspot.com/2009/09/read-android-system-info-using.html
Posted by 1010
04.Anddoid2010. 3. 29. 09:54
반응형
안드로이드는 어플리케이션 내에서 생성된 모든 Activity의 히스토리 스택
OnCreate
(): Activity가 생성될 때 처음으로 호출되는 함수.리소스를 초기화
OnStart(): Activity가 사용자에게 보여줄 준비가 되었을 때 호출됨
OnResume():Activity가 사용자에게 보여지고 사용자의 입력을 처리할수 있음. Activity스택의 가장 상위에 위치
OnPause(): 포커스 잃고 이전의 Activity 가 Resume되기 전, 데이터 저장,에니메이션 중지,CPU를 소비하는 작업 중단
OnStop():더 이상 Activity가 사용자에게 보여지지 않음.더 이상 Activity가 스택의 가장 위에 있지 않음.
OnDestroy():시스템 내에 Activity가 존재하지 않게 됨
 
Posted by 1010
04.Anddoid2010. 3. 24. 11:19
반응형
Posted by 1010