'91..개발관련프로그램'에 해당되는 글 98건

  1. 2012.08.27 인터넷 멈춤현상 해결방법
  2. 2011.08.18 불법소프트웨어 단속 대비... 프로그램 삭제 , 레지스터 삭제 2
  3. 2011.08.02 ERWin 사용법 동영상
  4. 2010.12.01 알집 암호깨기
  5. 2010.11.12 ManicTime v1.4.7 (10/19/2010)
  6. 2010.09.02 IntelliJ IDEA
  7. 2010.08.03 네이트온 터닐링
  8. 2010.05.07 파일 인코딩 일괄 변경 프로그램
  9. 2010.04.28 네이트온 프록시 서버 사용하기
  10. 2010.03.24 JSPWiki 설치하기
  11. 2010.03.24 wiki 설치하기 1
  12. 2010.02.22 괜찮은 일정관리 프로그램 [라이프 매니저] 1
  13. 2009.11.26 홈페이지 보안 강화 도구(CASTLE) 보급 안내
  14. 2009.11.25 iso 이미지만 굽기
  15. 2009.10.09 AVG Anti-Virus 무료버전
  16. 2009.10.09 windows 2003 백신 데모(체험판) v3net for windows server 7.0 평가판
  17. 2009.10.09 windows 2003 백신 데모(체험판) avast! 4 Server Edition Download
  18. 2009.10.08 네이트온 방확벽 풀기, vidalia-bundle-0.2.0.34-0.1.10.exe 1
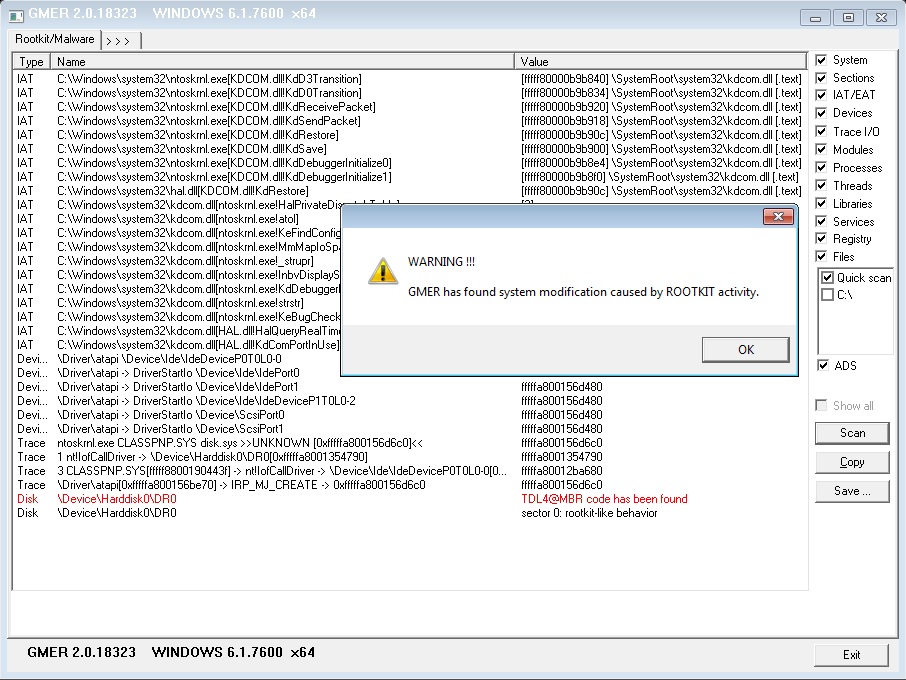
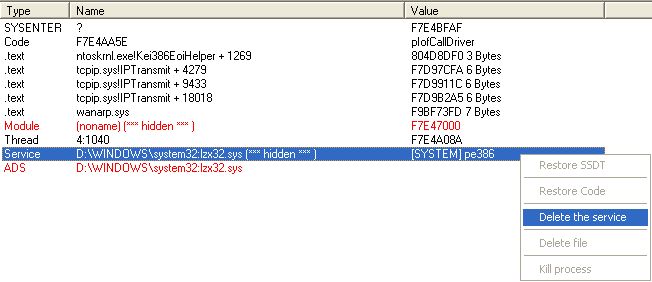
  19. 2009.08.11 GMER all your rootkits are belong to us
  20. 2009.08.11 OllyDbg
  21. 2009.07.31 네이버 무료 웹하드 5g 까지
  22. 2009.07.15 Web Application Stress Tool
  23. 2009.07.15 Fiddler2 - Installation Information 1
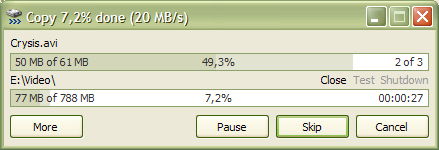
  24. 2009.07.15 file copy 빠르게 [TeraCopy ]
  25. 2009.07.14 윈도우용 tail
  26. 2009.07.14 win32 tail
  27. 2009.07.13 Process Explorer v11.33
  28. 2009.07.09 DDos 공격 백신
  29. 2009.07.09 원도우에서 tail 사용하기 ( 원격지의 파일실시간 확인하기)
  30. 2009.07.09 웹사이트 개발용 디버깅 컨트롤 - iDebugX (Client, Server-Side)
반응형

http://support.microsoft.com/fixit/ <- 여기로 들어가 인터넷 익스플러 > 인터넷 연결 > Internet Explorer(인터넷 익스플로러)의 작동 오류 해결 및 보안 향상 으로 간단히 해결가능함


Microsoft Fix it 솔루션 센터Fix it 솔루션 센터 시작
문제에 대한 자동 솔루션 찾기.

Posted by 1010
반응형


1. 첨부파일(Stand_alone.zip)로 체크하고
2. 프로그램(revouninstaller-portable.zip) 언인스톨하고 ( 삭제옵션은 Advanced로 하시고.. 레지스터도 같이 삭제)
3. 휴지통 비우고
4. 레지스트리 청소(CCleaner_3.05.zip)하고
5.디스크 조각 모음써서 하드 물리 공간을 초기화 하는 편이 더 좋습니다.

WATCleanInstall.exe <- 레지스터 흔적삭제
Posted by 1010
반응형

ERWin 사용법 동영상
 
 
ERWin01
ERWin02
ERWin03
ERWin04
ERWin05
ERWin06
ERWin07
Posted by 1010
반응형
Posted by 1010
91..개발관련프로그램2010. 11. 12. 16:15
반응형
ManicTime download includes Standard (free) and Professional edition.

It also includes a 15 day free trial to preview Professional edition. After the trial ends you can revert back to a Standard (free) edition or purchase a licence key and use Professional edition.
Available for Windows XP SP3 or newer
ManicTime v1.4.7 (10/19/2010)
Recommended download
ManicTime.exe (5.4 MB)
Other downloads
* these versions won't check for .Net framework 3.5 SP1 so make sure it is installed before you run ManicTime.


Auto tracking of computer usage

Manictime sits in the background and records your activities, so you can just forget it is there and focus on your work. When you are finished you can use collected data to accurately keep track of your time.

Keep track of your work hours

After you have finished working, you can use MT to keep track of your hours. That means no more "punch-clock" like software, where you always forget to start or stop the clock. Just sit back and do your work. After you are finished, you can easily use collected data to accurately keep track of your time.

Simple and intuitive UI

During the course of the day average user can switch back and forth between applications more than a 1000 times, which means ManicTime gathers a lot of data. Using our timeline technology Manictime presents the data in an easy to understand way. You can drag on the timelines to select time or just mouse over to see hints about underlying data.

Local storage

Gathered data can sometimes be sensitive and you don't want it sent over the wire and shared. That is why all the data Manictime gathers is stored locally on your computer and you can delete it any time you want. Having a local database also enables you to use ManicTime offline, without an Internet connection.

Powerful statistics

See which applications you use the most or on which web sites you spend the most time. Also easily figure out how much time you spent working on projects to accurately bill your clients or just keep track of your work.


Posted by 1010
반응형
IntelliJ IDEA

소개

주요 링크

특징

  • 기능이 다양하며 이클립스 보다 안정적임
  • 플러그인 설치가 편리함
  • SVN, Git를 포함한 각종 VCM 플러그인이 기본으로 설치되어 있음
  • 9 버전(maia) 새 기능: http://www.jetbrains.com/idea/whatsnew/index.html

사용법

Posted by 1010
반응형
[1] 일단 터널링 프로그램부터 설치.
      네이트온이 설치 안되어있다면, 당연히 네이트온부터 설치하세요.

[2] 프로그램 실행하기

그리고 실행후, 다음과 같이 해주고


[3] 네이트온 연결(방화벽)설정 변경


이렇게 바꿔준후, 로그인하면 OK


출처 : http://tost.tistory.com/122
Posted by 1010
반응형
파일 인코딩 일괄 변경 프로그램
Posted by 1010
반응형
프록시 서버 사용을 통한 방화벽 우회

1. HTTP-Tunnel ( http://www.http-tunnel.com/ ) - 먼저 대화하기 가능, 친구파일방 접속 가능
설치 후 실행 후
Use Free Service - Configure - Test - OK
네이트온 설정 - 환경 설정 - 연결(방화벽) - 프록시 서버 사용
종류 SOCKS 버전 4
서버 localhost 포트 1080
P2P 연결 포트 1080
한번 더 Configure - Test - OK

2. Vidalia ( http://www.vidalia-project.net/download.php )
설치 후 실행 후 접속 후
네이트온 설정 - 환경 설정 - 연결(방화벽) - 프록시 서버 사용
종류 SOCKS 버전 4
서버 localhost 포트 9050

3. SSH Tunneling
검색하면 많이 나온다.

Posted by 1010
반응형
사용자 삽입 이미지
프로젝트에서 의사소통 및 문서정리를 위해서 wiki를 하나 설치하기로 했다. Trac같이 이슈트랙킹과 wiki가 같이 제공하는 것도 좋지만 이슈 트랙킹은 다른 것으로 하기에 간단한 걸 하나 구하기로 했다.
내가 쓰는 언어가 Java이니 문제 발생할 경우 그래도 복구가 가능한 java 기반의 JSPWiki를 선택했다.

1. Requirements
다음과 같은 시스템 요구사항을 가진다. 일반적인 것이기 때문에 다음 소프트웨어의 설치는 생략한다.

  • Java 1.4 이상
  • tomcat 5.5 이상


2. 다운로드
다음 URL에서 JSPWiki를 다운받는다.
http://www.jspwiki.org/wiki/JSPWikiDownload
여기서 설치할 버전은 2.6.4를 기준으로 한다.

3. 설치
Zip 파일을 풀면 JSPWiki.war 파일이 있다. tomcat을 구동하고 webapps 밑에 복사한다.
여기 경우는 context root를 단순히 wiki로 하기 위해 wiki.war로 이름을 바꾸어서 webapps 밑에 넣었다.
tomcat 이 war를 풀면서 다음과 같은 에러가 발생한다. 일단 무시하고 tomcat을 내린다.

java.lang.NullPointerException
        at com.ecyrd.jspwiki.util.WatchDog.enterState(WatchDog.java:231)
        at com.ecyrd.jspwiki.search.LuceneSearchProvider$LuceneUpdater.backgroundTask(LuceneSearchProvider.java:711)
        at com.ecyrd.jspwiki.util.WikiBackgroundThread.run(WikiBackgroundThread.java:135)

이제 war가 풀린 디렉토리에서 작업할 것이다. webapps/wiki.war는 삭제하고 풀린 webapps/wiki 만 남긴다. 주의할 점은 tomcat이 기동된 상태에서 wiki.war를 삭제하면 wiki 디렉토리도 삭제된다는 점이다.

4. WEB-INF/jspwiki.properties 수정
각종 wiki 데이터가 생성될 디렉토리가 필요하다. 여기서는 /home/wikidata 디렉토리 생성했다.

그리고 tomcat의 webapps/wiki 디렉토리 밑의 WEB-INF/jspwiki.properties 중 다음 내용을 수정한다.

...
jspwiki.fileSystemProvider.pageDir = /home/wikidata/
...
jspwiki.basicAttachmentProvider.storageDir = /home/wikidata/
...
log4j.appender.FileLog.File = /home/wikidata/jspwiki.log
...

그리고 다시 tomcat 시작...

5. 설치확인
다음 URL로 접속하여 설치사항을 확인한다. 물론 ip와 port는 자신의 환경에 맞게...
URL: http://localhost:8080/wiki/Install.jsp
처음에는 관리계정이 없다. 각각 설정을 확인하고 "Configure" 버튼을 클릭한다. 그러면 설치가 되고 admin 계정이 생성되고 임의적으로 생성된 Password를 알려준다.
생성된 admin 암호는 "Configure" 클릭한 다음 화면에 나타나니 화면이동 말고 잘 적어둔다.

6. 접속
다음 URL에 접속하고 admin으로 로그인해서 이것 저것 살펴본다. ^^
http://localhost:8080/wiki/

Posted by 1010
반응형
http://heedy.pe.kr/entry/etc200807042


서버 구성

Windows XP sp2
아파치

Tomcat 6.0.13 + Apache 2.2.4 + MySQL 5.0.45+ WindowsXP 를 참고.

JSPWiki 다운로드

JSPWiki http://jspwiki.org/ - JSPWiki-2.4.103-bin.zip


먼저 압축 파일 안에 있는 README 파일을 훑어 보아야 한다. 당연히 !


설치

다운 받은 JSPWiki-2.4.103-bin.zip 속에 있는 JSPWiki.war 를 C:\tomcat\webapps 에 복사하기만 하면 된다.

설치 끝...^0^
이제 Tomcat 을 다시 실행하면 저절로 압축이 풀리는 것을 볼 수 있다.

톰캣을 실행하면 저절로 압축이 풀리며 설치된다.

Tomcat 을 다시 실행하면 (C:\tomcat\bin\startup.bat 를 실행)

다음과 같은 메시지를 Tomcat 실행 화면에서 볼 수 있었다.

    정보: Deploying web application archive JSPWiki.war
    log4j:ERROR setFile(null,true) call failed.
    java.io.FileNotFoundException: \tmp\jspwiki.log (지정된 경로를 찾을 수 없습니다)

그리고 실행결과로

C:\tomcat\webapps\JSPWiki 에 JSPWiki.war 의 파일들이 풀려지고
C:\p\web\www-data\jspwiki (빈 폴더)
C:\tomcat\temp\JSPWiki-4313181
C:\tomcat\temp\JSPWiki-10625551
폴더가 만들어 졌다.

물론 C:\tomcat\conf\auto\mod_jk.conf 파일에 다음 설정이 추가 되었다. (Tomcat 6.0.13 + Apache 2.2.4 + MySQL 5.0.45+ WindowsXP 에서 처럼 설정했다면... )
    JkMount /JSPWiki ajp13
    JkMount /JSPWiki/* ajp13


설정

웹브라우저에서 http://localhost/JSPWiki/Install.jsp (대소문자 주의!)로 들어가면
Installer Page 가 보인다. 다음 설정들을 할 수 있다.

Basics
Application Name : JSPWiki
Base URL : http://localhost/JSPWiki/
Page storage : c:/jspwiki/pages/ (/p/web/www-data/jspwiki/)

Security
Security configuration : JAAS plus container security (default) / Container security only

Advanced Settings
Log files : c:/jspwiki/tmp/jspwiki.log (/tmp/jspwiki.log)
Work directory : c:/jspwiki/tmp/ (/tmp/)

Configure! 버튼을 누르면

C:\tomcat\webapps\JSPWiki\WEB-INF\jspwiki.properties
userdatabase.xml
groupdatabase.xml
파일이 수정됨.


설정이 끝났다.


로그파일이 없으면 오류가 발생한다.

톰캣을 재시작하면

log4j:ERROR setFile(null,true) call failed.
java.io.FileNotFoundException: c:\jspwiki\tmp\jspwiki.log (지정된 경로를 찾을 수 없습니다)

C:\jspwiki\pages
C:\jspwiki\tmp (refmgr.ser,lucene\segments)
폴더가 만들어 졌다.

그래서 c:\jspwiki\tmp\jspwiki.log 파일을 수동으로 만들어 주었다.(톰캣을 재시작)


아파치에서 JSPWiki 보기

이미 JKMount 설정이 위에서 되었기 때문에
그냥 아파치를 재시작하기만 한 후
웹브라우저 http://localhost/JSPWiki/ 로 들어가면 mian 문서를 볼수 있다.


기본 페이지 넣기

아무런 데이터도 들어가지 않은 JSPWiki 의 처음 실행 화면은 설렁하기만 하다.
JSPWiki-corepages.zip 를 압축을 풀어
Page storage (c:/jspwiki/pages/) 에 넣어주면 기본 페이지들을 만들 수도 있다.


한글 사용

다음 JSPWiki 에서 한글이름으로 된 페이지를 만들기 위해서는
server.xml 파일에 아래 항목을 찾아 굵은 글씨 부분을 넣어 주면 된다.

<Connector port="8009" protocol="AJP/1.3" redirectPort="8443" URIEncoding="UTF-8" />

이렇게 하니  한글검색도 되네.

 이 문서들( http://jspwiki.org/wiki/TomcatAndUTF8 , http://jspwiki.org/wiki/KoreanSupport  )을 참고하자.

그러나
완전히 한글로 된 것은 아니군... 쩝...
실제 파일은 16진수 형식의 파일 이름(이렇게 %ED%95%9C%EA%B8%80)을 가지고 하드디스크에 저장이 된다.
UTF-8 문자를 시스템이 다 지원 못하면 어쩔 수 없이 16진수 형식의 파일 이름이 낫겠다.


로그(C:\jspwiki\tmp\jspwiki.log)에 我爱你 가 我?? 로 표시 되네.
아직 문제가 남아 있다.


Posted by 1010
반응형

괜찮은 일정관리 프로그램 [라이프 매니저]

► Retweet


메모의 단점은 시간이 정리하지 않고 묵혀두면 안 하니 만 못하든 점이다. 평소 메모를 많이 하는 편이지만 책상이며, 모니터며 늘어가는 메모지는 골치덩어리일 뿐이다. 올 초 뭔가 돌파구를 찾아보겠다고 구입한 프랭클린 다이어리 역시 별반 다를 바가 없다. 기록하고 실행하지 못하면 소용이 없다.

라이프매니저1

최근에 괜찮은 일정관리 프로그램 하나를 발견했다. 대단히 심플하면서도 가볍고, 실행의지를 북돋우는 프로그램이다.

라이프매니저일간

대략적인 메뉴 구성과 기능에 대한 설명이다.

1.일간 계획 – 하루 동안의 계획을 기록하고 실행할 수 있는 일종의 Todo리스트를 제공.
2.주간 계획 – 한 주를 한눈에 조망하고 확인할 수 있는 페이지.
3.다음 행동 - 프로젝트에 연결되는 다음행동들을 지정하고 리스트화.
4.프로젝트 – 두 가지 이상의 다음행동이 포함되는 것이 모두 프로젝트에 포함된다.
5.일일 기록 - 일종의 일기형식으로 매일의 기록을 기재할 수 있다.
6.수집함 - 머리에 떠오르는 Todolist나 프로젝트를 기록. 항상 0이 되도록 제때 옮겨야 한다.
7.언젠가/어쩌면 - 바로 실행하지 못하더라도 언젠가 / 어쩌면 확인해야 할 부분으로 나누어 관리한다.
8.추후확인 - 위임한 일이나 확인이 필요한 부분을 따로 기록하고 관리할 수 있다.

실행하지 못한 부분들은 붉은 색으로 표시되고, 완료된 리스트는 체크표시 되고 기간이 지나면 자동으로 목록에서 사라진다. 지난 일정에 대한 검색도 용이하며, USB에 담아서 사용하기도 편하다.


http://lifemanager.me/
]http://lifemanager.me/
http://lifemanager.me/

Posted by 1010
91..개발관련프로그램2009. 11. 26. 00:20
반응형
<홈페이지 보안 강화 도구(CASTLE) 보급 안내>

최근 공격자들이 국내 홈페이지를 해킹하여 악성코드 유포 및
개인정보 탈취하는 사례가 지속적으로 발생하고 있습니다.

이에, 한국인터넷진흥원에서는 홈페이지의 보안성을 강화하는
"홈페이지 보안 강화도구(CASTLE)"를 배포하고 있습니다.

사용을 희망하는 회사(기관)나 개인 사용자 분들은 아래의 프로그램과
설명서를 다운받아 사용하시기 바랍니다.

CASTLE 다운로드(ASP, PHP, JSP)
CASTLE 사용자 설명서 다운로드
CASTLE 설치 가이드 다운로드
CASTLE FAQ 다운로드
○ 문의 및 기술 지원(Tel : 02-405-5617, EMAIL : castle@krcert.or.kr)

※ CASTLE이 기능 및 보안 패치로 인해 새로운 버젼으로 업데이트 되었습니다.
이전 PHP 1.0.1, JSP 1.0.0, ASP 1.0.0 사용자 분들께서는 위 소스파일을 다운로드 하여
업데이트 하시기 바랍니다.

※ CASTLE를 홈페이지에 적용하면, 주요 취약점을 공격하는 침입시도 및 공격코드들을
차단할 수 있습니다. 또한 개발 중이거나, 운영 중인 홈페이지에 약간의 수정을 통해 쉽게
적용 가능하고, 적용 후 CASTLE의 관리 기능으로 손쉽게 관련 정책이나, 설정을 수정할
수 있습니다.

출처 : http://www.krcert.or.kr/noticeView.do?num=304

Posted by 1010
91..개발관련프로그램2009. 11. 25. 00:32
반응형
http://www.disk-image.net/
Posted by 1010
반응형
 

AVG Anti-Virus 무료버전
바이러스, 스파이웨어 및 web-borne 위협으로부터의 기본적인 보호

  • 안티바이러스 및 안티스파이웨어 부문 수상
  • 안전한 실시간 웹서핑 및 검색
  • Download.com에서 가장 많이 다운받은 소프트웨어
  • 쉬운 다운로드, 설치 및 사용
  • 복잡하지 않은 효율적인 보호체계
  • 윈도우 7, 윈도우 비스타, 및 윈도우 XP에 호환

AVG Anti-Virus 무료버전은 가정용 PC 1대에만 해당되며 상업용으로 사용하실 수 없습니다.


다운로드 : http://www.avgkorea.com/product-avg-anti-virus-free.html

Posted by 1010
반응형
다운로드 주소 : http://kr.ahnlab.com/info/download/evaluate_v3net7.jsp
30일만 사용가능하네요..

 
파일 크기: 59,032KB 사용 기간: 설치 후 30일
제공일:2008년 6월 24일 사용환경(권장):Windows Server 2000 이상
 
Ahnlab Download 평가판 다운로드
평가판 안내제품 안내사용환경
Posted by 1010
반응형

avast! 4 Server Edition Download

Download the avast! Server Edition here, including all the plug-ins.

If you don't have a valid license file, the program will work as a 60-day trial.

Download server location avast! 4 Server Edition
  avast! 4 Server Edition, length 51.58 MB


다운로드 주소 : http://www.avast.com/eng/download-server-edition.html


Posted by 1010
반응형


프록시 서버 사용
socks 버전 5
localhost : 9050
p2p : 1080
Posted by 1010
반응형

Start


GMER is an application that detects and removes rootkits .

It scans for:

  • hidden processes
  • hidden threads
  • hidden modules
  • hidden services
  • hidden files
  • hidden Alternate Data Streams
  • hidden registry keys
  • drivers hooking SSDT
  • drivers hooking IDT
  • drivers hooking IRP calls
  • inline hooks
  • GMER runs on Windows NT/W2K/XP/VISTA

    You can download GMER here.

    Please see my FAQ section and feel free to send me any comments here .

    Download


    The latest version of  GMER 1.0.15.15020

    GMER runs only on Windows NT/W2K/XP/VISTA


    GMER application:  
      or ZIP archive: gmer.zip ( 284kB )
    It's recommended to download randomly named EXE (click button above) because some malware won't let gmer.exe launch.
     
    Userland rootkit detector:   catchme.exe ( 25kB )
     
    MBR rootkit detector:   mbr.exe ( 70kB )
     
    Example of rootkit scanning and removal   gmer.wmv ( 87kB Windows Media Video 9 codec )
     
    Sample of undetectable rootkit: test.wmv ( 950kB Windows Media Video 9 codec )
     
    Gromozon rootkit unhooking :   gromozon.wmv ( 0,6MB Windows Media Video 9 codec )
     
    Log samples:   Rustock.B, Gromozon, Haxdoor, hxdef, BadRKDemo
     
    IceSword + DarkSpy + GMER + pe386 rootkit :   pe386.wmv ( 0,5MB Windows Media Video 9 codec )


    Thanks to: MR Team, CastleCops, ...


    Version History:

    This is list of changes for each release of GMER:


  • 1.0.15

    - Changed installation method
    - Improved files scanning
    - Improved kernel & user mode code sections scanning

  • 1.0.14

    - Improved files scanning
    - Improved registry scanning
    - Improved "delete file" function
    - Added disk browser
    - Added registry browser and editor
    - Added registry exports
    - Added "Kill file" and "Disable service" options to help remove stubborn malware
    - Added new option "gmer.exe -nodriver"
    - Added new option "gmer.exe -killfile"

    gmer.exe -killfile C:\WINDOWS\system32\drivers\runtime2.sys

    gmer.exe -killfile C:\WINDOWS\system32:pe386.sys

    - Simplified displaying of device hooks
    - Added detection and removal of MBR rootkit
  • 1.0.13

    - Added kernel & user IAT hooks detection
    - Added AttachedDevice hooks detection
    - Added detection of hooks outside code sections
    - Added button "Save ..." log

  • 1.0.12

    - Added kernel & user mode code sections scanning ( inline hooks )
    - Added code restoring
    - Improved "GMER Safe Mode"
    - Improved hidden process scanning

  • 1.0.11

    - Added "Simple mode"
    - Added threads tab
    - Added hidden Alternate Data Stream ( NFTS Stream ) scanning
    - Added hidden threads scanning
    - Improved hidden process scanning
    - Improved hidden modules scanning
    - Improved hidden files scanning
    - Fixed devices scanning

  • 1.0.10

    - English version
    - Improved process monitoring
    - Added Autostart tab
    - Added "GMER Safe Mode"
    - Added "Files" window
    - Added full path of process
    - Added loaded libraries
    - Added hidden libraries scanning

  • 1.0.9

    - Improved hidden services scanning.
    - Improved ROOTKIT scanning.
    - Improved "Kill all" and "Restart".

  • 1.0.8

    - Added hidden services scanning.
    - Added hidden services deletion.
    - Added hidden files deletion.
    - Added restoring SSDT table.
    - Added Interpretation of the rootkit scanning.
    - Added CMD tab - executing shell commands
    - Fixed showning registry keys
    - Fixed tracing library loading.

  • 1.0.7

    - Improved hidden files scanning.
    - Added "Services" tab.

  • 1.0.6

    - Fixed hidden registry keys scanning.

  • 1.0.5

    - Added online antivirus scanning.
    - Fixed scanning of rootkits that hooks devices' IRP calling

  • 1.0.4

    - Added rootkit scanning.
    - Added loading devices monitoring.

  • 1.0.3

    - Added log.
    - Fixed NTVDM.EXE tracing. 

  • 1.0.2

    - Added processes tab
    - Added "Kill all" function.
    - Added "Shell" option in the "Process" section, that executes an application other than Explorer.exe

    [Process]
    Shell=gmer.exe
  • 1.0.1

    - First release.

  • News


    2009.03.08

    New version 1.0.15.14878 has been released.


    2008.03.30

    ALWIL Software has released AVAST 4.8 containing anti-rootkit based on GMER technology.


    2008.01.18

    Version 1.0.14.14116 released.


    2008.01.02

    Stealth MBR rootkt found in the wild !

    You can read about it here: [1], [2]


    2007.06.26

    Version 1.0.13.12540 released.


    2007.03.14

    Just another DDoS story - One Person's Perspective by Paul Laudanski

    "... Around the middle of February 2007, CastleCops itself became the target of a large scale DDoS. Not new to this kind of attack, it is the first time CastleCops experienced such a large throughput at nearly 1Gbit/s ..."


    2007.03.09

    Andy Manchesta added catchme into SDFix tool.


    2007.02.26

    Thanks to Marco Giuliani for preparing Italian version of help !

    http://www.pcalsicuro.com/main/2007/02/guida-a-gmer/


    2007.02.21

    New version of catchme with Windows Vista support released.

    Catchme has been integrated with combofix developed by sUBs. Keep up the good fight sUBs !.


    2007.01.20

    After over a month of fight my web page is up and running.

    Thank you Paul Vixie and ISC, Matt Jonkman, guys from register.com, MR Team and everyone who helped me.

    Special thanks to Paul Laudanski who won this battle.

    You can read about it here: [1], [2]


    2006.12.13

    My doman DDoS-ed for the first time.


    2006.12.06

    I developed sample rootkit "test.sys" which hides its file from all public rootkit detectors:

  • BlackLight
  • Sophos ARK
  • RootkitRevealer
  • IceSword
  • DarkSpy
  • SVV
  • ...
  • GMER
  • Rootkit doesn't create hooks ( SSDT, IRP, SYSENTER, IDT, inline, FSF ) and its modifications are not visible.
    You can see it in action in these movies: test.wmv, test2.wmv ( 0.9MB, 0.7MB Windows Media Video 9 codec ).
    The detection of this type of rootkit will be added into the next version.


    2006.11.28

    Version 1.0.12.12011.


    2006.10.17

    New tool - catchme released.

    FAQ


    Frequently Asked Questions
    Question: Do I have a rootkit  ?
    Answer: You can scan the system for rootkits using GMER. Run gmer.exe, select Rootkit tab and click the "Scan" button.
    If you don't know how to interpret the output, please Save the log and send it to my email address.
    Warning ! Please, do not select the "Show all" checkbox during the scan.
    Question: How to install the GMER software ?
    Answer: Just run gmer.exe. All required files will be copied to the system during the first lanuch.
    Question: My computer is infected and GMER won't start:
    Answer: Try to rename gmer.exe to test.exe and click test.exe.
    Question: How do I remove the Rustock rootkit ?
    Answer: When GMER detects hidden service click "Delete the service" and answer YES to all questions.


    Question: How do I show all NTFS Streams ?
    Answer: On the "Rootkit Tab" select only: Files + ADS + Show all options and then click the Scan button.
    Question: Can I launch GMER in Safe Mode ?
    Answer: Yes, you can launch GMER in Safe Mode, however rootkits which doesn't work in Safe Mode won't be detected.
    Question: I am confused as to use delete or disable the hidden "service".
    Answer: Sometimes "delete the service" option wont work because the rootkit protects its service. So, in such case use: 1) "disable the service", 2) reboot your machine, and 3) "delete the service".

    Contact


    Feel free to write to me if you have any problems with GMER or malware. Use the following address: info@gmer.net

    Posted by 1010
    반응형
    Please read this before download!

    Registration

    This software is a shareware. To use this program on a permanent basis or for commercial purposes, you should register it by sending filled registration form to Ollydbg@t-online.de. The registration is free of charge and assumes no financial or other obligations from either side - just be fair and let me know that you like this software. Even your personal data in the registration form is optional (use your nickname or pseudonym if you want).

    If you use OllyDbg together with Randall Hyde's HLA (High Level Assembly), you don't need (but still allowed) to register.

    When registering, you can subscribe for information (email) on the new versions of this program, including pricing, terms of support and list of new features. In this case you agree not to treat this information as a spam as long as number of letters does not exceed 4 each calendar year and they contain no advertisements from the third parties. If you no longer want to receive this information - well, just let me know, and I will immediately delete your address from my database.
     

    Trademark information

    All brand names and product names used in OllyDbg, accompanying files or in this help are trademarks, registered trademarks, or trade names of their respective holders. They are used for identification purposes only.
     

    License Agreement

    This License Agreement ("Agreement") accompanies the OllyDbg versions 1.10, OllyDbg Plugin Development Kit version 1.10 and related files ("Software"). By using the Software, you agree to be bound by all of the terms and conditions of the Agreement.

    The Software is distributed "as is", without warranty of any kind, expressed or implied, including, but not limited to warranty of fitness for any particular purpose. In no event will the Author be liable to you for any special, incidental, indirect, consequential or any other damages caused by the use, misuse, or the inability to use of the Software, including any lostprofits or lost savings, even if Author has been advised of the possibility of such damages.

    The Software is owned by Oleh Yuschuk ("Author") and is Copyright (c) 2000-2004 Oleh Yuschuk. To use this Software on a permanent basis or for commercial purposes, you must register it by filling the supplied registration form and sending it to the Author. You don't need to register Software if you use it exclusively with Randall Hyde's High Level Assembly. If you are already a registered OllyDbg user, you don't need to re-register the Software again. If the Software is registered to a company or organization, any person within the company or organization has the right to use it at work. You may install the registered Software on any number of storage devices, like hard disks, floppy disks etc. and are allowed to make any number of backup copies of this Software.

    You are not allowed to modify, decompile, disassemble or reverse engineer the Software except and only to the extent that such activity is expressly permitted by applicable law. You are not allowed to distribute or use any parts of the Software separately. You may make and distribute copies of this Software provided that a) the copy contains all files from the original distribution and these files remain unchanged; b) if you distribute any other files (for example, plugins) together with the Software, they must be clearly marked as such and the conditions of their use cannot be more restrictive than conditions of this Agreement; and c) you collect no fee (except for transport media, like CD or diskette), even if your distribution contains additional files.

    You are allowed to develop and distribute your own plugins -- Dynamic Link Libraries that connect to the Software and make use of the functions implemented in the Software -- free of charge provided that a) your plugins contain no features that persuade or force user to register them, or limit functionality of unregistered plugins; b) you allow free distribution of your plugins on the conditions similar to that of the Software; and c) you collect no fee (except for transport media, like CD or diskette). If you want to develop commercial plugin, please contact Author for a special Agreement.

    The distribution includes files PSAPI.DLL and DBGHELP.DLL that are the Microsoft(R) Redistributable files. These files should be installed only in the directory where the Software resides. You should use supplied PSAPI.DLL only on Windows NT(R) 4.0. You are not allowed to distribute PSAPI.DLL or DBGHELP.DLL separately from the Software.

    This Agreement covers only the version 1.10 of the OllyDbg and version 1.10 of the OllyDbg Plugin Development Kit. All other versions are covered by separate License Agreements.
     

    Fair use

    Many software manufacturers explicitly disallow you any attempts of disassembling, decompilation, reverse engineering or modification of their programs. This restriction also covers all third-party dynamic-link libraries your application may use, including system libraries. If you have any doubts, contact the owner of copyright. The so called „fair use" clause can be misleading. You may want to discuss whether it applies in your case with competent lawyer.
     

    Download

     Download OllyDbg 1.10 (final version)

     Download Plugin Development Kit 1.10 (requires OllyDbg 1.10)

     Download free source of command line plugin (requires OllyDbg 1.08 or 1.10 and Borland's BCB 5.0)
     

    Older versions

     Download OllyDbg 1.08b (previous "official" release)

     Download Plugin Development Kit 1.08

     Version 1.00 (mostly of historical value)
     

    Posted by 1010
    반응형
    Posted by 1010
    반응형

    Web Application Stress Tool

    Brief Description
    The Microsoft web stress tool is designed to realistically simulate multiple browsers requesting pages from a Web site.

    On This Page

    Quick Details
    File Name: setup.exe
    Version: 1.0
    Date Published: 12/26/2002
    Language: English
    Download Size: 9.6 MB
    Estimated Download Time:
     24 min

    Overview

    The Microsoft WAS web stress tool is designed to realistically simulate multiple browsers requesting pages from a web site. You can use this tool to gather performance and stability information about your web application. This tool simulates a large number of requests with a relatively small number of client machines. The goal is to create an environment that is as close to production as possible so that you can find and eliminate problems in the web application prior to deployment.

     Top of page

    Posted by 1010
    반응형
    Fiddler2 - Installation Information

    Install Fiddler2 (~500kb)

    ...or, click here to install the latest v2.x BETA version.

    System Requirements

    Windows 2000 / XP / 2003 / Vista with Microsoft .NET Framework v2.0 or later
    10 megabytes disk space / 800mhz processor (Screams at 2.4ghz)
    128 megabytes RAM (512mb+ highly recommended)
     

    Note: The legacy product Fiddler v1.3, for users of the .NET Framework v1.1, remains available here.

    Complementary Tools

    Notification of Updates

    Upon booting, Fiddler will check for new versions by hitting a web service on this server.  If you'd prefer to only check for updates manually, set the option in Tools | Fiddler Options.

    Version History

    See the change log.

    Posted by 1010
    반응형

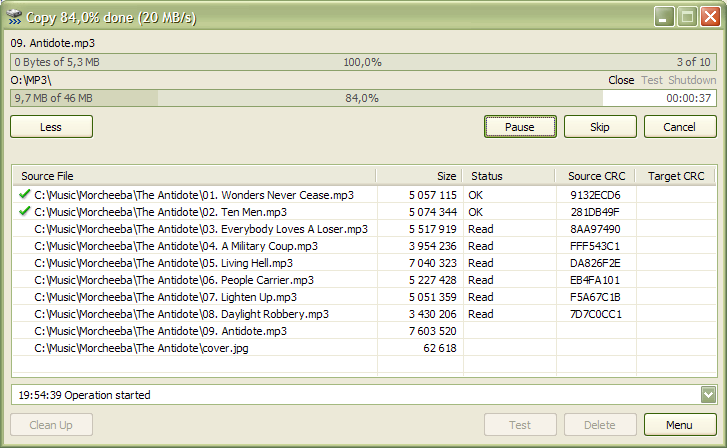
    파일복사가 느린경우 대안... 동적버퍼사이즈를 조정해 비동기복사와 같은 효과

    사용자 삽입 이미지
    사용자 삽입 이미지


    TeraCopy is a compact program designed to copy and move files at the maximum possible speed, providing the user a lot of features:

    • Copy files faster. TeraCopy uses dynamically adjusted buffers to reduce seek times. Asynchronous copy speeds up file transfer between two physical hard drives.
    • Pause and resume file transfers. Pause copy process at any time to free up system resources and continue with a single click.
    • Error recovery. In case of copy error, TeraCopy will try several times and in the worse case just skips the file, not terminating the entire transfer.
    • Interactive file list. TeraCopy shows failed file transfers and lets you fix the problem and recopy only problem files.
    • Shell integration. TeraCopy can completely replace Explorer copy and move functions, allowing you work with files as usual.
    • Full Unicode support.

    Download TeraCopy – Free for Home Users

    TeraCopy Pro

    You can also buy a Pro version of the program that lets you do the following:

    • Select files with the same extension/same folder
    • Remove selected files from the copy queue
    • Get free updates and priority support
    • More features coming soon!

    Buy TeraCopy Pro – 30-Day Money Back Guarantee

    Posted by 1010
    반응형
    리눅스나 유닉스 계열을 사용하신다면 tail 명령어를 아실겁니다.
    tail은 기본적으로 파일의 마지막 부분을 보여주는 유틸입니다.
    (Man 페이지에는 tail -- display the last part of a file 로 설명이 나옵니다.)

    파일의 마지막 부분을 보여주는 기능이 있다보니 로그를 보는데 아주 유용합니다.
    가령 웹(네트워크)서버에 로그 파일을 tail로 걸어놓고 보면 디버깅이나 프로그래밍할때 많은 도움을 줍니다.

    아쉬운게 윈도우용은 tail이 없어서 윈도우상에서 Tomcat + Eclipse 작업을 할땐 로그 보기가 여간 불편한게 아닙니다. 이런 불편함을 덜고자 tail과 유사한 mTail 이라는 프로그램이 있습니다.


    사용법은 간단합니다. 출력할 file을 선택하고 우측 위의 start를 누릅니다. 그러면 tail 처럼 log가 죽죽 올라가지요


    Posted by 1010
    반응형

    로그 파일을 모니터링할 때 UNIX 의 tail -f 보다 좋은 것은 없는 것 같습니다. 그런데 Windows 에는 tail 명령 자체가 없기 때문에 난감한 경우가 있습니다. Tail for Win32 라는 괜찮은 녀석이 있습니다. 키워드 하이라이트, 메일 알림 등 추가 기능들도 꽤 괜찮은 편이라, 예전에 소개한 TailXP 보다 더 추천하고 싶습니다.

    홈페이지, 다운로드: http://tailforwin32.sourceforge.net/

    Tail for Win32

    This is the homepage of Tail for Win32 - the Windows version of the UNIX 'tail -f' command.

    Tail for Win32 is used to monitor changes to files; displaying the changed lines in realtime. This makes Tail ideal for watching log files.

    Tail has a plugin architecture, which allows notifications to occur when certain keywords are detected in monitored files. At the moment a MAPI plugin is available, and work is in progress on an SMTP version.

    Features

    A few features of Tail:

    • Watch multiple files in realtime

    • Detect keyword matches, and highlight occurences

    • Send mail notifications on keyword matches by SMTP or MAPI

    • Plugin architecture allows you to write specialised handlers

    • Can process files of any size on all types of drive (local or networked)

    Download

    A number of downloads are available:

    • The binary package: a precompiled version, ready to go out of the box. The ZIP file contains the runnable EXE and a readme.

    • The source package: everything you need to build and modify Tail

    • The 'Devel' package: a snapshot of my development version at the time of the upload. Only download the 'Devel' package if you don't mind sofware that doesn't really 100% work...

    Please go to Tail's SourceForge project page to download.

    Contribute

    If you find Tail for Win32 useful, then why not donate a little to show your appreciation. Even a small amount will be very gratefully received! If you're happy to leave a comment when you donate, I'll add you to the supporters page.

    Donate to this project

    Alternatively, why not keep my iPod or bookshelf happy with an item from my Amazon wishlist? (I dread to think what that list says about me!)

    Tail's License

    Tail is OpenSource and is licensed under the GPL. In a nutshell, this allows you to give Tail away free or for a cost, but to do so you must also give the source away with it.

    Posted by 1010
    반응형

    Process Explorer v11.33

    By Mark Russinovich

    Published: February 4, 2009

     Download Process Explorer (1.6 MB)

    Introduction

    Ever wondered which program has a particular file or directory open? Now you can find out. Process Explorer shows you information about which handles and DLLs processes have opened or loaded.

    The Process Explorer display consists of two sub-windows. The top window always shows a list of the currently active processes, including the names of their owning accounts, whereas the information displayed in the bottom window depends on the mode that Process Explorer is in: if it is in handle mode you'll see the handles that the process selected in the top window has opened; if Process Explorer is in DLL mode you'll see the DLLs and memory-mapped files that the process has loaded. Process Explorer also has a powerful search capability that will quickly show you which processes have particular handles opened or DLLs loaded.

    The unique capabilities of Process Explorer make it useful for tracking down DLL-version problems or handle leaks, and provide insight into the way Windows and applications work.


    Download Process Explorer
    (1.6 MB)


    Run Process Explorer now from Live.Sysinternals.com


    Posted by 1010
    반응형
    Posted by 1010
    반응형


    사용법은 다운받은 파일을 c:\windows\system32\안에 넣어주시고
    cmd 모드로 들어가서..

    c:\> tail -f \\192.0.0.1\log.txt

    이런식으로하면 실시간으로 txt 쌓이는 정보를 확인할 수 있다.
    Posted by 1010
    반응형


    사용환경
    ------------------------------------------------------------
    OS: Windows 계열
    웹브라우저: MS Internet Explorer 거의 모든 버전
    스크립트: JavaScript, VBScript 등

    오랜만에 자작 프로그램(iDebugX) 올려봅니다.
    프로젝트에 JSP로 개발하면서 Server-side와 Client-side의 디버깅 컨트롤을 각각 만들었습니다.
    JSP용 서버 사이드는 정리되면 올리도록 하지요..
    클라이언트 사이드 컨트롤은 개발언어에 관계없이 사용할 수 있습니다.

    뭐하는데 사용하는 넘인가 하면요...
    개발시 웹페이지에서 변수값 등을 확인하기 위해서 alert() 함수를 많이 사용할 겁니다.
    사용 후 다시 지워야하고, 나중에 버그 발생시 값 확인하려면 또다시 alert()를 사용해야 하는 경우가 많을 겁니다.
    iDebugX는 OutputDebugString() API를 호출하므로 alert()처럼 사용자에게 직접적으로 보여주지는 않습니다.
    디버그 뷰어를 실행해서만 볼 수 있습니다.

    예를 봅시다..(이 예제를 테스트하기 위해서는 iDebug.ocx를 윈도우에 등록해야 됩니다. 방법은 아래 참조)

    debug.js (javascript)
    <script type="text/javascript">
    <!--
            // HTML 페이지에 디버그 컨트롤 삽입
            function SetDebugMode()
            {
                    var iDebug = "<OBJECT id=idbg classid='clsid:A7E78F01-4566-4A90-87EC-01EEF2D1344A'><param name='header' value='::'></<param name='UseDialogBox' value=false></OBJECT>";
                    document.writeln(iDebug);
            }
     
            SetDebugMode();
     
            // 디버그 컨트롤 설치 여부 검사
            function Installed_iDebugX()
            {
                    try
                    {
                            return (typeof(document.all("idbg"))!="undefined" & document.all("idbg").object != null & idbg.installed());
                    }
                    catch(e)
                    {
                    }
            }

            // 디버그 메시지 출력
            function OutputDebugString(msg)
            {
                    if (Installed_iDebugX())
                            idbg.OutputDebugString(msg);
            }
     
            // 디버그 메시지 대화상자 표시
            function ShowDebugString(msg)
            {
                            if (Installed_iDebugX())
                                    idbg.ShowDebugString(msg);
            }
    </script>
    -->


    사용 예제(javascript)
    <SCRIPT language='javascript' type='text/javascript' src='./debug.js'></SCRIPT>
    <SCRIPT language='javascript'>
            ....
            ....
        OutputDebugString("변수 user_id:" + user_id);
            ....
            ....
    </SCRIPT>
    </HTML>


    위 예제처럼 하면 디버그 뷰어에 "::변수 user_id:test"라는 문자열이 출력됩니다.(user_id가 test일 경우)
    태그의 PARAM "UseDialogBox"를 true로 설정하면 alert()처럼 대화상자로 나타나게 됩니다.

    alert()처럼 스크립트 실행을 중단시키지 않으며 사용자(고객)는 디버그 메시지를 볼 수 없습니다.
    사용자에게는 iDebug.ocx를 배포할 필요는 없습니다.
    iDebugX는 iDebugX가 윈도우에 등록된 클라이언트에서만 동작됩니다.

    메소드
    -------------------------------------------------------------------
    About(): 도움말 표시
    OutputDebugString(msg: string): 디버그 메시지 출력(디버그뷰어에)
    ShowDebugString(msg: string): 디버그 메시지 출력(대화상자로)

    속성
    -------------------------------------------------------------------
    header: 디버그 메시지 앞에 출력할 문자열
    UseDialogBox: OutputDebugString()를 ShowDebugString()와 같은 동작을 하게 할 것인지의 여부

    파라미터
    -------------------------------------------------------------------
    copyright: copyright 표시
    header, UseDialogBox: 속성 참고

    ---------------------------------
    Server-Side (PHP에서 사용)
    ---------------------------------
    <php?
            $user = 'guest';
            $idbg = new COM('iDebug.iDebugX');
            $idbg->header = "::";
            $idbg->OutputDebugString('변수 $user=' . $user);
    ?>

    PHP용은 ShowDebugString(), About()은 사용할 수 없습니다.

    참고: 여러 프로그램들이 OutputDebugString() API를 사용하기 때문에 디버그 뷰어에 자신이 호출하지 않은 문자열이 나타날 수도 있습니다. 이때 디버그 뷰어에서 필터 기능을 사용하면 자신의 메시지만 볼 수 있습니다.

    [다운로드]

    디버그 뷰어 다운로드 - http://download.sysinternals.com/Files/DebugView.zip

    iDebug.ocx 윈도우에 등록하는 법 - cmd에서 "regsvr32 C: estiDebug.ocx" 입력 후 엔터
    iDebug.ocx 윈도우에 등록 해제 하는 법 - cmd에서 "regsvr32 /u C: estiDebug.ocx" 입력 후 엔터
    Posted by 1010