'분류 전체보기'에 해당되는 글 2491건

  1. 2013.05.28 flex Using embedded fonts
  2. 2013.05.28 flex lineseries dotted line 1
  3. 2013.05.28 flex CartesianChart
  4. 2013.05.28 flex DateFormatter
  5. 2013.05.23 [펌]오라클 날짜 계산 1
  6. 2013.05.23 [SQL] SQL DateTime Functions
  7. 2013.05.23 [펌][Oracle] 시간 더하기 빼기
  8. 2013.05.22 flex 학습용 동영상
  9. 2013.05.20 [펌] Deleting items in a List from an item renderer
  10. 2013.05.20 [펌] (flex) itemrenderer 안의 component들의 외부 접근방법
  11. 2013.05.13 flex ImageSnapshot.captureBitmapData()
  12. 2013.05.13 [펌] FLEX에 Embed된 Flash SWF파일과의 통신
  13. 2013.05.10 flex DateField 날짜관련 유틸~
  14. 2013.05.07 Flex 4 animate properties
  15. 2013.04.25 MXAdvancedDataGridItemRenderer mouse over 시 배경 않보이게
  16. 2013.04.24 [펌] DataGrid 전체 다시 그리지 않고 데이터만 갱신하기
  17. 2013.04.12 Flex UX 40가지
  18. 2013.04.04 [펌] [Flex]Destination 못찾는 에러 (either does not exist or the destination has no channels defined)
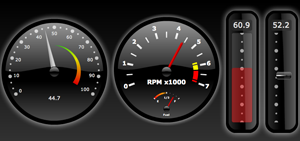
  19. 2013.04.03 flex gauges 참고 싸이트
  20. 2013.04.03 flex Gauge Component
  21. 2013.04.03 flex 4 module alert error
  22. 2013.04.03 [펌] FlashVars 사용법
  23. 2013.04.03 flex Call to a possibly undefined method getStyleDeclarations through a reference with static type Class.
  24. 2013.04.01 flex 에서 동적 영역 생성시 넓이와 높이 100% 안먹힐경우
  25. 2013.03.28 [펌] Flash CS3, 4에서 간단한 Remoting 호출을 위한 클래스
  26. 2013.03.28 Embedding HTML in a Flex application using an IFrame
  27. 2013.03.28 [펌] flex chart examples
  28. 2013.03.27 flex 동적 panel 생성및 제어 (flexlib) 1
  29. 2013.03.21 [펌] flex dataGrid data 조건에 따른 글자 색상 변경
  30. 2013.03.21 flash 에서 flex swf loader 하기....
00.Flex,Flash,ActionScript2013. 5. 28. 13:37
반응형

Using embedded fonts

Rather than rely on a client machine to have the fonts you specify, you can embed TrueType font (TTF) or OpenType font (OTF) families in your Flex application. This means that the font is always available to Flash Player when the application is running, and you do not have to consider the implications of a missing font.

Embedded fonts have the following benefits:

  • Client environment does not need the font to be installed.
  • Embedded fonts are anti-aliased, which means that their edges are smoothed for easier readability. This is especially apparent when the text size is large.
  • Embedded fonts can be partially or fully transparent.
  • Embedded fonts can be rotated.
  • Embedded fonts provide smoother playback when zooming.
  • Text appears exactly as you expect when you use embedded fonts.
  • When you embed a font, you can use the advanced anti-aliasing information that provides clear, high-quality text rendering in SWF files. Using advanced anti-aliasing greatly improves the readability of text, particularly when it is rendered at smaller font sizes. For more information about advanced anti-aliasing, see Using advanced anti-aliasing.

Using embedded fonts is not always the best solution, however. Embedded fonts have the following limitations and drawbacks:

  • Embed only TrueType or OpenType fonts. To embed other font types such as Type 1 PostScript fonts, embed that font in a SWF file that you create in Flash 8, and then embed that SWF file in your Flex application. For more information, see Embedding fonts from SWF files.
  • Embedded fonts increase the file size of your application, because the document must contain font outlines for the text. This can result in longer download times for your users.
  • Embedded fonts, in general, decrease the legibility of the text at sizes smaller than 10 points. All embedded fonts use anti-aliasing to render the font information on the client screen. As a result, fonts may look fuzzy or illegible at small sizes. To avoid this fuzziness, you can use advanced anti-aliasing to render fonts in Flex applications. For more information, see Using advanced anti-aliasing.
  • In some cases, embedded fonts can be truncated when they are used in visual components. In these cases, you might be required to change the padding properties of the component by using style properties or subclassing it. This only occurs with some fonts.

You typically use Cascading Style Sheets (CSS) syntax for embedding fonts in Flex applications. You use the @font-face "at-rule" declaration to specify the source of the embedded font and then define the name of the font by using the fontFamily property. You must specify the @font-face declaration for each face of the font for the same family that you use. The source can be a local Java Runtime Environment (JRE) font or one that is accessible by using a file path. You use this font family name in your MXML code to refer to the embedded font.

Note: Check your font licenses before embedding any font files in your Flex applications. Fonts might have licensing restrictions that preclude them from being stored as vector information.

If you attempt to embed a font that the Flex compiler cannot find, Flex throws an error and your application does not compile.

Embedded font syntax

To embed TrueType or OpenType fonts, you use the following syntax in your style sheet or <mx:Style> tag:

@font-face {
    src: url("location") | local("name");
    fontFamily: alias;
    [fontStyle: normal | italic | oblique;]
    [fontWeight: normal | bold | heavy;]
    [advancedAntiAliasing: true | false;]
}

The src property specifies how the compiler should look for the font and the name of the font to look for. You can load a font either by its filename (by using src:url) or by its system font name (by using src:local). This property is required. For more information, see Locating embedded fonts. The src property also helps determine which font manager the compiler will use; for more information, see About the font managers.

The fontFamily property sets the alias for the font that you use to apply the font in style sheets. This property is required. If you embed a font with a family name that matches the family name of a system font, the Flex compiler gives you a warning. You can disable this warning by setting the show-shadows-system-font-warnings compiler option to false.

The fontStyle and fontWeight properties set the type face values for the font. These properties are optional. The default values are normal.

The advancedAntiAliasing property determines whether to include the advanced anti-aliasing information when embedding the font. This property is optional. The default value is true. You cannot use this option when embedding fonts from a SWF file (see Embedding fonts from SWF files). For more information on using advanced anti-aliasing, see Using advanced anti-aliasing.

The following example embeds the MyriadWebPro.ttf font file:

@font-face {
    src: url("../assets/MyriadWebPro.ttf");
    fontFamily: myFontFamily;
    advancedAntiAliasing: true;
}

The following example embeds that same font, but by using its system font name:

@font-face {
    src: local("Myriad Web Pro");
    fontFamily: myFontFamily;
    advancedAntiAliasing: true;
}

After you embed a font with an @font-face declaration, you can use the value of the fontFamily property, or alias, in a type or class selector. The following example uses myFontFamily, the value of the fontFamily property, as the font in the VBox type selector:

<?xml version="1.0"?>
<!-- fonts/EmbeddedFontFace.mxml -->
<mx:Application xmlns:mx="http://www.adobe.com/2006/mxml">
  <mx:Style>
     @font-face {
        src:url("../assets/MyriadWebPro.ttf");
        fontFamily: myFontFamily;
        advancedAntiAliasing: true;
     }
     
     VBox {
        fontFamily: myFontFamily;
        fontSize: 15;
     }     

     Panel {
        paddingLeft: 10;
        paddingTop: 10;
        paddingBottom: 10;
        paddingRight: 10;
     }
  </mx:Style>

  <mx:Panel title="Embedded Font Applied With Type Selector">

     <mx:VBox>
        <!-- This button attempts to use the font of the VBox container. -->
        <mx:Button label="Click Me"/>
        <mx:Label text="This is a label."/> 
        <mx:TextArea width="250">
            <mx:text>
                The text in this TextArea control uses the 
                myClass class selector.
            </mx:text>
        </mx:TextArea>
     </mx:VBox>
  </mx:Panel>

  <!-- This button uses the default font because it is not in
   the VBox. -->
  <mx:Button label="Click Me"/>
    
</mx:Application>

The executing SWF file for the previous example is shown below:

You can also apply the embedded font inline by specifying the alias as the value of the control's fontFamily property, as the following example shows:

<?xml version="1.0"?>
<!-- fonts/EmbeddedFontFaceInline.mxml -->
<mx:Application xmlns:mx="http://www.adobe.com/2006/mxml">
  <mx:Style>
     @font-face {
        src:url("../assets/MyriadWebPro.ttf");
        fontFamily: myFontFamily;
        advancedAntiAliasing: true;
     }

     Panel {
        paddingLeft: 10;
        paddingTop: 10;
        paddingBottom: 10;
        paddingRight: 10;
     }
  </mx:Style>

  <mx:Panel title="Embedded Font Applied Inline">
     <mx:VBox fontFamily="myFontFamily">
        <mx:Button label="Click Me"/>
        <mx:Label text="This is a label."/> 
        <mx:TextArea width="200">
            <mx:text>
                The text in the TextArea control is Myriad Web Pro.
            </mx:text>
        </mx:TextArea>
     </mx:VBox>
  </mx:Panel>
</mx:Application>

The executing SWF file for the previous example is shown below:

When you run this example, you might notice that the Button control's label uses a system font. This is because the default style of a Button control's label uses a bold typeface. However, the embedded font's typeface (Myriad Web Pro) does not contain a definition for the bold typeface. To have the Button control's label use the proper typeface, you must either embed a font's bold typeface so that the label of a Button control is rendered with the correct font, or change the Button control's typeface to be non-bold. For information on embedding bold typefaces, see Using multiple typefaces.

Locating embedded fonts

The src property in the @font-face declaration specifies the location of the font family. You can specify a url or a local function. The following table describes these functions:

Attribute

Description

url

Embeds a TrueType or OpenType font by location by specifying a valid URI to the font. The URI can be relative (for example, ../fontfolder/akbar.ttf) or absolute (for example, c:/myfonts/akbar.ttf).

local

Embeds a locally accessible TrueType or OpenType font by name rather than location. You use the font name, and not the filename, for the font. For example, you specify "Akbar Bold Italic" rather than "AkbarBI.ttf".

You can embed fonts that are locally accessible by the application server's Java Runtime Environment (JRE). These fonts include the *.ttf files in the jre/lib/fonts folder, fonts that are mapped in the jre/lib/font.properties file, and fonts that are made available to the JRE by the operating system (OS).

On Windows, TTF files in the /windows/fonts directory (or /winnt/fonts) are available to the local function. On Solaris or Linux, fonts that are registered with a font server, such as xfs, are available.

The font name that you specify is determined by the operating system. In general, you do not include the font file's extension, but this is OS-dependent. For more information, consult your operating system documentation.

You must specify the url or local function of the src property in the @font-face declaration. All other properties are optional. In general, you should use url rather than local, because pointing to a file is more reliable than using a reference controlled by the operating system.

Do not mix embedded and nonembedded fonts in the same fontFamily property.

Embedding fonts in ActionScript

You can embed TrueType or OTF font files or system fonts by location or by name by using the [Embed] metadata tag in ActionScript. To embed a font by location, you use the source property in the [Embed] metadata tag. To embed a font by name, you use the systemFont property in the [Embed] metadata tag.

The following examples embed fonts by location by using the [Embed] tag syntax:

<?xml version="1.0"?>
<!-- fonts/EmbeddedFontFaceActionScriptByLocation.mxml -->
<mx:Application xmlns:mx="http://www.adobe.com/2006/mxml">
  <mx:Style>
     .mystyle1 {
        fontFamily:myMyriadFont;
        fontSize: 32pt;
     }
     .mystyle2 {
        fontFamily:myBoldMyriadFont;
        fontSize: 32pt;
        fontWeight: bold;
     }
  </mx:Style>
  
  <mx:Script>
     /* 
      * Embed a font by location. 
      */
     [Embed(source='../assets/MyriadWebPro.ttf', 
        fontName='myMyriadFont', 
        mimeType='application/x-font'
     )] 
     // You do not use this variable directly. It exists so that 
     // the compiler will link in the font.
     private var font1:Class;
     
     /* 
      * Embed a font with bold typeface by location. 
      */
     [Embed(source='../assets/MyriadWebPro-Bold.ttf', 
        fontWeight='bold', 
        fontName='myBoldMyriadFont', 
        mimeType='application/x-font', 
        advancedAntiAliasing='true'
     )] 
     private var font2:Class;
     
  </mx:Script>

  <mx:Panel title="Embedded Fonts Using ActionScript">
     <mx:VBox>
        <mx:Label 
            width="100%" 
            height="75" 
            styleName="mystyle1" 
            text="This text uses the MyriadWebPro font." 
            rotation="15"
        />
        <mx:Label 
            width="100%" 
            height="75" 
            styleName="mystyle2" 
            text="This text uses the MyriadWebPro-Bold font." 
            rotation="15"
        />
     </mx:VBox>
  </mx:Panel>
</mx:Application>

The executing SWF file for the previous example is shown below:

You use the value of the fontName property that you set in the [Embed] tag as the alias (fontFamily) in your style definition.

To embed a font with a different typeface (such as bold or italic), you specify the fontWeight or fontStyle properties in the [Embed] statement and in the style definition. For more information on embedding different typefaces, see Using multiple typefaces.

To show you that the example runs correctly, the Label controls are rotated. If the fonts were not correctly embedded, the text in the Label controls would disappear when you rotated the text.

To embed local or system fonts, you use the system font name rather than the filename for the font. You also specify that name using the systemFont property in the [Embed] tag rather than the source attribute. Otherwise, you use the same syntax, as the following example shows:

<?xml version="1.0"?>
<!-- fonts/EmbeddedFontFaceActionScriptByName.mxml -->
<mx:Application xmlns:mx="http://www.adobe.com/2006/mxml">
  <mx:Style>
     .mystyle1 {
        fontFamily:myPlainFont;
        fontSize: 32pt;
     }
     .mystyle2 {
        fontFamily:myItalicFont;
        fontSize: 32pt;
        fontStyle: italic;
     }
  </mx:Style>
  
  <mx:Script>
     /* 
      * Embed a font by name. 
      */
     [Embed(systemFont='Myriad Web Pro', 
        fontName='myPlainFont', 
        mimeType='application/x-font'
     )] 
     // You do not use this variable directly. It exists so that 
     // the compiler will link in the font.
     private var font1:Class;
     
     /* 
      * Embed a font with italic typeface by name. 
      */
     [Embed(systemFont='Myriad Web Pro', 
        fontStyle='italic', 
        fontName='myItalicFont', 
        mimeType='application/x-font', 
        advancedAntiAliasing='true'
     )] 
     private var font2:Class;
     
  </mx:Script>

  <mx:Panel title="Embedded Fonts Using ActionScript">
     <mx:VBox>
        <mx:Label 
            width="100%" 
            height="75" 
            styleName="mystyle1" 
            text="This text uses the plain typeface." 
            rotation="15"
        />
        <mx:Label 
            width="100%" 
            height="75" 
            styleName="mystyle2" 
            text="This text uses the italic typeface." 
            rotation="15"
        />
     </mx:VBox>
  </mx:Panel>
</mx:Application>

The executing SWF file for the previous example is shown below:

To get the system font name in Windows, install the Font properties extension. Then right-click the font's file in Windows Explorer and select the Names tab. Use the value under Font Family Name as the systemFont value.

You can specify a subset of the font's character range by specifying the unicodeRange parameter in the [Embed] metadata tag or the @font-face declaration. Embedding a range of characters rather than using the default of all characters can reduce the size of the embedded font and, therefore, reduce the final output size of your SWF file. For more information, see Setting character ranges.

Using advanced anti-aliasing

When you embed fonts, you can use advanced anti-aliasing to provide those fonts with additional information about the font. Embedded fonts that use the advanced anti-aliasing information are typically clearer and appear sharper at smaller font sizes.

By default, fonts that you embed in Flex applications use the advanced anti-aliasing information. This default is set by the fonts.advanced-anti-aliasing compiler option in the flex-config.xml file (the default value is true). You can override this default value by setting the value in your style sheets or changing it in the configuration file. To disable advanced anti-aliasing in style sheets, you set the advancedAntiAliasing style property to false in your @font-face rule, as the following example shows:

@font-face {
    src:url("../assets/MyriadWebPro.ttf");
    fontFamily: myFontFamily;
    advancedAntiAliasing: false;
}

Using advanced anti-aliasing can degrade the performance of your compiler. This is not a run-time concern, but can be noticeable if you compile your applications frequently or use the web-tier compiler. Using advanced anti-aliasing can also cause a slight delay when you load SWF files. You notice this delay especially if you are using several different character sets, so be aware of the number of fonts that you use. The presence of advanced anti-aliasing information may also cause an increase in the memory usage in Flash Player and Adobe® AIR™. Using four or five fonts, for example, can increase memory usage by approximately 4 MB.

When you embed fonts that use advanced anti-aliasing in your Flex applications, the fonts function exactly as other embedded fonts. They are anti-aliased, you can rotate them, and you can make them partially or wholly transparent.

Font definitions that use advanced anti-aliasing support several additional styles properties: fontAntiAliasType, fontGridFitType, fontSharpness, and fontThickness. These properties are all inheriting styles.

Because the advanced anti-aliasing-related style properties are CSS styles, you can use them in the same way that you use standard style properties, such as fontFamily and fontSize. For example, a text-based component could use subpixel-fitted advanced anti-aliasing of New Century 14 at sharpness 50 and thickness -35, while all Button controls could use pixel-fitted advanced anti-aliasing of Tahoma 10 at sharpness 0 and thickness 0. These styles apply to all the text in a TextField control; you cannot apply them to some characters and not others.

The default values for the advanced anti-aliasing styles properties are defined in the defaults.css file. If you replace this file or use another style sheet that overrides these properties, Flash Player and AIR use the standard font renderer to render the fonts that use advanced anti-aliasing. If you embed fonts that use advanced anti-aliasing, you must set the fontAntiAliasType property to advanced, or you lose the benefits of the advanced anti-aliasing information.

The following table describes these properties:

Style property

Description

fontAntiAliasType

Sets the antiAliasType property of internal TextField controls. The valid values are normal and advanced. The default value is advanced, which enables advanced anti-aliasing for the font.

Set this property to normal to prevent the compiler from using advanced anti-aliasing.

This style has no effect for system fonts or fonts embedded without the advanced anti-aliasing information.

fontGridFitType

Sets the gridFitType property of internal TextField controls. The valid values are none, pixel, and subpixel. The default value is pixel. For more information, see the TextField and GridFitType classes in the Adobe Flex Language Reference.

This property has the same effect as the gridFitType style property of the TextField control for system fonts, only it applies when you embed fonts with advanced anti-aliasing.

Changing the value of this property has no effect unless the fontAntiAliasType property is set to advanced.

fontSharpness

Sets the sharpness property of internal TextField controls. The valid values are numbers from -400 to 400. The default value is 0.

This property has the same effect as the fontSharpness style property on the TextField control for system fonts, only it applies when you embed fonts with advanced anti-aliasing.

Changing the value of this property has no effect unless the fontAntiAliasType property is set to advanced.

fontThickness

Sets the thickness property of internal TextField controls. The valid values are numbers from -200 to 200. The default value is 0.

This property has the same effect as the fontThickness style property on the TextField control for system fonts, only it applies when you embed fonts with advanced anti-aliasing.

Changing the value of this property has no effect unless the fontAntiAliasType property is set to advanced.

Detecting embedded fonts

You can use the SystemManager class's isFontFaceEmbedded() method to determine whether the font is embedded or whether it has been registered globally with the register() method of the Font class. The isFontFaceEmbedded() method takes a single argument--the object that describes the font's TextFormat--and returns a Boolean value that indicates whether the font family you specify is embedded, as the following example shows:

<?xml version="1.0"?>
<!-- fonts/DetectingEmbeddedFonts.mxml -->
<mx:Application xmlns:mx="http://www.adobe.com/2006/mxml"
     creationComplete="determineIfFontFaceIsEmbedded()">
  <mx:Style>
     @font-face {
        src: url(../assets/MyriadWebPro.ttf);
        fontFamily: myPlainFont;
        advancedAntiAliasing: true;
     }
     
     .myStyle1 {
        fontFamily: myPlainFont; 
        fontSize:12pt
     }
  </mx:Style>
  <mx:Script><![CDATA[
     import mx.managers.SystemManager;
     import flash.text.TextFormat;
     
     public function determineIfFontFaceIsEmbedded():void {
        var tf1:TextFormat = new TextFormat();
        tf1.font = "myPlainFont";
        
        var tf2:TextFormat = new TextFormat();
        tf2.font = "Arial";
        
        var b1:Boolean = Application.application.systemManager.
           isFontFaceEmbedded(tf1);
        var b2:Boolean = Application.application.systemManager.
           isFontFaceEmbedded(tf2);
        l1.text = tf1.font + " (" + b1 + ")";
        l2.text = tf2.font + " (" + b2 + ")";
     }
  ]]></mx:Script>
  <mx:Text id="text1" styleName="myStyle1" text="Rotate Me"/>

  <mx:HBox>
    <mx:Button label="Rotate +1" click="++text1.rotation;"/>
    <mx:Button label="Rotate -1" click="--text1.rotation;"/>
  </mx:HBox>

  <mx:Form>
     <mx:FormItem label="isFontFaceEmbedded:">
        <mx:Label id="l1"/>
     </mx:FormItem>         
     <mx:FormItem label="isFontFaceEmbedded:">
        <mx:Label id="l2"/>
     </mx:FormItem>         
  </mx:Form>    
</mx:Application>

The executing SWF file for the previous example is shown below:

You can use the Font class's enumerateFonts() method to output information about device or embedded fonts. The following example lists embedded fonts:

<?xml version="1.0"?>
<!-- fonts/EnumerateFonts.mxml -->
<mx:Application xmlns:mx="http://www.adobe.com/2006/mxml" creationComplete="listFonts()">
  <mx:Style>
     @font-face {
        src:url("../assets/MyriadWebPro.ttf");
        fontFamily: myFont;
        advancedAntiAliasing: true;
     }

     @font-face {
        src:url("../assets/MyriadWebPro-Bold.ttf");
        fontFamily: myFont;
        fontWeight: bold;
        advancedAntiAliasing: true;
     }

     @font-face {
        src:url("../assets/MyriadWebPro-Italic.ttf");
        fontFamily: myFont;
        fontStyle: italic;
        advancedAntiAliasing: true;
     }
     
     .myPlainStyle {
        fontSize: 20;
        fontFamily: myFont;
     }
     
     .myBoldStyle {
        fontSize: 20;
        fontFamily: myFont;
        fontWeight: bold;
     }

     .myItalicStyle {
        fontSize: 20;
        fontFamily: myFont;
        fontStyle: italic;
     }
  </mx:Style>

  <mx:Script><![CDATA[
     private function listFonts():void {
        var fontArray:Array = Font.enumerateFonts(false);
        for(var i:int = 0; i < fontArray.length; i++) {
           var thisFont:Font = fontArray[i];
           if (thisFont.fontType == "embedded") {
              ta1.text += "FONT " + i + ":: name: " + thisFont.fontName + "; typeface: " + 
                thisFont.fontStyle + "; type: " + thisFont.fontType + "\n";
           }
        }
     }
  ]]></mx:Script>

  <mx:HBox borderStyle="solid"> 
     <mx:Label text="Plain Label" styleName="myPlainStyle"/> 
     <mx:Label text="Bold Label" styleName="myBoldStyle"/> 
     <mx:Label text="Italic Label" styleName="myItalicStyle"/> 
  </mx:HBox>

  <mx:TextArea id="ta1" height="200" width="400"/>

</mx:Application>

The executing SWF file for the previous example is shown below:

The following list shows the output.

name: myFont; typeface: regular; type: embedded
name: myFont; typeface: bold; type: embedded
name: myFont; typeface: italic; type: embedded

The enumerateFonts() method takes a single Boolean argument: enumerateDeviceFonts. The default value of the enumerateDeviceFonts property is false, which means it returns an Array of embedded fonts by default.

If you set the enumerateDeviceFonts argument to true, the enumerateFonts() method returns an array of available device fonts on the client system, but only if the client's mms.cfg file sets the DisableDeviceFontEnumeration property to 0, the default value. If you set the DisableDeviceFontEnumeration property to 1, Flash Player cannot list device fonts on a client computer unless you explicitly configure the client to allow it. For more information about configuring the client with the mms.cfg file, see the Flash Player documentation.


Posted by 1010
00.Flex,Flash,ActionScript2013. 5. 28. 13:18
반응형
2009.1.21 : 데이타가 너무 촘촘하게 붙는 경우 직선과 차이가 없어지는 문제로, 수정하였습니다.

This is a DashLine Line Segment Renderer for Flex Chart. (Tested in FLEX 3.0)
You must modify the package & class path.


Click this icon to download the source.
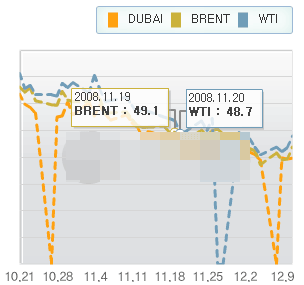
모자이크 부분은 고객사 로고 때문임..;; (Don't care the mossaic)

LineSeries 에서 점선을 사용해야 해서 만들게 된 Dash Line Renderer이다.
해당 클래스만 넣었으므로 Class Path는 적절히 고쳐서 사용할 것.


사용법은 LineChart 등에 쓰이는 LineSeries에 lineSegmentRenderer 값으로 해당 Class Path를 쓰면 된다.
예를 들어

component.LineRenderer.DotLine01 로 넣었다면

<mx:LineSeries lineSegmentRenderer="component.LineRenderer.DotLine01" ..... />
이렇게 넣으면 된다.


다운 받은 걸 열어보면 DotLineBase.as 와 DotLine01.as 가 있는데 DotLine01.as 를 복제해 가며 점선의 종류를 늘려 가면 된다.

개별 Class에서 설정 가능한 옵션은

gap=6; // 점선 사이 간격
length=6; // 점선 길이
lineWeight=3; // 선 굵기
lineAlpha=1; // 선 알파


이다.

선 색은 기본적으로 시리즈에 정의된 선 색을 쓰게 된다.


Posted by 1010
00.Flex,Flash,ActionScript2013. 5. 28. 11:23
반응형
<?xml version="1.0" encoding="utf-8"?>
<mx:Application xmlns:mx="http://www.adobe.com/2006/mxml" layout="horizontal">
   
<mx:DateFormatter id="df" formatString="JJ:NN:SS" />
   
<mx:Script>
        <![CDATA[
            private const minimum:Date = new Date( "Apr 1 2011 01:03:54 AM");
            private const maximum:Date = new Date( "Apr 1 2011 03:07:54 AM");
            private function labelFunction(item:Object,
                                           field:String,
                                           index:Number):String {
                return df.format(item as Date);
            }
        ]]>
   
</mx:Script>

   
<mx:CartesianChart width="600" height="200">

       
<mx:horizontalAxis>
           
<mx:DateTimeAxis
               
minimum = "{minimum}"
               
maximum = "{maximum}"
               
displayLocalTime="true"
               
labelFunction="labelFunction"
               
labelUnits="minutes"
           
/>
           
<!--
                interval="15"
            -->

       
</mx:horizontalAxis>

   
</mx:CartesianChart>

</mx:Application>

Gives this flex screenshot


Posted by 1010
00.Flex,Flash,ActionScript2013. 5. 28. 11:01
반응형

The DateFormatter is a very simple formatter. To use it you just have to specify the formatString property, apply the format and you are done.

<mx:DateFormatter formatString="Y|M|D|A|E|H|J|K|L|N|S"/>

Here are some short explanations of what the characters in formatString represent:

Y – Year
M – month
D – Day
A – AM/PM indicator
E – day of the week
H – Hour (1-24 hours format)
J – Hour (0-23 hours format)

K – Hour in am/pm (0-11 hours format)
L – Hour in am/pm (1-12 hours format)
N – Minutes
S – Seconds

The formatString may also contain other words as separators between Y, M, D, A etc. as we will see in the example below.

Here is an example that uses the Flex DateFormatter Class

<?xml version="1.0" encoding="utf-8"?>
<!--http://www.popamihai.com/2009/07/flex/example-of-using-the-dateformatter-class-in-flex/-->
<mx:Application xmlns:mx="http://www.adobe.com/2006/mxml" layout="vertical" backgroundColor="white" 
	creationComplete="formatDates()" viewSourceURL="srcview/index.html">
 
	<mx:Script>
		<![CDATA[
			private function formatDates():void{
				dateFormatter.formatString = "DD/MM/YY";
				formattedDate1.text = dateFormatter.format(initialDate.text);
				dateFormatter.formatString = "EEE DD/MM/YY";
				formattedDate2.text = dateFormatter.format(initialDate.text);
				dateFormatter.formatString = "EEEE DD/MM/YY";
				formattedDate3.text = dateFormatter.format(initialDate.text);
				dateFormatter.formatString = "EEEE DD MMM YYYY";
				formattedDate4.text = dateFormatter.format(initialDate.text);
				dateFormatter.formatString = "EEEE DD MMMM YYYY";
				formattedDate5.text = dateFormatter.format(initialDate.text);
				dateFormatter.formatString = "EEEE DD MMMM YYYY at HH:NN";
				formattedDate6.text = dateFormatter.format(initialDate.text);
				dateFormatter.formatString = "EEEE DD MMMM YYYY at HH:NN A";
				formattedDate7.text = dateFormatter.format(initialDate.text);
				dateFormatter.formatString = "EEEE DD MMMM YYYY at HH:NN.SS A";
				formattedDate8.text = dateFormatter.format(initialDate.text);
			}
		]]>
	</mx:Script>
 
	<mx:DateFormatter id="dateFormatter" />
 
	<mx:Text text="Change The Initial Date And Format The New Dates" fontWeight="bold"/>
 
	<mx:Form>
		<mx:FormItem label="Initial Date:" >
			<mx:TextInput id="initialDate" text="01.01.2009 10:34 57" />
		</mx:FormItem>
		<mx:FormItem label="DD/MM/YY" >
			<mx:TextInput id="formattedDate1" />
		</mx:FormItem>
		<mx:FormItem label="EEE DD/MM/YY" >
			<mx:TextInput id="formattedDate2" />
		</mx:FormItem>
		<mx:FormItem label="EEEE DD/MM/YY" >
			<mx:TextInput id="formattedDate3" />
		</mx:FormItem>
		<mx:FormItem label="EEEE DD MMM YYYY" >
			<mx:TextInput id="formattedDate4" />
		</mx:FormItem>
		<mx:FormItem label="EEEE DD MMMM YYYY" >
			<mx:TextInput id="formattedDate5" />
		</mx:FormItem>
		<mx:FormItem label="EEEE DD MMMM YYYY at HH:NN" >
			<mx:TextInput id="formattedDate6" />
		</mx:FormItem>
		<mx:FormItem label="EEEE DD MMMM YYYY at HH:NN A" >
			<mx:TextInput id="formattedDate7" />
		</mx:FormItem>
		<mx:FormItem label="EEEE DD MMMM YYYY at HH:NN.SS A" >
			<mx:TextInput id="formattedDate8" />
		</mx:FormItem>
		<mx:FormItem >
			<mx:Button click="formatDates()" label="format dates"/>
		</mx:FormItem>
	</mx:Form>
</mx:Application>

In the following example the formatString is displayed on the left column, and the formatted dates are displayed in the TextInput controls from the right column. To see how the different formats work change the “Initial Date” with a valid date and press the “format dates” button.

View Source is enabled in the above example. To view the source files right click on the swf and choose “View Source” from the context menu.


Posted by 1010
반응형
[펌]오라클 날짜 계산
출처 : http://www.zetswing.com/bbs/board.php?bo_table=ORACLE_TIP&wr_id=20&page=

1. Oracle에서의 날짜 특징

*oracle은 세기,년,월,일,시간,분,초의 내부숫자 형식으로 날짜를 저장합니다.
*디폴트 날짜형식은 'DD-MON-YY' 입니다.
*SYSDATE는 현재의 날짜와 시간을 리턴하는 함수입니다.(date타입)
ex : 2007-01-07 오후 10:34:00
*DUAL은 SYSDATE를 보기위해 사용된 dummy table입니다.

2.oracle에서의 날짜연산

* 날짜에서 숫자(날수)를 빼거나 더하여 날짜 결과를 리턴합니다. 결과는 날짜형식
* 날짜 사이의 일수를 알기 위하여 2개의 날짜를 뺍니다.
* 시간을 24로 나누어 날짜에 더합니다.
날짜 + 숫자 : 날짜 특정한 날로부터 몇일 후의 날짜 계산
날짜 - 숫자 : 날짜 특정한 날로부터 몇일 전의 날짜 계산
날짜 - 날짜 : 숫자 두 날짜 사이의 차이를 숫자로 계산

3.oracle에서의 날짜 컬럼데이타형

date 형

4. 월과 일을 문자로 출력시 한글로 나오는거 영문으로 나오게 하기

오라클 환경 설정에 따라 아래 쿼리를 실행시키면 "7월" 이라고 나올수 있다.
SELECT TO_CHAR(SYSDATE,'mon') FROM DUAL;

오라클 환경 설정에 따라 아래 쿼리를 실행시키면 "월요일" 이라고 나올수 있다.
SELECT TO_CHAR(sysdate,'day') FROM DUAL;

영문("Jul")으로 출력시키려면 아래 명령으로 환경설정을 변경한다.
ALTER SESSION SET NLS_LANGUAGE = 'AMERICAN';

※ 월요일, 화요일 형식이 아닌 월, 화 형식으로 나타내기
SELECT TO_CHAR(sysdate,'day') FROM DUAL;

5.날짜의 순서결과 데이타형

날짜 - 날짜 = 숫자
숫자 + 날짜 = 날짜
(날짜 - 날짜) + 날짜 = 날짜
날짜 + 날짜 = error


※ trunc함수를 날짜데이타에 사용하기

select sysdate from dual;
--2006-02-08 오전 12:11:05


select trunc(sysdate) from dual;
select trunc(sysdate,'dd') from dual;
--단지 시간을 없애고 날짜만 나오게 한다.
--2006-02-08


select trunc(sysdate,'d') from dual;
--시간을 없애고 일을 가장최근에 지난 일요일 일로 초기화합니다.(권장)
--2006-02-05


select trunc(sysdate,'d')+1 from dual;
--시간을 없애고 일을 가장최근에 지난 월요일 일로 초기화합니다.

select trunc(sysdate,'d')-1 from dual;
--시간을 없애고 일을 가장최근에 지난 토요일 일로 초기화합니다.


select trunc(sysdate,'ww') from dual;
--시간을 없애고 일을 가장최근에 지난 일요일 일로 초기화합니다.
--2006-02-05


select trunc(sysdate,'mm') from dual;
--시간을 없애고 일을 1로 초기화합니다.
--2006-02-01


select trunc(sysdate,'Y') from dual;
select trunc(sysdate,'YY') from dual;
select trunc(sysdate,'YYY') from dual;
select trunc(sysdate,'YYYY') from dual;
--시간을 없애고 년도는 올해 년도와 월과 일을 모두 1 로 변경하여 출력합니다.

ex. 2006-01-01

SELECT TO_CHAR(SYSDATE,'YYYYMMDD') FROM DUAL;
SELECT TO_CHAR('20070715') FROM DUAL;
-- 현재 날짜를 YYYYMMDD 형식으로 출력한다.(자주사용)

8자리일자와 6자리시간을 문자열로 출력
select
to_char(sysdate, 'yyyymmdd') ,
to_char(sysdate, 'hh24miss')
from dual

6.날짜 관련 쿼리 예제

해당일이 그달의 몇째주인지 알아내기(w)
SELECT to_char(to_date('20061224', 'yyyymmdd'), 'w') FROM dual;

해당년도의 전체 일수 구하기
SELECT to_date('20001231', 'YYYYMMDD') - to_date('20000101', 'YYYYMMDD') from dual
SELECT TO_CHAR (TO_DATE (:yyyy || '1231'), 'ddd') ilsu FROM DUAL
-- 위의 쿼리는 년도를 변수로 사용하였다.


UPDATE tab1 SET logdate = sysdate, ismodify = 1 WHERE logdate < sysdate-7
--기록된 날짜(LOGDATE)가 현재날짜(SYSDATE)로부터 일주일이 지났으면
--SYSDATE를LOGDATE에 쓰고 날짜가 바뀌었다는 기록을 남기는(ISMODYFY = 1) 쿼리

UPDATE tab1 SET logdate = sysdate, ismodify = 1 WHERE logdate < TRUNC(sysdate,'d')
기록된 날짜(LOGDATE)가 일요일이 한번이라도 지났다면, 즉 이번주 일요일부터 토요일간의 기록이라면 그대로 두고 그 이상 오래된 경우 현재날짜(SYSDATE)를 LOGDATE에 남기는 쿼리

select ename,job,hiredate from emp where hiredate between '1981-02-20' and '1981-05-01';
--1981년02월20일부터 1985년05월01일까지의 레코드를 검색한다.(꼭옛날날짜에서최근날짜로검색)


select ename,(sysdate - hiredate)/7 week from emp;
--sysdate함수로 현재 날짜시간에서 입사날짜(hiredate)를 빼면 일수가나오고 거기서 7을 나누어

--근무한 주수를 알수있습니다.

select * from emp where hiredate='1980/12/17';
--날짜 비교는 ''을 이용하여 비교합니다.


select months_between(sysdate,hiredate)/12 ,hiredate from emp;
--오늘날짜에서 입사날짜를 빼서 달수를 구한후 12을 나누어 근무한 년수를 구할수있다.


select months_between(to_date(20011129,'yyyymmdd'),to_date(20020228,'yyyymmdd')) from dual;
--첫번째 날짜에서 두번째 날짜를 빼서 달수로 구한다.

select round(months_between(sysdate,hiredate)/12) ,hiredate from emp;
--소수점이 있는 결과에서 반올림합니다.

select trunc(months_between(sysdate,hiredate)/12) ,hiredate from emp;
--소수점이 있는 결과에서 버림합니다.


ADD_MONTHS 함수예제

SELECT ADD_MONTHS(HIREDATE,2) FROM EMP;
-- HIREDATE값에 2달를 더하여 출력

SELECT TO_CHAR(ADD_MONTHS(SYSDATE,-1), 'YYYYMMDD'),
TO_CHAR(SYSDATE-30, 'HH24MIDD') FROM DUAL;
-- DATE형 현재 날짜시간에서 1달을 뺀후 출력

SELECT TO_CHAR(ADD_MONTHS(TO_DATE('20060907230000','YYYYMMDDHH24MISS'),
-1),'YYYYMMDDHH24MI') FROM DUAL;
-- CHAR형 현재 날짜시간에서 1달을 뺀후 출력

select add_months(to_date('200706'||'01','yyyymmdd'),-1) from dual
-- 20070601에서 한달을 뺍니다.

select add_months(hiredate,-2) from emp;
--입사날짜에서 2달을 빼서 출력합니다.


select hiredate+100 from emp;
--입사날짜에서 100일을 더합니다.


select hiredate-100 from emp;
--입사날짜에서 100일을 뺍니다.


LAST_DAY() 함수
해당 날짜에 달에 마지막 일의 날짜를 출력한다.
사용예제
SELECT LAST_DAY('2006-05-05') FROM DUAL;
--2006-05-31

SELECT LAST_DAY(SYSDATE) FROM DUAL;
--2006-05-31 오후 10:35:51


※oracle에서는 날짜함수에(sysdate) 산술연산이 가능합니다.
1일->1
1시간->1/24
1분->1/24/60
1초->1/24/60/60

select sysdate-1 from dual;
--지금 시간 기준으로 1일전


select sysdate-(1/24) from dual;
--지금 시간 기준으로 1시간전


select sysdate+1/24/60*1 from dual;
--지금 시간 기주으로 1분전


select sysdate+1/24/60*10 from dual;
--지금 시간 기주으로 10분전


select to_date(200611210800,'yyyymmdd hh24miss')+ 10/24 from duaL;
--10시간을 더한다.


select to_char(to_date('2005-05-05'),'d') from account;
--날짜를 숫자형식의 요일로 출력(1-일요일,7-토요일)

select to_char(to_date('2005-05-05'),'day') from account;
--날짜를 알파벳요일로 출력

select to_char(to_date('2005-05-05'),'year') from account;
--날짜를 알파벳년도로 출력


select to_char(to_date('2005-05-05'),'month') from account;
-- 월을 영문으로 완벽하게 출력


select to_char(to_date('2005-05-05'),'mon') from account;
-- 월을 영문 앞 3글자만 출력


select decode(to_char(to_date('2005-05-05'),'d'),
'2','1',
'3','2',
'4','3',
'5','4',
'6','5',
'7','6',
'1','7') "요일"
from dual;

--날짜의 요일을 숫자로 출력(1-월요일,7-일요일)

DATE형 컬럼 비교시

SELECT * FROM TABLE_NAME WHERE FDATE < to_date('20070711','YYYYMMDD')

6. 프로그래밍 언어에서 날짜 검색시 방법

날짜 관련 컬럼은 DATE, CHAR(8), NCHAR(8)을 주지만 DATE는 7바이트이다.

DATE형은 아래와 같이 검색 조건을 사용한다.

WHERE A_DATE BETWEEN '2005-10-10' AND '2005-10-30';
WHERE A_DATE BETWEEN TO_DATE('2005-10-10') AND TO_DATE('2005-10-30');

CHAR(8), NCHAR(8)형은 아래와 같이 검색조건을 사용한다.

WHERE A_DATE BETWEEN '20051010' AND '20051030';

두가지의 장단점을 알아보자

7. 해당 시간이 현재 24시간이 지났는지 알수 있는 쿼리

SELECT CASE WHEN SYSDATE - TO_DATE('20070727','YYYYMMDD') >= 1
THEN 'Y' ELSE 'N' END RESUAL FROM DUAL;
※ SYSDATE가 날짜형이므로 빼주는 값도 날짜형이어야 합니다.

SELECT round(to_date('95/05/25'),'DAY')
FROM dual
1995/05/28 00:00:00
SELECT TRUNC(TO_DATE('95/05/25'), 'DAY')
FROM dual
1995/05/21 00:00:00

문제는 day 함수에 있습니다.
day함수는 요일을 나타내죠.
따라서 to_date('95/05/25')를 day로 표시하면 수요일이 나옵니다.
위에 쿼리는 그걸 반올림하였으니 그 주에 가장 큰 28일이 나왔구요,
아래 쿼리는 그걸 잘라내버렸으니 그 주에 가장 작은 21일이 나온 겁니다.

SELECT SYSDATE + 2/24 FROM DUAL;
-- 현재시간의 2시간후에 시간을 출력
SELECT SYSDATE - 2/24 FROM DUAL;
-- 현재시간의 2시간전의 시간을 출력

select to_char(trunc(sysdate), 'rrrr/mm/dd') A from dual;
select to_char(trunc(sysdate), 'yyyy/mm/dd') A from dual;
YYYY포맺은 현재를 기준으로 합니다.
RRRR기준은 .년도의 뒷자리를 기준으로
2000년도 기준으로 보면
0-49 년은 after year 35/12/12 ->2055/12/12
50-99 년은 before year 51/12/12 ->1951/12/12
가 됨니다.

8. 날짜 관련 함수

SYSDATE 함수
? 현재 시스템 날짜를 출력
SELECT SYSDATE FROM DUAL;
-- ORACLE 10g XE 에서 출력되는 날짜형식
-- 2008-05-17 오후 5:15:17

LAST_DAY 함수
? 해당 날짜의 달에서 마지막 일을 출력
SELECT LAST_DAY(SYSDATE) FROM DUAL;
--2008-05-31 오후 5:16:54


Posted by 1010
반응형

SQL - Timestamp
A timestamp servers as the catch all for dates and times. Retrieving a timestamp is very simple and the result can be converted or manipulated in nearly every way imaginable.


SQL Code:
SELECT CURRENT_TIMESTAMP;
Return a Timestamp:2004-06-22 10:33:11.840
Keep in mind that each platform of SQL (DB2, Oracle, SQL Server, etc...) may return dates and times which are formatted differently.
SQL- Date FunctionsAs we just mentioned, it is possible to breakdown timestamps into their individual pieces using any of the following date functions.

SQL Code:
SELECT MONTH(CURRENT_TIMESTAMP);
Return a Month:6 SQL Code:
SELECT DAY(CURRENT_TIMESTAMP);
Return a Day:22

There are many more functions available, including functions to extract milliseconds, names of the months, names of each week day, etc.
Each SQL platform varies in the actual naming of date functions. Here's a few c\The following is a list of other date functions available to most platforms of SQL with the exception of MS's SQL Server.

SQL Function Code:
SELECT DATE(CURRENT_TIMESTAMP); - returns a date (2004-06-22)
SELECT TIME(CURRENT_TIMESTAMP); - returns the time (10:33:11.840)
SELECT DAYOFWEEK(CURRENT_TIMESTAMP); - returns a numeric value (1-7)
SELECT DAYOFMONTH(CURRENT_TIMESTAMP); - returns a day of month (1-31)
SELECT DAYOFYEAR(CURRENT_TIMESTAMP); - returns the day of the year (1-365)
SELECT MONTHNAME(CURRENT_TIMESTAMP); - returns the month name (January - December
SELECT DAYNAME(CURRENT_TIMESTAMP); - returns the name of the day (Sunday - Saturday)
SELECT WEEK(CURRENT_TIMESTAMP); - returns number of the week (1-53)


Timestamps are often the easiest to work with, but we certainly are not limited to using only the current_timestamp as our parameter. We can send any date, time, or timestamp to the function which then returns our result.

SQL Code:
SELECT MONTHNAME('2004-11-27');
Return a Month Name: MONTHNAME('2004-11-27') November
Date functions can also be performed on table columns similarly to numeric and mathematical functions such as SUM() or AVG().

SQL Code:
SELECT DAYOFYEAR(column_name) FROM table_name WHERE name = 'Joe';
SQL will return a numeric result from 1 - 365 representing the day of the year that Joe's record was created/inserted.We can expand this concept one step further with the use of a subquery. Say we have a table with a column named timestamp. In this table column are timestamps of when each record was entered and we would like to know what was the numeric day of the year that a record was entered.

SQL Code:
SELECT DAYOFYEAR((SELECT DATE(timestamp) FROM employees WHERE name = 'James Bond'));
Above you can see how it is possible to combine several date functions as well as a subquery to return very specific information about Mr. James Bond.
SQL - Inserting Date DataDate data exists as numbers, strings, and timestamps. Built into most platforms are several date column types such as DATE or TIMESTAMP. By setting the default value to the current date or timestamp, the table column will automatically be filled with a current date/timestamp as each record is inserted.
Here's the code to add a timestamp column to an existing table.
SQL Code:
ALTER TABLE `orders` ADD `order_date` TIMESTAMP DEFAULT CURRENT_TIMESTAMP NOT NULL;
Now each time an order is placed in our make believe business, a timestamp of that order is also recorded.A date or timestamp table column will only allow date data types to be inserted as values so be sure to convert any strings or numbers to dates and timestamps before trying to insert them.

SQL - Datepart()

Microsoft's SQL Server takes a little different approach to working with dates. It is still possible to extract individual parts of a timestamp and several other functions also work as outlined in SQL - Date. The difference is that SQL Server uses one main function as oppose to several different functions ie the DATEPART() function.
Datepart() requires two parameters, a part argument and a date argument. By part we mean year, day of the year, day of the week, etc. Let's look at an example.

SQL Code:
SELECT DATEPART(week, '2005-12-31');Return the Week Number:53

Here we have successfully pulled the "week number" from existing date.
SQL's CURRENT_DATE function could be also be substituted or a string value representing the year ('Dec 31, 2005').

Posted by 1010
반응형

–1시간 더하기

select to_char(to_date(’121212′,’hh24miss’)+1/24,’hh24:mi:ss’) from dual;

–30분 더하기

select to_char(to_date(’121212′,’hh24miss’)+30/24/60,’hh24:mi:ss’) from dual;

select to_char(to_date(’121212′,’hh24miss’)+30/(24*60),’hh24:mi:ss’) from dual;

–40초 더하기

select to_char(to_date(’121212′,’hh24miss’)+40/24/60/60,’hh24:mi:ss’) from dual;

select to_char(to_date(’121212′,’hh24miss’)+40/(24*60*60),’hh24:mi:ss’) from dual;

–12시간 58분 58초 더하기

select to_char(to_date(’121212′,’hh24miss’)+12/24 + 58/24/60 + 58/24/60/60,’hh24:mi:ss’) from dual;

– 시: 분: 초 가져오기

select substr(’125858′,1,2), substr(’125858′,3,2), substr(’125858′,5,2) from dual;

[참고] http://julymorning.co.kr/xe/index.php?document_srl=3798&mid=tiptech_prog


Posted by 1010
00.Flex,Flash,ActionScript2013. 5. 22. 09:33
반응형
Posted by 1010
00.Flex,Flash,ActionScript2013. 5. 20. 14:12
반응형

출처 : http://flexponential.com/2009/09/23/deleting-items-in-a-list-from-an-item-renderer/


It’s easy to delete an item in a spark List from within an item renderer. This is handy if you have a List with a custom renderer that provides a button to delete the item that is associated with that renderer.

You can do this by using the ItemRenderer’s owner property to access the List it is in, drill down to its dataProvider and delete the data item:

<s:ItemRenderer>
    <fx:Script>
        <![CDATA[
                import spark.components.List;
                public function deleteItem():void {
                    var parentList:List = owner as List;
                    // remove the item
                    parentList.dataProvider.removeItemAt(parentList.dataProvider.getItemIndex(data))
                }
            ]]>
        </fx:Script>
        <s:HGroup>
            <s:Label text="{data}" />
            <s:Button id="remove" label="X"  click="deleteItem()"/>
        </s:HGroup>
</s:ItemRenderer>

Another approach is to delete items based on the selectedItem/selectedIndex, but I prefer this method since it allows you to delete items without needing to select them.

Here is an example that uses the deleteItem() method listed above:

View Source

This should work the same way for DataGroup and SkinnableDataContainer as well.

Note: This sample requires Flex SDK 4.0.0.10545 or higher. You can get the latest SDK builds from opensource.adobe.com.

Posted by 1010
00.Flex,Flash,ActionScript2013. 5. 20. 13:52
반응형

<init시 itemrenderer를 갖고 있는 start_addr_deny(datagrid)에 접근할 addEventListener추가>

private function init():void{
start_addr_deny.addEventListener("status_bt", status_btHandler);

}

<dispatchEvent를 이용한 클릭시 외부 접근>

<mx:DataGridColumn id="check_Add" width="50">
<mx:itemRenderer>
<mx:Component>
<mx:HBox horizontalAlign="center">
<mx:CheckBox click="dispatchEvent(new Event('status_bt', true))"/>
</mx:HBox>
</mx:Component>
</mx:itemRenderer>
</mx:DataGridColumn>

Posted by 1010
00.Flex,Flash,ActionScript2013. 5. 13. 19:20
반응형

Taking screenshots in Flex 3 using the ImageSnapshot.captureBitmapData() method

By On November 17, 2007 · 11 Comments

As we saw in a previous entry, “Taking screenshots in Flex 3 using the ImageSnapshot.captureImage() method”, it is possible to take a screenshot of an item on the display list using the static ImageCapture.captureImage() method. Once the image is captured, we accessed the image’s pixel data using the ImageCapture object’s data property, which was displayed using the SWFLoader control.

The ability to load a ByteArray object directly into a SWFLoader was added in Flex 3 build 187814, you may need to update your SDK build by downloading a recent nightly build from http://labs.adobe.com/technologies/flex/sdk/flex3sdk.html.

The following example shows how you can take a snapshot of an item on the display list using the static ImageSnapshot.captureBitmapData() method, which returns a BitmapData object, as seen in the following snippet:

var imageBitmapData:BitmapData = ImageSnapshot.captureBitmapData(source);
swfLoader.source = new Bitmap(imageBitmapData);

Full code after the jump.

View MXML

<?xml version="1.0" encoding="utf-8"?>
<!-- http://blog.flexexamples.com/2007/11/17/taking-screenshots-in-flex-3-using-the-imagesnapshotcapturebitmapdata-method/ -->
<mx:Application xmlns:mx="http://www.adobe.com/2006/mxml"
        layout="vertical"
        verticalAlign="middle"
        backgroundColor="white">

    <mx:Script>
        <![CDATA[
            import mx.graphics.ImageSnapshot;

            private function takeSnapshot(source:IBitmapDrawable):void {
                var imageBitmapData:BitmapData = ImageSnapshot.captureBitmapData(source);
                swfLoader.source = new Bitmap(imageBitmapData);
            }
        ]]>
    </mx:Script>

    <mx:Array id="arr">
        <mx:Object col1="Row 1, Col 1" col2="Row 1, Col 2" />
        <mx:Object col1="Row 2, Col 1" col2="Row 2, Col 2" />
        <mx:Object col1="Row 3, Col 1" col2="Row 3, Col 2" />
        <mx:Object col1="Row 4, Col 1" col2="Row 4, Col 2" />
        <mx:Object col1="Row 5, Col 1" col2="Row 5, Col 2" />
        <mx:Object col1="Row 6, Col 1" col2="Row 6, Col 2" />
    </mx:Array>

    <mx:ApplicationControlBar dock="true">
        <mx:Button label="Take snapshot of DataGrid"
                click="takeSnapshot(dataGrid);" />
    </mx:ApplicationControlBar>

    <mx:HBox>
        <mx:DataGrid id="dataGrid" dataProvider="{arr}" />
        <mx:SWFLoader id="swfLoader">
            <mx:filters>
                <mx:DropShadowFilter />
            </mx:filters>
        </mx:SWFLoader>
    </mx:HBox>

</mx:Application>

View source is enabled in the following example.

Posted by 1010
00.Flex,Flash,ActionScript2013. 5. 13. 13:23
반응형

출처 : http://blog.marines.co.kr/archives/58

FLEX에서 SWFLoader를 이용하여 플래시SWF파일을 Embed시킬 경우에
간단하게 변수를 전달하는 것이 안되더군요. (SWFLoader.params = 어쩌고 이런 방식이 안됨;;)

이를 위해서는 이전부터 존재했던 LocalConnection을 사용하여야 통신이 가능합니다.

Javascript, AJAX를 사용하여도 되지만, 독립적인 실행이 가능하게 하려는 취지에는 맞지않지요.

private var lc:LocalConnection;

private function init():void {
lc = new LocalConnection();
lc.addEventListener(StatusEvent.STATUS, onStatus);
}

public function clickHandler():void {
webservice.getPhotoListArray.send();
}

private function onStatus(e:StatusEvent):void {
switch(e.level) {
case “status”:
trace(“swf send success”);
break;
case “error”:
trace(“Failed”);
break;
}
}

public function resultHandler(event:ResultEvent):void{
datas = ArrayCollection(event.result);
sendPhotoListData(datas, _imagePath);
}
private function onStatus(e:StatusEvent):void {
switch(e.level) {
case “status”:
trace(“swf send success”);
break;
case “error”:
trace(“Failed”);
break;
}
}
private function sendPhotoListData(data:*, _imagePath:String):void { //PhotoListData Request
try {
lc.send(“photoListData”, “dataHandler”, data, _imagePath);
}catch (e:Error) {
Alert.show(String(e));
}
}
public function faultHandler(event:FaultEvent):void {
Alert.show(event.fault.faultDetail, “Error”);
}


이와 같은 방법으로 FLEX의 송신부에서 localConnection 객체를 생성해주고 StatusEvent리스너를 달아줍니다.

FLASH의 수신부에는 아래의 코드를 입력해줍니다.

public function UIMFL_Base() {
Security.allowDomain(“*”);
//
lc = new LocalConnection();
lc.client = this;
try {
lc.connect(“photoListData”);
} catch (error:ArgumentError) {
trace(“Can’t connect…the connection name is already being used by another SWF”);
}
thumblist.mask = thumbMask;
}// End of Function

//Flex to Flash Data Response Handler Define
public function dataHandler(dt:*, _path:String):void {
var responseData:* = dt;
_strDomain = _path;
totalElementNum = responseData.length;
}


수신부에서는 이처럼 세팅합니다. 이런 방식으로 FLEX에서 플래시로 데이터를 전달할수 있고, 플래시에서 다시 FLEX로 데이터를 전달할때는 이 방식도 가능하겠지만, Event를 디스패치 시켜서 받는 방식도 가능합니다


private function init():void{
swfObj.content.addEventListener(“SWF_EVENT”, swfHandler);
}
private function swfHandler(e:Event):void {
currentOsgsSeq = e.target.currentTargetID;
}

Posted by 1010
00.Flex,Flash,ActionScript2013. 5. 10. 16:17
반응형


// 검색일자 초기화
    var now:Date = new Date();
    fromYYYYMMDD.selectedDate = now;      // 검색 : 시작일
    toYYYYMMDD.selectedDate = DateUtil.addDays(now,1); // 검색  : 종료일

----------------- dateutil.as

package biz.sehwa.core.utils
{
 public class DateUtil
 {
  public function DateUtil()
  {
  }
  
  /**
   * Add Month
   *
   * @param date:Date
   * @param months:Number Month Count
   * @return Date
   */
  public static function addMonths(date:Date, months:Number):Date{
   var rtnDate:Date = new Date(date.getFullYear(), date.getMonth() + months, date.getDate());
   return rtnDate;
  }
  
  /**
   * Add Week
   *
   * @param date:Date
   * @param weeks:Number Week Count
   * @return Date
   */
  public static function addWeeks(date:Date, weeks:Number):Date {
   return addDays(date, weeks*7);
  }
  
  /**
   * Add Date
   *
   * @param date:Date
   * @param days:Number Date Count
   * @return Date
   */
  public static function addDays(date:Date, days:Number):Date {
   return addHours(date, days*24);
  }
  
  /**
   * Add Hours
   *
   * @param date:Date
   * @param hrs:Number Hour Count
   * @return Date
   */
  public static function addHours(date:Date, hrs:Number):Date {
   return addMinutes(date, hrs*60);
  }
  
  /**
   * Add Minutes
   *
   * @param date:Date
   * @param mins:Number Minute Count
   * @return Date
   */
  public static function addMinutes(date:Date, mins:Number):Date {
   return addSeconds(date, mins*60);
  }
  
  /**
   * Add Seconds
   *
   * @param date:Date
   * @param secs:Number Seconds Count
   * @return Date
   */
  public static function addSeconds(date:Date, secs:Number):Date {
   var mSecs:Number = secs * 1000;
   var sum:Number = mSecs + date.getTime();
   return new Date(sum);
  }
 }
}

Posted by 1010
반응형

Flex 4 animate properties

by on Jan.25, 2010, under Actual RIA info, Adobe AIR, Adobe Flex

I came across a situation while doing a Flex 4 upgrade for an Adobe Developer Center sample app where I wanted to use some the Spark animate properties classes.

This is SO cool because it gives you truly granular control over every aspect of a component you want to animate. In the sample I’m upgrading, there is an extended TileGroup component that has three columns and two rows of charts for an enterprise dashboard application. When a user clicks a button to zoom in on any given chart, I wanted to make use of some of the new Spark effects to really create a 3D look and feel quickly (without delving too much into custom layouts). Actually, the layout I made is a custom TileGroup, but I wanted to point out some ways you can use the Animate class to make sweet transitions on any property of a component in your own apps for simple animation, without having to create custom layouts.

This super simple test was to find out if I could use the Animate class to move the entire TileGroup to a new X,Y and increase its horizontalGap and verticalGap at the same time. In other words, could I use the Animate class to create my whole animation in one shot, truly custom? I watched Chet Haase on Adobe TV’s Codedependent on animating properties, and it worked great, but I needed it running in ActionScript.

The above code is the MXML that worked great for my test, and here’s the AS3 equivalent:

01
02
03
04
05
06
07
08
09
10
11
12
13
14
15
16
17
18
19
20
21
22
23
24
25
26
27
28
29
30
31
32
33
34
35
36
37
38
39
40
import spark.effects.Scale;
import spark.effects.Move;
import mx.effects.Parallel;
import spark.effects.Animate;
import spark.effects.animation.MotionPath;
import spark.effects.animation.SimpleMotionPath;
import flash.events.MouseEvent;
public function handleClick(event:MouseEvent):void
{
var p:Parallel = new Parallel(t);
p.duration = 1000;
var s:SimpleMotionPath = new SimpleMotionPath();
s.valueFrom = t.horizontalGap;
s.valueTo = 200;
s.property = "horizontalGap";
var s2:SimpleMotionPath = new SimpleMotionPath();
s2.valueFrom = t.verticalGap;
s2.valueTo = 200;
s2.property = "verticalGap";
var v:Vector. = new Vector.();
v.push( s );
v.push( s2 );
var a:Animate = new Animate();
a.motionPaths = v;
var m:Move = new Move();
m.xTo = t.width/2;
m.yTo = t.height/2;
p.addChild( a );
p.addChild( m );
p.play();
}

Thanks to Chet too for spotting what my tired eyes didn’t see :P sheesh, it’s been one of those days.

This sample is not very exciting, except for the fact that it gives you the idea how you can animate any property over time. If I wanted to (and I have for my project) animate the x, y, z, width, and height at the same time using the Animate class, you could easily create a very specific animation this way.

For my purposes, I used the SimpleMotionPath to specify certain properties to change, and since the Animate class’s Interpolator is set to NumberInterpolator by default, it worked out great to fill in the steps for the “tween” automatically for me. I’d like to get to the point where I come up with my own Flat-terpolator for some other project one day just to see what I can create, but for now, this worked out fine.

You can download the FXP for this sample and try it out yourself here. Once you see how this works, you can imagine the possibilities afforded to Flex 4 that will allow you to make some truly amazing animations. Mine’s turning out to be pretty cool, but you’ll have to wait until the ADC releases it :P In the meantime, you can get started on this one to catch up on Flex 4 and Flash Builder.

Posted by 1010
00.Flex,Flash,ActionScript2013. 4. 25. 15:54
반응형

<?xml version="1.0" encoding="utf-8"?>
<s:MXAdvancedDataGridItemRenderer xmlns:fx="http://ns.adobe.com/mxml/2009"
          xmlns:s="library://ns.adobe.com/flex/spark"
          xmlns:mx="library://ns.adobe.com/flex/mx"
          focusEnabled="true"
          autoDrawBackground="false"> <-- 마우스 오버시 백그라운드 
 <fx:Script>
  <![CDATA[
   import mx.controls.AdvancedDataGrid;
   import mx.controls.advancedDataGridClasses.AdvancedDataGridListData;
   
   private const NORMALCY_COLOR:uint = 0x000000; // 0:정상(검정)
   private const PROBLEM_COLOR:uint = 0xFF0000; // 1:장치이상(빨강)
   private const INSPECTION_COLOR:uint = 0xFFFF00; // 2:점검(노랑)
   private const WARNING_COLOR:uint = 0xFF9900; // 3:경고(주황)
   private const DANGER_COLOR:uint = 0xFF0000; // 4:위험(빨강)
   
   private var strData:String;
   private var strDataError:String;
   
   override public function set data(value:Object) : void {
//    super.data = value;
    var arryStr:Array;
    if(value != null){
     
     var tmpStr:String  = (value[AdvancedDataGridListData(listData).dataField]) as String;
     arryStr = tmpStr.split("/");
     if(arryStr.length > 1){

      itemLabel.text = arryStr[0] as String;
      itemLabel.setStyle("color",getTLDS_TC_Color(arryStr[1]));
      
      strData = arryStr[0] as String;
      strDataError= arryStr[1] as String;
      itemLabel.addEventListener(MouseEvent.ROLL_OVER,overToolTip);
     }
    }
   }
   
   private function overToolTip(event:Event):void{
    this.toolTip = "[측정값:"+this.strData+"] [상태:"+getTLDS_TC_ErrorMsg(strDataError)+"]";
   }
   
   
   private function getTLDS_TC_Color(val:String):* {
    var rt:uint = 0x000000;
 
    //0:정상, 1:장치이상, 2:점검, 3:경고, 4:위험
    switch(val) {
     case "0": rt = 0x000000; break; //정상 검정  0x000000
     case "1": rt = 0xFF0000; break; //에러 빨강
     case "2": rt = 0xFFFF00; break; //주의 노랑
     case "3": rt = 0xFF9900; break; //경고 주황
     case "4": rt = 0xFF0000; break; //에러 빨강
    }
    return rt;
   }
   
   private function getTLDS_TC_ErrorMsg(val:String):String {
    var rtnStr:String = "";
    
    //0:정상, 1:장치이상, 2:점검, 3:경고, 4:위험
    switch(val) {
     case "0": rtnStr = "정상"; break; //정상 검정  0x000000
     case "1": rtnStr = "에러"; break; //에러 빨강
     case "2": rtnStr = "주의"; break; //주의 노랑
     case "3": rtnStr = "경고"; break; //경고 주황
     case "4": rtnStr = "에러"; break; //에러 빨강
    }
    return rtnStr;
   }
  ]]>
 </fx:Script>
 
 <s:Label id="itemLabel" text="" left="2" right="2" verticalCenter="0" backgroundAlpha="0"/> <-- 여기도...(랜더러로 만들지 않고 그냥 컴포넌트로 만들면 이부분만 처리해주면됨... 랜더러로 만드려면 위에 부분에 처리해줘야 함..

1시간 삽질후~~


</s:MXAdvancedDataGridItemRenderer>


Posted by 1010
00.Flex,Flash,ActionScript2013. 4. 24. 19:29
반응형

출처 : http://eflex.tistory.com/entry/DataGrid-%EC%A0%84%EC%B2%B4-%EB%8B%A4%EC%8B%9C-%EA%B7%B8%EB%A6%AC%EC%A7%80-%EC%95%8A%EA%B3%A0-%EB%8D%B0%EC%9D%B4%ED%84%B0%EB%A7%8C-%EA%B0%B1%EC%8B%A0%ED%95%98%EA%B8%B0


<?xml version="1.0" encoding="utf-8"?>
< s:Application xmlns:fx="http://ns.adobe.com/mxml/2009"
xmlns:s="library://ns.adobe.com/flex/spark"
xmlns:mx="library://ns.adobe.com/flex/mx" creationComplete="application1_creationCompleteHandler(event)" >


<fx:Script>
<![CDATA[
import mx.collections.ArrayCollection;
import mx.events.CollectionEvent;
import mx.events.FlexEvent;

[Bindable]
private var ac:ArrayCollection = new ArrayCollection();
private var arr:Array = new Array();

protected function application1_creationCompleteHandler(event:FlexEvent):void
{

arr.push({first:"aaaaa", second:"bbbbbb"});
arr.push({first:"ccccc", second:"dddddd"});
arr.push({first:"eeeee", second:"ffffff"});
arr.push({first:"ggggg", second:"iiiiii"});
arr.push({first:"aaaaa", second:"bbbbbb"});
arr.push({first:"ccccc", second:"dddddd"});
arr.push({first:"eeeee", second:"ffffff"});
arr.push({first:"ggggg", second:"iiiiii"});

ac.source = arr;
dg.dataProvider = ac;
}


protected function button1_clickHandler(event:MouseEvent):void
{
//var arr2:Array = new Array();
arr[0]={first:"2222", second:"bbbbbb"};
arr[1]={first:"333", second:"dddddd"};
arr[2]={first:"444", second:"ffffff"};
arr[3]={first:"5555", second:"iiiiii"};

ac.refresh();
//또는 dg.dataProvider.dispatchEvent(new CollectionEvent(CollectionEvent.COLLECTION_CHANGE));
}

]]>
</fx:Script>

<mx:DataGrid id="dg" >
<mx:columns>
<mx:DataGridColumn dataField="first" />
<mx:DataGridColumn dataField="second"/>
</mx:columns>
</mx:DataGrid>

<mx:Button id="addBtn" y="200" label="add" click="button1_clickHandler(event)"/>
< /s:Application>

Posted by 1010
00.Flex,Flash,ActionScript2013. 4. 12. 10:33
반응형

6 Tips for a Great Flex UX: Part 4

By Theresa Neil

Since the book focuses on rich interactions, I want to spend some time on Adobe Flex/AIR.

These tips are based on the best Flex resources I have found, and how you can use them to craft a great user experience. This is part 4 of 6:

Stock your Toolbox: 40+ Custom Flex Controls

Flex 3 includes a wide range of controls. Unfortunately, it doesn’t have all of the Essential Controls I use for RIA design. But fortunately, talented and industrious Flex developers have created numerous custom controls for Flex.
40_flex_custom_controls1

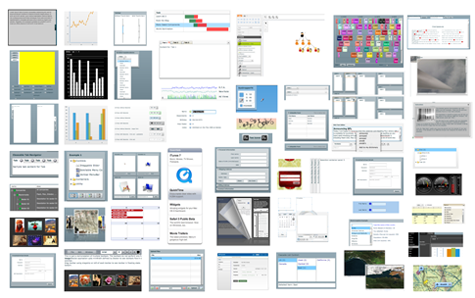
I pulled together a visual repository of custom Flex controls. Most of these controls were created to showcase certain functionality- not usability best practices. So some may need further refinement to comply with the usability principles discussed in the previous posts. Click on the picture for the demo.

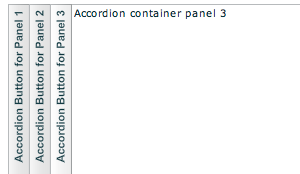
01. Accordions

accordion_with_custom_header
Complex Headers
accordion_horizontal
Horizontal Accordion
accordion_apple_style

Apple Style
More under ‘Collapsible Panels’

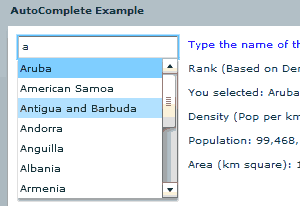
02. Auto Complete

auto_complete
More Examples

03. Bar Code Generator

barcode_reader

04. Build a List

build_a_list2

05. Calendar/Scheduler

calendar1
ILog Elixir
calendar
Ely Greenfield’s early Scheduler
calendar_scheduling
Adobe’s Scheduler on flexlib see flexlib.scheduling package

06. Captcha

captcha

07. Charts & Graphs

chart
3D charts by iLog Elixir
graph_drill
Chart Drill Down with Animation
dash
Dashed Line Series
graph_compress
Chart Offest
legend
Advanced Legend
scroll_zoom
Scroll and Zoom

08. Collapsible Panels

collapsible_panels
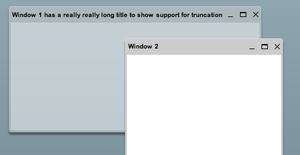
Window Shade- panels roll up and down
collapsible
Arc90’s Collapsible Panel
stacked_panels
Early Stacked Panels

09. Cover Flow

coverflow1
Doug McCune’s updated Cover Flow

10. Data Visualization

diagrammer
gauge
Kap IT Lab
ILog Elixir
BirdEye

11. Docking

dockable

12. Drop Down Menu with Scrolling

menu_scrolling

13. Find and Highlight Text

highlight
In flexlib as Highlighter

14. Fisheye Menu (like Mac Dock)

dock

15. Flip Card

flip

16. Floating

floating

17. Gantt Chart

gantt
ILOG Elixir Gantt
gantt
Doug McCune’s Early Gantt Chart

18. Inline Edit (Fields)

inline_edit
Early example by Ely Greenfield
inplace_edit
Modal editing variation by Ryan Swanson
* The hover invitation to edit on a field by field basis (like Flickr) works best for infrequent edits

19. Icon Loader

image_converter
On flexlib under Icon Loader

20. List/Tree Converter

list_tree
On flexlib under Convertible Tree List

21. Mask (text input and validation)

mask
On Adobe Flex Exchange

22. Multiple Document Interface (MDI)

mdi1
On flexlib under flexlib.mdi

23. Magnify

magnify1
magnify_big

24. Map Callouts

map_callouts

23. Pan and Zoom

pan_zoom

24. Page Turn

page_turn
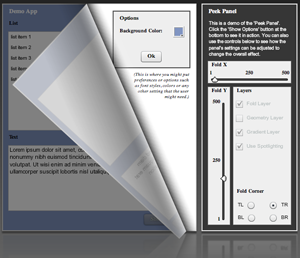
Peek Panel by Bill White (nice blog)
Ely Greenfield’s early FlexBook

Didier Braun’s PageFlip

25. Pivot Table

pivot
Satish’s Pivot Table
pivot_flexmonster
Flex Monster product

26. Resize

resize1
Resizeable and moveable window
resize
Resize Objects with ResizeManagerFX

27. Scrolling-Internal

scroll_panel
In flexlib as Drag Scrolling Canvas

28. Side Tabs/Vertical Tabs

side_tabs
Degrafa ToggleButtonBar vertical tabs
side_tabs_2
side_tabs_3
Vertical Tab Navigator

29. Sliders

slider_dual

30. Sliding Panel

slide_panel

Early example
Slide out menu with effects instead of states

31. Sparklines

sparkline
More examples:
Fusion Charts
Sherlock Informatics
Birdeye
19nates

32. Spell Check

spell_check
There is also a Spell Check component on Flex Exchange

33. Tabs (configurable)

tab_2

34. Text Prompt/ Watermark Fields

watermark
At flexlib under prompting TextInput

35. Tree Table

tree_table
Early Tree Grid

36. Time Picker

time
Alternate one on Flex Exchange as Time Chooser

37. Toolbars

toolbars

38. Trees

tree
Open branches by clicking on the row
Adding leaf notes
Showing XML
Rearranging nodes with drag and drop
Drag from a Grid to a Tree

39. Upload Files

upload

40. Vertical Browse

vertical_browse

Comment with your custom Flex controls

Posted by 1010
반응형

출처 : http://blog.naver.com/PostView.nhn?blogId=dennis0203&logNo=140133999738&redirect=Dlog&widgetTypeCall=true

에러내용

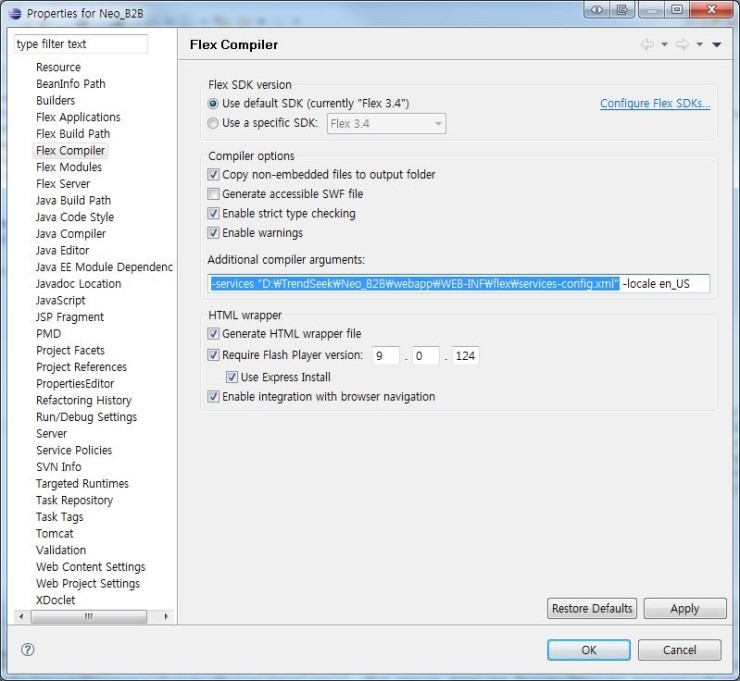
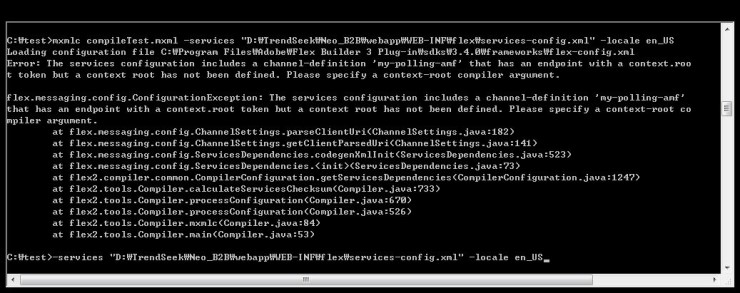
faultCode:InvokeFailed faultString:'[MessagingError message='Destination 'memberDao' either does not exist or the destination has no channels defined (and the application does not define any default channels.)']' faultDetail:'Couldn't establish a connection to 'memberDao''

이런 애러가 나는 이유는 플렉스 컴파일러가 services-config.xml을 못찾기 때문이다.

Properties - Flex Compiler - Additional compiler arguments 에 다음과 같이

-services "절대경로\service-config.xml" 을 추가해주면 문제는 해결된다.

또는 Navigator로 프로젝트 루트에 .actionScriptProperties 파일을 직접 수정해도 된다.

<compiler additionalCompilerArguments="-services & quot;/프로젝트 절대경로/services-config.xml&quot; -locale en_US" copyDependentFiles="true" enableModuleDebug="true" generateAccessible="true" htmlExpressInstall="true" htmlGenerate="true" htmlHistoryManagement="true" htmlPlayerVersion="9.0.124" htmlPlayerVersionCheck="true" outputFolderPath="bin-debug" sourceFolderPath="flex_src" strict="true" useApolloConfig="false" verifyDigests="true" warn="true">

추가로

그래도 컴파일이 되지 않는 경우가 있다.. 머가 하나 빠뜨린게 있어서..

콘솔로 컴파일 해보니 다음과 같은 에러가 난다. '...context root has not been defined...'

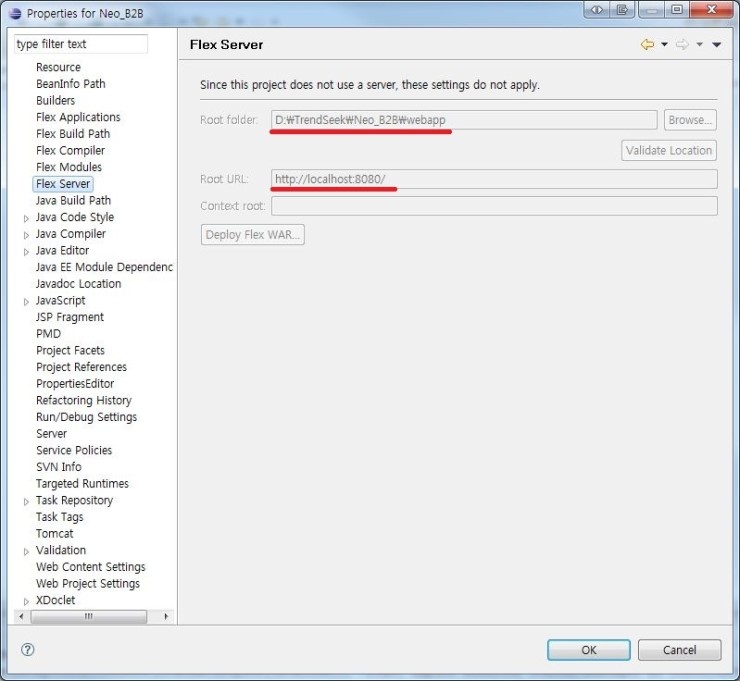
Properties - Flex Server 에 다음과 같이 입력하거나

Navigator로 프로젝트 루트에 .flexProperties 파일을 직접 수정하면 된다.

<flexProperties flexServerType="0" serverContextRoot="" serverRoot="D:/TrendSeek/Neo_B2B/webapp" serverRootURL="http://localhost:8080/" toolCompile="true" useServerFlexSDK="false" version="1"/>
Posted by 1010
반응형
Posted by 1010
반응형

Source Code:
BrightPoint Flex Library - This contains the complete collection of BrightPoint source code used in many of the projects that have been open sourced on this website
Coming Soon. Email support [at] brightpointinc [dot] com if you need a copy immediately.
Micro Charts - Source code for the Micro Charts that can be seen in the Gallery.
Coming Soon. Email support [at] brightpointinc [dot] com if you need a copy immediately.
Gauge Component - Source code for the Gauge Component that can be seen in the Gallery.
Coming Soon. Email support [at] brightpointinc [dot] com if you need a copy immediately.
Google Finance - Source code for the Google Finance Demo that can be seen in the Gallery.
Coming Soon. Email support [at] brightpointinc [dot] com if you need a copy immediately.

Posted by 1010
반응형

밑에 내용은 참고하고...중요한건...

Application 안에


/* Create dummy variables. */
   private var dragManager:DragManager;
   private var popUpManager:PopUpManager;

더미 객체 생성해주고...


Module 안에서

Alert.show("더이상 띄우지마세요~","module",4,null,null,null,4 , this.moduleFactory);


해주면됨..


------------------


If you use modules/sub apps and pop ups(Alert, ToolTip, TitleWindow, etc.) then you probably would be interested in some of the api changes that were introduced by the “Per-Module Style Management” feature in Flex 4. As I mentioned in my previous posts that StyleManager is no longer a singleton class and all modules and sub apps have their own instance of the Style Manager. So when you define a style in a module or sub app, the style definition is managed by the style manager instance of the module/sub app. This works well for most components but pop ups are a special case (all pop ups depend on the PopUpManager)

PopUpManager is a singleton and hence it lives in the top level application domain. When a component is displayed using the PopUpManager it will try to get its styles via the StyleManager in the top level application domain and so the styles that are defined in your module/sub app will be ignored. In order to provide a solution for this situation some apis were modified to accept a new optional parameter. Via the optional parameter the module factory can be specified (which is then internally used to locate the correct style manager). Some apis that were modified are:

  • mx.controls.Alert – show() method was modified to take an optional moduleFactory parameter
  • mx.manager.PopUpManager- createPopUp() and addPopUp() methods were modified to take an optional moduleFactory parameter

So if you are defining styles in your modules/sub apps, you should then pass the moduleFactory parameter to these methods. Lets look at some examples:

Following the code for a main app that loads one module(which shows Alert and TitleWindow) and one sub application (which shows ToolTip).

<?xml version="1.0" encoding="utf-8"?>
<s:Application xmlns:fx="http://ns.adobe.com/mxml/2009" xmlns:s="library://ns.adobe.com/flex/spark"
			   xmlns:mx="library://ns.adobe.com/flex/mx" width="600" height="500" >
	<fx:Style>
		@namespace s "library://ns.adobe.com/flex/spark";
		@namespace mx "library://ns.adobe.com/flex/mx";
 
		s|TitleWindow
		{
			chromeColor: #FF0000;
		}
	</fx:Style>
	<fx:Script>
		<![CDATA[
			import mx.events.FlexEvent;
			import mx.managers.PopUpManager;
 
			import spark.components.TitleWindow;
 
			private var placeHolder: PopUpManager;
			private var placeHolder2: TitleWindow;
 
			protected function popup_load_clickHandler(event:MouseEvent):void {
				if(mod_loader_pop.url == null) {
					mod_loader_pop.url = "PopUpModule.swf";
				} else {
					mod_loader_pop.loadModule();
				}
			}
 
			protected function popup_unload_clickHandler(event:MouseEvent):void {
				mod_loader_pop.unloadModule();
			}
 
			protected function toolTip_load_clickHandler(event:MouseEvent):void {
				swfLoader.load("ToolTipSubApp.swf");
			}
 
			protected function toolTip_unload_clickHandler(event:MouseEvent):void {
				swfLoader.unloadAndStop();
			}
		]]>
	</fx:Script>
	<s:layout>
		<s:VerticalLayout paddingTop="5" paddingLeft="5" />
	</s:layout>
	<s:HGroup>
		<s:Button id="popup_load" label="Load PopUp Module" click="popup_load_clickHandler(event)"/>
		<s:Button id="popup_unload" label="Unload PopUp Module" click="popup_unload_clickHandler(event)" />
		<s:Button id="toolTip_load" label="Load ToolTip App" click="toolTip_load_clickHandler(event)"/>
		<s:Button id="toolTip_unload" label="Unload ToolTip App" click="toolTip_unload_clickHandler(event)" />
	</s:HGroup>
	<s:HGroup>
		<mx:ModuleLoader id="mod_loader_pop"/>
		<mx:SWFLoader id="swfLoader" />
	</s:HGroup>
</s:Application>

If you notice, the above app sets the chromeColor for the TitleWindow to #FF0000. Also it does not use any Alert.

Let’s look at the code for the module (PopUpModule.mxml):

<?xml version="1.0" encoding="utf-8"?>
<mx:Module xmlns:fx="http://ns.adobe.com/mxml/2009" 
		   xmlns:s="library://ns.adobe.com/flex/spark" 
		   xmlns:mx="library://ns.adobe.com/flex/mx" >
	<fx:Style>
		@namespace s "library://ns.adobe.com/flex/spark";
		@namespace mx "library://ns.adobe.com/flex/mx";
 
		s|TitleWindow
		{
			fontSize: 32;
		}
	</fx:Style>
	<fx:Script>
		<![CDATA[
			import mx.events.CloseEvent;
			import mx.managers.PopUpManager;
			import spark.components.TitleWindow;
			import mx.controls.Alert;
 
			public var titleWindow: TitleWindow;
 
			protected function btn1_clickHandler(event:MouseEvent):void {
				Alert.show("clicked","module",4,null,null,null,4);
			}
 
			protected function btn2_clickHandler(event:MouseEvent):void
			{
				Alert.show("clicked","module",4,null,null,null,4 , this.moduleFactory);
			}
 
			protected function btn1_1_clickHandler(event:MouseEvent):void {
				titleWindow = PopUpManager.createPopUp(DisplayObject(systemManager),TitleWindow, true, null) as TitleWindow;
				titleWindow.title ="Title Window";
				titleWindow.width = 136;
				titleWindow.addEventListener(CloseEvent.CLOSE, closeMe, false, 0, true); 
			}
 
			protected function btn2_1_clickHandler(event:MouseEvent):void {
				titleWindow = PopUpManager.createPopUp(DisplayObject(systemManager),TitleWindow, true, null, moduleFactory) as TitleWindow;
				titleWindow.title ="Module Title Window";
				titleWindow.width = 426;
				titleWindow.addEventListener(CloseEvent.CLOSE, closeMe, false, 0, true); 
			}
 
			private function closeMe(e:CloseEvent):void {
				PopUpManager.removePopUp(titleWindow);
				titleWindow.removeEventListener(CloseEvent.CLOSE, closeMe);
			}
		]]>
	</fx:Script>
	<s:Panel width="100%" height="100%" title="PopUp Module ">
		<s:layout>
			<s:VerticalLayout paddingTop="5" paddingLeft="5" />
		</s:layout>
		<s:Button label="Show alert" id="btn1" click="btn1_clickHandler(event)" />
		<s:Button label="Show alert (with moduleFactory)" id="btn2" click="btn2_clickHandler(event)" />
		<s:Button label="show title window" id="btn1_1" click="btn1_1_clickHandler(event)" />
		<s:Button label="show title window (with moduleFactory)" id="btn2_1" click="btn2_1_clickHandler(event)" />
	</s:Panel>
</mx:Module>

The module defines the fontSize for the TitleWindow. Also it has two calls to Alert.show() (with and without the moduleFactory parameter). Similarly two calls to PopUpManager.createPopUp() (with and without the moduleFactory parameter). When you run the example code, you will notice the only the Alert and TitleWindow displayed with the moduleFactory parameter are able to pick the correct styles.

Before looking at the running swf, lets also look at the code for the sub application (ToolTipSubApp.mxml):

<?xml version="1.0" encoding="utf-8"?>
<s:Application xmlns:fx="http://ns.adobe.com/mxml/2009" height="200" width="200" 
			   xmlns:s="library://ns.adobe.com/flex/spark">
	<fx:Script>
		<![CDATA[
			import flash.events.MouseEvent;
 
			import mx.core.IToolTip;
			import mx.managers.ToolTipManager;
 
			public var mytoolTip:IToolTip;
 
			protected function panel1_mouseOverHandler(event:MouseEvent):void {
				if(useContext.selected) {
					mytoolTip = ToolTipManager.createToolTip("This is a custom tooltip in a sub App", 100, 100, null,this);
				} else {
					mytoolTip = ToolTipManager.createToolTip("This is a custom tooltip in a sub App", 100, 100, null);					
				}
			}
 
			protected function panel1_mouseOutHandler(event:MouseEvent):void {
				ToolTipManager.destroyToolTip(mytoolTip);
			}
		]]>
	</fx:Script>
	<fx:Style>
		@namespace ns "library://ns.adobe.com/flex/mx";
		@namespace s "library://ns.adobe.com/flex/spark";
 
		ns|ToolTip
		{
			color: blue;
			fontSize: 22;
		}
	</fx:Style>
	<s:layout>
		<s:VerticalLayout />
	</s:layout>
	<s:Panel width="100%" height="90%" mouseOver="panel1_mouseOverHandler(event)" mouseOut="panel1_mouseOutHandler(event)" title="Sub App">
	</s:Panel>
	<s:CheckBox label="pass context" id="useContext" />
</s:Application>

The sub app contains a Panel and a CheckBox, it also contains a style declaration for the ToolTip. When you move the mouse over the panel it displays a tooltip. By default it does not passes the context to the createToolTip method, but when the checkbox is selected it passes the content parameter. In the previous releases the context parameter was not used, but starting from Flex 4 it is being used to locate the current moduleFactory. Only when you pass the context (by selecting the checkbox) the styles for ToolTip defined in the sub app are picked.

Let’s look at the running swf now:


If you load the PopUp Module and click on the “Show alert” button, you would notice that the Alert doesn’t show up with the proper window or title bar. This reason for this broken appearance of Alert is that when the module factory is *not* passed, Alert will try to get its style from the top level style manager. But the main app does not use Alert, so the styles for Alert are not available in the main app. The solution is to pass the moduleFactory to the Alert.show() method. When you click on the “Show Alert (with moduleFactory)” button, you would see an Alert with correct Styles.

Also when you click on the “Show title window” button, you would notice that the title window shows up with chromeColor red but the fontSize style defined in the module is ignored. This reason for this is same (i.e. when the module factory is *not* passed, TitleWindow will try to get its style from the top level style manager. But the main app only sets chromeColor to red, and the modified fontSize style is not available in the main app) . The solution is to pass the moduleFactory to the PopUpManager.createPopUp() method. And when you click on the “Show title window (with moduleFactory)” button, you would see an TitleWindow with correct fontSize and chromeColor.

You would also notice similar behavioral difference when you load the Tool Tip app and play with the tool tip. The ToolTip styles defined in the sub app will only be picked when you pass the context (by selecting the checkbox) to the ToolTipManager.createToolTip() method. Passing the context sets the correct moduleFactory (which is then used to get to the correct style manager).

So, I hope you find this information useful and continue to create awesome looking and mind blowing apps.


Posted by 1010
반응형

출처 : http://hmjkor.tistory.com/323


flex 3.x

html
<object id="paramTest" classid="clsid:D27CDB6E-AE6D-11cf-96B8-444553540000" width="300" height="120">
<param name="movie" value="Example.swf" />
<param name="flashVars" value="
type=typevar&name=namevar" />
<object type="application/x-shockwave-flash"
data="Example.swf" width="300" height="120"
flashVars="type=typevar&name=namevar">
</object>


flex
creationComplete="init()"

private function init():void{
var type:String = Application.application.parameters.type as String;
var name : String = Application.application.parameters.name as String;
}


flex 4.x

html

var flashvars = {};

flashvars.type = "타입변수";
flashvars.name = "이름변수";


flex
creationComplete="init()"

private function init():void{
var type:String =
parameters.type as String;
var name : String = parameters.name as String;
}


flex 4.5

html

var flashvars = {};

flashvars.type = "타입변수";
flashvars.name = "이름변수";


flex
creationComplete="init()"

private function init():void{
var type:String =
FlexGlobals.topLevelApplication.parameters.type as String;
var name : String = FlexGlobals.topLevelApplication.parameters.name as String;
}
Posted by 1010
반응형

I haven't seen this well documented before, but if you're component was using the style manager and is throwing a bunch of warnings in Flex 4, you need to get the "global" style manager now. You probably see this error:
"3608: 'getStyleDeclaration' has been deprecated since 4.0. Please use 'IStyleManager2.getStyleDeclaration on a style manager instance'."

This is really easy to fix, but not extremely well documented. StyleManager is no longer a global singleton, but there is an instance of it running already at the top of your app. Flex 4 has a new static class called FlexGlobals. You can use that to get a reference to the top of your app and then get the instantiated one.

//Flex 3 code
StyleManager.getStyleDeclaration("someStyle");
//Flex 4 code
FlexGlobals.topLevelApplication.styleManager.getStyleDeclaration("someStyle");

출처 : http://www.jonathanrowny.com/journal/migrating-flex-4-stylemanager

Posted by 1010
반응형

flex


Note: You can specify a percentage value in the MXML width attribute, such as width="100%", but you cannot use a percentage value in the width property in ActionScript. Use the percentWidth property instead.


mxml 에서는 width 를 100% 로 줄수 있지만 ActionScript 에서는 100% 가 먹지 않으니...


percentWidth  이걸로 주면됨 (0~100) 으로...

ex:


_SWFLoader.percentWidth = 100;
_SWFLoader.percentHeight = 100;

Posted by 1010
00.Flex,Flash,ActionScript2013. 3. 28. 18:46
반응형

출처 : http://blog.jidolstar.com/527


Flash에서는 Remoting 호출을 위한 클래스가 존재하지 않는다. NetConnection을 가지고 할 수 있으나 Remoting 호출을 위한 전용 클래스가 아니기 때문에 실용적이지 못하다.

Flex에서는 Remoting 호출을 위해서 RemoteObject 클래스가 있다. 하지만 Flex 전용이라 Flash CS3, 4 개발자는 쓸 수 없다.

여기서는 NetConnection을 한번 wrapping하여 Remoting 호출을 구현한 Service 클래스를 소개한다. 이 Service 클래스는 byteArray.org 블로그 운영자가 만든 것으로 필요할 때 사용하면 매우 유용할 것이라 생각한다.

mport org.bytearray.remoting.Service;
import org.bytearray.remoting.PendingCall;
import org.bytearray.remoting.events.FaultEvent;
import org.bytearray.remoting.events.ResultEvent;

var service:Service=new Service("HelloRemoting",
"http://localhost:8001/amfphp/gateway.php");

var pendingCall:PendingCall=service.sayHello("remoting");
pendingCall.addEventListener(ResultEvent.RESULT,onResult);
pendingCall.addEventListener(FaultEvent.FAULT,onFault);

function onResult(e:ResultEvent):void{
trace(e.result);
}

function onFault(e:FaultEvent):void{
trace(e.fault);
}

사용법은 위처럼 너무 간단하다. AMFPHP, OpenAMF등으로 Remoting 서비스를 위한 서버를 구축하고 클라이언트는 Flash를 통해 개발하려는 사람에게 매우 유용할 듯 싶다. 또는 Flex가 아닌 순수 ActionScript 3.0 으로만 개발하려는 사람에게도 괜찮을 것 같다.


더 자세한 내용은 아래에 이 코드를 만든 원저자의 글을 보길 바란다.


Making Flash Remoting easier in Flash CS3

Posted by 1010
00.Flex,Flash,ActionScript2013. 3. 28. 18:36
반응형

Finally Updated: Embedding HTML in a Flex application using an IFrame

I've updated to Flex 2 (and which can also be used in Flex 3) the code by Christophe Coenraets for embedding HTML in a Flex application using an iframe.

You can see a demo of it here.

You can download the code here.

To run locally, first compile IFrameDemo.mxml. If you are using Flex Builder, unclick "Generate HTML wrapper file" in the Flex Compiler settings before publishing, since there is an existing HTML wrapper. After this, you can view IFrameDemo.html. If you get a "Security sandbox violation" error, you need to put the IFrameDemo directory in the local-trusted sandbox. See the Flex documentation for information on updating FlashPlayerTrust files.

There's been some comments below that say these instructions are no longer valid in Flex Builder 3. So check out the comments if these instructions don't work for you.

The one cause for limitations in this code is the use of opaque for wmode. I've seen reports of tabbing problems in the player, and running more than one player when using opaque wmode seems to degrade performance.

Check below the ad for some very important updates. The comments also have a lot of excellent details in them.

Update 1: see this post for an update to the code that needs less HTML changes, allows multiple HTML pages to be referenced at once, and controls the HTML visibility as needed.

Update 2 (an important update that I highly suggest you read): for my new views on iframes and Flex, read my post from July 2008: Don't Use IFrames for HTML in Flex

Posted by 1010
00.Flex,Flash,ActionScript2013. 3. 28. 16:05
반응형

컬럼차트
1. 컬럼에 라벨 넣기
http://blog.flexexamples.com/2008/01/23/displaying-the-labels-vertically-in-flex-columnchart-control/
2. Custom라벨
http://blog.flexexamples.com/2007/11/25/adding-custom-labels-to-a-flex-columnchart-controls-column-series/
3. 컬럼 width change
http://blog.flexexamples.com/2007/11/24/changing-the-default-column-width-ratio-of-a-columnchart-control-in-flex/
4. 컬럼 color mouseover change
http://blog.flexexamples.com/2007/11/24/setting-a-columnchart-controls-item-roll-over-color-and-item-selection-color-in-flex/
5. 컬럼 color gradient fill-in
http://blog.flexexamples.com/2007/11/22/creating-a-radial-gradient-fill-on-a-columnchart-controls-column-series-in-flex/
6. 컬럼 세부화
http://demo.quietlyscheming.com/drillDown/app.html


라인차트
1. 배경 격자
http://blog.flexexamples.com/2007/11/15/displaying-grid-lines-in-a-flex-linechart-control/
2. 라인 color change
http://blog.flexexamples.com/2007/11/13/changing-default-line-colors-in-a-flex-linechart-control/

3. 라인차트 레전드 체크박스

http://flexdevtips.blogspot.com/2009/10/linechart-with-checkbox-legend.html

4. 라인차트 동적으로 그리기

http://blog.daum.net/_blog/BlogTypeView.do?blogid=0AIhE&articleno=17147067#ajax_history_home

5. Add and remove lineseries - Flex LineChart

http://whatsmytitletoday.blogspot.com/2008/12/add-and-remove-lineseries-flex.html

6. 라인의 포인트에 동글뱅이, 네모등으로 표시기

http://thesunrises.tistory.com/58

7. Line Chart BackgroundElement color

http://kb.cnblogs.com/a/1587795/

8.레전드의 기준값을 여러개 주지

http://livedocs.adobe.com/flex/3/html/help.html?content=charts_types_12.html


파이차트
1. item클릭시 alert Display
http://blog.flexexamples.com/2007/11/15/displaying-a-pieseries-items-data-when-a-user-clicks-an-item-in-a-flex-piechart-control/
2. item mouseover시 value강조
http://blog.flexexamples.com/2007/11/10/exploding-wedges-in-a-flex-piechart-control-based-on-user-input/
3. PieChart Crea By Only AS3
http://blog.flexexamples.com/2007/11/07/creating-a-simple-piechart-in-flex-using-actionscript/
4. Custom Label Position
http://blog.flexexamples.com/2007/11/04/positioning-labels-in-a-flex-piechart-control/


바차트
1. Custom Label Axis
http://blog.flexexamples.com/2007/10/15/rotating-labels-in-a-flex-chart-axis-using-the-labelrotation-style/
2. Animate Bar Value
http://blog.flexexamples.com/2007/10/15/using-data-effects-to-animate-chart-data/
3. End of Bar Chart
http://blog.flexexamples.com/2007/10/11/creating-clustered-stacked-overlaid-and-100-bar-charts-in-flex-3/


CartesianDataCanvas 사용하여 차트에 선 그리기

1. FLEX 3 : Custom ColumnChart (adding display objects to chart)

http://www.codesofmylife.com/2011/03/02/flex-3-custom-columnchart-adding-display-objects-to-chart-2/

2. Drawing on chart controls

http://livedocs.adobe.com/flex/3/html/help.html?content=charts_eventsandeffects_13.html

3. Flex Chart Zoom Window

http://blog.ninjacaptain.com/tag/cartesiandatacanvas/


기타검색

Setting a ColumnChart control’s item roll over color and item selection color in Flex
: Chart 에 롤 오버 시, 색상이 변경
Adding a stroke around a ColumnSeries item in a Flex ColumnChart control
: 컬럼 시리즈에 외곽선 처리
Creating a radial gradient fill on a ColumnChart control’s column series in Flex
: 컬럼 색상에 그라데이션 처리
Animating a Flex PieChart control’s rotation when a user clicks on an item
: 파이 차트 클릭 시, 움직임 처리
Setting specific minimum and maximum ranges for a Flex LineChart control LinearAxis
: 라인 차트 최소, 최대값 범위 지정
Aligning data in a Flex LineChart control to horizontal and vertical tick marks
: 백그라운드에 색상 입력하기
Alternating background column colors in a Flex LineSeries chart
: 백그라운드에 색상 입력하기
Changing a chart legend’s direction
: 범례 표시
Creating a custom label function on a Flex LineChart control’s category axis
: 카테고리 축(X축) 라벨 표시
Changing the horizontal grid line frequency in a Flex LineChart control using the horizontalChangeCount style
: 수평 그리드 라인 처리
Displaying grid lines in a Flex LineChart control
: 그리드 라인 표시 처리
Alternating background row colors in a Flex LineSeries chart
: 백그라운드에 색상 입력하기
Customizing the horizontal grid lines in a Flex LineChart control
: 그리드 라인 색상 처리
Displaying a PieSeries item’s data when a user clicks an item in a Flex PieChart control
: 파이 차트 외곽선 및 아이템 클릭 시 표현
Changing default line colors in a Flex LineChart control
: 라인 차트 색상 바꾸기
Removing the default drop shadow from a LineChart chart in Flex
: 라인 차트 그림자 없애기
Controlling whether a LineChart should set its base value at zero
: 라인 차트 기준 값이 0일 때, 아닐 때
Drawing transparent pie wedges in a Flex PieChart control
: 파이 차트 부분 투명하게 만들기
Exploding all wedges in a Flex PieChart control using the explodeRadius property
: 파이 차트 아이템 간격 조정하기
Customizing radial strokes in a Flex PieChart control
: 파이 차트 아이템 간격 선색상, 굵기, Cap(?) 조정하기
Customizing callout strokes in a Flex PieChart control
: 파이 차트 아이템 지정 선색상, 굵기, Cap(?) 조정하기
Exploding wedges in a Flex PieChart control based on user input
: 파이 차트 아이템 선택 시, 선택된 아이템만 떨어져서 보여주기
Creating a simple PieChart in Flex using ActionScript
: ActionScript로 파이 차트 생성하기
Creating custom fills in a Flex PieChart control using the fillFunction property
: 파이 차트 아이템 색상 지정하기
Rotating a Flex PieChart control when a user clicks on an item
: 파이 차트 아이템 선택 시, 회전하며 표현하기
Exploding wedges in a Flex PieChart control
: 파이 차트 롤 오버 시, 음영 주기
Customizing strokes in a Flex PieChart control
: 파이 차트 외곽선 굵기 조정하기
Removing the drop shadow from a Flex PieChart control
: 파이 차트 그림자 없애기
Positioning labels in a Flex PieChart control
: 파이 차트 라벨 위치 조정하기
Creating a custom data tip function on a Flex PieChart control
: 롤 오버 시, Data Tip 한꺼번에 보여주기
Displaying all data tips at once on a Flex PieChart control
: Data Tip 한꺼번에 보여주기
Dropping labels in a Flex Chart
: 라벨(X 축) 드롭하여 보여주기
Rotating labels in a Flex chart axis using the labelRotation style
: 라벨(X, Y축) 회전 시키기
Changing the bar width ratio on a Flex Bar Chart
: 막대 차트 막대 넓이 조정하기
Using data effects to animate chart data
: 차트 표현 시, 효과 주기
Creating donut shaped Pie charts using the innerRadius style
: 파이 차트 도넛형태로 표현하기
Creating clustered, stacked, overlaid, and 100% Bar charts in Flex 3
: 막대 차트 표현 방법
Setting a Flex Pie Chart’s start angle
: 파이 차트 시작점(각도) 조정하기
Animating data changes in a Flex Pie Chart
: 파이 차트 변환 시, 효과 주기
Using special characters in your Flex applications
: 특수문자 표현하기

[출처] flex chart examples|작성자 고구 마

Posted by 1010
00.Flex,Flash,ActionScript2013. 3. 27. 13:15
반응형
Posted by 1010
00.Flex,Flash,ActionScript2013. 3. 21. 20:29
반응형

출처 : http://hks003.egloos.com/1957266


dataGrid 에서 아이템렌더(itemRenderer)를 사용하는 가장 기본적인 소스코드 인것같다. 아이템렌더 사용에 익숙해지기 위해서 많이 보아두어야 할듯 ^^

[결과물]


[Source file test.mxml]


[Source as file CustomComp.as ] 같은 디렉토리에


<원본출처: 바로가기>

Posted by 1010
00.Flex,Flash,ActionScript2013. 3. 21. 19:02
반응형
////////////////////////////////////////////////////////////////////////////////
//
//  Licensed to the Apache Software Foundation (ASF) under one or more
//  contributor license agreements.  See the NOTICE file distributed with
//  this work for additional information regarding copyright ownership.
//  The ASF licenses this file to You under the Apache License, Version 2.0
//  (the "License"); you may not use this file except in compliance with
//  the License.  You may obtain a copy of the License at
//
//      http://www.apache.org/licenses/LICENSE-2.0
//
//  Unless required by applicable law or agreed to in writing, software
//  distributed under the License is distributed on an "AS IS" BASIS,
//  WITHOUT WARRANTIES OR CONDITIONS OF ANY KIND, either express or implied.
//  See the License for the specific language governing permissions and
//  limitations under the License.
//
////////////////////////////////////////////////////////////////////////////////
package
{

import flash.display.Loader;
import flash.display.Sprite;
import flash.display.StageAlign;
import flash.display.StageScaleMode;
import flash.events.Event;
import flash.net.URLRequest;
import flash.system.ApplicationDomain;

/**
 *  Classes used by the networking protocols go here
 */
import mx.messaging.config.ConfigMap; ConfigMap;
import mx.messaging.messages.AcknowledgeMessage; AcknowledgeMessage;
import mx.messaging.messages.AcknowledgeMessageExt; AcknowledgeMessageExt;
import mx.messaging.messages.AsyncMessage; AsyncMessage;
import mx.messaging.messages.AsyncMessageExt; AsyncMessageExt;
import mx.messaging.messages.CommandMessage; CommandMessage;
import mx.messaging.messages.CommandMessageExt; CommandMessageExt;
import mx.messaging.messages.ErrorMessage; ErrorMessage;
import mx.messaging.messages.HTTPRequestMessage; HTTPRequestMessage;
import mx.messaging.messages.MessagePerformanceInfo; MessagePerformanceInfo;
import mx.messaging.messages.RemotingMessage; RemotingMessage;
import mx.messaging.messages.SOAPMessage; SOAPMessage;
import mx.core.mx_internal;

[SWF(width="600", height="700")]
public class air_Bootstrap_Managers extends Sprite
{
    /**
     *  The URL of the application SWF to be loaded
     *  by this bootstrap loader.
     */
    private static const applicationURL:String = "assets/zzaird_Bootstrap_Managers_Child.swf";

	public var portNumber : Number=80;
    /**
     *  Constructor.
     */
    public function air_Bootstrap_Managers()
    {
        super();

        if (ApplicationDomain.currentDomain.hasDefinition("mx.core::UIComponent"))
            throw new Error("UIComponent should not be in Bootstrap.");

        stage.scaleMode = StageScaleMode.NO_SCALE;
        stage.align = StageAlign.TOP_LEFT;

        if (!stage)
            isStageRoot = false;

        root.loaderInfo.addEventListener(Event.INIT, initHandler);
        
        if(root.loaderInfo != null && root.loaderInfo.parameters != null)
		{
			for (var ix:String in root.loaderInfo.parameters) 
			{
				if(ix == "port") 
				{
					portNumber = Number(root.loaderInfo.parameters[ix]);	
				}
			}
		}        
    }

    /**
     *  The Loader used to load the application SWF.
     */
    private var loader:Loader;

    /**
     *  @private
     *  Whether we are the stage root or not.
     *  We are only the stage root if we were the root
     *  of the first SWF that got loaded by the player.
     *  Otherwise we could be top level but not stage root
     *  if we are loaded by some other non-Flex shell
     *  or are sandboxed.
     */
    private var isStageRoot:Boolean = true;
    
	/**
	 *  @private
	 *  Whether the content is loaded
	 */
	private var contentLoaded:Boolean;    

    /**
     *  Called when BootstrapLoader.swf has been loaded.
     *  Starts loading the application SWF
     *  specified by applicationURL.
     */
    private function initHandler(event:Event):void
    {
        loader = new Loader();
        addChild(loader);
        loader.contentLoaderInfo.addEventListener(
            Event.COMPLETE, completeHandler);
        loader.load(new URLRequest(applicationURL));
        loader.addEventListener("mx.managers.SystemManager.isBootstrapRoot", bootstrapRootHandler);
        loader.addEventListener("mx.managers.SystemManager.isStageRoot", stageRootHandler);

        stage.addEventListener(Event.RESIZE, resizeHandler);
    }

    private function completeHandler(event:Event):void
    {
        contentLoaded = true;
    }

    private function bootstrapRootHandler(event:Event):void
    {
        // cancel event to indicate that the message was heard
        event.preventDefault();
    }

    private function stageRootHandler(event:Event):void
    {
        // cancel event to indicate that the message was heard
        if (!isStageRoot)
            event.preventDefault();
    }

    private function resizeHandler(event:Event):void
    {
		if (!contentLoaded)
			return;
			
        loader.width = stage.width;
        loader.height = stage.height;
        Object(loader.content).setActualSize(stage.width, stage.height);
    }
}

}


Posted by 1010