'분류 전체보기'에 해당되는 글 2491건

  1. 2009.01.28 고급 Bash 스크립팅 가이드
  2. 2009.01.28 input type="file"에서 찾아보기 버튼 바꾸기
  3. 2009.01.28 jQuery Core 기본예제
  4. 2009.01.28 Google AJAX Libraires API를 이용해서 자바스크립트 프레임워크 사용하기 3
  5. 2009.01.28 잘못된 Javascript의 사용에 대해서....
  6. 2009.01.28 팝업 또는 새창에 관한 정리
  7. 2009.01.28 XHTML 사용에 대한 정리
  8. 2009.01.28 제발 a href="#" 좀 쓰지 말자.... 1
  9. 2009.01.28 괜찮은 클라이언트사이드 IDE : aptana Studio 1
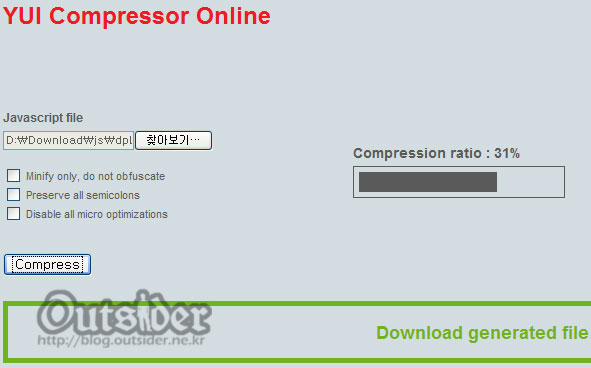
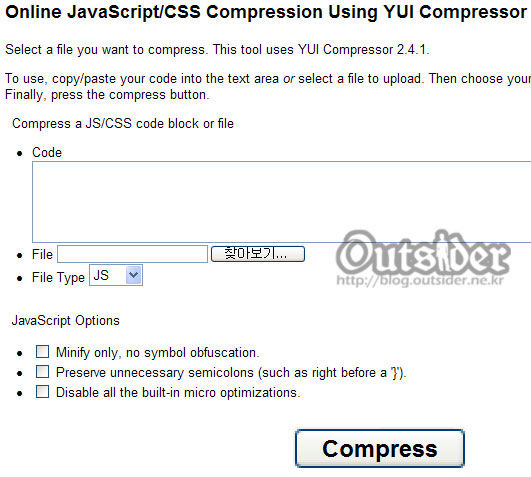
  10. 2009.01.28 외부 Javascript 파일 압축하기
  11. 2009.01.28 괜찮은 클라이언트사이드 IDE : aptana Studio
  12. 2009.01.28 script.aculo.us의 Sortable로 드래그앤드롭(DragNDrop) 사용하기
  13. 2009.01.28 여러 행 SELECT해서 INSERT 하기
  14. 2009.01.28 JDBC에 사용예제... 2
  15. 2009.01.28 Weblogic 8.1에서 Production mode 설정
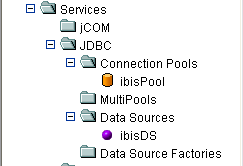
  16. 2009.01.28 Weblogic에서 DataSource로 디비(DB) 연결하기
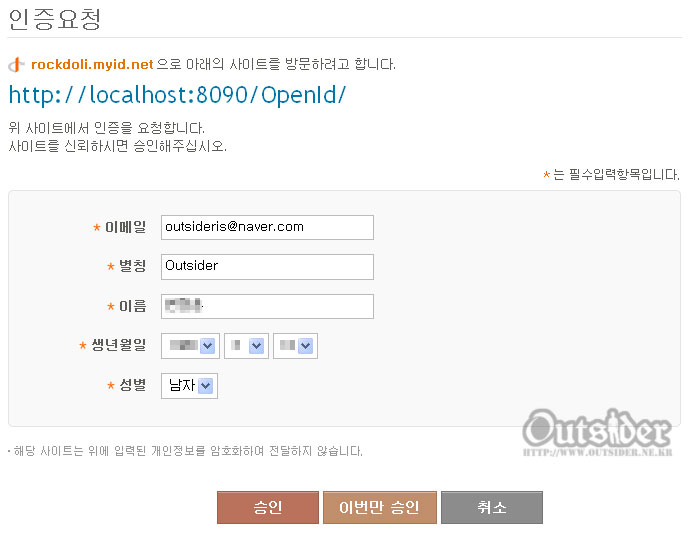
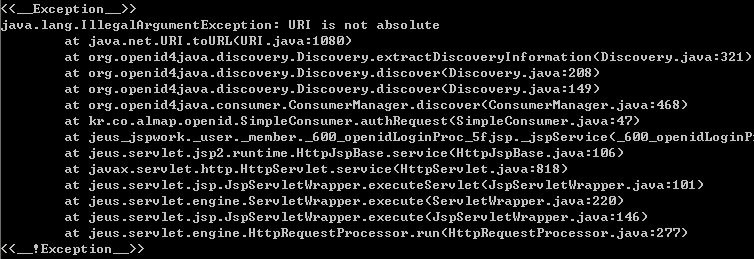
  17. 2009.01.28 Java로 OpenID Consumer 서비스 구현하기 #4 : OpenID4Java로 추가정보 요청하기
  18. 2009.01.28 cos.jar로 파일 업로드 하기
  19. 2009.01.28 리다이렉트 방식에 대해서.....
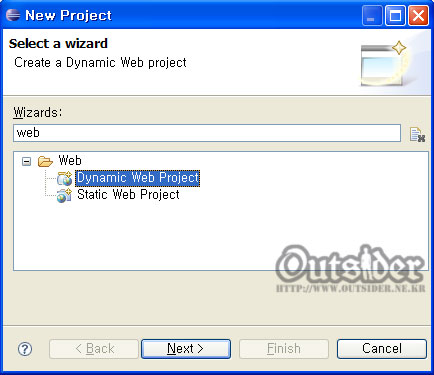
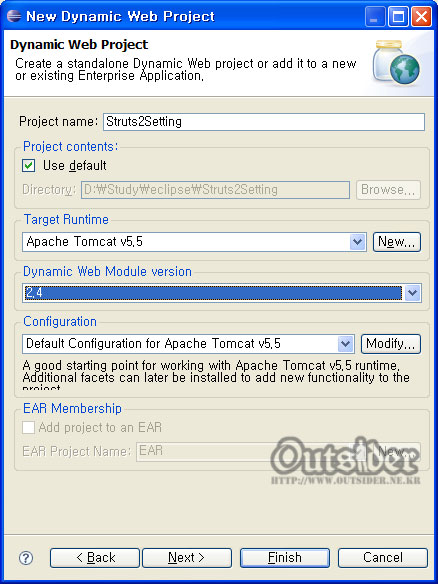
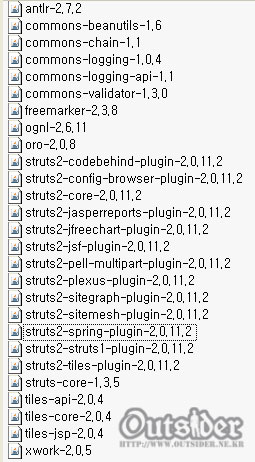
  20. 2009.01.28 Eclipse에 Struts 2 셋팅하기
  21. 2009.01.28 JDBC와 ODBC로 Java에서 MS Access(.mdb) 연결하기
  22. 2009.01.28 StringBuffer 객체 초기화하기
  23. 2009.01.28 PreparedStatement 객체 재사용하기
  24. 2009.01.28 JDBC Driver 리스트
  25. 2009.01.28 jQuery로 작업하기, 3부: jQuery와 Ajax로 RIA 만들기
  26. 2009.01.23 JavaTM EE (J2EE) Programming
  27. 2009.01.23 도메인이 다른 경우 자바스크립트 연동
  28. 2009.01.23 JSP 페이지 이동 4가지 방법 및 특성
  29. 2009.01.23 이클립스에서 스트럿츠 프레임 워크 세팅하기
  30. 2009.01.23 velocity로 java 문법 사용하기
98..Etc/shell script2009. 1. 28. 17:59
반응형

고급 Bash 스크립팅 가이드

Bash를 이용한 쉘 스크립팅 완전 가이드

Mendel Cooper

Brindlesoft

thegrendel (at) theriver.com

차현진

terminus (at) kldp.org

2001년 12월 16일

본 튜토리얼은 여러분이 Bash에 대해서 어떠한 사전 지식도 없다고 가정을 합니다만, 금방 중/고급 수준의 명령어들을 소개합니다(...유닉스의 슬기롭고 교훈적인 부분들을 배워 나가면서). 이 문서는 교과서나, 혼자 공부할 때 볼 수 있는 메뉴얼, 쉘 스크립팅 기술에 대한 레퍼런스및 소스로 쓰일 수 있습니다. 스크립트를 배우는 유일한 방법은 스크립트를 직접 짜 보는 것이다라는 전제하에, 연습문제와 아주 자세하게 주석 처리된 예제들로 능동적인 독자들의 참여를 유도할 것입니다.

이 문서의 최신 버전은 저자의 홈페이지에서 SGML 소스와 HTML을 "타르볼"형태로 얻을 수 있습니다. 고침 변경 사항은 change log를 참고하세요.

고친 과정
고침 0.1 2000년 6월 14일 고친이 mc
초기 릴리스.
고침 0.2 2000년 10월 30일 고친이 mc
버그 수정, 내용및 예제 스크립트 추가.
고침 0.3 2001년 2월 12일 고친이 mc
메이저 업데이트.
고침 0.4 2001년 7월 8일 고친이 mc
버그 수정, 더 많은 내용및 예제 추가 - 완전한 책 형태의 개정판.
고침 0.5 2001년 9월 3일 고친이 mc
메이저 업데이트. 버그 수정, 내용 추가, 장과 절을 재편성.
고침 1.0.11 2001년 12월 16일 고친이 mc
버그 수정, 재편성, 내용 추가. Stable release.

바치는 글

모든 마법의 근원인 Anita에게 이 책을 바칩니다.

차례
Part 1. 소개
1. 왜 쉘 프로그래밍을 해야 하죠?
2. #! 으로 시작하기
2.1. 스크립트 실행하기
2.2. 몸풀기 연습문제(Preliminary Exercises)
Part 2. 기초 단계
3. 종료와 종료 상태(Exit and Exit Status)
4. 특수 문자
5. 변수와 매개변수 소개
5.1. 변수 치환(Variable Substitution)
5.2. 변수 할당(Variable Assignment)
5.3. Bash 변수는 타입이 없다(untyped)
5.4. 특수한 변수 타입
6. 쿼우팅(quoting)
7. 테스트
7.1. 테스트(Test Constructs)
7.2. 파일 테스트 연산자
7.3. 비교 연산자(이진)
7.4. 중첩된 if/then 조건 테스트
7.5. 여러분이 테스트문을 얼마나 이해했는지 테스트 해보기
8. 연산자 이야기(Operations and Related Topics)
8.1. 연산자(Operators)
8.2. 숫자 상수(Numerical Constants)
Part 3. 중급 단계(Beyond the Basics)
9. 변수 재검토(Variables Revisited)
9.1. 내부 변수(Internal Variables)
9.2. 문자열 조작
9.3. 매개변수 치환(Parameter Substitution)
9.4. 변수 타입 지정: declaretypeset
9.5. 변수 간접 참조
9.6. $RANDOM: 랜덤한 정수 만들기
9.7. 이중소괄호(The Double Parentheses Construct)
10. 루프와 분기(Loops and Branches)
10.1. 루프
10.2. 중첩된 루프
10.3. 루프 제어
10.4. 테스트와 분기(Testing and Branching)
11. 내부 명령어(Internal Commands and Builtins)
11.1. 작업 제어 명령어
12. 외부 필터, 프로그램, 명령어
12.1. 기본 명령어
12.2. 복잡한 명령어
12.3. 시간/날짜 명령어
12.4. 텍스트 처리 명령어
12.5. 파일, 아카이브(archive) 명령어
12.6. 통신 명령어
12.7. 터미널 제어 명령어
12.8. 수학용 명령어
12.9. 기타 명령어
13. 시스템과 관리자용 명령어
14. 명령어 치환(Command Substitution)
15. 산술 확장(Arithmetic Expansion)
16. I/O 재지향
16.1. exec 쓰기
16.2. 코드 블럭 재지향
16.3. 응용
17. Here Documents
18. 쉬어가기
Part 4. 고급 주제들(Advanced Topics)
19. 정규 표현식(Regular Expressions)
19.1. 정규 표현식의 간략한 소개
19.2. Globbing
20. 서브쉘(Subshells)
21. 제한된 쉘(Restricted Shells)
22. 프로세스 치환(Process Substitution)
23. 함수
23.1. 복잡 함수와 함수의 복잡성(Complex Functions and Function Complexities)
23.2. 지역 변수와 재귀 함수(Local Variables and Recursion)
24. 별칭(Aliases)
25. 리스트(List Constructs)
26. 배열
27. 파일들
28. /dev 와 /proc
28.1. /dev
28.2. /proc
29. 제로와 널(Of Zeros and Nulls)
30. 디버깅
31. 옵션
32. 몇 가지 지저분한 것들(Gotchas)
33. 스타일 있게 스크립트 짜기
33.1. 비공식 쉘 스크립팅 스타일시트
34. 자질구레한 것들
34.1. 대화(interactive)형 모드와 비대화(non-interactive)형 모드 쉘과 스크립트
34.2. 쉘 래퍼(Shell Wrappers)
34.3. 테스트와 비교: 다른 방법
34.4. 최적화
34.5. 팁 모음(Assorted Tips)
34.6. 괴상한 것(Oddities)
34.7. 이식성 문제(Portability Issues)
34.8. 윈도우즈에서의 쉘 스크립팅
35. Bash, 버전 2
36. 후기(Endnotes)
36.1. 저자 후기(Author's Note)
36.2. 저자에 대해서
36.3. 이 책을 만드는데 쓴 도구들
36.3.1. 하드웨어
36.3.2. 소프트웨어와 프린트웨어
36.4. 크레딧
서지사항
A. 여러분들이 보내준 스크립트들(Contributed Scripts)
B. Sed 와 Awk 에 대한 간단한 입문서
B.1. Sed
B.2. Awk
C. 특별한 의미를 갖는 종료 코드
D. I/O와 I/O 재지향에 대한 자세한 소개
E. 지역화(Localization)
F. 샘플 .bashrc 파일
G. 도스(DOS) 배치 파일을 쉘 스크립트로 변환
H. 연습문제
I. Copyright
예 목록
2-1. cleanup: /var/log 에 있는 로그 파일들을 청소하는 스크립트
2-2. cleanup: 위 스크립트의 향상되고 일반화된 버전.
3-1. 종료/종료 상태
3-2. !으로 조건을 부정하기
4-1. 코드 블럭과 I/O 재지향
4-2. 코드 블럭의 결과를 파일로 저장하기
4-3. 최근 하루동안 변경된 파일들을 백업하기
5-1. 변수 할당과 치환
5-2. 평범한 변수 할당
5-3. 평범하고 재미있는 변수 할당
5-4. 정수? 문자열?
5-5. 위치 매개변수
5-6. wh, whois 도메인 네임 룩업
5-7. shift 쓰기
6-1. 이상한 변수를 에코하기
6-2. 이스케이프된 문자들
7-1. 무엇이 참인가?
7-2. [ ]test 의 동일함
7-3. (( ))로 산술식 테스트 하기
7-4. 산술 비교와 문자열 비교
7-5. 문자열이 인지 테스트 하기
7-6. zmost
8-1. 산술 연산자 쓰기
8-2. && 와 || 를 쓴 복합 조건 테스트
8-3. 숫자 상수 표기법:
9-1. $IFS 와 빈 칸
9-2. 타임 아웃 처리 입력
9-3. 타임 아웃 처리 입력, 한 번 더
9-4. 내가 루트인가?
9-5. arglist: $* 과 $@ 로 인자를 나열하기
9-6. 일관성 없는 $*$@의 동작
9-7. $IFS 가 비어 있을 때 $*$@
9-8. 밑줄 변수(underscore variable)
9-9. 그래픽 파일을 다른 포맷 확장자로 이름을 바꾸면서 변환
9-10. 매개변수 치환과 : 쓰기
9-11. 변수의 길이
9-12. 매개변수 치환에서의 패턴 매칭
9-13. 파일 확장자 바꾸기:
9-14. 임의의 문자열을 파싱하기 위해 패턴 매칭 사용하기
9-15. 문자열의 접두, 접미어에서 일치하는 패턴 찾기
9-16. declare를 써서 변수 타입 지정하기
9-17. 간접 참조
9-18. awk에게 간접 참조를 넘기기
9-19. 랜덤한 숫자 만들기
9-20. RANDOM 으로 주사위를 던지기
9-21. RANDOM 에 seed를 다시 지정해 주기
9-22. C 형태의 변수 조작
10-1. 간단한 for 루프
10-2. 각 [list] 항목이 인자를 두 개씩 갖는 for
10-3. Fileinfo: 변수에 들어 있는 파일 목록에 대해 동작
10-4. for 문에서 파일 조작하기
10-5. in [list]가 빠진 for
10-6. for 문의 [list]에 명령어 치환 쓰기
10-7. 이진 파일에 grep 걸기
10-8. 특정 디렉토리의 모든 바이너리 파일에 대해 원저작자(authorship)를 확인 하기
10-9. 디렉토리에 들어 있는 심볼릭 링크들을 나열하기
10-10. 디렉토리에 들어 있는 심볼릭 링크들을 파일로 저장하기
10-11. C 형태의 for 루프
10-12. 배치 모드로 efax 사용하기
10-13. 간단한 while 루프
10-14. 다른 while 루프
10-15. 다중 조건 while 루프
10-16. C 형태의 문법을 쓰는 while 루프
10-17. until 루프
10-18. 중첩된 루프
10-19. 루프에서 breakcontinue의 영향
10-20. 여러 단계의 루프에서 탈출하기
10-21. 더 상위 루프 레벨에서 계속하기(continue)
10-22. case 쓰기
10-23. case로 메뉴 만들기
10-24. case용 변수를 만들기 위해서 명령어 치환 쓰기
10-25. 간단한 문자열 매칭
10-26. 입력이 알파벳인지 확인하기
10-27. select로 메뉴 만들기
10-28. 함수에서 select를 써서 메뉴 만들기
11-1. printf가 실제로 쓰이는 예제
11-2. read로 변수 할당하기
11-3. read로 여러줄의 입력 넣기
11-4. read파일 재지향과 같이 쓰기
11-5. 현재 작업 디렉토리 변경하기
11-6. let으로 몇 가지 산술 연산을 하기.
11-7. eval의 효과 보여주기
11-8. 강제로 로그 아웃 시키기
11-9. "rot13" 버전
11-10. 위치 매개변수와 set 쓰기
11-11. 변수를 "언셋"(unset) 하기
11-12. export를 써서, 내장된 awk 스크립트에 변수를 전달하기
11-13. getopts로 스크립트로 넘어온 옵션과 인자 읽기
11-14. 데이타 파일 "포함하기"
11-15. exec 효과
11-16. 작업을 계속 해 나가기 전에 프로세스가 끝나길 기다리기
12-1. CDR 디스크를 구울 때 ls로 목차 만들기
12-2. Badname, 파일 이름에 일반적이지 않은 문자나 공백 문자를 포함하는 파일을 지우기.
12-3. inode 로 파일을 지우기
12-4. 시스템 로그 모니터링용 xargs 로그 파일
12-5. copydir. xargs로 현재 디렉토리를 다른 곳으로 복사하기
12-6. expr 쓰기
12-7. date 쓰기
12-8. 스크립트에서 두 파일을 비교하기 위해 cmp 쓰기.
12-9. 낱말 빈도수 분석
12-10. 10자리 랜덤한 숫자 만들기
12-11. tail로 시스템 로그를 모니터하기
12-12. 스크립트에서 "grep"을 에뮬레이트 하기
12-13. 목록에 들어 있는 낱말들의 유효성 확인하기
12-14. toupper: 파일 내용을 모두 대문자로 바꿈.
12-15. lowercase: 현재 디렉토리의 모든 파일명을 소문자로 바꿈.
12-16. du: 도스용 텍스트 파일을 UNIX용으로 변환.
12-17. rot13: 초허접(ultra-weak) 암호화, rot13.
12-18. "Crypto-Quote" 퍼즐 만들기
12-19. 파일 목록 형식화.
12-20. column 으로 디렉토리 목록을 형식화 하기
12-21. nl: 자기 자신에게 번호를 붙이는 스크립트.
12-22. cpio로 디렉토리 트리 옮기기
12-23. rpm 아카이브 풀기
12-24. C 소스에서 주석을 제거하기
12-25. /usr/X11R6/bin 둘러보기
12-26. basenamedirname
12-27. 인코드된 파일을 uudecode하기
12-28. 저당에 대한 월 상환액(Monthly Payment on a Mortgage)
12-29. 진법 변환(Base Conversion)
12-30. 다른 방법으로 bc 실행
12-31. seq로 루프에 인자를 만들어 넣기
12-32. 키보드 입력을 갈무리하기
12-33. 파일을 안전하게 지우기
12-34. m4 쓰기
13-1. 지움 글자(erase character) 세팅하기
13-2. 비밀스런 비밀번호: 터미널 에코 끄기
13-3. 키누름 알아내기
13-4. pidof 로 프로세스를 죽이기
13-5. CD 이미지 확인하기
13-6. 한 파일에서 한번에 파일 시스템 만들기
13-7. 새 하드 드라이브 추가하기
13-8. killall, /etc/rc .d/init.d 에서 인용
16-1. exec으로 표준입력을 재지향 하기
16-2. 재지향된 while 루프
16-3. 다른 형태의 재지향된 while 루프
16-4. 재지향된 until 루프
16-5. 재지향된 for 루프
16-6. 재지향된 for 루프(표준입력, 표준출력 모두 재지향됨)
16-7. 재지향된 if/then 테스트
16-8. 이벤트 로깅하기
17-1. dummyfile: 두 줄짜리 더미 파일 만들기
17-2. broadcast: 로그인 해 있는 모든 사람들에게 메세지 보내기
17-3. cat으로 여러 줄의 메세지 만들기
17-4. 탭이 지워진 여러 줄의 메세지
17-5. Here document에서 매개변수 치환하기
17-6. 매개변수 치환 끄기
17-7. upload: "Sunsite" incoming 디렉토리에 파일 한 쌍을 업로드
17-8. "아무개"(anonymous) Here Document
20-1. 서브쉘에서 변수의 통용 범위(variable scope)
20-2. 사용자 프로파일 보기
20-3. 프로세스를 서브쉘에서 병렬로 돌리기
21-1. 제한된 모드로 스크립트 돌리기
23-1. 간단한 함수
23-2. 매개변수를 받는 함수
23-3. 두 숫자중 큰 수 찾기
23-4. 숫자를 로마 숫자로 바꾸기
23-5. 함수에서 큰 값을 리턴하는지 테스트하기
23-6. 큰 두 정수 비교하기
23-7. 사용자 계정 이름에서 실제 이름을 알아내기
23-8. 지역 변수의 영역(Local variable visibility)
23-9. 지역 변수를 쓴 재귀 함수
24-1. 스크립트에서 쓰이는 별칭(alias)
24-2. unalias: 별칭을 설정, 해제하기
25-1. "and list"를 써서 명령어줄 인자 확인하기
25-2. "and list"를 써서 명령어줄 인자를 확인하는 다른 방법
25-3. "or lists""and list"를 같이 쓰기
26-1. 간단한 배열 사용법
26-2. 배열의 특별한 특성 몇 가지
26-3. 빈 배열과 빈 원소
26-4. 아주 오래된 친구: 버블 정렬(Bubble Sort)
26-5. 복잡한 배열 어플리케이션: 에라토스테네스의 체(Sieve of Erastosthenes)
26-6. 복잡한 배열 어플리케이션: 기묘한 수학 급수 탐색(Exploring a weird mathematical series)
26-7. 2차원 배열을 흉내낸 다음, 기울이기(tilting it)
28-1. 특정 PID와 관련있는 프로세스 찾기
28-2. 온라인 연결 상태
29-1. 쿠키 항아리를 숨기기
29-2. /dev/zero로 스왑 파일 세팅하기
29-3. 램디스크 만들기
30-1. 버그 있는 스크립트
30-2. test24, 버그가 있는 다른 스크립트
30-3. "assert"로 조건을 테스트하기
30-4. exit 잡아채기(Trapping at exit)
30-5. Control-C 가 눌렸을 때 깨끗이 청소하기
30-6. 변수 추적하기
32-1. 서브쉘 함정(Subshell Pitfalls)
34-1. 쉘 래퍼(shell wrapper)
34-2. 조금 복잡한 쉘 래퍼(shell wapper)
34-3. awk 스크립트 쉘 래퍼(shell wrapper)
34-4. Bash 스크립트에 내장된 펄
34-5. 하나로 묶인 Bash 스크립트와 펄 스크립트
34-6. 자신을 재귀적으로 부르는 스크립트
35-1. 문자열 확장
35-2. 간접 변수 참조 - 새로운 방법
35-3. 배열과 약간의 트릭을 써서 한 벌의 카드를 4명에게 랜덤하게 돌리기
A-1. manview: 포맷된 맨 페이지를 보는 스크립트
A-2. mailformat: 이메일 메세지를 포맷해서 보기
A-3. rn: 간단한 파일이름 변경 유틸리티
A-4. encryptedpw: 로컬에 암호화 되어 있는 비밀번호로 ftp 사이트에 파일을 업로드하는 스크립트
A-5. copy-cd: 데이타 CD를 복사하는 스크립트
A-6. days-between: 두 날짜 사이의 차이를 계산해 주는 스크립트
A-7. behead: 메일과 뉴스 메세지 헤더를 제거해 주는 스크립트
A-8. ftpget: ftp에서 파일을 다운로드 해 주는 스크립트
A-9. password: 8 글자짜리 랜덤한 비밀번호 생성 스크립트
A-10. fifo: 네임드 파이프를 써서 매일 백업해 주는 스크립트
A-11. 나머지 연산자로 소수 생성하기
A-12. tree: 디렉토리 구조를 트리 형태로 보여주는 스크립트
A-13. 문자열 함수들: C 형태의 문자열 함수
A-14. 객체 지향 데이타 베이스
F-1. 샘플 .bashrc 파일
G-1. VIEWDATA.BAT: 도스용 배치 파일
G-2. viewdata.sh: VIEWDATA.BAT 의 스크립트 버전
Posted by 1010
반응형

웹에서 파일을 첨부하려면 <input type="file" />을 사용한다. 자동으로 찾아보기 버튼이 생기고 파일브라우징이 가능하다.

사용자 삽입 이미지

input type=file은 약간의 특징이 있다. 파일을 업로드하는 기능을 가진 특성때문에 다른 input타입과는 다르게 약간의 제약이 있다. 그건 스크립트를 이용해서 제어하는 것을 막고 있는 것인데 그것 때문에 다루기가 좀 쉽지 않다. 하지만 그것보다 문제되는게 저 "찾아보기..."버튼이다. 점점 디자인이 강조되고 있는 가운데 기본적으로 뜨는 찾아보기 버튼은 웹디자이너에게는 걸리적거리는 것 같다.

항상 디자인을 받을 때마다 찾아보기 버튼대신에 이미지버튼으로 된 디자인이 왔었는데 이번에 여러가지 테스트를 해보았다. 결론적으로 말하자면 찾아보기버튼은 바꿀수 없다.(적어도 내 지식 수준에서는...) 물론 이에대한 태클도 있을꺼라고 생각한다.


가장 쉽게 생각할 수 있는 것이 input type=file을 input type=text와 이미지버튼의 조합으로 대치하는 것이다.

  1. <input type="text" size="30" id="txt" /> 
  2. <img src="" onclick="document.getElementById('file').click();" /> 
  3. <input type="file" size="30" id="file" style="display:none;" onchange="document.getElementById('txt').value=this.value;" /> 

위와같은 모양이다. 인풋파일은 보기에는 인풋텍스트와 버튼의 조합형태이기 때문에 앞에 인풋텍스트를 넣어놓고 그옆에 디자인된 이미지 버튼을 넣은 뒤에 인풋파일은 스타일을 주어서 보이지 않게 하는 것이다. 이미지 버튼을 onclick했을 때 인풋타입의 객체에 click()이벤트를 주는 구조이다. 파일선택하는 창도 아주 잘 뜬다. 인풋파일에 onchange이벤트를 주어서 파일선택해서 값이 들어갈때 인풋텍스트로 값을 복사해서 넣어서 찾아보기버튼을 이미지로 교체한 듯한 효과를 주는 것이다.

실제적으로 인터넷을 찾아보면 찾아보기 버튼 교체에 대한 위의 소스가 엄청 많다. 잘못된 정보의 대표적인 예라고 할 수가 있다. 서버쪽은 제대로 돌려보지도 않고 클라이언트쪽만 테스트 해보고 잘된다고 올려진 소스를 서로 계속 퍼나르고 있는 상황이다. ㅡ..ㅡ

인풋파일은 보안문제상 Read Only이기 때문에 스트립트로 값을 입력하는 것을 허용하지 않는다. 소스상으로는 아주 잘 돌아가는 거서럼 보이지만 막상 submit버튼을 누르면 전송이 되는 것이 아니라 인풋파일의 값이 clear되어 버린다. 스크립트로 실행한 것은 초기화 시켜버리고 다시한번 submit버튼을 눌러야 POST전송이 일어난다.

쉽게 말하면 이구조로는 절대 파일 업로드를 받을 수가 없다.


그래서 다른 방법을 찾기 시작했다.

  1. <input type="text" size="30" id="txt" /> 
  2. <span style="overflow:hidden; width:61; height:20; background-image:url(/images/button.gif);"> 
  3.     <input  type='file' id="file" style="width:0; height:20; filter:alpha(opacity=0);" onchange='document.getElementById('txt').value=this.value;'> 
  4. </span>   

그래서 찾은 방법이 위의 방법이다. 방법은 앞에서 얘기했던것과 거의 비슷하다. 파일명을 보여줄 인풋텍스트를 하나 보여주고 그 뒤에 span을 둔다. span은 찾아보기 버튼을 대체해 주는 역할을 한다. 크기를 정해주고 배경색으로 버튼 이미지를 지정해 준다. 그리고 그 span안에 인풋파일을 넣어주는데 여기서 스타일로 width를 0px를 주고 alpha값으로 투명도를 0을 준 것이다.

이렇게 하면 인풋파일의 파일명이 나타나는 부분의 width가 0px가 되기 때문에 나타나지 않고 찾아보기 버튼의 크기는 조절할 수가 없기 때문에 앞에 넣은 인풋파일뒤에 바로 찾아보기 버튼이 위치한다. 하지만 투명도가 0이기 때문에 실제 위치하고 있기는 하지만 보이지가 않고 span의 배경인 버튼 이미지가 보이는 구조이다.

하지만 여기에 약간의 문제가 있다. 일단 여기서 중요한 역할인 투명도를 나타내는 alpha값은 IE에서만 유효한 스타일값이다. Firefox에서는 투명도를 -moz-opacity:0; 를 사용해야 하는데 이걸 사용해도 Firefox에서는 IE같은 효과가 나지 않는다. 배경으로 지정된 이미지버튼이 나오지 않는다. 머 이것만으로도 요즘같은 분위기에서는 의미가 없다고 본다. 그리고 눈에 보이는 버튼이 실제버튼이 아니고 실제버튼은 투명하게 있는 버튼이기 때문에 클릭을 하면 실제 버튼보다 작게 점선이 생겨서 보기에 별로이다. 또한 저 소스에서는 width가 61로 설정이 되어있는데 브라우저마다 다른지는 모르겠지만 IE7에서는 찾아보기 버튼이 103px이기 때문에 이미지버튼도 103에 맞추어 져야 크기에 맞출수 있을것 같다.

앞의 방법보다는 좀 낫긴 하지만 이 방법에도 확실히 문제가 있다.


하지만 이런 방식으로 실제 구현해서 사용하려고 하면 더 큰 문제에 부딪히게 된다. 인풋파일의 경우 파일을 선택했다가 올리기가 싫어지면 그냥 지워주면 되는데 여기서는 편법을 써서 인풋텍스트를 눈앞에 보여주었기 때문에 지워도 인풋텍스트만 지워질뿐 실제 인풋파일의 내용이 지워진것이 아니다. 결국은 아예 한번 선택하면 지우지 못하도록 막아주던가(이렇게 할수는 있지만 기존의 사용자경험을 깨버린다고 생각하기에 별로 하고싶지 않았다.) 인풋텍스트의 값을 지우면 인풋파일의 값도 지워줘야 한다. 

그럴려면 천상 스크립트로 값을 지워져야 하는데 보안문제 때문에 인풋파일은 스크립트가 값을 바꿔버리는 것을 허용하지 않는다. 다른거에 하던 식으로

document.getElementById("file").value = "";

는 아예 먹지도 않는다.  대신에...

  1. document.getElementById("file").select();  
  2. //document.execCommand('Delete');     
  3. document.selection.clear();  

위와 같은 자바스크립트 코드를 이용하면 해당 인풋파일의 값을 지워줄 수 있다. 2번줄에 주석처리한 부분은 3번줄 대신 2번줄을 사용해도 된다. 둘줄 하나로 하면 된다. 물론 이 소스

(어찌된 일인지 글을 여기까지만 작성된채 공개됐다. 그럴리가 없는데 약간의 문제가 있었던듯.. 기억을 더듬어 글을 마무리 한다. 2008.7.17)
도 돌아가지 않는다. 위에 말한대로 보안문제 때문에 submit()할 때 문제가 생긴다.

인터넷을 찾아보다 보면 CSS를 이용해서 수십줄로 바꾸는 것도 있긴 한데 해보진 않았다. 버튼 하나 바꿀려고 여러문제는 가지게 되거나 아니면 수십줄의 코드를 넣는게 과연 의미가 있을까 하는 생각이 든다.

차라리 그 노력이면 요즘 게시판 등에서 많이 하는 추세대로 플래시 컴포넌트를 이용해서 바로바로 파일을 올릴수 있게 만드는 것이 훨씬 좋은 선택이라고 생각된다. 찾아보기 버튼은 왠만하면 그냥 쓰자.
Posted by 1010
반응형
<jQuery Core>

1. jQuery( html )  Returns: jQuery
jQuery( html ), 실행후 jQuery객체를 반환

Create DOM elements on-the-fly from the provided String of raw HTML.
주어진 html을 가지고 빠르게 문서 원소를 생성한다.
그리고 jQuery객체로서 그 것을 반환한다.
이말은 그것을 이어서 jQuery의 다른 함수와 함께 사용가능하다는 뜻이다.

<!DOCTYPE HTML PUBLIC "-//W3C//DTD HTML 4.01 Transitional//EN"
                   "http://www.w3.org/TR/html4/loose.dtd">
<html>
<head>
  <script src="http://code.jquery.com/jquery-latest.js"></script>
  <script>
  $(document).ready(function(){
   $("<div><p>Hello</p></div>").appendTo("body");
  });
  </script>

</head>
<body>
</body>
</html>


2. jQuery( elements )  Returns: jQuery
jQuery( 원소 ) jQuery( 원소.원소.원소 ), 실행후 jQuery객체를 반환

Wrap jQuery functionality around a single or multiple DOM Element(s).
하나 또는 다단계의 문서원소로서 사용할수 있다.

<!DOCTYPE HTML PUBLIC "-//W3C//DTD HTML 4.01 Transitional//EN"
                   "http://www.w3.org/TR/html4/loose.dtd">
<html>
<head>
  <script src="http://code.jquery.com/jquery-latest.js"></script>
  <script>
  $(document).ready(function(){
   $(document.body).css( "background", "black" );
  });
  </script>

</head>
<body>
</body>
</html>


3. jQuery( callback )  Returns: jQuery
jQuery( 콜백함수 ), 실행후 jQuery객체를 반환

A shorthand for $(document).ready().
$()은 $(document).ready() 의 짧은 표현으로 사용가능하다.
$(document).ready() 은 문서가 사용가능한 시점을 자동으로 인식하여 주어진 콜백 함수를 동작시킨다.
콜백함수란 지정된 행위가 끝난다음 자동적으로 실행될 함수를 의미한다.

<!DOCTYPE HTML PUBLIC "-//W3C//DTD HTML 4.01 Transitional//EN"
                   "http://www.w3.org/TR/html4/loose.dtd">
<html>
<head>
  <script src="http://code.jquery.com/jquery-latest.js"></script>
  <script>
  $(function(){

   $(document.body).css( "background", "black" );
  });
  </script>

</head>
<body>
</body>
</html>


4. each( callback )  Returns: jQuery
each( 콜백함수 ),  실행후 jQuery객체를 반환

Execute a function within the context of every matched element.
매치 되어진 모든 원소에 대해 주어진 콜백 함수를 실행한다. 루프의 의미이다.

<!DOCTYPE HTML PUBLIC "-//W3C//DTD HTML 4.01 Transitional//EN"
                   "http://www.w3.org/TR/html4/loose.dtd">
<html>
<head>
  <script src="http://code.jquery.com/jquery-latest.js"></script>
  <script>
  $(document).ready(function(){

   $(document.body).click(function () {
     $("div").each(function (i) {
       if (this.style.color != "blue") {
         this.style.color = "blue";
       } else {
         this.style.color = "";
       }
     });
   });

  });
  </script>
  <style>
  div { color:red; text-align:center; cursor:pointer;
       font-weight:bolder; width:300px; }
  </style>
</head>
<body>
  <div>Click here</div>
  <div>to iterate through</div>
  <div>these divs.</div>
</body>
</html>


5. size( )  Returns: Number
size( ), 실행후 숫자를 반환

The number of elements in the jQuery object.
매치되어진 원소들의 갯수를 반환한다.

<!DOCTYPE HTML PUBLIC "-//W3C//DTD HTML 4.01 Transitional//EN"
                   "http://www.w3.org/TR/html4/loose.dtd">
<html>
<head>
  <script src="http://code.jquery.com/jquery-latest.js"></script>
  <script>
  $(document).ready(function(){

   $(document.body).click(function () {
     $(document.body).append($("<div>"));
     var n = $("div").size();
     $("span").text("There are " + n + " divs." +
                    "Click to add more.");
   }).click(); // trigger the click to start

  });
  </script>
  <style>
  body { cursor:pointer; }
  div { width:50px; height:30px; margin:5px; float:left;
       background:blue; }
  span { color:red; }
  </style>
</head>
<body>
  <span></span>
  <div></div>
</body>
</html>


6. length  Returns: Number
length, 실행후 숫자를 반환

The number of elements in the jQuery object.
매치되어진 원소들의 갯수를 반환한다.

<!DOCTYPE HTML PUBLIC "-//W3C//DTD HTML 4.01 Transitional//EN"
                   "http://www.w3.org/TR/html4/loose.dtd">
<html>
<head>
  <script src="http://code.jquery.com/jquery-latest.js"></script>
  <script>
  $(document).ready(function(){

   $(document.body).click(function () {
     $(document.body).append($("<div>"));
     var n = $("div").length;
     $("span").text("There are " + n + " divs." +
                    "Click to add more.");
   }).trigger('click'); // trigger the click to start

  });
  </script>
  <style>
  body { cursor:pointer; }
  div { width:50px; height:30px; margin:5px; float:left;
       background:green; }
  span { color:red; }
  </style>
</head>
<body>
  <span></span>
  <div></div>
</body>
</html>


7. get( )  Returns: Array<Element>
get( ), 실행후 원소 배열 반환

Access all matched DOM elements.
매치되는 모든 문서 원소들을 배열로 반환한다.

<!DOCTYPE HTML PUBLIC "-//W3C//DTD HTML 4.01 Transitional//EN"
                   "http://www.w3.org/TR/html4/loose.dtd">
<html>
<head>
  <script src="http://code.jquery.com/jquery-latest.js"></script>
  <script>
  $(document).ready(function(){

   function disp(divs) {
     var a = [];
     for (var i = 0; i < divs.length; i++) {
       a.push(divs[i].innerHTML);
     }
     $("span").text(a.join(" "));
   }

   disp( $("div").get().reverse() );

  });
  </script>
  <style>
  span { color:red; }
  </style>
</head>
<body>
  Reversed - <span></span>
  <div>One</div>
  <div>Two</div>
  <div>Three</div>
</body>
</html>


8. get( index )  Returns: Element
get( 인덱스 ), 실행후 매치 되는 원소를 반환

Access a single matched DOM element at a specified index in the matched set.
매치되는 원소들 중 주어진 인덱스에 해당하는 하나의 원소만 반환한다.

<!DOCTYPE HTML PUBLIC "-//W3C//DTD HTML 4.01 Transitional//EN"
                   "http://www.w3.org/TR/html4/loose.dtd">
<html>
<head>
  <script src="http://code.jquery.com/jquery-latest.js"></script>
  <script>
  $(document).ready(function(){

   $("*", document.body).click(function (e) {
     e.stopPropagation();
     var domEl = $(this).get(0);
     $("span:first").text("Clicked on - " + domEl.tagName);
   });

  });
  </script>
  <style>
  span { color:red; }
  div { background:yellow; }
  </style>
</head>
<body>
  <span> </span>
  <p>In this paragraph is an <span>important</span> section</p>
  <div><input type="text" /></div>
</body>
</html>


9. index( subject )  Returns: Number
index( 객체 ), 실행후 숫자를 반환

Searches every matched element for the object and returns the index of the element, if found, starting with zero.
매치되어진 원소들에 대해 주어진 객체와 동일한것을 검색하여,
존재하면 그 원소들중에 몇번째에 해당하는가 하는 인덱스 번호를 반환한다.
인덱스는 0부터 시작한다.

<!DOCTYPE HTML PUBLIC "-//W3C//DTD HTML 4.01 Transitional//EN"
                   "http://www.w3.org/TR/html4/loose.dtd">
<html>
<head>
  <script src="http://code.jquery.com/jquery-latest.js"></script>
  <script>
  $(document).ready(function(){

   $("div").click(function () {
     // this is the dom element clicked
     var index = $("div").index(this);
     $("span").text("That was div index #" + index);
   });

  });
  </script>
  <style>
  div { background:yellow; margin:5px; }
  span { color:red; }
  </style>
</head>
<body>
  <span>Click a div!</span>
  <div>First div</div>
  <div>Second div</div>
  <div>Third div</div>
</body>
</html>


10. jQuery.fn.extend( object )  Returns: jQuery
jQuery.fn.extend( 객체), 실행후 jQuery객체를 반환

Extends the jQuery element set to provide new methods (used to make a typical jQuery plugin).
제이쿼리에 새로운 함수를 확장한다.(플러그인으로 만들어 사용한다.)


<!DOCTYPE HTML PUBLIC "-//W3C//DTD HTML 4.01 Transitional//EN"
                   "http://www.w3.org/TR/html4/loose.dtd">
<html>
<head>
  <script src="http://code.jquery.com/jquery-latest.js"></script>
  <script>
  jQuery.fn.extend({
   check: function() {
     return this.each(function() { this.checked = true; });
   },
   uncheck: function() {
     return this.each(function() { this.checked = false; });
   }
  });

  $(function(){

   $("#button1").click(function(){

     $('input').check();
   });

   $("#button2").click(function(){

     $('input').uncheck();
   });
  });
  </script>
  <style>
  div { background:yellow; margin:5px; }
  span { color:red; }
  </style>
</head>
<body>
<form>
<input type="checkbox" name="">
</form>
<input type='button' id='button1' value='전체선택'>
<input type='button' id='button2' value='전체해제'>
</body>
</html>


11. jQuery.extend( object )  Returns: jQuery
jQuery.fn.extend( 객체), 실행후 jQuery객체를 반환

Extends the jQuery object itself.
제이쿼리 자체를 확장
아직은 잘 모르겟음


14. jQuery.noConflict( )  Returns: jQuery
jQuery.noConflict( ),  실행후 jQuery객체를 반환

Run this function to give control of the $ variable back to whichever library first implemented it.
아직은 잘 모르겠음


15. jQuery.noConflict( extreme )  Returns: jQuery
jQuery.noConflict( extreme ), 실행후 jQuery객체를 반환

Revert control of both the $ and jQuery variables to their original owners. Use with discretion.
아직은 잘 모르겠음


<Selectors>=>객체 선책

1. #id  Returns: Element
#아이디, 실행후 원소 반환

Matches a single element with the given id attribute.
주어진 아이디에 매치되는 원소하나를 찾아 반환

<!DOCTYPE HTML PUBLIC "-//W3C//DTD HTML 4.01 Transitional//EN"
                   "http://www.w3.org/TR/html4/loose.dtd">
<html>
<head>
  <script src="http://code.jquery.com/jquery-latest.js"></script>
  <script>
  $(document).ready(function(){
   $("#myDiv").css("border","3px solid red");
  });
  </script>
  <style>
  div {
   width: 90px;
   height: 90px;
   float:left;
   padding: 5px;
   margin: 5px;
   background-color: #EEEEEE;
  }
  </style>
</head>
<body>
  <div id="notMe"><p>id="notMe"</p></div>
  <div id="myDiv">id="myDiv"</div>
</body>
</html>


2. element  Returns: Array<Element>
원소명, 실행후 원소 배열 반환

Matches all elements with the given name.
주어진 원소명에 매치되는 모든 원소를 배열로 반환

<!DOCTYPE HTML PUBLIC "-//W3C//DTD HTML 4.01 Transitional//EN"
                   "http://www.w3.org/TR/html4/loose.dtd">
<html>
<head>
  <script src="http://code.jquery.com/jquery-latest.js"></script>
  <script>
  $(document).ready(function(){
   $("div").css("border","3px solid red");
  });
  </script>
  <style>
  div,span {
   width: 60px;
   height: 60px;
   float:left;
   padding: 10px;
   margin: 10px;
   background-color: #EEEEEE;
  }
  </style>
</head>
<body>
  <div>DIV1</div>
  <div>DIV2</div>
  <span>SPAN</span>
</body>
</html>


3. .class  Returns: Array<Element>
클래스명, 실행후 원소배열로 반환

Matches all elements with the given class.
주어진 클래스명에 매치되는 모든 원소를 배열로 반환

<!DOCTYPE HTML PUBLIC "-//W3C//DTD HTML 4.01 Transitional//EN"
                   "http://www.w3.org/TR/html4/loose.dtd">
<html>
<head>
  <script src="http://code.jquery.com/jquery-latest.js"></script>
  <script>
  $(document).ready(function(){
   $(".myClass").css("border","3px solid red");
  });
  </script>
  <style>
  div,span {
   width: 150px;
   height: 60px;
   float:left;
   padding: 10px;
   margin: 10px;
   background-color: #EEEEEE;
  }
  </style>
</head>
<body>
  <div class="notMe">div class="notMe"</div>
  <div class="myClass">div class="myClass"</div>
  <span class="myClass">span class="myClass"</span>
</body>
</html>


4. *  Returns: Array<Element>
모든것, 실행후 원소 배열로 반환

Matches all elements.
매치되는 모든 원소를 반환한다.

<!DOCTYPE HTML PUBLIC "-//W3C//DTD HTML 4.01 Transitional//EN"
                   "http://www.w3.org/TR/html4/loose.dtd">
<html>
<head>
  <script src="http://code.jquery.com/jquery-latest.js"></script>
  <script>
  $(document).ready(function(){
   $("*").css("border","3px solid red");
  });
  </script>
  <style>
  div,span,p {
   width: 150px;
   height: 60px;
   float:left;
   padding: 10px;
   margin: 10px;
   background-color: #EEEEEE;
  }
  </style>
</head>
<body>
  <div>DIV</div>
  <span>SPAN</span>
  <p>P <button>Button</button></p>
</body>
</html>


5. selector1, selector2, selectorN  Returns: Array<Element>
selector1, selector2, selectorN, 실행후 원소배열로 반환

Matches the combined results of all the specified selectors.
주어진 것들에 대해 매치되는 모든 원소를 배열로 반환
구분자는 ,

<!DOCTYPE HTML PUBLIC "-//W3C//DTD HTML 4.01 Transitional//EN"
                   "http://www.w3.org/TR/html4/loose.dtd">
<html>
<head>
  <script src="http://code.jquery.com/jquery-latest.js"></script>
  <script>
  $(document).ready(function(){
   $("div,span,p.myClass").css("border","3px solid red");
  });
  </script>
  <style>
  div,span,p {
   width: 130px;
   height: 60px;
   float:left;
   padding: 3px;
   margin: 2px;
   background-color: #EEEEEE;
   font-size:14px;
  }
  </style>
</head>
<body>
  <div>div</div>
  <p class="myClass">p class="myClass"</p>
  <p class="notMyClass">p class="notMyClass"</p>
  <span>span</span>
</body>
</html>


6. ancestor descendant  Returns: Array<Element>
조상 자손, 실행후 원소 배열로 반환

Matches all descendant elements specified by "descendant" of elements specified by "ancestor".
주어진 조상에 주어진 자손을 가진 모든 자손을 배열로 반환

<!DOCTYPE HTML PUBLIC "-//W3C//DTD HTML 4.01 Transitional//EN"
                   "http://www.w3.org/TR/html4/loose.dtd">
<html>
<head>
  <script src="http://code.jquery.com/jquery-latest.js"></script>
  <script>
  $(document).ready(function(){
   $("form input").css("border", "2px dotted blue");
  });
  </script>
  <style>
  body { font-size:14px; }
  form { border:2px green solid; padding:2px; margin:0;
        background:#efe; }
  div { color:red; }
  fieldset { margin:1px; padding:3px; }
  </style>
</head>
<body>
  <form>
   <div>Form is surrounded by the green outline</div>
   <label>Child:</label>
   <input name="name" />
   <fieldset>
     <label>Grandchild:</label>
     <input name="newsletter" />
   </fieldset>
  </form>
  Sibling to form: <input name="none" />
</body>
</html>


7. parent > child  Returns: Array<Element>
조상 > 자손, 실행후 원소 배열 반환

Matches all child elements specified by "child" of elements specified by "parent".
주어진 조상에 포함된 주어진 자손에 매치되는 일단계 자손들만 모두 배열로 반환

<!DOCTYPE HTML PUBLIC "-//W3C//DTD HTML 4.01 Transitional//EN"
                   "http://www.w3.org/TR/html4/loose.dtd">
<html>
<head>
  <script src="http://code.jquery.com/jquery-latest.js"></script>
  <script>
  $(document).ready(function(){
   $("#main > *").css("border", "3px double red");
  });
  </script>
  <style>
  body { font-size:14px; }
  span#main { display:block; background:yellow; height:110px; }
  button { display:block; float:left; margin:2px;
          font-size:14px; }
  div { width:90px; height:90px; margin:5px; float:left;
       background:#bbf; font-weight:bold; }
  div.mini { width:30px; height:30px; background:green; }
  </style>
</head>
<body>
  <span id="main">
   <div></div>
   <button>Child</button>
   <div class="mini"></div>
   <div>
     <div class="mini"></div>
     <div class="mini"></div>
   </div>
   <div><button>Grand</button></div>
   <div><span>A Span <em>in</em> child</span></div>
   <span>A Span in main</span>
  </span>
</body>
</html>


8. prev + next  Returns: Array<Element>
앞 뒤, 실행후 원소배열 반환

Matches all next elements specified by "next" that are next to elements specified by "prev".
주어진 앞원소와 뒤원소에 순차적으로 매치 되는 뒤원소들을 모두 배열로 반환

<!DOCTYPE HTML PUBLIC "-//W3C//DTD HTML 4.01 Transitional//EN"
                   "http://www.w3.org/TR/html4/loose.dtd">
<html>
<head>
  <script src="http://code.jquery.com/jquery-latest.js"></script>
  <script>
  $(document).ready(function(){
   $("label + input").css("color", "blue").val("Labeled!")
  });
  </script>

</head>
<body>
  <form>
   <label>Name:</label>
   <input name="name" />
   <fieldset>
     <label>Newsletter:</label>
     <input name="newsletter" />
   </fieldset>
  </form>
  <input name="none" />
</body>
</html>


9. prev ~ siblings  Returns: Array<Element>
앞원소~형제 원소, 실행후 원소배열 반환

Matches all sibling elements after the "prev" element that match the filtering "siblings" selector.
주어진 앞원소와 형제인 뒤원소를 찾아 모두 배열로 반환

<!DOCTYPE HTML PUBLIC "-//W3C//DTD HTML 4.01 Transitional//EN"
                   "http://www.w3.org/TR/html4/loose.dtd">
<html>
<head>
  <script src="http://code.jquery.com/jquery-latest.js"></script>
  <script>
  $(document).ready(function(){
   $("#prev ~ div").css("border", "3px groove blue");
  });
  </script>
  <style>
  div,span {
   display:block;
   width:80px;
   height:80px;
   margin:5px;
   background:#bbffaa;
   float:left;
   font-size:14px;
  }
  div#small {
   width:60px;
   height:25px;
   font-size:12px;
   background:#fab;
  }
  </style>
</head>
<body>
  <div>div (doesn't match since before #prev)</div>
  <div id="prev">div#prev</div>
  <div>div sibling</div>
  <div>div sibling <div id="small">div neice</div></div>
  <span>span sibling (not div)</span>
  <div>div sibling</div>
</body>
</html>


10. :first  Returns: Element
첫번째, 실행후 원소 반환

Matches the first selected element.
매치되는 원소들중 첫번째 것만 반환한다.

<!DOCTYPE HTML PUBLIC "-//W3C//DTD HTML 4.01 Transitional//EN"
                   "http://www.w3.org/TR/html4/loose.dtd">
<html>
<head>
  <script src="http://code.jquery.com/jquery-latest.js"></script>
  <script>
  $(document).ready(function(){
   $("tr:first").css("font-style", "italic");
  });
  </script>
  <style>
  td { color:blue; font-weight:bold; }
  </style>
</head>
<body>
  <table>
   <tr><td>Row 1</td></tr>
   <tr><td>Row 2</td></tr>
   <tr><td>Row 3</td></tr>
  </table>
</body>
</html>


11. :last  Returns: Element
마지막, 실행후 원소 반환

Matches the last selected element.
매치되는 원소들중 마지막 것만 반환한다.

<!DOCTYPE HTML PUBLIC "-//W3C//DTD HTML 4.01 Transitional//EN"
                   "http://www.w3.org/TR/html4/loose.dtd">
<html>
<head>
  <script src="http://code.jquery.com/jquery-latest.js"></script>
  <script>
  $(document).ready(function(){
   $("tr:last").css({backgroundColor: 'yellow', fontWeight: 'bolder'});
  });
  </script>

</head>
<body>
  <table>
   <tr><td>First Row</td></tr>
   <tr><td>Middle Row</td></tr>
   <tr><td>Last Row</td></tr>
  </table>
</body>
</html>


12. :not(selector)  Returns: Array<Element>
아니다, 실행후 원소 배열 반환

Filters out all elements matching the given selector.
주어진 것에 해당하지 않는 모든 것을 반환한다.

<!DOCTYPE HTML PUBLIC "-//W3C//DTD HTML 4.01 Transitional//EN"
                   "http://www.w3.org/TR/html4/loose.dtd">
<html>
<head>
  <script src="http://code.jquery.com/jquery-latest.js"></script>
  <script>
  $(document).ready(function(){

   $("input:not(:checked) + span").css("background-color", "yellow");
   $("input").attr("disabled", "disabled");

  });
  </script>

</head>
<body>
  <div>
   <input type="checkbox" name="a" />
   <span>Mary</span>
  </div>
  <div>
   <input type="checkbox" name="b" />
   <span>Paul</span>
  </div>
  <div>
   <input type="checkbox" name="c" checked="checked" />
   <span>Peter</span>
  </div>
</body>
</html>


13. :even  Returns: Array<Element>
짝수, 실행후 원소 배열 반환

Matches even elements, zero-indexed.
매치된 원소들 중에서 인덱스가 짝수인것 모두 반환한다.

<!DOCTYPE HTML PUBLIC "-//W3C//DTD HTML 4.01 Transitional//EN"
                   "http://www.w3.org/TR/html4/loose.dtd">
<html>
<head>
  <script src="http://code.jquery.com/jquery-latest.js"></script>
  <script>
  $(document).ready(function(){
   $("tr:even").css("background-color", "#bbbbff");
  });
  </script>
  <style>
  table {
   background:#eeeeee;
  }
  </style>
</head>
<body>
  <table border="1">
   <tr><td>Row with Index #0</td></tr>
   <tr><td>Row with Index #1</td></tr>
   <tr><td>Row with Index #2</td></tr>
   <tr><td>Row with Index #3</td></tr>
  </table>
</body>
</html>


14. :odd  Returns: Array<Element>
홀수, 실행후 원소 배열 반환

Matches odd elements, zero-indexed.
매치된 원소들 중에서 인덱스가 홀수인것 모두 반환한다.

<!DOCTYPE HTML PUBLIC "-//W3C//DTD HTML 4.01 Transitional//EN"
                   "http://www.w3.org/TR/html4/loose.dtd">
<html>
<head>
  <script src="http://code.jquery.com/jquery-latest.js"></script>
  <script>
  $(document).ready(function(){
   $("tr:odd").css("background-color", "#bbbbff");
  });
  </script>
  <style>
  table {
   background:#f3f7f5;
  }
  </style>
</head>
<body>
  <table border="1">
   <tr><td>Row with Index #0</td></tr>
   <tr><td>Row with Index #1</td></tr>
   <tr><td>Row with Index #2</td></tr>
   <tr><td>Row with Index #3</td></tr>
  </table>
</body>
</html>


15. :eq(index)  Returns: Element
eq(인덱스), 실행후 원소  반환

Matches a single element by its index.
매치된 원소들 중에서 주어진 인덱스에 매치되는 원소 한개를 반환한다.

<!DOCTYPE HTML PUBLIC "-//W3C//DTD HTML 4.01 Transitional//EN"
                   "http://www.w3.org/TR/html4/loose.dtd">
<html>
<head>
  <script src="http://code.jquery.com/jquery-latest.js"></script>
  <script>
  $(document).ready(function(){
   $("td:eq(2)").css("text-decoration", "blink");
  });
  </script>

</head>
<body>
  <table border="1">
   <tr><td>TD #0</td><td>TD #1</td><td>TD #2</td></tr>
   <tr><td>TD #3</td><td>TD #4</td><td>TD #5</td></tr>
   <tr><td>TD #6</td><td>TD #7</td><td>TD #8</td></tr>
  </table>
</body>
</html>


16. :gt(index)  Returns: Array<Element>
초과, 실행후 원소 배열 반환

Matches all elements with an index above the given one.
매치된 원소들 중에서 인덱스로 주어진 것보다 큰 인덱스 들을 모두 배열로 반환

<!DOCTYPE HTML PUBLIC "-//W3C//DTD HTML 4.01 Transitional//EN"
                   "http://www.w3.org/TR/html4/loose.dtd">
<html>
<head>
  <script src="http://code.jquery.com/jquery-latest.js"></script>
  <script>
  $(document).ready(function(){
   $("td:gt(4)").css("text-decoration", "line-through");
  });
  </script>

</head>
<body>
  <table border="1">
   <tr><td>TD #0</td><td>TD #1</td><td>TD #2</td></tr>
   <tr><td>TD #3</td><td>TD #4</td><td>TD #5</td></tr>
   <tr><td>TD #6</td><td>TD #7</td><td>TD #8</td></tr>
  </table>
</body>
</html>


17. :lt(index)  Returns: Array<Element>
미만, 실행후 원소 배열 반환

Matches all elements with an index below the given one.
매치된 원소들 중에서 인덱스로 주어진 것보다 작은 인덱스 들을 모두 배열로 반환

<!DOCTYPE HTML PUBLIC "-//W3C//DTD HTML 4.01 Transitional//EN"
                   "http://www.w3.org/TR/html4/loose.dtd">
<html>
<head>
  <script src="http://code.jquery.com/jquery-latest.js"></script>
  <script>
  $(document).ready(function(){
   $("td:lt(4)").css("color", "red");
  });
  </script>

</head>
<body>
  <table border="1">
   <tr><td>TD #0</td><td>TD #1</td><td>TD #2</td></tr>
   <tr><td>TD #3</td><td>TD #4</td><td>TD #5</td></tr>
   <tr><td>TD #6</td><td>TD #7</td><td>TD #8</td></tr>
  </table>
</body>
</html>


18. :header  Returns: Array<Element>
헤더, 실행후 원소 배열 반환

Matches all elements that are headers, like h1, h2, h3 and so on.
매치되는 원소들 중에서 h1, h2 ... 와 같은 헤더 태그들을 모두 배열로 반환한다.

<!DOCTYPE HTML PUBLIC "-//W3C//DTD HTML 4.01 Transitional//EN"
                   "http://www.w3.org/TR/html4/loose.dtd">
<html>
<head>
  <script src="http://code.jquery.com/jquery-latest.js"></script>
  <script>
  $(document).ready(function(){
   $(":header").css({ background:'#CCC', color:'blue' });
  });
  </script>
  <style>
  body { font-size: 10px; font-family: Arial; }
  h1, h2 { margin: 3px 0; }
  </style>
</head>
<body>
  <h1>Header 1</h1>
  <p>Contents 1</p>
  <h2>Header 2</h2>
  <p>Contents 2</p>
</body>
</html>


19. :animated  Returns: Array<Element>
움직인다, 실행후 원소 배열 반환

Matches all elements that are currently being animated.
매치된 원소들 중에서 애니메이션이 동작하고 있는 것들을 모두 반환한다.

<!DOCTYPE HTML PUBLIC "-//W3C//DTD HTML 4.01 Transitional//EN"
                   "http://www.w3.org/TR/html4/loose.dtd">
<html>
<head>
  <script src="http://code.jquery.com/jquery-latest.js"></script>
  <script>
  $(document).ready(function(){

   $("#run").click(function(){
     $("div:animated").toggleClass("colored");
   });
   function animateIt() {
     $("#mover").slideToggle("slow", animateIt);
   }
   animateIt();

  });
  </script>
  <style>
  div { background:yellow; border:1px solid #AAA; width:80px; height:80px; margin:5px; float:left; }
  div.colored { background:green; }
  </style>
</head>
<body>
  <button id="run">Run</button>
  <div></div>
  <div id="mover"></div>
  <div></div>
</body>
</html>


20. :contains(text)  Returns: Array<Element>
포함, 실행후 원소 배열 반환

Matches elements which contain the given text.
매치된 원소들 중에서 주어진 텍스트를 포함하는 것들을 모두 배열로 반환한다.

<!DOCTYPE HTML PUBLIC "-//W3C//DTD HTML 4.01 Transitional//EN"
                   "http://www.w3.org/TR/html4/loose.dtd">
<html>
<head>
  <script src="http://code.jquery.com/jquery-latest.js"></script>
  <script>
  $(document).ready(function(){
   $("div:contains('John')").css("text-decoration", "underline");
  });
  </script>

</head>
<body>
  <div>John Resig</div>
  <div>George Martin</div>
  <div>Malcom John Sinclair</div>
  <div>J. Ohn
</body>
</html>


21. :empty  Returns: Array<Element>
비엇다. 실행후 원소 배열 반환

Matches all elements that are empty, be it elements or text.
매치된 원소들 중에서 텍스트가 비어있는 것들을 모두 배열로 반환한다.

<!DOCTYPE HTML PUBLIC "-//W3C//DTD HTML 4.01 Transitional//EN"
                   "http://www.w3.org/TR/html4/loose.dtd">
<html>
<head>
  <script src="http://code.jquery.com/jquery-latest.js"></script>
  <script>
  $(document).ready(function(){
   $("td:empty").text("Was empty!").css('background', 'rgb(255,220,200)');
  });
  </script>
  <style>
  td { text-align:center; }
  </style>
</head>
<body>
  <table border="1">
   <tr><td>TD #0</td><td></td></tr>
   <tr><td>TD #2</td><td></td></tr>
   <tr><td></td><td>TD#5</td></tr>
  </table>
</body>
</html>


22. :has(selector)  Returns: Array<Element>
has(selector), 실행후 원소 배열 반환

Matches elements which contain at least one element that matches the specified selector.
매치된 원소들 중에서 주어진 것을 포함하는 것을 모두 배열로 반환한다.

<!DOCTYPE HTML PUBLIC "-//W3C//DTD HTML 4.01 Transitional//EN"
                   "http://www.w3.org/TR/html4/loose.dtd">
<html>
<head>
  <script src="http://code.jquery.com/jquery-latest.js"></script>
  <script>
  $(document).ready(function(){
   $("div:has(p)").addClass("test");
  });
  </script>
  <style>
  .test{ border: 3px inset red; }
  </style>
</head>
<body>
  <div><p>Hello in a paragraph</p></div>
  <div>Hello again! (with no paragraph)</div>
</body>
</html>


23. :parent  Returns: Array<Element>
부모, 실행후 원소 배열 반환

Matches all elements that are parents - they have child elements, including text.
주어진 것이 부모인 것을 모두 받아온다, 비어있는 것은 포함 안함

<!DOCTYPE HTML PUBLIC "-//W3C//DTD HTML 4.01 Transitional//EN"
                   "http://www.w3.org/TR/html4/loose.dtd">
<html>
<head>
  <script src="http://code.jquery.com/jquery-latest.js"></script>
  <script>
  $(document).ready(function(){
   $("td:parent").fadeTo(1500, 0.3);
  });
  </script>
  <style>
td { width:40px; background:green; }
  </style>
</head>
<body>
  <table border="1">
   <tr><td>Value 1</td><td></td></tr>
   <tr><td>Value 2</td><td></td></tr>
  </table>
</body>
</html>


24. :hidden  Returns: Array<Element>
안보임, 실행후 원소 배열 반환

Matches all elements that are hidden, or input elements of type "hidden".
보이지 않는 모든 것들을 반환한다. none hidden  등, 추가로 input을 지정하면 인풋타입이 히든인것만 받아온다

<!DOCTYPE HTML PUBLIC "-//W3C//DTD HTML 4.01 Transitional//EN"
                   "http://www.w3.org/TR/html4/loose.dtd">
<html>
<head>
  <script src="http://code.jquery.com/jquery-latest.js"></script>
  <script>
  $(document).ready(function(){

   // in some browsers :hidden includes head, title, script, etc... so limit to body
   $("span:first").text("Found " + $(":hidden", document.body).length +
                        " hidden elements total.");
   $("div:hidden").show(3000);
   $("span:last").text("Found " + $("input:hidden").length + " hidden inputs.");

  });
  </script>
  <style>
  div { width:70px; height:40px; background:#ee77ff; margin:5px; float:left; }
  span { display:block; clear:left; color:red; }
  .starthidden { display:none; }
  </style>
</head>
<body>
  <span></span>
  <div></div>
  <div style="display:none;">Hider!</div>
  <div></div>
  <div class="starthidden">Hider!</div>
  <div></div>
  <form>
   <input type="hidden" />
   <input type="hidden" />
   <input type="hidden" />
  </form>
  <span>
  </span>
</body>
</html>


25. :visible  Returns: Array<Element>
보임, 실행후 원소 배열 반환

Matches all elements that are visible.
보이는 것들을 모두 반환한다.

<!DOCTYPE HTML PUBLIC "-//W3C//DTD HTML 4.01 Transitional//EN"
                   "http://www.w3.org/TR/html4/loose.dtd">
<html>
<head>
  <script src="http://code.jquery.com/jquery-latest.js"></script>
  <script>
  $(document).ready(function(){

   $("div:visible").click(function () {
     $(this).css("background", "yellow");
   });
   $("button").click(function () {
     $("div:hidden").show("fast");
   });

  });
  </script>
  <style>
  div { width:50px; height:40px; margin:5px; border:3px outset green; float:left; }
  .starthidden { display:none; }
  </style>
</head>
<body>
  <button>Show hidden to see they don't change</button>
  <div></div>
  <div class="starthidden"></div>
  <div></div>
  <div></div>
  <div style="display:none;"></div>
</body>
</html>


26. [attribute]  Returns: Array<Element>
속성, 실행후 원소 배열 반환

Matches elements that have the specified attribute.
주어진 속성을 가진 것들을 모두 반환한다.

<!DOCTYPE HTML PUBLIC "-//W3C//DTD HTML 4.01 Transitional//EN"
                   "http://www.w3.org/TR/html4/loose.dtd">
<html>
<head>
  <script src="http://code.jquery.com/jquery-latest.js"></script>
  <script>
  $(document).ready(function(){

   $("div[id]").one("click", function(){
     var idString = $(this).text() + " = " + $(this).attr("id");
     $(this).text(idString);
   });

  });
  </script>

</head>
<body>
  <div>no id</div>
  <div id="hey">with id</div>
  <div id="there">has an id</div>
  <div>nope</div>
</body>
</html>


27. [attribute=value]  Returns: Array<Element>
속성=값, 실행후 원소 배열 반환

Matches elements that have the specified attribute with a certain value.
주어진 속성과 주어진 값이 일치 하는 모든것들을 반환한다.

<!DOCTYPE HTML PUBLIC "-//W3C//DTD HTML 4.01 Transitional//EN"
                   "http://www.w3.org/TR/html4/loose.dtd">
<html>
<head>
  <script src="http://code.jquery.com/jquery-latest.js"></script>
  <script>
  $(document).ready(function(){
   $("input[name='newsletter']").next().text(" is newsletter");
  });
  </script>

</head>
<body>
  <div>
   <input type="radio" name="newsletter" value="Hot Fuzz" />
   <span>name?</span>
  </div>
  <div>
   <input type="radio" name="newsletter" value="Cold Fusion" />
   <span>name?</span>
  </div>
  <div>
   <input type="radio" name="accept" value="Evil Plans" />
   <span>name?</span>
  </div>
</body>
</html>


28. [attribute!=value]  Returns: Array<Element>
속성!=값, 실행후 원소 배열 반환

Matches elements that don't have the specified attribute with a certain value.
주어진 속성과 주어진 값이 일치 하지 않는 모든것들을 반환한다.

<!DOCTYPE HTML PUBLIC "-//W3C//DTD HTML 4.01 Transitional//EN"
                   "http://www.w3.org/TR/html4/loose.dtd">
<html>
<head>
  <script src="http://code.jquery.com/jquery-latest.js"></script>
  <script>
  $(document).ready(function(){
   $("input[name!='newsletter']").next().text(" is not newsletter");
  });
  </script>

</head>
<body>
  <div>
   <input type="radio" name="newsletter" value="Hot Fuzz" />
   <span>name?</span>
  </div>
  <div>
   <input type="radio" name="newsletter" value="Cold Fusion" />
   <span>name?</span>
  </div>
  <div>
   <input type="radio" name="accept" value="Evil Plans" />
   <span>name?</span>
  </div>
</body>
</html>


29. [attribute^=value]  Returns: Array<Element>
속성^=값, 실행후 원소 배열 반환

Matches elements that have the specified attribute and it starts with a certain value.
주어진 속성을 가지며 값이 주어진 값으로 시작되는 모든 것을 반환한다.

<!DOCTYPE HTML PUBLIC "-//W3C//DTD HTML 4.01 Transitional//EN"
                   "http://www.w3.org/TR/html4/loose.dtd">
<html>
<head>
  <script src="http://code.jquery.com/jquery-latest.js"></script>
  <script>
  $(document).ready(function(){
   $("input[name^='news']").val("news here!");
  });
  </script>

</head>
<body>
  <input name="newsletter" />
  <input name="milkman" />
  <input name="newsboy" />
</body>
</html>


30. [attribute$=value]  Returns: Array<Element>
속성$=값, 실행후 원소 배열 반환

Matches elements that have the specified attribute and it ends with a certain value.
주어진 속성을 가지며 값이 주어진 값으로 끝나는 모든 것을 반환한다.

<!DOCTYPE HTML PUBLIC "-//W3C//DTD HTML 4.01 Transitional//EN"
                   "http://www.w3.org/TR/html4/loose.dtd">
<html>
<head>
  <script src="http://code.jquery.com/jquery-latest.js"></script>
  <script>
  $(document).ready(function(){
   $("input[name$='letter']").val("a letter");
  });
  </script>

</head>
<body>
  <input name="newsletter" />
  <input name="milkman" />
  <input name="jobletter" />
</body>
</html>


31. [attribute*=value]  Returns: Array<Element>
속성*=값, 실행후 원소 배열 반환

Matches elements that have the specified attribute and it contains a certain value.
주어진 속성을 가지며 값이 주어진 값을 포함하는 모든 것을 반환한다.

<!DOCTYPE HTML PUBLIC "-//W3C//DTD HTML 4.01 Transitional//EN"
                   "http://www.w3.org/TR/html4/loose.dtd">
<html>
<head>
  <script src="http://code.jquery.com/jquery-latest.js"></script>
  <script>
  $(document).ready(function(){
   $("input[name*='man']").val("has man in it!");
  });
  </script>

</head>
<body>
  <input name="man-news" />
  <input name="milkman" />
  <input name="letterman2" />
  <input name="newmilk" />
</body>
</html>


32. [selector1][selector2][selectorN]  Returns: Array<Element>
속성들, 실행후 원소 배열 반환

Matches elements that have the specified attribute and it contains a certain value.
속성을 여러개 지정할수도 있다. 매치되는 모든 것을 반환한다.

<!DOCTYPE HTML PUBLIC "-//W3C//DTD HTML 4.01 Transitional//EN"
                   "http://www.w3.org/TR/html4/loose.dtd">
<html>
<head>
  <script src="http://code.jquery.com/jquery-latest.js"></script>
  <script>
  $(document).ready(function(){
   $("input[id][name$='man']").val("only this one");
  });
  </script>

</head>
<body>
  <input id="man-news" name="man-news" />
  <input name="milkman" />
  <input id="letterman" name="new-letterman" />
  <input name="newmilk" />
</body>
</html>


33. :nth-child(index/even/odd/equation)  Returns: Array<Element>
몇번째 자식, 실행후 원소 배열 반환

Matches the nth-child of its parent or all its even or odd children.
인덱스나 키워드로 자식을 지정하여 매치되는 것은 모두 반환한다.

<!DOCTYPE HTML PUBLIC "-//W3C//DTD HTML 4.01 Transitional//EN"
                   "http://www.w3.org/TR/html4/loose.dtd">
<html>
<head>
  <script src="http://code.jquery.com/jquery-latest.js"></script>
  <script>
  $(document).ready(function(){
   $("ul li:nth-child(2)").append("<span> - 2nd!</span>");
  });
  </script>
  <style>
  div { float:left; }
  span { color:blue; }
  </style>
</head>
<body>
  <div><ul>
   <li>John</li>
   <li>Karl</li>
   <li>Brandon</li>
  </ul></div>
  <div><ul>
   <li>Sam</li>
  </ul></div>
  <div><ul>
   <li>Glen</li>
   <li>Tane</li>
   <li>Ralph</li>
   <li>David</li>
  </ul></div>
</body>
</html>


34. :first-child  Returns: Array<Element>
첫번째 자식, 실행후 원소 배열 반환

Matches the first child of its parent.
첫번째 자식에 매치되는 모든 것을 반환한다.

<!DOCTYPE HTML PUBLIC "-//W3C//DTD HTML 4.01 Transitional//EN"
                   "http://www.w3.org/TR/html4/loose.dtd">
<html>
<head>
  <script src="http://code.jquery.com/jquery-latest.js"></script>
  <script>
  $(document).ready(function(){

   $("div span:first-child")
       .css("text-decoration", "underline")
       .hover(function () {
             $(this).addClass("sogreen");
           }, function () {
             $(this).removeClass("sogreen");
           });

  });
  </script>
  <style>
  span { color:#008; }
  span.sogreen { color:green; font-weight: bolder; }
  </style>
</head>
<body>
  <div>
   <span>John,</span>
   <span>Karl,</span>
   <span>Brandon</span>
  </div>
  <div>
   <span>Glen,</span>
   <span>Tane,</span>
   <span>Ralph</span>
  </div>
</body>
</html>


35. :last-child  Returns: Array<Element>
마지막 자식, 실행후 원소 배열 반환

Matches the last child of its parent.
마지막 자식에 매치되는 모든 것을 반환한다.

<!DOCTYPE HTML PUBLIC "-//W3C//DTD HTML 4.01 Transitional//EN"
                   "http://www.w3.org/TR/html4/loose.dtd">
<html>
<head>
  <script src="http://code.jquery.com/jquery-latest.js"></script>
  <script>
  $(document).ready(function(){

   $("div span:last-child")
       .css({color:"red", fontSize:"80%"})
       .hover(function () {
             $(this).addClass("solast");
           }, function () {
             $(this).removeClass("solast");
           });

  });
  </script>
  <style>
  span.solast { text-decoration:line-through; }
  </style>
</head>
<body>
  <div>
   <span>John,</span>
   <span>Karl,</span>
   <span>Brandon,</span>
   <span>Sam</span>
  </div>
  <div>
   <span>Glen,</span>
   <span>Tane,</span>
   <span>Ralph,</span>
   <span>David</span>
  </div>
</body>
</html>


36. :only-child  Returns: Array<Element>
하나의 자식, 실행후 원소 배열 반환

Matches the only child of its parent.
하나의 자식으로만 이루어진 모든 것을 반환한다.

<!DOCTYPE HTML PUBLIC "-//W3C//DTD HTML 4.01 Transitional//EN"
                   "http://www.w3.org/TR/html4/loose.dtd">
<html>
<head>
  <script src="http://code.jquery.com/jquery-latest.js"></script>
  <script>
  $(document).ready(function(){
   $("div button:only-child").text("Alone").css("border", "2px blue solid");
  });
  </script>
  <style>
  div { width:100px; height:80px; margin:5px; float:left; background:#b9e }
  </style>
</head>
<body>
  <div>
   <button>Sibling!</button>
   <button>Sibling!</button>
  </div>
  <div>
   <button>Sibling!</button>
  </div>
  <div>
   None
  </div>
  <div>
   <button>Sibling!</button>
   <button>Sibling!</button>
   <button>Sibling!</button>
  </div>
  <div>
   <button>Sibling!</button>
  </div>
</body>
</html>


37. :input  Returns: Array<Element>
인풋, 실행후 원소 배열 반환

Matches all input, textarea, select and button elements.
인풋, 텍스트에리어, 셀렉트박스, 버튼들을 모두 반환한다.

<!DOCTYPE HTML PUBLIC "-//W3C//DTD HTML 4.01 Transitional//EN"
                   "http://www.w3.org/TR/html4/loose.dtd">
<html>
<head>
  <script src="http://code.jquery.com/jquery-latest.js"></script>
  <script>
  $(document).ready(function(){

   var allInputs = $(":input");
   var formChildren = $("form > *");
   $("div").text("Found " + allInputs.length + " inputs and the form has " +
                            formChildren.length + " children.")
           .css("color", "red");
   $("form").submit(function () { return false; }); // so it won't submit

  });
  </script>
  <style>
  textarea { height:45px; }
  </style>
</head>
<body>
  <form>
   <input type="button" value="Input Button"/>
   <input type="checkbox" />
   <input type="file" />
   <input type="hidden" />
   <input type="image" />
   <input type="password" />
   <input type="radio" />
   <input type="reset" />
   <input type="submit" />
   <input type="text" />
   <select><option>Option<option/></select>
   <textarea></textarea>
   <button>Button</button>
  </form>
  <div>
  </div>
</body>
</html>


38. :text  Returns: Array<Element>
텍스트, 실행후 원소 배열 반환

Matches all input elements of type text.
인풋타입이 텍스트인 것을 모두 반환한다.

<!DOCTYPE HTML PUBLIC "-//W3C//DTD HTML 4.01 Transitional//EN"
                   "http://www.w3.org/TR/html4/loose.dtd">
<html>
<head>
  <script src="http://code.jquery.com/jquery-latest.js"></script>
  <script>
  $(document).ready(function(){

   var input = $(":text").css({background:"yellow", border:"3px red solid"});
   $("div").text("For this type jQuery found " + input.length + ".")
           .css("color", "red");
   $("form").submit(function () { return false; }); // so it won't submit

  });
  </script>
  <style>
  textarea { height:45px; }
  </style>
</head>
<body>
  <form>
   <input type="button" value="Input Button"/>
   <input type="checkbox" />
   <input type="file" />
   <input type="hidden" />
   <input type="image" />
   <input type="password" />
   <input type="radio" />
   <input type="reset" />
   <input type="submit" />
   <input type="text" />
   <select><option>Option<option/></select>
   <textarea></textarea>
   <button>Button</button>
  </form>
  <div>
  </div>
</body>
</html>


39. :password  Returns: Array<Element>
패스워드, 실행후 원소 배열 반환

Matches all input elements of type password.
인풋타입이 패스워드인 것을 모두 반환한다.

<!DOCTYPE HTML PUBLIC "-//W3C//DTD HTML 4.01 Transitional//EN"
                   "http://www.w3.org/TR/html4/loose.dtd">
<html>
<head>
  <script src="http://code.jquery.com/jquery-latest.js"></script>
  <script>
  $(document).ready(function(){

   var input = $(":password").css({background:"yellow", border:"3px red solid"});
   $("div").text("For this type jQuery found " + input.length + ".")
           .css("color", "red");
   $("form").submit(function () { return false; }); // so it won't submit

  });
  </script>
  <style>
  textarea { height:45px; }
  </style>
</head>
<body>
  <form>
   <input type="button" value="Input Button"/>
   <input type="checkbox" />
   <input type="file" />
   <input type="hidden" />
   <input type="image" />
   <input type="password" />
   <input type="radio" />
   <input type="reset" />
   <input type="submit" />
   <input type="text" />
   <select><option>Option<option/></select>
   <textarea></textarea>
   <button>Button</button>
  </form>
  <div>
  </div>
</body>
</html>


40. :radio  Returns: Array<Element>
레디오, 실행후 원소 배열 반환

Matches all input elements of type radio.
인풋타입이 레디오인 것을 모두 반환한다.

<!DOCTYPE HTML PUBLIC "-//W3C//DTD HTML 4.01 Transitional//EN"
                   "http://www.w3.org/TR/html4/loose.dtd">
<html>
<head>
  <script src="http://code.jquery.com/jquery-latest.js"></script>
  <script>
  $(document).ready(function(){

   var input = $(":radio").css({background:"yellow", border:"3px red solid"});
   $("div").text("For this type jQuery found " + input.length + ".")
           .css("color", "red");
   $("form").submit(function () { return false; }); // so it won't submit

  });
  </script>
  <style>
  textarea { height:45px; }
  </style>
</head>
<body>
  <form>
   <input type="button" value="Input Button"/>
   <input type="checkbox" />
   <input type="file" />
   <input type="hidden" />
   <input type="image" />
   <input type="password" />
   <input type="radio" name="asdf" />
   <input type="radio" name="asdf" />
   <input type="reset" />
   <input type="submit" />
   <input type="text" />
   <select><option>Option<option/></select>
   <textarea></textarea>
   <button>Button</button>
  </form>
  <div>
  </div>
</body>


41. :checkbox  Returns: Array<Element>
체크박스, 실행후 원소 배열 반환

Matches all input elements of type checkbox.
인풋타입이 체크박스인 것을 모두 반환한다.

<!DOCTYPE HTML PUBLIC "-//W3C//DTD HTML 4.01 Transitional//EN"
                   "http://www.w3.org/TR/html4/loose.dtd">
<html>
<head>
  <script src="http://code.jquery.com/jquery-latest.js"></script>
  <script>
  $(document).ready(function(){

   var input = $(":checkbox").css({background:"yellow", border:"3px red solid"});
   $("div").text("For this type jQuery found " + input.length + ".")
           .css("color", "red");
   $("form").submit(function () { return false; }); // so it won't submit

  });
  </script>
  <style>
  textarea { height:45px; }
  </style>
</head>
<body>
  <form>
   <input type="button" value="Input Button"/>
   <input type="checkbox" />
   <input type="checkbox" />
   <input type="file" />
   <input type="hidden" />
   <input type="image" />
   <input type="password" />
   <input type="radio" />
   <input type="reset" />
   <input type="submit" />
   <input type="text" />
   <select><option>Option<option/></select>
   <textarea></textarea>
   <button>Button</button>
  </form>
  <div>
  </div>
</body>
</html>


42. :submit  Returns: Array<Element>
서브밋, 실행후 원소 배열 반환

Matches all input elements of type submit.
인풋타입이 서브밋인 것을 모두 반환한다.

<!DOCTYPE HTML PUBLIC "-//W3C//DTD HTML 4.01 Transitional//EN"
                   "http://www.w3.org/TR/html4/loose.dtd">
<html>
<head>
  <script src="http://code.jquery.com/jquery-latest.js"></script>
  <script>
  $(document).ready(function(){

   var input = $(":submit").css({background:"yellow", border:"3px red solid"});
   $("div").text("For this type jQuery found " + input.length + ".")
           .css("color", "red");
   $("form").submit(function () { return false; }); // so it won't submit

  });
  </script>
  <style>
  textarea { height:45px; }
  </style>
</head>
<body>
  <form>
   <input type="button" value="Input Button"/>
   <input type="checkbox" />
   <input type="file" />
   <input type="hidden" />
   <input type="image" />
   <input type="password" />
   <input type="radio" />
   <input type="reset" />
   <input type="submit" />
   <input type="text" />
   <select><option>Option<option/></select>
   <textarea></textarea>
   <button>Button</button>
  </form>
  <div>
  </div>
</body>
</html>


43. :image  Returns: Array<Element>
이미지, 실행후 원소 배열 반환

Matches all input elements of type image.
인풋타입이 이미지인 것을 모두 반환한다.

<!DOCTYPE HTML PUBLIC "-//W3C//DTD HTML 4.01 Transitional//EN"
                   "http://www.w3.org/TR/html4/loose.dtd">
<html>
<head>
  <script src="http://code.jquery.com/jquery-latest.js"></script>
  <script>
  $(document).ready(function(){

   var input = $(":image").css({background:"yellow", border:"3px red solid"});
   $("div").text("For this type jQuery found " + input.length + ".")
           .css("color", "red");
   $("form").submit(function () { return false; }); // so it won't submit

  });
  </script>
  <style>
  textarea { height:45px; }
  </style>
</head>
<body>
  <form>
   <input type="button" value="Input Button"/>
   <input type="checkbox" />
   <input type="file" />
   <input type="hidden" />
   <input type="image" />
   <input type="password" />
   <input type="radio" />
   <input type="reset" />
   <input type="submit" />
   <input type="text" />
   <select><option>Option<option/></select>
   <textarea></textarea>
   <button>Button</button>
  </form>
  <div>
  </div>
</body>
</html>


44.  :reset  Returns: Array<Element>
리셋, 실행후 원소 배열 반환

Matches all input elements of type reset.
인풋타입이 리셋인 것을 모두 반환한다.

<!DOCTYPE HTML PUBLIC "-//W3C//DTD HTML 4.01 Transitional//EN"
                   "http://www.w3.org/TR/html4/loose.dtd">
<html>
<head>
  <script src="http://code.jquery.com/jquery-latest.js"></script>
  <script>
  $(document).ready(function(){

   var input = $(":reset").css({background:"yellow", border:"3px red solid"});
   $("div").text("For this type jQuery found " + input.length + ".")
           .css("color", "red");
   $("form").submit(function () { return false; }); // so it won't submit

  });
  </script>
  <style>
  textarea { height:45px; }
  </style>
</head>
<body>
  <form>
   <input type="button" value="Input Button"/>
   <input type="checkbox" />
   <input type="file" />
   <input type="hidden" />
   <input type="image" />
   <input type="password" />
   <input type="radio" />
   <input type="reset" />
   <input type="submit" />
   <input type="text" />
   <select><option>Option<option/></select>
   <textarea></textarea>
   <button>Button</button>
  </form>
  <div>
  </div>
</body>
</html>


45. :button  Returns: Array<Element>
버튼, 실행후 원소 배열 반환

Matches all input elements of type button.
인풋타입이 버튼인 것을 모두 반환한다.

<!DOCTYPE HTML PUBLIC "-//W3C//DTD HTML 4.01 Transitional//EN"
                   "http://www.w3.org/TR/html4/loose.dtd">
<html>
<head>
  <script src="http://code.jquery.com/jquery-latest.js"></script>
  <script>
  $(document).ready(function(){

   var input = $(":button").css({background:"yellow", border:"3px red solid"});
   $("div").text("For this type jQuery found " + input.length + ".")
           .css("color", "red");
   $("form").submit(function () { return false; }); // so it won't submit

  });
  </script>
  <style>
  textarea { height:45px; }
  </style>
</head>
<body>
  <form>
   <input type="button" value="Input Button"/>
   <input type="checkbox" />
   <input type="file" />
   <input type="hidden" />
   <input type="image" />
   <input type="password" />
   <input type="radio" />
   <input type="reset" />
   <input type="submit" />
   <input type="text" />
   <select><option>Option<option/></select>
   <textarea></textarea>
   <button>Button</button>
  </form>
  <div>
  </div>
</body>
</html>


46. :file  Returns: Array<Element>
파일, 실행후 원소 배열 반환

Matches all input elements of type file.
인풋타입이 파일인 것을 모두 반환한다.

<!DOCTYPE HTML PUBLIC "-//W3C//DTD HTML 4.01 Transitional//EN"
                   "http://www.w3.org/TR/html4/loose.dtd">
<html>
<head>
  <script src="http://code.jquery.com/jquery-latest.js"></script>
  <script>
  $(document).ready(function(){

   var input = $(":file").css({background:"yellow", border:"3px red solid"});
   $("div").text("For this type jQuery found " + input.length + ".")
           .css("color", "red");
   $("form").submit(function () { return false; }); // so it won't submit

  });
  </script>
  <style>
  textarea { height:45px; }
  </style>
</head>
<body>
  <form>
   <input type="button" value="Input Button"/>
   <input type="checkbox" />
   <input type="file" />
   <input type="hidden" />
   <input type="image" />
   <input type="password" />
   <input type="radio" />
   <input type="reset" />
   <input type="submit" />
   <input type="text" />
   <select><option>Option<option/></select>
   <textarea></textarea>
   <button>Button</button>
  </form>
  <div>
  </div>
</body>
</html>


47. :hidden  Returns: Array<Element>
히든, 실행후 원소 배열 반환

Matches all elements that are hidden, or input elements of type "hidden".
인풋타입이 히든인 것을 모두 반환한다.

<!DOCTYPE HTML PUBLIC "-//W3C//DTD HTML 4.01 Transitional//EN"
                   "http://www.w3.org/TR/html4/loose.dtd">
<html>
<head>
  <script src="http://code.jquery.com/jquery-latest.js"></script>
  <script>
  $(document).ready(function(){

   // in some browsers :hidden includes head, title, script, etc... so limit to body
   $("span:first").text("Found " + $(":hidden", document.body).length +
                        " hidden elements total.");
   $("div:hidden").show(3000);
   $("span:last").text("Found " + $("input:hidden").length + " hidden inputs.");

  });
  </script>
  <style>
  div { width:70px; height:40px; background:#ee77ff; margin:5px; float:left; }
  span { display:block; clear:left; color:red; }
  .starthidden { display:none; }
  </style>
</head>
<body>
  <span></span>
  <div></div>
  <div style="display:none;">Hider!</div>
  <div></div>
  <div class="starthidden">Hider!</div>
  <div></div>
  <form>
   <input type="hidden" />
   <input type="hidden" />
   <input type="hidden" />
  </form>
  <span>
  </span>
</body>
</html>


48. :enabled  Returns: Array<Element>
활성화? 사용가능?, 실행후 원소 배열 반환

Matches all elements that are enabled.
활성화된 모든 것들을 반환한다.

<!DOCTYPE HTML PUBLIC "-//W3C//DTD HTML 4.01 Transitional//EN"
                   "http://www.w3.org/TR/html4/loose.dtd">
<html>
<head>
  <script src="http://code.jquery.com/jquery-latest.js"></script>
  <script>
  $(document).ready(function(){
   $("input:enabled").val("this is it");
  });
  </script>

</head>
<body>
  <form>
   <input name="email" disabled="disabled" />
   <input name="id" />
  </form>
</body>
</html>


49. :disabled  Returns: Array<Element>
비활성화? 사용불가능?, 실행후 원소 배열 반환

Matches all elements that are disabled.
비활성화된 모든 것들을 반환한다.

<!DOCTYPE HTML PUBLIC "-//W3C//DTD HTML 4.01 Transitional//EN"
                   "http://www.w3.org/TR/html4/loose.dtd">
<html>
<head>
  <script src="http://code.jquery.com/jquery-latest.js"></script>
  <script>
  $(document).ready(function(){
   $("input:disabled").val("this is it");
  });
  </script>

</head>
<body>
  <form>
   <input name="email" disabled="disabled" />
   <input name="id" />
  </form>
</body>
</html>


50. :checked  Returns: Array<Element>
체크됏음, 실행후 원소 배열 반환

Matches all elements that are checked.
인풋이 체크된 모든 것들을 반환한다.

<!DOCTYPE HTML PUBLIC "-//W3C//DTD HTML 4.01 Transitional//EN"
                   "http://www.w3.org/TR/html4/loose.dtd">
<html>
<head>
  <script src="http://code.jquery.com/jquery-latest.js"></script>
  <script>
  $(document).ready(function(){

   function countChecked() {
     var n = $("input:checked").length;
     $("div").text(n + (n == 1 ? " is" : " are") + " checked!");
   }
   countChecked();
   $(":checkbox").click(countChecked);

  });
  </script>
  <style>
  div { color:red; }
  </style>
</head>
<body>
  <form>
   <input type="checkbox" name="newsletter" checked="checked" value="Hourly" />
   <input type="checkbox" name="newsletter" value="Daily" />
   <input type="checkbox" name="newsletter" value="Weekly" />
   <input type="checkbox" name="newsletter" checked="checked" value="Monthly" />
   <input type="checkbox" name="newsletter" value="Yearly" />
  </form>
  <div></div>
</body>
</html>


51. :selected  Returns: Array<Element>
선택되어짐, 실행후 원소 배열 반환

Matches all elements that are selected.
선택된 모든 것을 반환한다.

<!DOCTYPE HTML PUBLIC "-//W3C//DTD HTML 4.01 Transitional//EN"
                   "http://www.w3.org/TR/html4/loose.dtd">
<html>
<head>
  <script src="http://code.jquery.com/jquery-latest.js"></script>
  <script>
  $(document).ready(function(){

   $("select").change(function () {
         var str = "";
         $("select option:selected").each(function () {
               str += $(this).text() + " ";
             });
         $("div").text(str);
       })
       .trigger('change');

  });
  </script>
  <style>
  div { color:red; }
  </style>
</head>
<body>
  <select name="garden" multiple="multiple">
   <option>Flowers</option>
   <option selected="selected">Shrubs</option>
   <option>Trees</option>
   <option selected="selected">Bushes</option>
   <option>Grass</option>
   <option>Dirt</option>
  </select>
  <div></div>
</body>
</html>


<Attributes>

1. attr( name )  Returns: Object
속성 실행후 객체 반환

Access a property on the first matched element. This method makes it easy to retrieve a property value from the first matched element. If the element does not have an attribute with such a name, undefined is returned.
주어진 속성명의 값을 가져옴, 매치되는 첫번째 것만 가져옴

<!DOCTYPE HTML PUBLIC "-//W3C//DTD HTML 4.01 Transitional//EN"
                   "http://www.w3.org/TR/html4/loose.dtd">
<html>
<head>
  <script src="http://code.jquery.com/jquery-latest.js"></script>
  <script>
  $(document).ready(function(){

   var title = $("em").attr("title");
   $("div").text(title);

  });
  </script>
  <style>
  em { color:blue; font-weight;bold; }
  div { color:red; }
  </style>
</head>
<body>
  <p>
   Once there was a <em title="huge, gigantic">large</em> dinosaur...
  </p>
  The title of the emphasis is:<div></div>
</body>
</html>


2. attr( properties )  Returns: jQuery
attr(속성배열) 실행후 jQuery객체를 반환

Set a key/value object as properties to all matched elements.
속성과 값들의 배열을 지정하여 적용

<!DOCTYPE HTML PUBLIC "-//W3C//DTD HTML 4.01 Transitional//EN"
                   "http://www.w3.org/TR/html4/loose.dtd">
<html>
<head>
  <script src="http://code.jquery.com/jquery-latest.js"></script>
  <script>
  $(document).ready(function(){

   $("img").attr({
         src: "/images/hat.gif",
         title: "jQuery",
         alt: "jQuery Logo"
       });
   $("div").text($("img").attr("alt"));

  });
  </script>
  <style>
  img { padding:10px; }
  div { color:red; font-size:24px; }
  </style>
</head>
<body>
  <img />
  <img />
  <img />
  <div></div>
</body>
</html>


3. attr( key, value )  Returns: jQuery
attr( 속성, 값 ) 실행후 jQuery객체를 반환

Set a single property to a value, on all matched elements.
하나의 속성과 하나의 값만 지정하여 적용

<!DOCTYPE HTML PUBLIC "-//W3C//DTD HTML 4.01 Transitional//EN"
                   "http://www.w3.org/TR/html4/loose.dtd">
<html>
<head>
  <script src="http://code.jquery.com/jquery-latest.js"></script>
  <script>
  $(document).ready(function(){
   $("button:gt(0)").attr("disabled","disabled");
  });
  </script>
  <style>
  button { margin:10px; }
  </style>
</head>
<body>
  <button>0th Button</button>
  <button>1st Button</button>
  <button>2nd Button</button>
</body>
</html>


4. attr( key, fn )  Returns: jQuery
attr(속성, 콜백함수) 실행후 jQuery 객체를 반환

Set a single property to a computed value, on all matched elements.
하나의 속성과 콜백함수를 지정하여 적용

<!DOCTYPE HTML PUBLIC "-//W3C//DTD HTML 4.01 Transitional//EN"
                   "http://www.w3.org/TR/html4/loose.dtd">
<html>
<head>
  <script src="http://code.jquery.com/jquery-latest.js"></script>
  <script>
  $(document).ready(function(){

   $("img").attr("src", function() {
         return "/images/" + this.title;
       });

  });
  </script>

</head>
<body>
  <img title="hat.gif"/>
  <img title="hat-old.gif"/>
  <img title="hat2-old.gif"/>
</body>
</html>


5. removeAttr( name )  Returns: jQuery
속성 제거 실행후 jQuery 객체를 반환

Remove an attribute from each of the matched elements.
주어진 이름과 매치되는 속성을 제거

<!DOCTYPE HTML PUBLIC "-//W3C//DTD HTML 4.01 Transitional//EN"
                   "http://www.w3.org/TR/html4/loose.dtd">
<html>
<head>
  <script src="http://code.jquery.com/jquery-latest.js"></script>
  <script>
  $(document).ready(function(){

   $("button").click(function () {
     $(this).next().removeAttr("disabled")
            .focus()
            .val("editable now");
   });

  });
  </script>

</head>
<body>
  <button>Enable</button>
  <input type="text" disabled="disabled" value="can't edit this" />
</body>
</html>


6. addClass( class )  Returns: jQuery
클래스 추가 실행후 jQuery 객체 반환

Adds the specified class(es) to each of the set of matched elements.
주어진 클래스 적용

<!DOCTYPE HTML PUBLIC "-//W3C//DTD HTML 4.01 Transitional//EN"
                   "http://www.w3.org/TR/html4/loose.dtd">
<html>
<head>
  <script src="http://code.jquery.com/jquery-latest.js"></script>
  <script>
  $(document).ready(function(){
   $("p:last").addClass("selected");
  });
  </script>
  <style>
  p { margin: 8px; font-size:16px; }
  .selected { color:red; }
  .highlight { background:yellow; }
  </style>
</head>
<body>
  <p>Hello</p>
  <p>and</p>
  <p>Goodbye</p>
</body>
</html>


7. removeClass( class )  Returns: jQuery
클래스 제거 실행후 JQuery 객체를 리턴

Removes all or the specified class(es) from the set of matched elements.
주어진 클래스 제거

<!DOCTYPE HTML PUBLIC "-//W3C//DTD HTML 4.01 Transitional//EN"
                   "http://www.w3.org/TR/html4/loose.dtd">
<html>
<head>
  <script src="http://code.jquery.com/jquery-latest.js"></script>
  <script>
  $(document).ready(function(){
   $("p:even").removeClass("blue");
  });
  </script>
  <style>
  p { margin: 4px; font-size:16px; font-weight:bolder; }
  .blue { color:blue; }
  .under { text-decoration:underline; }
  .highlight { background:yellow; }
  </style>
</head>
<body>
  <p class="blue under">Hello</p>
  <p class="blue under highlight">and</p>
  <p class="blue under">then</p>
  <p class="blue under">Goodbye</p>
</body>
</html>


8. toggleClass( class )  Returns: jQuery
클래스 추가 삭제 반복 실행후 jQuery 객체 리턴

Adds the specified class if it is not present, removes the specified class if it is present.
주어진 클래스를 추가 삭제를 반복한다.

<!DOCTYPE HTML PUBLIC "-//W3C//DTD HTML 4.01 Transitional//EN"
                   "http://www.w3.org/TR/html4/loose.dtd">
<html>
<head>
  <script src="http://code.jquery.com/jquery-latest.js"></script>
  <script>
  $(document).ready(function(){

   $("p").click(function () {
     $(this).toggleClass("highlight");
   });

  });
  </script>
  <style>
  p { margin: 4px; font-size:16px; font-weight:bolder;
     cursor:pointer; }
  .blue { color:blue; }
  .highlight { background:yellow; }
  </style>
</head>
<body>
  <p class="blue">Click to toggle</p>
  <p class="blue highlight">highlight</p>
  <p class="blue">on these</p>
  <p class="blue">paragraphs</p>
</body>
</html>


9. html( )  Returns: String
실행후 문자열을 반환

Get the html contents (innerHTML) of the first matched element. This property is not available on XML documents (although it will work for XHTML documents).
선택되어진 객체의 html을 반환한다.

<!DOCTYPE HTML PUBLIC "-//W3C//DTD HTML 4.01 Transitional//EN"
                   "http://www.w3.org/TR/html4/loose.dtd">
<html>
<head>
  <script src="http://code.jquery.com/jquery-latest.js"></script>
  <script>
  $(document).ready(function(){

   $("p").click(function () {
     var htmlStr = $(this).html();
     $(this).text(htmlStr);
   });

  });
  </script>
  <style>
  p { margin:8px; font-size:20px; color:blue;
     cursor:pointer; }
  b { text-decoration:underline; }
  button { cursor:pointer; }
  </style>
</head>
<body>
  <p>
   <b>Click</b> to change the <span id="tag">html</span>
  </p>
  <p>
   to a <span id="text">text</span> node.
  </p>
  <p>
   This <button name="nada">button</button> does nothing.
  </p>
</body>
</html>


10. html( val )  Returns: jQuery
실행후 jQuery 객체를 반환

Set the html contents of every matched element. This property is not available on XML documents (although it will work for XHTML documents).
매치되는 모든 원소에 주어진 html을 넣는다.

<!DOCTYPE HTML PUBLIC "-//W3C//DTD HTML 4.01 Transitional//EN"
                   "http://www.w3.org/TR/html4/loose.dtd">
<html>
<head>
  <script src="http://code.jquery.com/jquery-latest.js"></script>
  <script>
  $(document).ready(function(){
   $("div").html("<span class='red'>Hello <b>Again</b></span>");
  });
  </script>
  <style>
  .red { color:red; }
  </style>
</head>
<body>
  <span>Hello</span>
  <div></div>
  <div></div>
  <div></div>
</body>
</html>


11. text( )  Returns: String
실행후 문자열 반환

Get the text contents of all matched elements.
선택되어진 객체의 문자열을 반환한다. 태그는 제외된다.

<!DOCTYPE HTML PUBLIC "-//W3C//DTD HTML 4.01 Transitional//EN"
                   "http://www.w3.org/TR/html4/loose.dtd">
<html>
<head>
  <script src="http://code.jquery.com/jquery-latest.js"></script>
  <script>
  $(document).ready(function(){

   var str = $("p:first").text();
   $("p:last").html(str);

  });
  </script>
  <style>
  p { color:blue; margin:8px; }
  b { color:red; }
  </style>
</head>
<body>
  <p><b>Test</b> Paragraph.</p>
  <p></p>
</body>
</html>


12. text( val )  Returns: jQuery
실행후 jQuery 객체 반환

Set the text contents of all matched elements.
매치되는 모든 원소에 주어진 텍스트를 집어넣는다. html을 넣는다 해도 텍스트화 된다.

<!DOCTYPE HTML PUBLIC "-//W3C//DTD HTML 4.01 Transitional//EN"
                   "http://www.w3.org/TR/html4/loose.dtd">
<html>
<head>
  <script src="http://code.jquery.com/jquery-latest.js"></script>
  <script>
  $(document).ready(function(){
   $("p").text("<b>Some</b> new text.");
  });
  </script>
  <style>
  p { color:blue; margin:8px; }
  </style>
</head>
<body>
  <p>Test Paragraph.</p>
</body>
</html>


13. val( )  Returns: String, Array
실행후 문자열이나 배열로 반환

Get the content of the value attribute of the first matched element.
첫번째 매치되는 원소의 값을 반환한다.

<!DOCTYPE HTML PUBLIC "-//W3C//DTD HTML 4.01 Transitional//EN"
                   "http://www.w3.org/TR/html4/loose.dtd">
<html>
<head>
  <script src="http://code.jquery.com/jquery-latest.js"></script>
  <script>
  $(document).ready(function(){

   function displayVals() {
     var singleValues = $("#single").val();
     var multipleValues = $("#multiple").val() || [];
     $("p").html("<b>Single:</b> " +
                 singleValues +
                 " <b>Multiple:</b> " +
                 multipleValues.join(", "));
   }

   $("select").change(displayVals);
   displayVals();

  });
  </script>
  <style>
  p { color:red; margin:4px; }
  b { color:blue; }
  </style>
</head>
<body>
  <p></p>
  <select id="single">
   <option>Single</option>
   <option>Single2</option>
  </select>
  <select id="multiple" multiple="multiple">
   <option selected="selected">Multiple</option>
   <option>Multiple2</option>
   <option selected="selected">Multiple3</option>
  </select>
</body>
</html>


14. val( val )  Returns: jQuery
jQuery 객체를 반환

Set the value attribute of every matched element.
매치되는 모든 원소에 주어진 값을 적용한다.

<!DOCTYPE HTML PUBLIC "-//W3C//DTD HTML 4.01 Transitional//EN"
                   "http://www.w3.org/TR/html4/loose.dtd">
<html>
<head>
  <script src="http://code.jquery.com/jquery-latest.js"></script>
  <script>
  $(document).ready(function(){

   $("button").click(function () {
     var text = $(this).text();
     $("input").val(text);
   });

  });
  </script>
  <style>
  button { margin:4px; cursor:pointer; }
  input { margin:4px; color:blue; }
  </style>
</head>
<body>
  <div>
   <button>Feed</button>
   <button>the</button>
   <button>Input</button>
  </div>
  <input type="text" value="click a button" />
</body>
</html>


15. val( val )
반환 없음

Checks, or selects, all the radio buttons, checkboxes, and select options that match the set of values.
체크 박스, 셀렉트 박스 레디오 버튼 셀렉트 옵션 등에 값을 적용
레디오나 체크박스 같은 경우는 값을 여러개 지정하여 할수 있다.
멀티플 같은 경우 배열로서 값을 지정할수 있다.

<!DOCTYPE HTML PUBLIC "-//W3C//DTD HTML 4.01 Transitional//EN"
                   "http://www.w3.org/TR/html4/loose.dtd">
<html>
<head>
  <script src="http://code.jquery.com/jquery-latest.js"></script>
  <script>
  $(document).ready(function(){

   $("#single").val("Single2");
   $("#multiple").val(["Multiple2", "Multiple3"]);
   $("input").val(["check2", "radio1"]);

  });
  </script>
  <style>
  body { color:blue; }
  </style>
</head>
<body>
  <select id="single">
   <option>Single</option>
   <option>Single2</option>
  </select>
  <select id="multiple" multiple="multiple">
   <option selected="selected">Multiple</option>
   <option>Multiple2</option>
   <option selected="selected">Multiple3</option>
  </select><br/>
  <input type="checkbox" value="check1"/> check1
  <input type="checkbox" value="check2"/> check2
  <input type="radio" name="r" value="radio1"/> radio1
  <input type="radio" name="r" value="radio2"/> radio2
</body>
</html>


<Traversing>

1. eq( index )  Returns: jQuery
eq(인덱스) 실행후 jQuery 객체 반환

Reduce the set of matched elements to a single element.
매치되는 원소중 인덱스와 일치하는 것 하나만 반환한다.

<!DOCTYPE HTML PUBLIC "-//W3C//DTD HTML 4.01 Transitional//EN"
                   "http://www.w3.org/TR/html4/loose.dtd">
<html>
<head>
  <script src="http://code.jquery.com/jquery-latest.js"></script>
  <script>
  $(document).ready(function(){

   $("div").eq(2).addClass("red");

  });
  </script>
  <style>
  div { width:60px; height:60px; margin:10px; float:left;
       border:2px solid blue; }
  .red { background:red; }
  </style>
</head>
<body>
  <div></div>
  <div></div>
  <div></div>
  <div></div>
  <div></div>
  <div></div>
</body>
</html>


2. hasClass( class )  Returns: Boolean
클래스가 있나 없나 실행후 참거짓 리턴

Checks the current selection against a class and returns true, if at least one element of the selection has the given class.
매치되는 원소에 주어진 클래스가 존재하면 참, 아니면 거짓을 반환한다.

<!DOCTYPE HTML PUBLIC "-//W3C//DTD HTML 4.01 Transitional//EN"
                   "http://www.w3.org/TR/html4/loose.dtd">
<html>
<head>
  <script src="http://code.jquery.com/jquery-latest.js"></script>
  <script>
  $(document).ready(function(){

   $("div").click(function(){
     if ( $(this).hasClass("protected") )
       $(this).animate({ left: -10 }, 75)
              .animate({ left: 10 }, 75)
              .animate({ left: -10 }, 75)
              .animate({ left: 10 }, 75)
              .animate({ left: 0 }, 75);
   });

  });
  </script>
  <style>
  div { width: 80px; height: 80px; background: #abc;
       position: relative; border: 2px solid black;
       margin: 20px 0px; float: left; left:0 }
  div.protected { border-color: red; }
  span { display:block; float:left; width:20px;
        height:20px; }
  </style>
</head>
<body>
  <span></span><div class="protected"></div>
  <span></span><div></div>
  <span></span><div></div>
  <span></span><div class="protected"></div>
</body>
</html>


3. filter( expr )  Returns: jQuery
실행후 jQuery 객체를 반환

Removes all elements from the set of matched elements that do not match the specified expression(s).
매치되는 원소들중 해당 필터 표현에 맞지 않는 것들은 제거하고 반환

<!DOCTYPE HTML PUBLIC "-//W3C//DTD HTML 4.01 Transitional//EN"
                   "http://www.w3.org/TR/html4/loose.dtd">
<html>
<head>
  <script src="http://code.jquery.com/jquery-latest.js"></script>
  <script>
  $(document).ready(function(){

   $("div").css("background", "#c8ebcc")
           .filter(".middle")
           .css("border-color", "red");

  });
  </script>
  <style>
  div { width:60px; height:60px; margin:5px; float:left;
       border:2px white solid;}
  </style>
</head>
<body>
  <div></div>
  <div class="middle"></div>
  <div class="middle"></div>
  <div class="middle"></div>
  <div class="middle"></div>
  <div></div>
</body>
</html>


4. filter( fn )  Returns: jQuery
filter(함수) 실행후 jQuery 객체를 반환

Removes all elements from the set of matched elements that does not match the specified function.
매치되는 원소들중 해당 필터 함수에 맞지 않는 것들은 제거하고 반환

<!DOCTYPE HTML PUBLIC "-//W3C//DTD HTML 4.01 Transitional//EN"
                   "http://www.w3.org/TR/html4/loose.dtd">
<html>
<head>
  <script src="http://code.jquery.com/jquery-latest.js"></script>
  <script>
  $(document).ready(function(){

   $("div").css("background", "#b4b0da")
           .filter(function (index) {
                 return index == 1 || $(this).attr("id") == "fourth";
               })
           .css("border", "3px double red");

  });
  </script>
  <style>
  div { width:60px; height:60px; margin:5px; float:left;
       border:3px white solid; }
  </style>
</head>
<body>
  <div id="first"></div>
  <div id="second"></div>
  <div id="third"></div>
  <div id="fourth"></div>
  <div id="fifth"></div>
  <div id="sixth"></div>
</body>
</html>


5. is( expr )  Returns: Boolean
존재 여부 실행후 참거짓 반환

Checks the current selection against an expression and returns true, if at least one element of the selection fits the given expression.
매치되는 원소들중 주어진 표현식과 비교하여 일치 하면 참, 그렇지 않으면 거짓을 반환한다.

<!DOCTYPE HTML PUBLIC "-//W3C//DTD HTML 4.01 Transitional//EN"
                   "http://www.w3.org/TR/html4/loose.dtd">
<html>
<head>
  <script src="http://code.jquery.com/jquery-latest.js"></script>
  <script>
  $(document).ready(function(){

   $("div").one('click', function () {
     if ($(this).is(":first-child")) {
       $("p").text("It's the first div.");
     } else if ($(this).is(".blue,.red")) {
       $("p").text("It's a blue or red div.");
     } else if ($(this).is(":contains('Peter')")) {
       $("p").text("It's Peter!");
     } else {
       $("p").html("It's nothing <em>special</em>.");
     }
     $("p").hide().slideDown("slow");
     $(this).css({"border-style": "inset", cursor:"default"});
   });

  });
  </script>
  <style>
  div { width:60px; height:60px; margin:5px; float:left;
       border:4px outset; background:green; text-align:center;
       font-weight:bolder; cursor:pointer; }
  .blue { background:blue; }
  .red { background:red; }
  span { color:white; font-size:16px; }
  p { color:red; font-weight:bolder; background:yellow;
     margin:3px; clear:left; display:none; }
  </style>
</head>
<body>
  <div></div>
  <div class="blue"></div>
  <div></div>
  <div class="red"></div>
  <div><br/><span>Peter</span></div>
  <div class="blue"></div>
  <p> </p>
</body>
</html>


16. map( callback )  Returns: jQuery
map(콜백함수) 실행후 jQuery  객체 반환

Translate a set of elements in the jQuery object into another set of values in an array (which may, or may not, be elements).

<!DOCTYPE HTML PUBLIC "-//W3C//DTD HTML 4.01 Transitional//EN"
                   "http://www.w3.org/TR/html4/loose.dtd">
<html>
<head>
  <script src="http://code.jquery.com/jquery-latest.js"></script>
  <script>
  $(document).ready(function(){

   $("p").append( $("input").map(function(){
     return $(this).val();
   }).get().join(", ") );

  });
  </script>
  <style>
  p { color:red; }
  </style>
</head>
<body>
  <p><b>Values: </b></p>
  <form>
   <input type="text" name="name" value="John"/>
   <input type="text" name="password" value="password"/>
   <input type="text" name="url" value="http://ejohn.org/"/>
  </form>
</body>
</html>


17. not( expr )  Returns: jQuery
실행후 jQuery 객체 반환

Removes elements matching the specified expression from the set of matched elements.
매치되는 원소들중 표현식과 일치 하는 원소는 제거 하고 반환한다.

<!DOCTYPE HTML PUBLIC "-//W3C//DTD HTML 4.01 Transitional//EN"
                   "http://www.w3.org/TR/html4/loose.dtd">
<html>
<head>
  <script src="http://code.jquery.com/jquery-latest.js"></script>
  <script>
  $(document).ready(function(){

   $("div").not(".green, #blueone")
           .css("border-color", "red");

  });
  </script>
  <style>
  div { width:60px; height:60px; margin:10px; float:left;
       background:yellow; border:2px solid white; }
  .green { background:#8f8; }
  .gray { background:#ccc; }
  #blueone { background:#99f; }
  </style>
</head>
<body>
  <div></div>
  <div id="blueone"></div>
  <div></div>
  <div class="green"></div>
  <div class="green"></div>
  <div class="gray"></div>
  <div></div>
</body>
</html>


18. slice( start, end )  Returns: jQuery
Selects a subset of the matched elements.
매치되어진 원소들 중에서 해당 시작인덱스와 끝 인덱스의 범위에 있는 인덱스의 원소들을 모두 배열로 반환한다.
끝 인덱스를 지정하지 않으면 시작인덱스 부터 끝까지 배열로 반환한다.

<!DOCTYPE HTML PUBLIC "-//W3C//DTD HTML 4.01 Transitional//EN"
                   "http://www.w3.org/TR/html4/loose.dtd">
<html>
<head>
  <script src="http://code.jquery.com/jquery-latest.js"></script>
  <script>
  $(document).ready(function(){
  
   function colorEm() {
     var $div = $("div");
     var start = Math.floor(Math.random() *
                            $div.length);
     var end = Math.floor(Math.random() *
                          ($div.length - start)) +
                          start + 1;
     if (end == $div.length) end = undefined;
     $div.css("background", "");
     if (end)
       $div.slice(start, end).css("background", "yellow");  
      else
       $div.slice(start).css("background", "yellow");
    
     $("span").text('$("div").slice(' + start +
                    (end ? ', ' + end : '') +
                    ').css("background", "yellow");');
   }

   $("button").click(colorEm);

  });
  </script>
  <style>
  div { width:40px; height:40px; margin:10px; float:left;
       border:2px solid blue; }
  span { color:red; font-weight:bold; }
  button { margin:5px; }
  </style>
</head>
<body>
  <button>Turn slice yellow</button>
  <span>Click the button!</span>
  <div></div>
  <div></div>
  <div></div>
  <div></div>
  <div></div>
  <div></div>
  <div></div>
  <div></div>
  <div></div>
</body>
</html>


19. add( expr )  Returns: jQuery
add( expr ), 실행후 jQuery 객체 반환

Adds more elements, matched by the given expression, to the set of matched elements.
매치된 원소에 새로운 원소나 원소들을 추가한다.

<!DOCTYPE HTML PUBLIC "-//W3C//DTD HTML 4.01 Transitional//EN"
                   "http://www.w3.org/TR/html4/loose.dtd">
<html>
<head>
  <script src="http://code.jquery.com/jquery-latest.js"></script>
  <script>
  $(document).ready(function(){
  
   $("div").css("border", "2px solid red")
           .add("p")
           .css("background", "yellow");

  });
  </script>
  <style>
  div { width:60px; height:60px; margin:10px; float:left; }
  p { clear:left; font-weight:bold; font-size:16px;
     color:blue; margin:0 10px; padding:2px; }
  </style>
</head>
<body>
  <div></div>
  <div></div>
  <div></div>
  <div></div>
  <div></div>
  <div></div>
  <p>Added this... (notice no border)</p>
</body>
</html>


20. children( expr )  Returns: jQuery
children( expr ), 실행후 jQuery 객체 반환

Get a set of elements containing all of the unique children of each of the matched set of elements.
선택되어진 원소의 자식들을 반환
이해가 잘 안됨

<!DOCTYPE HTML PUBLIC "-//W3C//DTD HTML 4.01 Transitional//EN"
                   "http://www.w3.org/TR/html4/loose.dtd">
<html>
<head>
  <script src="http://code.jquery.com/jquery-latest.js"></script>
  <script>
  $(document).ready(function(){
  
   $("#container").click(function (e) {
     $("*").removeClass("hilite");
     var $kids = $(e.target).children();
     var len = $kids.addClass("hilite").length;

     $("#results span:first").text(len);
     $("#results span:last").text(e.target.tagName);

     e.preventDefault();
     return false;
   });

  });
  </script>
  <style>
  body { font-size:16px; font-weight:bolder; }
  div { width:130px; height:82px; margin:10px; float:left;
       border:1px solid blue; padding:4px; }
  #container { width:auto; height:105px; margin:0; float:none;
       border:none; }
  .hilite { border-color:red; }
  #results { display:block; color:red; }
  p { margin:10px; border:1px solid transparent; }
  span { color:blue; border:1px solid transparent; }
  input { width:100px; }
  em { border:1px solid transparent; }
  a { border:1px solid transparent; }
  b { border:1px solid transparent; }
  button { border:1px solid transparent; }
  </style>
</head>
<body>
  <div id="container">
   <div>
     <p>This <span>is the <em>way</em> we</span>
     write <em>the</em> demo,</p>
   </div>
   <div>
     <a href="#"><b>w</b>rit<b>e</b></a> the <span>demo,</span> <button>write
     the</button> demo,
   </div>
   <div>
     This <span>the way we <em>write</em> the <em>demo</em> so</span>
     <input type="text" value="early" /> in
   </div>
   <p>
     <span>t</span>he <span>m</span>orning.
     <span id="results">Found <span>0</span> children in <span>TAG</span>.</span>
   </p>
  </div>
</body>
</html>


21. contents( )  Returns: jQuery
contents( ), 실행후 jQuery 객체 반환

Find all the child nodes inside the matched elements (including text nodes), or the content document, if the element is an iframe.
매치된 원소들중에서 비어있지 않는 자식들을 모두 가져옴
이해가 잘 안됨

<!DOCTYPE HTML PUBLIC "-//W3C//DTD HTML 4.01 Transitional//EN"
                   "http://www.w3.org/TR/html4/loose.dtd">
<html>
<head>
  <script src="http://code.jquery.com/jquery-latest.js"></script>
  <script>
  $(document).ready(function(){
   $("p").contents().not("[@nodeType=1]").wrap("<b/>");
  });
  </script>
 
</head>
<body>
  <p>Hello <a href="Johnhttp://ejohn.org/">John</a>, how are you doing?</p>
</body>
</html>


22. find( expr )  Returns: jQuery
find( expr ), 실행후 jQuery 객체 반환

Searches for all elements that match the specified expression. This method is a good way to find additional descendant elements with which to process.
매치되어진 원소들 중에서 주어진 것에 매치되는 것을 찾아 그것들을 모두 배열로 반환한다.

<!DOCTYPE HTML PUBLIC "-//W3C//DTD HTML 4.01 Transitional//EN"
                   "http://www.w3.org/TR/html4/loose.dtd">
<html>
<head>
  <script src="http://code.jquery.com/jquery-latest.js"></script>
  <script>
  $(document).ready(function(){
   $("p").find("span").css('color','red');
  });
  </script>
 
</head>
<body>
  <p><span>Hello</span>, how are you?</p>
  <p>Me? I'm <span>good</span>.</p>
</body>
</html>


23. next( expr )  Returns: jQuery
next( expr ), 실행후 jQuery 객체 반환

Get a set of elements containing the unique next siblings of each of the matched set of elements.
매치되어진 원소와 형제 관계인 바로 다음 원소를 찾아 객체로 반환

<!DOCTYPE HTML PUBLIC "-//W3C//DTD HTML 4.01 Transitional//EN"
                   "http://www.w3.org/TR/html4/loose.dtd">
<html>
<head>
  <script src="http://code.jquery.com/jquery-latest.js"></script>
  <script>
  $(document).ready(function(){
  
   $("button").click(function () {
     var txt = $(this).text();
     $(this).next().text(txt);
   });

  });
  </script>
  <style>
  span { color:blue; font-weight:bold; }
  button { width:100px; }
  </style>
</head>
<body>
  <div><button>First</button> - <span></span></div>
  <div><button>Second</button> - <span></span></div>
  <div><button>Third</button> - <span></span></div>
</body>
</html>


24. nextAll( expr )  Returns: jQuery
nextAll( expr ), 실행후 jQuery 객체 반환

Find all sibling elements after the current element.
현재 매치되어진 원소와 형제 관계에 있는 모든 원소를 찾아 객체로 반환

<!DOCTYPE HTML PUBLIC "-//W3C//DTD HTML 4.01 Transitional//EN"
                   "http://www.w3.org/TR/html4/loose.dtd">
<html>
<head>
  <script src="http://code.jquery.com/jquery-latest.js"></script>
  <script>
  $(document).ready(function(){
   $("div:first").nextAll().addClass("after");
  });
  </script>
  <style>
  div { width: 80px; height: 80px; background: #abc;
       border: 2px solid black; margin: 10px; float: left; }
  div.after { border-color: red; }
  </style>
</head>
<body>
  <div></div>
  <div></div>
  <div></div>
  <div></div>
</body>
</html>


25. parent( expr )  Returns: jQuery
parent( expr ), 실행후 jQuery 객체 반환

Get a set of elements containing the unique parents of the matched set of elements.
매치되어진 원소의 유일한 부모를 찾아 객체로 반환한다.

<!DOCTYPE HTML PUBLIC "-//W3C//DTD HTML 4.01 Transitional//EN"
                   "http://www.w3.org/TR/html4/loose.dtd">
<html>
<head>
  <script src="http://code.jquery.com/jquery-latest.js"></script>
  <script>
  $(document).ready(function(){
  
   $("*", document.body).each(function () {
     var parentTag = $(this).parent().get(0).tagName;
     $(this).prepend(document.createTextNode(parentTag + " > "));
   });

  });
  </script>
  <style>
  div,p { margin:10px; }
  </style>
</head>
<body>
  <div>div,
   <span>span, </span>
   <b>b </b>
  </div>
  <p>p,
   <span>span,
     <em>em </em>
   </span>
  </p>
  <div>div,
   <strong>strong,
     <span>span, </span>
     <em>em,
       <b>b, </b>
     </em>
   </strong>
   <b>b </b>
  </div>
</body>
</html>


26. parents( expr )  Returns: jQuery
parents( expr ), 실행후 jQuery 객체 반환

Get a set of elements containing the unique ancestors of the matched set of elements (except for the root element).
매치되어진 원소의 유일한 조상들을 찾아 객체로 반환한다.

The matched elements can be filtered with an optional expression.

<!DOCTYPE HTML PUBLIC "-//W3C//DTD HTML 4.01 Transitional//EN"
                   "http://www.w3.org/TR/html4/loose.dtd">
<html>
<head>
  <script src="http://code.jquery.com/jquery-latest.js"></script>
  <script>
  $(document).ready(function(){
  
   var parentEls = $("b").parents()
                         .map(function () {
                               return this.tagName;
                             })
                         .get().join(", ");
   $("b").append("<strong>" + parentEls + "</strong>");

  });
  </script>
  <style>
  b { color:blue; }
  strong { color:red; }
  </style>
</head>
<body>
  <div>
   <p>
     <span>
       <b>My parents are: </b>
     </span>
   </p>
  </div>
</body>
</html>


27. prev( expr )  Returns: jQuery
prev( expr ), 실행후 jQuery 객체 반환

Get a set of elements containing the unique previous siblings of each of the matched set of elements.
매치되어진 원소 보다 앞에 있는 유니크한 형제 원소를 찾아 객체로 반환한다.

<!DOCTYPE HTML PUBLIC "-//W3C//DTD HTML 4.01 Transitional//EN"
                   "http://www.w3.org/TR/html4/loose.dtd">
<html>
<head>
  <script src="http://code.jquery.com/jquery-latest.js"></script>
  <script>
  $(document).ready(function(){
  
   var $curr = $("#start");
   $curr.css("background", "#f99");
   $("button").click(function () {
     $curr = $curr.prev();
     $("div").css("background", "");
     $curr.css("background", "#f99");
   });

  });
  </script>
  <style>
  div { width:40px; height:40px; margin:10px;
       float:left; border:2px blue solid;
       padding:2px; }
  span { font-size:14px; }
  p { clear:left; margin:10px; }
  </style>
</head>
<body>
  <div></div>
  <div></div>
  <div><span>has child</span></div>
  <div></div>
  <div></div>
  <div></div>
  <div id="start"></div>
  <div></div>
  <p><button>Go to Prev</button></p>
</body>
</html>


28. prevAll( expr )  Returns: jQuery
prevAll( expr ), 실행후 jQuery 객체 반환

Find all sibling elements before the current element.
매치되어진 원소보다 이전에 있는 모든 형제 원소를 찾아 객체로 반환한다.

<!DOCTYPE HTML PUBLIC "-//W3C//DTD HTML 4.01 Transitional//EN"
                   "http://www.w3.org/TR/html4/loose.dtd">
<html>
<head>
  <script src="http://code.jquery.com/jquery-latest.js"></script>
  <script>
  $(document).ready(function(){
   $("div:last").prevAll().addClass("before");
  });
  </script>
  <style>
  div { width:70px; height:70px; background:#abc;
       border:2px solid black; margin:10px; float:left; }
  div.before { border-color: red; }
  </style>
</head>
<body>
  <div></div>
  <div></div>
  <div></div>
  <div></div>
</body>
</html>


29. siblings( expr )  Returns: jQuery
siblings( expr ), 실행후 jQuery 객체 반환

Get a set of elements containing all of the unique siblings of each of the matched set of elements.
매치되어진 원소들의 모든 형제 원소들을 찾아 반환한다.

Can be filtered with an optional expressions.

<!DOCTYPE HTML PUBLIC "-//W3C//DTD HTML 4.01 Transitional//EN"
                   "http://www.w3.org/TR/html4/loose.dtd">
<html>
<head>
  <script src="http://code.jquery.com/jquery-latest.js"></script>
  <script>
  $(document).ready(function(){
  
   var len = $(".hilite").siblings()
                         .css("color", "red")
                         .length;
   $("b").text(len);

  });
  </script>
  <style>
  ul { float:left; margin:5px; font-size:16px; font-weight:bold; }
  p { color:blue; margin:10px 20px; font-size:16px; padding:5px;
     font-weight:bolder; }
  .hilite { background:yellow; }
</style>
</head>
<body>
  <ul>
   <li>One</li>
   <li>Two</li>
   <li class="hilite">Three</li>
   <li>Four</li>
  </ul>
  <ul>
   <li>Five</li>
   <li>Six</li>
   <li>Seven</li>
  </ul>
  <ul>
   <li>Eight</li>
   <li class="hilite">Nine</li>
   <li>Ten</li>
   <li class="hilite">Eleven</li>
  </ul>
  <p>Unique siblings: <b></b></p>
</body>
</html>


30. andSelf( )  Returns: jQuery
andSelf( ), 실행후 jQuery 객체 반환

Add the previous selection to the current selection.
매치되어진 원소들의 상위의 형제 원소들과 조상 원소 모두를 찾아 추가하여 객체로 반환한다.
이해가 잘 안됨

<!DOCTYPE HTML PUBLIC "-//W3C//DTD HTML 4.01 Transitional//EN"
                   "http://www.w3.org/TR/html4/loose.dtd">
<html>
<head>
  <script src="http://code.jquery.com/jquery-latest.js"></script>
  <script>
  $(document).ready(function(){
  
   $("div").find("p").andSelf().addClass("border");
   $("div").find("p").addClass("background");

  });
  </script>
  <style>
  p, div { margin:5px; padding:5px; }
  .border { border: 2px solid red; }
  .background { background:yellow; }
  </style>
</head>
<body>
  <div>
   <p>First Paragraph</p>
   <p>Second Paragraph</p>
  </div>
</body>
</html>


31. end( )  Returns: jQuery
end( ), 실행후 jQuery 객체 반환

Revert the most recent 'destructive' operation, changing the set of matched elements to its previous state (right before the destructive operation).
현재 보다 이전의 매치상태로 돌아가서 객체를 반환
잘 이해가 안됨

<!DOCTYPE HTML PUBLIC "-//W3C//DTD HTML 4.01 Transitional//EN"
                   "http://www.w3.org/TR/html4/loose.dtd">
<html>
<head>
  <script src="http://code.jquery.com/jquery-latest.js"></script>
  <script>
  $(document).ready(function(){
  
   jQuery.fn.showTags = function (n) {
     var tags = this.map(function () {
                             return this.tagName;
                           })
                       .get().join(", ");
     $("b:eq(" + n + ")").text(tags);
     return this;
   };

   $("p").showTags(0)
         .find("span")
         .showTags(1)
         .css("background", "yellow")
         .end()
         .showTags(2)
         .css("font-style", "italic");

  });
  </script>
  <style>
  p, div { margin:1px; padding:1px; font-weight:bold;
          font-size:16px; }
  div { color:blue; }
  b { color:red; }
  </style>
</head>
<body>
  <p>
   Hi there <span>how</span> are you <span>doing</span>?
  </p>
  <p>
   This <span>span</span> is one of
   several <span>spans</span> in this
   <span>sentence</span>.
  </p>
  <div>
   Tags in jQuery object initially: <b></b>
  </div>
  <div>
   Tags in jQuery object after find: <b></b>
  </div>
  <div>
   Tags in jQuery object after end: <b></b>
  </div>
</body>
</html>


<Manipulation>

1. html( )  Returns: String
html( ), 실행후 문자열 반환

Get the html contents (innerHTML) of the first matched element. This property is not available on XML documents (although it will work for XHTML documents).
매치되어진 첫번째 원소의 html을 가져와서 반환

<!DOCTYPE HTML PUBLIC "-//W3C//DTD HTML 4.01 Transitional//EN"
                   "http://www.w3.org/TR/html4/loose.dtd">
<html>
<head>
  <script src="http://code.jquery.com/jquery-latest.js"></script>
  <script>
  $(document).ready(function(){
  
   $("p").click(function () {
     var htmlStr = $(this).html();
     $(this).text(htmlStr);
   });

  });
  </script>
  <style>
  p { margin:8px; font-size:20px; color:blue;
     cursor:pointer; }
  b { text-decoration:underline; }
  button { cursor:pointer; }
  </style>
</head>
<body>
  <p>
   <b>Click</b> to change the <span id="tag">html</span>
  </p>
  <p>
   to a <span id="text">text</span> node.
  </p>
  <p>
   This <button name="nada">button</button> does nothing.
  </p>
</body>
</html>


2. html( val )  Returns: jQuery
html( val ), 실행후 jQuery 객체 반환

Set the html contents of every matched element. This property is not available on XML documents (although it will work for XHTML documents).

매치되는 모든 원소들에게 주어진 html을 삽입하고 객체를 반환한다.

<!DOCTYPE HTML PUBLIC "-//W3C//DTD HTML 4.01 Transitional//EN"
                   "http://www.w3.org/TR/html4/loose.dtd">
<html>
<head>
  <script src="http://code.jquery.com/jquery-latest.js"></script>
  <script>
  $(document).ready(function(){
   $("div").html("<span class='red'>Hello <b>Again</b></span>");
  });
  </script>
  <style>
  .red { color:red; }
  </style>
</head>
<body>
  <span>Hello</span>
  <div></div>
  <div></div>
  <div></div>
</body>
</html>


3. text( )  Returns: String
text( ), 실행후 문자열 반환

Get the text contents of all matched elements.
매치되어진 원소의 태그를 제외한 문자열만 반환한다.

<!DOCTYPE HTML PUBLIC "-//W3C//DTD HTML 4.01 Transitional//EN"
                   "http://www.w3.org/TR/html4/loose.dtd">
<html>
<head>
  <script src="http://code.jquery.com/jquery-latest.js"></script>
  <script>
  $(document).ready(function(){
  
   var str = $("p:first").text();
   $("p:last").html(str);

  });
  </script>
  <style>
  p { color:blue; margin:8px; }
  b { color:red; }
  </style>
</head>
<body>
  <p><b>Test</b> Paragraph.</p>
  <p></p>
</body>
</html>


4. text( val )  Returns: jQuery
text( val ), 실행후 jQuery 객체 반환

Set the text contents of all matched elements.
매치된 원소들에 주어진 문자열을 삽입하고 객체를 반환한다.

<!DOCTYPE HTML PUBLIC "-//W3C//DTD HTML 4.01 Transitional//EN"
                   "http://www.w3.org/TR/html4/loose.dtd">
<html>
<head>
  <script src="http://code.jquery.com/jquery-latest.js"></script>
  <script>
  $(document).ready(function(){
   $("p").text("<b>Some</b> new text.");
  });
  </script>
  <style>
  p { color:blue; margin:8px; }
  </style>
</head>
<body>
  <p>Test Paragraph.</p>
</body>
</html>


5. append( content )  Returns: jQuery
append( content ) , 실행후 jQuery 객체 반환

Append content to the inside of every matched element.
매치되어진 원소에 주어진 내용을 추가로 삽입한 후 객체 반환

<!DOCTYPE HTML PUBLIC "-//W3C//DTD HTML 4.01 Transitional//EN"
                   "http://www.w3.org/TR/html4/loose.dtd">
<html>
<head>
  <script src="http://code.jquery.com/jquery-latest.js"></script>
  <script>
  $(document).ready(function(){
   $("p").append("<b>Hello</b>");
  });
  </script>
  <style>p { background:yellow; }</style>
</head>
<body>
  <p>I would like to say: </p>
</body>
</html>


6. appendTo( content )  Returns: jQuery
appendTo( content ), 실행후 jQuery 객체 반환

Append all of the matched elements to another, specified, set of elements.
매치되어진 원소들의 내용들을 주어진 조건에 맞는 원소에 추가로 삽입한후  객체 반환

<!DOCTYPE HTML PUBLIC "-//W3C//DTD HTML 4.01 Transitional//EN"
                   "http://www.w3.org/TR/html4/loose.dtd">
<html>
<head>
  <script src="http://code.jquery.com/jquery-latest.js"></script>
  <script>
  $(document).ready(function(){
   $("span").appendTo("#foo"); // check append() examples
  });
  </script>
  <style>#foo { background:yellow; }</style>
</head>
<body>
  <span>I have nothing more to say... </span>
  <div id="foo">FOO! </div>
</body>
</html>


7. prepend( content )  Returns: jQuery
prepend( content ), 실행후 jQuery 객체 반환

Prepend content to the inside of every matched element.
매치되어진 원소들에 맨앞에 주어진 내용을 삽입한후 객체를 반환

<!DOCTYPE HTML PUBLIC "-//W3C//DTD HTML 4.01 Transitional//EN"
                   "http://www.w3.org/TR/html4/loose.dtd">
<html>
<head>
  <script src="http://code.jquery.com/jquery-latest.js"></script>
  <script>
  $(document).ready(function(){
   $("p").prepend("<b>Hello </b>");
  });
  </script>
  <style>p { background:yellow; }</style>
</head>
<body>
  <p>there friend!</p>
  <p>amigo!</p>
</body>
</html>


8. prependTo( content )  Returns: jQuery
prependTo( content )  실행후 jQuery 객체 반환

Prepend all of the matched elements to another, specified, set of elements.
매칮되어진 원소의 내용을 주어진 것에 매치되는 원소의 맨앞에 추가 삽입한후 객체를 반환

<!DOCTYPE HTML PUBLIC "-//W3C//DTD HTML 4.01 Transitional//EN"
                   "http://www.w3.org/TR/html4/loose.dtd">
<html>
<head>
  <script src="http://code.jquery.com/jquery-latest.js"></script>
  <script>
  $(document).ready(function(){
   $("span").prependTo("#foo"); // check prepend() examples
  });
  </script>
  <style>div { background:yellow; }</style>
</head>
<body>
  <div id="foo">FOO!</div>
  <span>I have something to say... </span>
</body>
</html>


9. after( content )  Returns: jQuery
after( content ), 실행후 jQuery 객체를 반환

Insert content after each of the matched elements.
매치되는 모든 원소의 뒤에 주어진 내용을 삽입

<!DOCTYPE HTML PUBLIC "-//W3C//DTD HTML 4.01 Transitional//EN"
                   "http://www.w3.org/TR/html4/loose.dtd">
<html>
<head>
  <script src="http://code.jquery.com/jquery-latest.js"></script>
  <script>
  $(document).ready(function(){
   $("p").after("<b>Hello</b>");
  });
  </script>
  <style>p { background:yellow; }</style>
</head>
<body>
  <p>I would like to say: </p>
</body>
</html>


10. before( content )  Returns: jQuery
before( content )  실행후 jQuery 객체를 반환

Insert content before each of the matched elements.

매치되는 모는 원소의 앞에 주어진 내용 삽입
<!DOCTYPE HTML PUBLIC "-//W3C//DTD HTML 4.01 Transitional//EN"
                   "http://www.w3.org/TR/html4/loose.dtd">
<html>
<head>
  <script src="http://code.jquery.com/jquery-latest.js"></script>
  <script>
  $(document).ready(function(){
   $("p").before("<b>Hello</b>");
  });
  </script>
  <style>p { background:yellow; }</style>
</head>
<body>
  <p> is what I said...</p>
</body>
</html>


11. insertAfter( content )  Returns: jQuery
insertAfter( content ), 실행후 jQuery 객체 반환

Insert all of the matched elements after another, specified, set of elements.
매치되어진 원소들을 주어진 것에 매치되는 원소의 뒤에 삽입한다.

<!DOCTYPE HTML PUBLIC "-//W3C//DTD HTML 4.01 Transitional//EN"
                   "http://www.w3.org/TR/html4/loose.dtd">
<html>
<head>
  <script src="http://code.jquery.com/jquery-latest.js"></script>
  <script>
  $(document).ready(function(){
   $("p").insertAfter("#foo"); // check after() examples
  });
  </script>
  <style>#foo { background:yellow; }</style>
</head>
<body>
  <p> is what I said... </p><div id="foo">FOO!</div>
</body>
</html>


12. insertBefore( content )  Returns: jQuery
insertBefore( content ), 실행후 jQuery 객체 반환

Insert all of the matched elements before another, specified, set of elements.
매치되어진 원소앞에 주어진 것에 매치된 원소를 삽입한다.

<!DOCTYPE HTML PUBLIC "-//W3C//DTD HTML 4.01 Transitional//EN"
                   "http://www.w3.org/TR/html4/loose.dtd">
<html>
<head>
  <script src="http://code.jquery.com/jquery-latest.js"></script>
  <script>
  $(document).ready(function(){
   $("p").insertBefore("#foo"); // check before() examples
  });
  </script>
  <style>#foo { background:yellow; }</style>
</head>
<body>
  <div id="foo">FOO!</div><p>I would like to say: </p>
</body>
</html>


13. wrap( html )  Returns: jQuery
wrap( html ), 실행후 jQuery 객체를 반환

Wrap all matched elements with a structure of other elements.
매치되어진 원소를 주어진 html로서 감싼후 객체를 반환

<!DOCTYPE HTML PUBLIC "-//W3C//DTD HTML 4.01 Transitional//EN"
                   "http://www.w3.org/TR/html4/loose.dtd">
<html>
<head>
  <script src="http://code.jquery.com/jquery-latest.js"></script>
  <script>
  $(document).ready(function(){
   $("span").wrap("<div><div><p><em><b></b></em></p></div></div>");
  });
  </script>
  <style>
  div { border:2px blue solid; margin:2px; padding:2px; }
  p { background:yellow; margin:2px; padding:2px; }
  </style>
</head>
<body>
  <span>Span Text</span>
  <span>Another One</span>
</body>
</html>


14. wrap( elem )  Returns: jQuery
wrap( elem ), 실행후 jQuery 객체 반환

Wrap all matched elements with a structure of other elements.
매치된 모든 원소를 주어진것에 매치되는 원소로 감싼다.

<!DOCTYPE HTML PUBLIC "-//W3C//DTD HTML 4.01 Transitional//EN"
                   "http://www.w3.org/TR/html4/loose.dtd">
<html>
<head>
  <script src="http://code.jquery.com/jquery-latest.js"></script>
  <script>
  $(document).ready(function(){
   $("p").wrap(document.getElementById('content'));
  });
  </script>
  <style>#content { background:#9f9; }</style>
</head>
<body>
  <p>Test Paragraph.</p><div id="content"></div>
</body>
</html>


15. wrapAll( html )  Returns: jQuery
wrapAll( html )  실행후 jQuery 객체 반환

Wrap all the elements in the matched set into a single wrapper element.
매치되는 원소들을 주어진 html로 모두 하나로 감싼다.

<!DOCTYPE HTML PUBLIC "-//W3C//DTD HTML 4.01 Transitional//EN"
                   "http://www.w3.org/TR/html4/loose.dtd">
<html>
<head>
  <script src="http://code.jquery.com/jquery-latest.js"></script>
  <script>
  $(document).ready(function(){
   $("span").wrapAll("<div><div><p><em><b></b></em></p></div></div>");
  });
  </script>
  <style>
  div { border:2px blue solid; margin:2px; padding:2px; }
  p { background:yellow; margin:2px; padding:2px; }
  strong { color:red; }
  </style>
</head>
<body>
  <span>Span Text</span>
  <strong>What about me?</strong>
  <span>Another One</span>
</body>
</html>


16. wrapAll( elem )  Returns: jQuery
wrapAll( elem ), 실행후 jQuery 객체 반환

Wrap all the elements in the matched set into a single wrapper element.
매치되어진 원소들을 주어진 것에 매치되는 것으로 하나로 감싼다.

<!DOCTYPE HTML PUBLIC "-//W3C//DTD HTML 4.01 Transitional//EN"
                   "http://www.w3.org/TR/html4/loose.dtd">
<html>
<head>
  <script src="http://code.jquery.com/jquery-latest.js"></script>
  <script>
  $(document).ready(function(){
   $("p").wrapAll(document.createElement("div"));
  });
  </script>
  <style>
  div { border: 2px solid blue; }
  p { background:yellow; margin:4px; }
  </style>
</head>
<body>
  <p>Hello</p>
  <p>cruel</p>
  <p>World</p>
</body>
</html>


17. wrapInner( html )  Returns: jQuery
wrapInner( html ), 실행후 jQuery 객체 반환

Wrap the inner child contents of each matched element (including text nodes) with an HTML structure.
매치되어진 원소 속의 내용을 주어진 것으로 감싼다

<!DOCTYPE HTML PUBLIC "-//W3C//DTD HTML 4.01 Transitional//EN"
                   "http://www.w3.org/TR/html4/loose.dtd">
<html>
<head>
  <script src="http://code.jquery.com/jquery-latest.js"></script>
  <script>
  $(document).ready(function(){
   $("body").wrapInner("<div><div><p><em><b></b></em></p></div></div>");
  });
  </script>
  <style>
  div { border:2px green solid; margin:2px; padding:2px; }
  p { background:yellow; margin:2px; padding:2px; }
  </style>
</head>
<body>
  Plain old text, or is it?
</body>
</html>


18. wrapInner( elem )  Returns: jQuery
wrapInner( elem ), 실행후 jQuery 객체를 반환

Wrap the inner child contents of each matched element (including text nodes) with a DOM element.
매치되어진 원소 속의 내용을 주어진 것에 매치된것으로 감싼다.

<!DOCTYPE HTML PUBLIC "-//W3C//DTD HTML 4.01 Transitional//EN"
                   "http://www.w3.org/TR/html4/loose.dtd">
<html>
<head>
  <script src="http://code.jquery.com/jquery-latest.js"></script>
  <script>
  $(document).ready(function(){
   $("p").wrapInner(document.createElement("b"));
  });
  </script>
  <style>p { background:#9f9; }</style>
</head>
<body>
  <p>Hello</p>
  <p>cruel</p>
  <p>World</p>
</body>
</html>


19. replaceWith( content )  Returns: jQuery
replaceWith( content ), 실행후 jQuery 객체 반환

Replaces all matched elements with the specified HTML or DOM elements.
매치되어진 원소를 주어진 내용과 치환한다.

<!DOCTYPE HTML PUBLIC "-//W3C//DTD HTML 4.01 Transitional//EN"
                   "http://www.w3.org/TR/html4/loose.dtd">
<html>
<head>
  <script src="http://code.jquery.com/jquery-latest.js"></script>
  <script>
  $(document).ready(function(){
  
   $("button").click(function () {
     $(this).replaceWith("<div>" + $(this).text() + "</div>");
   });

  });
  </script>
  <style>
  button { display:block; margin:3px; color:red; width:200px; }
  div { color:red; border:2px solid blue; width:200px;
       margin:3px; text-align:center; }
  </style>
</head>
<body>
  <button>First</button>
  <button>Second</button>
  <button>Third</button>
</body>
</html>


20. replaceAll( selector )  Returns: jQuery
replaceAll( selector ), 실행후 jQuery 객체 반환

Replaces the elements matched by the specified selector with the matched elements.
매치되어진 것들을 주어진 것에 매치되는 것에 모두 바꿈

<!DOCTYPE HTML PUBLIC "-//W3C//DTD HTML 4.01 Transitional//EN"
                   "http://www.w3.org/TR/html4/loose.dtd">
<html>
<head>
  <script src="http://code.jquery.com/jquery-latest.js"></script>
  <script>
  $(document).ready(function(){
   $("<b>Paragraph. </b>").replaceAll("p"); // check replaceWith() examples
  });
  </script>
 
</head>
<body>
  <p>Hello</p>
  <p>cruel</p>
  <p>World</p>
</body>
</html>


21. empty( )  Returns: jQuery
empty( )  실행후 jQuery 객체 반환

Remove all child nodes from the set of matched elements.
매치되어진 모든 것들을 없앤다.

<!DOCTYPE HTML PUBLIC "-//W3C//DTD HTML 4.01 Transitional//EN"
                   "http://www.w3.org/TR/html4/loose.dtd">
<html>
<head>
  <script src="http://code.jquery.com/jquery-latest.js"></script>
  <script>
  $(document).ready(function(){
  
   $("button").click(function () {
     $("p").empty();
   });

  });
  </script>
  <style>
  p { background:yellow; }
  </style>
</head>
<body>
  <p>
   Hello, <span>Person</span> <a href=";">and person</a>
  </p>
  <button>Call empty() on above paragraph</button>
</body>
</html>


22. remove( expr )  Returns: jQuery
remove( expr ), 실행후 jQuery 객체를 반환

Removes all matched elements from the DOM.
매치되는 모든 원소를 옮기다.

<!DOCTYPE HTML PUBLIC "-//W3C//DTD HTML 4.01 Transitional//EN"
                   "http://www.w3.org/TR/html4/loose.dtd">
<html>
<head>
  <script src="http://code.jquery.com/jquery-latest.js"></script>
  <script>
  $(document).ready(function(){
  
   $("button").click(function () {
     $("p").remove();
   });

  });
  </script>
  <style>p { background:yellow; margin:6px 0; }</style>
</head>
<body>
  <p>Hello</p>
  how are
  <p>you?</p>
  <button>Call remove() on paragraphs
</body>
</html>


23. clone( )  Returns: jQuery
clone( )  실행후 jQuery 객체 반환

Clone matched DOM Elements and select the clones.
선택되어진 원소를 복사

<!DOCTYPE HTML PUBLIC "-//W3C//DTD HTML 4.01 Transitional//EN"
                   "http://www.w3.org/TR/html4/loose.dtd">
<html>
<head>
  <script src="http://code.jquery.com/jquery-latest.js"></script>
  <script>
  $(document).ready(function(){
   $("b").clone().prependTo("p");
  });
  </script>
 
</head>
<body>
  <b>Hello</b><p>, how are you?</p>
</body>
</html>


24. clone( true )  Returns: jQuery
clone( true )  실행후 jQuery 객체 반환

Clone matched DOM Elements, and all their event handlers, and select the clones.
완벽한 복사

<!DOCTYPE HTML PUBLIC "-//W3C//DTD HTML 4.01 Transitional//EN"
                   "http://www.w3.org/TR/html4/loose.dtd">
<html>
<head>
  <script src="http://code.jquery.com/jquery-latest.js"></script>
  <script>
  $(document).ready(function(){
  
   $("button").click(function(){
     $(this).clone(true).insertAfter(this);
   });

  });
  </script>
 
</head>
<body>
  <button>Clone Me!</button>
</body>
</html>


<CSS>

1. css( name )  Returns: String
css( name )  실행후 문자열 반환

Return a style property on the first matched element.
매치된 원소에서 주어진 스타일 속성이 발견되면 그 값을 반환

<!DOCTYPE HTML PUBLIC "-//W3C//DTD HTML 4.01 Transitional//EN"
                   "http://www.w3.org/TR/html4/loose.dtd">
<html>
<head>
  <script src="http://code.jquery.com/jquery-latest.js"></script>
  <script>
  $(document).ready(function(){
  
   $("div").click(function () {
     var color = $(this).css("background-color");
     $("#result").html("That div is <span style='color:" +
                        color + ";'>" + color + "</span>.");
   });

  });
  </script>
  <style>
  div { width:60px; height:60px; margin:5px; float:left; }
  </style>
</head>
<body>
  <span id="result"> </span>
  <div style="background-color:blue;"></div>
  <div style="background-color:rgb(15,99,30);"></div>
  <div style="background-color:#123456;"></div>
  <div style="background-color:#f11;"></div>
</body>
</html>


2. css( properties )  Returns: jQuery
css( properties )  실행후 jQuery 객체 반환

Set a key/value object as style properties to all matched elements.
매치되어진 모든 원소에 주어진 키와 값으로 이루어진 속성들의 배열의 스타일을 적용하고 객체를 반환

<!DOCTYPE HTML PUBLIC "-//W3C//DTD HTML 4.01 Transitional//EN"
                   "http://www.w3.org/TR/html4/loose.dtd">
<html>
<head>
  <script src="http://code.jquery.com/jquery-latest.js"></script>
  <script>
  $(document).ready(function(){
  
   $("p").hover(function () {
     $(this).css({ "background-color":"yellow", "font-weight":"bolder" });
   }, function () {
     var cssObj = {
       "background-color": "#ddd",
       "font-weight": "",
       color: "rgb(0,40,244)"
     }
     $(this).css(cssObj);
   });

  });
  </script>
  <style>
  p { color:green; }
  </style>
</head>
<body>
  <p>
   Move the mouse over a paragraph.
  </p>
  <p>
   Like this one or the one above.
  </p>
</body>
</html>


3. css( name, value )  Returns: jQuery
css( name, value )  실행후 jQuery 객체 반환

Set a single style property to a value on all matched elements.
하나의 속성과 값을 받아 매치되어진 모든 원소에 적용

<!DOCTYPE HTML PUBLIC "-//W3C//DTD HTML 4.01 Transitional//EN"
                   "http://www.w3.org/TR/html4/loose.dtd">
<html>
<head>
  <script src="http://code.jquery.com/jquery-latest.js"></script>
  <script>
  $(document).ready(function(){
  
   $("p").mouseover(function () {
     $(this).css("color","red");
   });

  });
  </script>
  <style>
  p { color:blue; width:200px; font-size:14px; }
  </style>
</head>
<body>
  <p>
   Just roll the mouse over me.
  </p>
  <p>
   Or me to see a color change.
  </p>
</body>
</html>


4. offset( )  Returns: Object{top,left}
offset( )  실행후 탑과 레프트에 해당하는 위치 정보를 반환

Get the current offset of the first matched element relative to the viewport.

<!DOCTYPE HTML PUBLIC "-//W3C//DTD HTML 4.01 Transitional//EN"
                   "http://www.w3.org/TR/html4/loose.dtd">
<html>
<head>
  <script src="http://code.jquery.com/jquery-latest.js"></script>
  <script>
  $(document).ready(function(){
   var p = $("p:last");
var offset = p.offset();
p.html( "left: " + offset.left + ", top: " + offset.top );
  });
  </script>
  <style>
  p { margin-left:10px; }
  </style>
</head>
<body>
  <p>Hello</p><p>2nd Paragraph</p>
</body>
</html>


5. height( )  Returns: Integer
height( )  실행후 정수형을 반환한다.

Get the current computed, pixel, height of the first matched element.
매치된 첫번째 원소의 높이를 픽셀로 반환한다.

<!DOCTYPE HTML PUBLIC "-//W3C//DTD HTML 4.01 Transitional//EN"
                   "http://www.w3.org/TR/html4/loose.dtd">
<html>
<head>
  <script src="http://code.jquery.com/jquery-latest.js"></script>
  <script>
  $(document).ready(function(){
  
   function showHeight(ele, h) {
     $("div").text("The height for the " + ele +
                   " is " + h + "px.");
   }
   $("#getp").click(function () {
     showHeight("paragraph", $("p").height());
   });
   $("#getd").click(function () {
     showHeight("document", $(document).height());
   });
   $("#getw").click(function () {
     showHeight("window", $(window).height());
   });

  });
  </script>
  <style>
  body { background:yellow; }
  button { font-size:12px; margin:2px; }
  p { width:150px; border:1px red solid; }
  div { color:red; font-weight:bold; }
  </style>
</head>
<body>
  <button id="getp">Get Paragraph Height</button>
  <button id="getd">Get Document Height</button>
  <button id="getw">Get Window Height</button>
  <div> </div>
  <p>
   Sample paragraph to test height
  </p>
</body>
</html>


6. height( val )  Returns: jQuery
height( val )  실행후 jQuery 객체 반환

Set the CSS height of every matched element.
매치되는 모든 원소에 주어진 높이를 적용한다.

<!DOCTYPE HTML PUBLIC "-//W3C//DTD HTML 4.01 Transitional//EN"
                   "http://www.w3.org/TR/html4/loose.dtd">
<html>
<head>
  <script src="http://code.jquery.com/jquery-latest.js"></script>
  <script>
  $(document).ready(function(){
  
   $("div").one('click', function () {
     $(this).height(30)
            .css({cursor:"auto", backgroundColor:"green"});
   });

  });
  </script>
  <style>
  div { width:50px; height:70px; float:left; margin:5px;
       background:rgb(255,140,0); cursor:pointer; }
  </style>
</head>
<body>
  <div></div>
  <div></div>
  <div></div>
  <div></div>
  <div></div>
</body>
</html>


7. width( )  Returns: Integer
width( )  실행후 정수형을 반환

Get the current computed, pixel, width of the first matched element.
매치되는 첫번째 원소의 너비를 픽셀로 반환

<!DOCTYPE HTML PUBLIC "-//W3C//DTD HTML 4.01 Transitional//EN"
                   "http://www.w3.org/TR/html4/loose.dtd">
<html>
<head>
  <script src="http://code.jquery.com/jquery-latest.js"></script>
  <script>
  $(document).ready(function(){
  
   function showWidth(ele, w) {
     $("div").text("The width for the " + ele +
                   " is " + w + "px.");
   }
   $("#getp").click(function () {
     showWidth("paragraph", $("p").width());
   });
   $("#getd").click(function () {
     showWidth("document", $(document).width());
   });
   $("#getw").click(function () {
     showWidth("window", $(window).width());
   });

  });
  </script>
  <style>
  body { background:yellow; }
  button { font-size:12px; margin:2px; }
  p { width:150px; border:1px red solid; }
  div { color:red; font-weight:bold;  }
  </style>
</head>
<body>
  <button id="getp">Get Paragraph Width</button>
  <button id="getd">Get Document Width</button>
  <button id="getw">Get Window Width</button>
  <div> </div>
  <p>
   Sample paragraph to test width
  </p>
</body>
</html>

8. width( val )  Returns: jQuery
width( val )  실행후 jQuery 객체를 반환

Set the CSS width of every matched element.
매치되는 모든 원소에 주어진 너비를 적용한다.

<!DOCTYPE HTML PUBLIC "-//W3C//DTD HTML 4.01 Transitional//EN"
                   "http://www.w3.org/TR/html4/loose.dtd">
<html>
<head>
  <script src="http://code.jquery.com/jquery-latest.js"></script>
  <script>
  $(document).ready(function(){
  
   $("div").one('click', function () {
     $(this).width(30)
            .css({cursor:"auto", "background-color":"blue"});
   });

  });
  </script>
  <style>
  div { width:70px; height:50px; float:left; margin:5px;
       background:red; cursor:pointer; }
  </style>
</head>
<body>
  <div></div>
  <div></div>
  <div></div>
  <div></div>
  <div></div>
</body>
</html>


<Events>

1. ready( fn )  Returns: jQuery
ready( fn )  실행후 jQuery 객체를 반환

Binds a function to be executed whenever the DOM is ready to be traversed and manipulated.
문서가 준비가 되면 그 시점에 함수를 실행시킨다.

<!DOCTYPE HTML PUBLIC "-//W3C//DTD HTML 4.01 Transitional//EN"
                   "http://www.w3.org/TR/html4/loose.dtd">
<html>
<head>
  <script src="http://code.jquery.com/jquery-latest.js"></script>
  <script>
  $(document).ready(function(){
   $("p").text("The DOM is now loaded and can be manipulated.");
  });
  </script>
  <style>p { color:red; }</style>
</head>
<body>
  <p>
  </p>
</body>
</html>


2. bind( type, data, fn )  Returns: jQuery
bind( type, data, fn )  실행후 jQuery 객체를 반환

Binds a handler to a particular event (like click) for each matched element.
지정된 이벤트가 일어날때까지 기다렷다가 함수 실행

<!DOCTYPE HTML PUBLIC "-//W3C//DTD HTML 4.01 Transitional//EN"
                   "http://www.w3.org/TR/html4/loose.dtd">
<html>
<head>
  <script src="http://code.jquery.com/jquery-latest.js"></script>
  <script>
  $(document).ready(function(){
  
   $("p").bind("click", function(e){
     var str = "( " + e.pageX + ", " + e.pageY + " )";
     $("span").text("Click happened! " + str);
   });
   $("p").bind("dblclick", function(){
     $("span").text("Double-click happened in " + this.tagName);
   });

  });
  </script>
  <style>
  p { background:yellow; font-weight:bold; cursor:pointer;
     padding:5px; }
  span { color:red; }
  </style>
</head>
<body>
  <p>Click or double click here.</p>
  <span></span>
</body>
</html>


3. one( type, data, fn )  Returns: jQuery
one( type, data, fn )  실행후 jQuery 객체 반환

Binds a handler to a particular event to be executed once for each matched element.
지정된 이벤트가 일어날때까지 기다렷다가 한번만 실행

<!DOCTYPE HTML PUBLIC "-//W3C//DTD HTML 4.01 Transitional//EN"
                   "http://www.w3.org/TR/html4/loose.dtd">
<html>
<head>
  <script src="http://code.jquery.com/jquery-latest.js"></script>
  <script>
  $(document).ready(function(){
  
   var n = 0;
   $("div").one("click", function(){
     var index = $("div").index(this);
     $(this).css({ borderStyle:"inset",
                   cursor:"auto" });
     $("p").text("Div at index #" + index + " clicked." +
                 "  That's " + ++n + " total clicks.");
   });

  });
  </script>
  <style>
  div { width:60px; height:60px; margin:5px; float:left;
       background:green; border:10px outset;
       cursor:pointer; }
  p { color:red; margin:0; clear:left; }
  </style>
</head>
<body>
  <div></div>
  <div></div>
  <div></div>
  <div></div>
  <div></div>
  <p>Click a green square...</p>
</body>
</html>


4. trigger( type, data )  Returns: jQuery
trigger( type, data )  실행후 jQuery 객체 반환

Trigger a type of event on every matched element.
매치되는 모든 원소에 지정된 타입의 이벤트를 발생시킨다.

<!DOCTYPE HTML PUBLIC "-//W3C//DTD HTML 4.01 Transitional//EN"
                   "http://www.w3.org/TR/html4/loose.dtd">
<html>
<head>
  <script src="http://code.jquery.com/jquery-latest.js"></script>
  <script>
  $(document).ready(function(){
  
   $("button:first").click(function () {
     update($("span:first"));
   });
   $("button:last").click(function () {
     $("button:first").trigger('click');

     update($("span:last"));
   });

   function update(j) {
     var n = parseInt(j.text(), 0);
     j.text(n + 1);
   }

  });
  </script>
  <style>
  button { margin:10px; }
  div { color:blue; font-weight:bold; }
  span { color:red; }
  </style>
</head>
<body>
  <button>Button #1</button>
  <button>Button #2</button>
  <div><span>0</span> button #1 clicks.</div>
  <div><span>0</span> button #2 clicks.</div>
</body>
</html>


5. triggerHandler( type, data )  Returns: jQuery
triggerHandler( type, data )  실행후 jQuery객체 반환

This particular method triggers all bound event handlers on an element (for a specific event type) WITHOUT executing the browsers default actions.
잘은 모르겟지만 실제적인 행위는 하지 않고 그결과만 실행한다는 뜻인것 같음

<!DOCTYPE HTML PUBLIC "-//W3C//DTD HTML 4.01 Transitional//EN"
                   "http://www.w3.org/TR/html4/loose.dtd">
<html>
<head>
  <script src="http://code.jquery.com/jquery-latest.js"></script>
  <script>
  $(document).ready(function(){
  
   $("#old").click(function(){
     $("input").trigger("focus");
   });
   $("#new").click(function(){
     $("input").triggerHandler("focus");
   });
   $("input").focus(function(){
     $("<span>Focused!</span>").appendTo("body").fadeOut(1000);
   });

  });
  </script>
 
</head>
<body>
  <button id="old">.trigger("focus")</button>
  <button id="new">.triggerHandler("focus")</button><br/><br/>
  <input type="text" value="To Be Focused"/>
</body>
</html>


6. unbind( type, data )  Returns: jQuery
unbind( type, data ), 실행후 jQuery 객체 반환

This does the opposite of bind, it removes bound events from each of the matched elements.
bind와 정반대의 역활을 하며 매치되는 모든 원소에 바운드 이벤트를 제거한다.

<!DOCTYPE HTML PUBLIC "-//W3C//DTD HTML 4.01 Transitional//EN"
                   "http://www.w3.org/TR/html4/loose.dtd">
<html>
<head>
  <script src="http://code.jquery.com/jquery-latest.js"></script>
  <script>
  $(document).ready(function(){
  
   function aClick() {
     $("div").show().fadeOut("slow");
   }
   $("#bind").click(function () {
     // could use .bind('click', aClick) instead but for variety...
     $("#theone").click(aClick)
                 .text("Can Click!");
   });
   $("#unbind").click(function () {
     $("#theone").unbind('click', aClick)
                 .text("Does nothing...");
   });

  });
  </script>
  <style>
  button { margin:5px; }
  button#theone { color:red; background:yellow; }
  </style>
</head>
<body>
  <button id="theone">Does nothing...</button>
  <button id="bind">Bind Click</button>
  <button id="unbind">Unbind Click</button>
  <div style="display:none;">Click!</div>
</body>
</html>


7. hover( over, out )  Returns: jQuery
hover( over, out )  실행후 jQuery 객체를 반환

Simulates hovering (moving the mouse on, and off, an object). This is a custom method which provides an 'in' to a frequent task.
마우스 오버와 아웃시 행위를 지정할수 있다.

<!DOCTYPE HTML PUBLIC "-//W3C//DTD HTML 4.01 Transitional//EN"
                   "http://www.w3.org/TR/html4/loose.dtd">
<html>
<head>
  <script src="http://code.jquery.com/jquery-latest.js"></script>
  <script>
  $(document).ready(function(){
  
   $("li").hover(
     function () {
       $(this).append($("<span> ***</span>"));
     },
     function () {
       $(this).find("span:last").remove();
     }
   );

  });
  </script>
  <style>
  ul { margin-left:20px; color:blue; }
  li { cursor:default; }
  span { color:red; }
  </style>
</head>
<body>
  <ul>
   <li>Milk</li>
   <li>Bread</li>
   <li>Chips</li>
   <li>Socks</li>
  </ul>
</body>


8. toggle( fn, fn )  Returns: jQuery
toggle( fn, fn )  실행후 jQuery 객체 반환

Toggle between two function calls every other click.
클릭시 두개의 함수를 반복적으로 실행

<!DOCTYPE HTML PUBLIC "-//W3C//DTD HTML 4.01 Transitional//EN"
                   "http://www.w3.org/TR/html4/loose.dtd">
<html>
<head>
  <script src="http://code.jquery.com/jquery-latest.js"></script>
  <script>
  $(document).ready(function(){
  
   $("li").toggle(
     function () {
       $(this).css("list-style-type", "disc")
              .css("color", "blue");
     },
     function () {
       $(this).css({"list-style-type":"", "color":""});
     }
   );

  });
  </script>
  <style>
  ul { margin:10px; list-style:inside circle; font-weight:bold; }
  li { cursor:pointer; }
  </style>
</head>
<body>
  <ul>
   <li>Go to the store</li>
   <li>Pick up dinner</li>
   <li>Debug crash</li>
   <li>Take a jog</li>
  </ul>
</body>
</html>


9. blur( )  Returns: jQuery
blur( )  실행후 jQuery 객체 반환

Triggers the blur event of each matched element.


10. blur( fn )  Returns: jQuery
blur( fn )  실행후 jQuery 객체 반환

Bind a function to the blur event of each matched element.


11. change( )  Returns: jQuery
change( )  실행후 jQuery 객체 반환

Triggers the change event of each matched element.


12. change( fn )  Returns: jQuery
change( fn )  실행후 jQuery 객체 반환

Binds a function to the change event of each matched element.

<!DOCTYPE HTML PUBLIC "-//W3C//DTD HTML 4.01 Transitional//EN"
                   "http://www.w3.org/TR/html4/loose.dtd">
<html>
<head>
  <script src="http://code.jquery.com/jquery-latest.js"></script>
  <script>
  $(document).ready(function(){
  
   $("select").change(function () {
         var str = "";
         $("select option:selected").each(function () {
               str += $(this).text() + " ";
             });
         $("div").text(str);
       })
       .change();

  });
  </script>
  <style>
  div { color:red; }
  </style>
</head>
<body>
  <select name="sweets" multiple="multiple">
   <option>Chocolate</option>
   <option selected="selected">Candy</option>
   <option>Taffy</option>
   <option selected="selected">Carmel</option>
   <option>Fudge</option>
   <option>Cookie</option>
  </select>
  <div></div>
</body>
</html>


13. click( )  Returns: jQuery
click( )  실행후 jQuery 객체 반환

Triggers the click event of each matched element.


14. click( fn )  Returns: jQuery
click( fn )  실행후 jQuery 객체 반환

Binds a function to the click event of each matched element.

<!DOCTYPE HTML PUBLIC "-//W3C//DTD HTML 4.01 Transitional//EN"
                   "http://www.w3.org/TR/html4/loose.dtd">
<html>
<head>
  <script src="http://code.jquery.com/jquery-latest.js"></script>
  <script>
  $(document).ready(function(){
  
   $("p").click(function () {
     $(this).slideUp();
   });
   $("p").hover(function () {
     $(this).addClass("hilite");
   }, function () {
     $(this).removeClass("hilite");
   });

  });
  </script>
  <style>
  p { color:red; margin:5px; cursor:pointer; }
  p.hilite { background:yellow; }
  </style>
</head>
<body>
  <p>First Paragraph</p>
  <p>Second Paragraph</p>
  <p>Yet one more Paragraph</p>
</body>
</html>


15. dblclick( )  Returns: jQuery
dblclick( )  실행후 jQuery 객체를 리턴

Triggers the dblclick event of each matched element.


16. dblclick( fn )  Returns: jQuery
dblclick( fn )  실행후 jQuery 객체를 리턴

Binds a function to the dblclick event of each matched element.


17. error( )  Returns: jQuery
Triggers the error event of each matched element.


18. error( fn )  Returns: jQuery
Binds a function to the error event of each matched element.


19. focus( )  Returns: jQuery
Triggers the focus event of each matched element.

20. focus( fn )  Returns: jQuery
Binds a function to the focus event of each matched element.


21. keydown( )  Returns: jQuery
Triggers the keydown event of each matched element.

22. keydown( fn )  Returns: jQuery
Bind a function to the keydown event of each matched element.


23. keypress( )  Returns: jQuery
Triggers the keypress event of each matched element.

24. keypress( fn )  Returns: jQuery
Binds a function to the keypress event of each matched element.


25. keyup( )  Returns: jQuery
Triggers the keyup event of each matched element.

26. keyup( fn )  Returns: jQuery
Bind a function to the keyup event of each matched element.


27. load( fn )  Returns: jQuery
Binds a function to the load event of each matched element.


28. mousedown( fn )  Returns: jQuery
Binds a function to the mousedown event of each matched element.


29. mousemove( fn )  Returns: jQuery
Bind a function to the mousemove event of each matched element.


30. mouseout( fn )  Returns: jQuery
Bind a function to the mouseout event of each matched element.


31. mouseover( fn )  Returns: jQuery
Bind a function to the mouseover event of each matched element.


32. mouseup( fn )  Returns: jQuery
Bind a function to the mouseup event of each matched element.


33. resize( fn )  Returns: jQuery
Bind a function to the resize event of each matched element.


34. scroll( fn )  Returns: jQuery
Bind a function to the scroll event of each matched element.


35. select( )  Returns: jQuery
Trigger the select event of each matched element.

36. select( fn )  Returns: jQuery
Bind a function to the select event of each matched element.


37. submit( )  Returns: jQuery
Trigger the submit event of each matched element.

38. submit( fn )  Returns: jQuery
Bind a function to the submit event of each matched element.


39. unload( fn )  Returns: jQuery
Binds a function to the unload event of each matched element.


<Effect>

1. show( )  Returns: jQuery
Displays each of the set of matched elements if they are hidden.

<!DOCTYPE HTML PUBLIC "-//W3C//DTD HTML 4.01 Transitional//EN"
                   "http://www.w3.org/TR/html4/loose.dtd">
<html>
<head>
  <script src="http://code.jquery.com/jquery-latest.js"></script>
  <script>
  $(document).ready(function(){
   $("p").show()
  });
  </script>

</head>
<body>
  <p style="display:none">Hello</p>
</body>
</html>


2. show( speed, callback )  Returns: jQuery
Show all matched elements using a graceful animation and firing an optional callback after completion.
##A string representing one of the three predefined speeds ("slow", "normal", or "fast") or the number of milliseconds to run the animation (e.g. 1000).

<!DOCTYPE HTML PUBLIC "-//W3C//DTD HTML 4.01 Transitional//EN"
                   "http://www.w3.org/TR/html4/loose.dtd">
<html>
<head>
  <script src="http://code.jquery.com/jquery-latest.js"></script>
  <script>
  $(document).ready(function(){

   $("button").click(function () {
     $("p").show("slow");
   });

  });
  </script>
  <style>
  p { background:yellow; }
  </style>
</head>
<body>
  <button>Show it</button>
  <p style="display: none">Hello</p>
</body>
</html>


3. hide( )  Returns: jQuery
Hides each of the set of matched elements if they are shown.

<!DOCTYPE HTML PUBLIC "-//W3C//DTD HTML 4.01 Transitional//EN"
                   "http://www.w3.org/TR/html4/loose.dtd">
<html>
<head>
  <script src="http://code.jquery.com/jquery-latest.js"></script>
  <script>
  $(document).ready(function(){

   $("p").hide();
   $("a").click(function () {
     $(this).hide();
     return false;
   });

  });
  </script>

</head>
<body>
  <p>Hello</p>
  <a href="#">Click to hide me too</a>
  <p>Here is another paragraph</p>
</body>
</html>


4. hide( speed, callback )  Returns: jQuery
Hide all matched elements using a graceful animation and firing an optional callback after completion.

<!DOCTYPE HTML PUBLIC "-//W3C//DTD HTML 4.01 Transitional//EN"
                   "http://www.w3.org/TR/html4/loose.dtd">
<html>
<head>
  <script src="http://code.jquery.com/jquery-latest.js"></script>
  <script>
  $(document).ready(function(){

   $("button").click(function () {
     $("p").hide("slow");
   });

  });
  </script>
  <style>
  p { background:#dad; font-weight:bold; }
  </style>
</head>
<body>
  <button>Hide 'em</button>
  <p>Hiya</p>
  <p>Such interesting text, eh?</p>
</body>
</html>


5. toggle( )  Returns: jQuery
Toggles each of the set of matched elements.

<!DOCTYPE HTML PUBLIC "-//W3C//DTD HTML 4.01 Transitional//EN"
                   "http://www.w3.org/TR/html4/loose.dtd">
<html>
<head>
  <script src="http://code.jquery.com/jquery-latest.js"></script>
  <script>
  $(document).ready(function(){

   $("button").click(function () {
     $("p").toggle();
   });

  });
  </script>

</head>
<body>
  <button>Toggle</button>
  <p>Hello</p>
  <p style="display: none">Good Bye</p>
</body>
</html>


6. slideDown( speed, callback )  Returns: jQuery
Reveal all matched elements by adjusting their height and firing an optional callback after completion.

<!DOCTYPE HTML PUBLIC "-//W3C//DTD HTML 4.01 Transitional//EN"
                   "http://www.w3.org/TR/html4/loose.dtd">
<html>
<head>
  <script src="http://code.jquery.com/jquery-latest.js"></script>
  <script>
  $(document).ready(function(){

   $(document.body).click(function () {
     if ($("div:first").is(":hidden")) {
       $("div").slideDown("slow");
     } else {
       $("div").hide();
     }
   });

  });
  </script>
  <style>
  div { background:#de9a44; margin:3px; width:80px;
       height:40px; display:none; float:left; }
  </style>
</head>
<body>
  Click me!
  <div></div>
  <div></div>
  <div></div>
</body>
</html>


7. slideUp( speed, callback )  Returns: jQuery
Hide all matched elements by adjusting their height and firing an optional callback after completion.

<!DOCTYPE HTML PUBLIC "-//W3C//DTD HTML 4.01 Transitional//EN"
                   "http://www.w3.org/TR/html4/loose.dtd">
<html>
<head>
  <script src="http://code.jquery.com/jquery-latest.js"></script>
  <script>
  $(document).ready(function(){

   $(document.body).click(function () {
     if ($("div:first").is(":hidden")) {
       $("div").show("fast");
     } else {
       $("div").slideUp();
     }
   });

  });
  </script>
  <style>
  div { background:#3d9a44; margin:3px; width:80px;
       height:40px; float:left; }
  </style>
</head>
<body>
  Click me!
  <div></div>
  <div></div>
  <div></div>
  <div></div>
  <div></div>
</body>
</html>


8. slideToggle( speed, callback )  Returns: jQuery
Toggle the visibility of all matched elements by adjusting their height and firing an optional callback after completion.

<!DOCTYPE HTML PUBLIC "-//W3C//DTD HTML 4.01 Transitional//EN"
                   "http://www.w3.org/TR/html4/loose.dtd">
<html>
<head>
  <script src="http://code.jquery.com/jquery-latest.js"></script>
  <script>
  $(document).ready(function(){

   $("button").click(function () {
     $("p").slideToggle("slow");
   });

  });
  </script>
  <style>
  p { width:400px; }
  </style>
</head>
<body>
  <button>Toggle</button>
  <p>
   This is the paragraph to end all paragraphs.  You
   should feel <em>lucky</em> to have seen such a paragraph in
   your life.  Congratulations!
  </p>
</body>
</html>


9. fadeIn( speed, callback )  Returns: jQuery
Fade in all matched elements by adjusting their opacity and firing an optional callback after completion.

<!DOCTYPE HTML PUBLIC "-//W3C//DTD HTML 4.01 Transitional//EN"
                   "http://www.w3.org/TR/html4/loose.dtd">
<html>
<head>
  <script src="http://code.jquery.com/jquery-latest.js"></script>
  <script>
  $(document).ready(function(){

   $(document.body).click(function () {
     $("div:hidden:first").fadeIn("slow");
   });

  });
  </script>
  <style>
  span { color:red; cursor:pointer; }
  div { margin:3px; width:80px; display:none;
       height:80px; float:left; }
  div#one { background:#f00; }
  div#two { background:#0f0; }
  div#three { background:#00f; }
  </style>
</head>
<body>
  <span>Click here...</span>
  <div id="one"></div>
  <div id="two"></div>
  <div id="three"></div>
</body>
</html>


10. fadeOut( speed, callback )  Returns: jQuery
Fade out all matched elements by adjusting their opacity and firing an optional callback after completion.

<!DOCTYPE HTML PUBLIC "-//W3C//DTD HTML 4.01 Transitional//EN"
                   "http://www.w3.org/TR/html4/loose.dtd">
<html>
<head>
  <script src="http://code.jquery.com/jquery-latest.js"></script>
  <script>
  $(document).ready(function(){

   $("p").click(function () {
     $("p").fadeOut("slow");
   });

  });
  </script>
  <style>
  p { font-size:150%; cursor:pointer; }
  </style>
</head>
<body>
  <p>
   If you click on this paragraph
   you'll see it just fade away.
  </p>
</body>
</html>


11. fadeTo( speed, opacity, callback )  Returns: jQuery
Fade the opacity of all matched elements to a specified opacity and firing an optional callback after completion.

<!DOCTYPE HTML PUBLIC "-//W3C//DTD HTML 4.01 Transitional//EN"
                   "http://www.w3.org/TR/html4/loose.dtd">
<html>
<head>
  <script src="http://code.jquery.com/jquery-latest.js"></script>
  <script>
  $(document).ready(function(){

   $("p:first").click(function () {
     $(this).fadeTo("slow", 0.33);
   });

  });
  </script>

</head>
<body>
  <p>
   Click this paragraph to see it fade.
  </p>
  <p>
   Compare to this one that won't fade.
  </p>
</body>
</html>


12. animate( params, duration, easing, callback )  Returns: jQuery
A function for making your own, custom animations.

<!DOCTYPE HTML PUBLIC "-//W3C//DTD HTML 4.01 Transitional//EN"
                   "http://www.w3.org/TR/html4/loose.dtd">
<html>
<head>
  <script src="http://code.jquery.com/jquery-latest.js"></script>
  <script>
  $(document).ready(function(){

   $("#right").click(function(){
     $(".block").animate({"left": "+=50px"}, "slow");
   });

   $("#left").click(function(){
     $(".block").animate({"left": "-=50px"}, "slow");
   });

  });
  </script>
  <style>
  div {
   position:absolute;
   background-color:#abc;
   left:50px;
   width:90px;
   height:90px;
   margin:5px;
  }
  </style>
</head>
<body>
  <button id="left">≪</button> <button id="right">≫</button>
<div class="block"></div>

</body>
</html>


13. animate( params, options )  Returns: jQuery
A function for making your own, custom animations.

<!DOCTYPE HTML PUBLIC "-//W3C//DTD HTML 4.01 Transitional//EN"
                   "http://www.w3.org/TR/html4/loose.dtd">
<html>
<head>
  <script src="http://code.jquery.com/jquery-latest.js"></script>
  <script>
  $(document).ready(function(){

   // Using multiple unit types within one animation.
   $("#go").click(function(){
     $("#block").animate({
       width: "70%",
       opacity: 0.4,
       marginLeft: "0.6in",
       fontSize: "3em",
       borderWidth: "10px"
     }, 1500 );
   });

  });
  </script>
  <style>
  div {
   background-color:#bca;
   width:100px;
   border:1px solid green;
  }
  </style>
</head>
<body>
  <button id="go">≫ Run</button>
  <div id="block">Hello!</div>
</body>
</html>


14. stop( )  Returns: jQuery
Stops all the currently running animations on all the specified elements.

<!DOCTYPE HTML PUBLIC "-//W3C//DTD HTML 4.01 Transitional//EN"
                   "http://www.w3.org/TR/html4/loose.dtd">
<html>
<head>
  <script src="http://code.jquery.com/jquery-latest.js"></script>
  <script>
  $(document).ready(function(){

   // Start animation
   $("#go").click(function(){
     $(".block").animate({left: '+=100px'}, 2000);
   });

   // Stop animation when button is clicked
   $("#stop").click(function(){
     $(".block").stop();
   });

   // Start animation in the opposite direction
   $("#back").click(function(){
     $(".block").animate({left: '-=100px'}, 2000);
   });

  });
  </script>
  <style>div {
   position: absolute;
   background-color: #abc;
   left: 0px;
   top:30px;
   width: 60px;
   height: 60px;
   margin: 5px;
  }
  </style>
</head>
<body>
  <button id="go">Go</button>
  <button id="stop">STOP!</button>
  <button id="back">Back</button>
  <div class="block"></div>
</body>
</html>


15. queue( )  Returns: Array<Function>
Returns a reference to the first element's queue (which is an array of functions).

<!DOCTYPE HTML PUBLIC "-//W3C//DTD HTML 4.01 Transitional//EN"
                   "http://www.w3.org/TR/html4/loose.dtd">
<html>
<head>
  <script src="http://code.jquery.com/jquery-latest.js"></script>
  <script>
  $(document).ready(function(){

   $("#show").click(function () {
     var n = $("div").queue("fx");
     $("span").text("Queue length is: " + n.length);
   });
   function runIt() {
     $("div").show("slow");
     $("div").animate({left:'+=200'},2000);
     $("div").slideToggle(1000);
     $("div").slideToggle("fast");
     $("div").animate({left:'-=200'},1500);
     $("div").hide("slow");
     $("div").show(1200);
     $("div").slideUp("normal", runIt);
   }
   runIt();

  });
  </script>
  <style>
  div { margin:3px; width:40px; height:40px;
       position:absolute; left:0px; top:30px;
       background:green; display:none; }
  div.newcolor { background:blue; }
  span { color:red; }
  </style>
</head>
<body>
  <button id="show">Show Length of Queue</button>
  <span></span>
  <div></div>
</body>
</html>


16. queue( callback )
Adds a new function, to be executed, onto the end of the queue of all matched elements.

<!DOCTYPE HTML PUBLIC "-//W3C//DTD HTML 4.01 Transitional//EN"
                   "http://www.w3.org/TR/html4/loose.dtd">
<html>
<head>
  <script src="http://code.jquery.com/jquery-latest.js"></script>
  <script>
  $(document).ready(function(){

   $(document.body).click(function () {
     $("div").show("slow");
     $("div").animate({left:'+=200'},2000);
     $("div").queue(function () {
       $(this).addClass("newcolor");
       $(this).dequeue();
     });
     $("div").animate({left:'-=200'},500);
     $("div").queue(function () {
       $(this).removeClass("newcolor");
       $(this).dequeue();
     });
     $("div").slideUp();
   });

  });
  </script>
  <style>
  div { margin:3px; width:40px; height:40px;
       position:absolute; left:0px; top:30px;
       background:green; display:none; }
  div.newcolor { background:blue; }
  </style>
</head>
<body>
  Click here...
  <div></div>
</body>
</html>


17. queue( queue )
Replaces the queue of all matched element with this new queue (the array of functions).

<!DOCTYPE HTML PUBLIC "-//W3C//DTD HTML 4.01 Transitional//EN"
                   "http://www.w3.org/TR/html4/loose.dtd">
<html>
<head>
  <script src="http://code.jquery.com/jquery-latest.js"></script>
  <script>
  $(document).ready(function(){

   $("#start").click(function () {
     $("div").show("slow");
     $("div").animate({left:'+=200'},5000);
     $("div").queue(function () {
       $(this).addClass("newcolor");
       $(this).dequeue();
     });
     $("div").animate({left:'-=200'},1500);
     $("div").queue(function () {
       $(this).removeClass("newcolor");
       $(this).dequeue();
     });
     $("div").slideUp();
   });
   $("#stop").click(function () {
     $("div").queue("fx", []);
     $("div").stop();
   });

  });
  </script>
  <style>
  div { margin:3px; width:40px; height:40px;
       position:absolute; left:0px; top:30px;
       background:green; display:none; }
  div.newcolor { background:blue; }
  </style>
</head>
<body>
  <button id="start">Start</button>
  <button id="stop">Stop</button>
  <div></div>
</body>
</html>


18. dequeue( )  Returns: jQuery
Removes a queued function from the front of the queue and executes it.

<!DOCTYPE HTML PUBLIC "-//W3C//DTD HTML 4.01 Transitional//EN"
                   "http://www.w3.org/TR/html4/loose.dtd">
<html>
<head>
  <script src="http://code.jquery.com/jquery-latest.js"></script>
  <script>
  $(document).ready(function(){

   $("button").click(function () {
     $("div").animate({left:'+=200px'}, 2000);
     $("div").animate({top:'0px'}, 600);
     $("div").queue(function () {
       $(this).toggleClass("red");
       $(this).dequeue();
     });
     $("div").animate({left:'10px', top:'30px'}, 700);
   });

  });
  </script>
  <style>
  div { margin:3px; width:50px; position:absolute;
       height:50px; left:10px; top:30px;
       background-color:yellow; }
  div.red { background-color:red; }
  </style>
</head>
<body>
  <button>Start</button>
  <div></div>
</body>
</html>

Posted by 1010
반응형
이전에 파이어준님의 포스팅 에서 보고는 담에는 써야지 하다가 이번에야 써봤다. 쉽게 말하면 자바스크립트 프레임워크를 구글이 제공 해서 자신의 사이트에 올리지 않고 구글에서 끌어다가 쓸 수 있게 한다. 머 이건데... 회사에서는 쓸 일 있을지 모르겠고 블로그에서 예제파일 돌릴려고 몇개 올려두기는 했는데 버전도 계속 바뀌고 그래서 신경이 쓰였는데 이 서비스는 내가 써먹기는 딱인듯 하다. ㅋ 그래서 바로 전의 포스팅을 하면서 한번 써봤다. 잘된다.(당연하지. ㅡ..ㅡ)

파이어준님의 포스팅에도 나와있긴 하지만 다시 정리하자면
제공하는 라이브러리는 jQuery , prototype , script.aculo.us , mootools , dojo 이다.(2008년 8월 1일 현재...) - 2개씩 적혀 있는 것은 위의것은 압축된(compressed) 버전이고 아래쪽은 압축되지 않은 버전이다.)

jQuery (1.2.3, 1.2.6 지원)
  1. <script src="http://ajax.googleapis.com/ajax/libs/jquery/1.2.6/jquery.min.js"></script>   
  2. <script src="http://ajax.googleapis.com/ajax/libs/jquery/1.2.6/jquery.js"></script>   


prototype (1.6.0.2 지원)
  1. <script src="http://ajax.googleapis.com/ajax/libs/prototype/1.6.0.2/prototype.js"></script>   


script.aculo.us (1.8.1 지원)
  1. <script src="http://ajax.googleapis.com/ajax/libs/scriptaculous/1.8.1/scriptaculous.js "></script>   


mootools (1.11 지원)
  1. <script src="http://ajax.googleapis.com/ajax/libs/mootools/1.11/mootools.js"></script>   
  2. <script src="http://ajax.googleapis.com/ajax/libs/mootools/1.11/mootools.js"></script>   


dojo (1.1.1 지원)
  1. <script src="http://ajax.googleapis.com/ajax/libs/dojo/1.1.1/dojo/dojo.xd.js "></script>   
  2. <script src="http://ajax.googleapis.com/ajax/libs/dojo/1.1.1/dojo/dojo.xd.js.uncompressed.js"></script> 


머 사용법이고 말고 할것도 없다. 그냥 script 인클루드의 링크를 구글로 건거다. ㅋㅋ 구글 API써서 하는 방법도 있지만 평소에도 이런식이 익숙하니까 이게 더 편한 것 같다. 이렇게 블로그에 올리거나 잠시 테스트할 때 프레임웍 불러내는게 은근 귀찮은데 이렇게 쓰니까 참 편하다.


그냥 구글이 갔다 쓸수만 있게 했겠는가? ㅋ Ajaxian의 포스트 에 따르면 다음과 같은 장점이 있다고 한다.

  • 개발자가 아무짓도 안해도 캐싱이 잘 된다.
  • Gzip으로 동작한다.
  • 최소화된 버전으로 제공할 수 있다.
  • 세계곳곳의 CDN을 통해서 구글이 파일을 호스팅하기 때문에 사용자가 빨리 받을 수 있다.
  • 서버가 빠르다.
  • 같은 URL을 사용하기 때문에 구글의 인프라가 커지면 사용자가 당신의 어플리케이션에 처음왔을 때 이미 프레임워크가 로드되어 있을수도 있다.
  • 당신이 보내고 받는 헤더관련 미묘한 성능 및 보안 이슈가 해결된다. 당신이 특별한 도메인(구글말고)을 사용한 이래고 쿠기가 없거나 다른 장황한 헤더가 보내질 것이므로 귀중한 바이트를 아낄수 있다.
개발하는 사이트에서 자신의 사이트에 라이브러리가 없는게 좀 신경쓰일 수도 있지만 많은 장점이 있는데도 굳이 안 쓸 이유도 없을것 같다. 나야 개인적으로만 쓰겠지만.. ㅎㅎㅎㅎ


위에처럼 직접 인클루드하는 방법 외에도 Google AJAX API Loader를 이용해서도 라이브러리 파일을 인클루드 할 수 있다.  구글과으 매쉬업을 위해서 구글 api를 사용한다면 google.load()방식이 더욱 유용할 것이다.

  1. <script src="http://www.google.com/jsapi"></script> 
  2. <script type="text/javascript"> 
  3.     // jQuery 압축, 비압축  
  4.     google.load("jquery", "1.2.6");  
  5.     google.load("jquery", "1.2", {uncompressed:true});  
  6.  
  7.     // prototype, scriptaculous  
  8.     google.load("prototype", "1.6.0.2");  
  9.     google.load("scriptaculous", "1.8.1");  
  10.  
  11.     // mootools 압축, 비압축  
  12.     google.load("mootools", "1.11");  
  13.     google.load("mootools", "1.11", {uncompressed:true});  
  14.  
  15.     // dojo 압축, 비압축  
  16.     google.load("dojo", "1.1.1");  
  17.     google.load("dojo", "1.1.1", {uncompressed:true});  
  18. </script> 


마지막으로 Google AJAX Libraires API에 대한 설명 영상

Posted by 1010
반응형

제목이 좀 거창하기는 한데(ㅡ..ㅡ) 을 아예 이해를 못한채 개발된 코드를 좀 보게 된다. 개발이라는 것이 순수 자기 머릿속에 있는 것만 가지고 처음부터 끝까지 개발하는 사람이 어디 있겠는가... 요즘 같으면 개발능력이 검색 능력이라고 농담할 정도로 소스가 인터넷에 널려있고 그걸 갔다가 잘 조합하다보면 그럭저럭 돌아간다. 또한 사수나 이전에 구축되어 있는 사이트들도 있고.... 근데 여기서 돌아가는 동작을 이해하지 못하면 결국 잘못된 소스가 나올 경우가 많다.

실용주의 프로그래머에 보면 "디버깅을 하지 못하는 것은 원래 어떻게 돌아갔는지 몰랐기 때문이다."라는 말이 있다. 철저히 공감한다.


최근에 본 소스에 대해서 얘기를 해보려고 한다. 머 그녀석이 작성한 소스는 아니었지만 이런 내용을 보면 프로젝트의 일원으로써 기분나쁠수도 있지만 머 잘못된 것은 잘못된거다. 약간 상황상 초기단계에도 그 프로젝트의 소스를 좀 보았었는데 초반에도 많이 잘못된 부분이 있었는데 내가 관여할 상황이 아니기 때문에 그냥 나뒀다. 몇달만에 다시 보았을때는 괜찮은 사이트의 모습을 갖추고 있었지만 내부는 영 부실했다. 로그인 체크가 이런식으로 되어 있었다.

  1. if (isLogin) {  
  2.     // 로그인되었을 때의 동작  
  3. } else {  
  4.     // 로그인 안되었을때의 동작     
  5.  }  


동작은 중요하지 않으므로 그냥 한글로 처리했다. 아이디/패스워드를 입력하면 서블릿을 호출해서 결과값을 xml로 가져와서 파싱한다. 그리고 결과값을 isLogin에 넣어서 로그인 여부를 보여준다. 아마 작성자는 로그인을 하지 않았을때 권한이 없는 메뉴에 대해서 페이지가 넘어갔다가 오는 것도 낭비라고 생각한것 같다. Ajax로 할때 많이 하듯이 로그인 처리도 현재 페이지에서 바로 처리했고 권한이 없는 메뉴에 대해서 isLogin이라는 자바스크립트 변수로 접근하지 못하게 막고 있다.


이건 완전히 잘못됐다. 이건 브라우저 주소창에 다음과 같은 한줄만 입력하면 isLogin의 값을 접속자 맘대로 바꿔버릴 수 있다.

javascript:isLogin=true;void 0;

정확히는 모르겠지만 내가 보기엔 이건 해킹도 아니고 XSS(크로스 사이트스크립팅)도 아니다. 그냥 잘못만든거다. 보안 문제는 서버쪽에서 체크해야지 클라이언트단이 자바스크립트에서 하겠다는 생각은 잘못 된것이다.(물론 자바스크립트에서도 신경써야하는 보안문제가 있지만...) 자바스크립트는 유저 편의성과 HTML강화를 위해서 제공하는 것이지 자바스크립트로 모든 걸 다 할 수는 없다. Ajax를 쓰다보면 자바스크립트에서 처리해야 하는 부분도 있지만 이부분은 UI를 위한 부분이지 검증을 위한 부분이 아니기 때문에 검정을 Javascript에 의존하지 말고 당연히 서버쪽에서도 재확인 해주어야 한다.


여기서 또하나를 보자

  1. <script type="text/javascript">  
  2. var usrId = "<% session.getAttribute("userId") %>";  
  3.  
  4. if (userid != null) {  
  5.       로그인에 대한 동작  
  6. } else {  
  7.       <% <STRONG>session</STRONG>.<EM><STRONG>remove</STRONG></EM>("userId"); %>  
  8.       <% <STRONG>session</STRONG>.<EM><STRONG>remove</STRONG></EM>("memberType"); %>  
  9. }  
  10. </script>  


위 코드가 로그인하고 메뉴에 들어간 페이지에 들어있던 자바스크립트 코드이다. 무엇이 잘못된지 알겠는가.... 해당부분만 잘라온 라서 약간 헷갈릴수도 있지만 이건 JSP와 자바스크립트의 동작을 전혀 이해하지 못한 것이다. 그냥 보면 뭘 하고 싶었는지 까지는 이해할 수 있다. 세션에 값이 있으면 로그인하고 세션에 값이 없으면 로그인에 문제가 있었다고 생각하고 세션을 초기화 해주겠다는 것이다. 결론적으로 이 코드는 돌아가지 않는다.

아주 단순한 원리인데 인터넷에서 사람들이 질문하는 것을 봐도 이걸 이해하지 못하는 사람들을 꽤 많이 볼 수 있다.

웹이라는 것은 서버가 있다. 서버에는 웹서버가 있고 WAS(컨테이너포함)라고 얘기하는 웹어플리케이션서버가 있다. 설정나름이지만 이렇게 존재하는 이유는 서버에서 컴파일등의 동작이 필요없는 html, javscript파일, css, 이미지등을 사용자가 요청이 오면 그냥 돌려준다. 그렇지 않고 jsp등 서버의 해석이 필요한 페이지는 WAS가 페이지를 해석해서 나온 결과값을 원래의 html파일에 넣어서 사용자에게 돌려준다. 그러면 사용자의 웹브라우저(IE, Firefox 등등)가 해당 페이지를 받아서 렌더링을 한다. 여기서 웹브라우저가 html을 렌더링해서 보여주고 javascript를 해석해서 해당 동작을 수행한다.


이게 간단히 요약한 동작방식이다. 위에서 보듯이 jsp코드와 자바스크립트는 그 수행시점과 장소가 완전히 다르다. 그 순서로 보면 저위의 코드는 if문의 참여부의 상관없이 무조건 session.remove()가 동작한다. WAS는 jsp의 <% %>안에 있는 스크립틀릿 코드만 수행하지 그 외의 부분은 전혀 신경쓰지 않기 때문에....

그렇기 때문에 저 사이트는 첫페이지에서 세션을 심고는 두번째 페이지에서 무조건 세션을 날려버린다. 이런 동작방식을 이해하고 있어야 개발할 때 헷갈리지 않고 많이 나오는 질문중에 하나인 자바스크립트의 변수에 있는 값을 jsp의 변수에 넣으려고 하는 것이 불가능한지를 이해할 수 있다. (물론 js와 jsp간에 서로 값을 주고 받을 수 있는 프레임워크는 존재하지만 여기선 그 얘기가 아니므로....)


항상 어디서나 기본적인 개념이 중요하다는 생각......

Posted by 1010
반응형
어렵지 않은 거라고 안적어놨더니만 맨날 할때마다 책꺼내봐야하고.... 아놔~

window.open(URL, 윈도우명, 옵션);

이라고 하면 팝업을 띄울 수 있다. 네번재 파라미터도 있는데 네번째 파라미터는 이미 존재하는 창의 이름을 지정할때만 사용하며 브라우저 열어본 페이지 목록에 덮어씌울 것인지 새로 추가할 것인지를 지정한다. 기본값인 false는 새로 추가하는 것이다.

ex) window.open("http://blog.outsider.ne.kr", "" , "width=800,height=600,toolba=no");

dependent   부모의 종속된 윈도우를 연다(부모 닫으면 같이 닫힌다.)(no)
directories   개인북마크 or 링크바를 표시(yes)
height          높이(Min 100px)
width            넓이(Min 100px)
top               팝업의 위쪽 위치
left                팝업의 왼쪽 위치
menubar      메뉴바 표시 여부
toolbar         툴바 표시여부
location       주소표시줄 표시 여부
status          하단 상태표시줄 표시여부
resizable     크기변경 여부
scrollbars    스크롤바 표시 여부(내용이 창보다 클 경우)
modal           모달윈도우를 연다
minimizable  윈도 최소화 버튼 추가


window.open()은 해당 윈도우 객체를 리턴한다. 그러므로 팝업을 열고 팝업창을 제어하려면 객체로 받아서 핸들링 해주면 된다.

var popup = window.open("http://blog.outsider.ne.kr", "" , "width=800,height=600,toolba=no");
popup.moveTo(0,0);

moveTo()    창의 좌측 상단 모서리를 지정된 좌표로 이동
moveBy()    창을 지정된 픽셀 수만큼 상하좌우로 이동
resizeTo()  창의 크기를 절대적인 크기로 조절
resizeBy()  창의 크기를 상대적인 크기로 조절
focus()       창을 활성화한다
blur()          포커를스를 잃게 한다.
close()        창을 닫는다.


자신을 닫을 때는 window.close()나 self.close()를 사용하면 된다. 팝업에서 부모창에 접근하려면 opener를 이용하면 된다. 또한 name프로퍼티를 이용해서 target으로 사용할 수 있다.

popup에 관련해서 몇가지 보안관련 사항들이 있는데 자바스크립트는 자신이 연 창만 다시 닫을수 있고 다른 창을 닫으려면 사용자의 승인이 필요하다. 보이지 않는 팝업을 띄워서 악의적인 사용을 막기 위해서 너무 작은 크기(보통은 100px미만)로 축소할 수 없고 화면밖으로 이동시킬 수 없다.

팝업에 대한 자세한 정보는 모질라의 Dom Reference 에 자세히 나와있다
Posted by 1010
반응형
나는 XHTML을 사용하기를 즐겨한다. 물론 난 퍼블리셔는 아니고 개발자이다. 큰 회사라면 퍼블리셔를 따로 두겠지만 작은 회사에서는 개발자가 이것저것 다 해야 한다. 그리고 나는 웹표준 옹호론자이다. 그리고 웹표준을 하는 것이 전체 웹에 도움이 된다고 믿고 있기 때문에 내가 참여하는 사이트라도 웹표준화에 일조하고자 한다.(현실은 머 만만치 않지만....)

퍼블리셔라는 영역이 생기면서 약간 애매해 진것은 사실이지만 퍼블리셔를 따로 두고 있는 회사는 그렇게 많아보이지 않는다. 일단 웹표준을 지키려고 하는 회사도 그리 많지 않지만...  어쨌든 이전의 방식과 호환성을 가지기 위해 사용하던 HTML 4.01이 지나 이제는 XHTML 1.0으로 가는게 맞다고 생각하고 있다. 논쟁을 하고자 하는 건 아니고 새기술이 좋다고 생각하는 전제를 깔고 있고 더 엄격한 규칙을 가지고 더 좋은 웹을 만들수 있는 것은 확실하다.


XHTML을 사용하기 위한 문서의 기본 구조는 전에 올린 XHTML 1.0 Transitional 문서 템플릿 포스트를 참고하고 여기에 적용되는 몇가지 XHTML의 규칙을 설명하고자 한다. 이 규칙들은 이전 HTML에서는 유효했지만 XHTML에서는 유효하지 않은 규칙들이다. 정의된 문서를 먼저 설명하면(위 템플릿 참고)

XHTML은 DOCTYPE을 무조건 선언해 준다. 이 문서가 어떤 문서인지를 정의 하는 것은 반드시 해야하는 것이고 DOCTYPE없으면 XHTML 유효성 검사를 할 수 없다.(HTML 4.01에서도 반드시 쓰라) 브라우저는 DOCTYPE이 있으면 표준모드로 없으면 호환모드로 돌아간다. XHTML은 Transitional, Strict, Frameset 3가지 DTD가 있는데 유연한 Transitional이 과도기인 현재로써는 가장 맞다고 생각한다. Strict는 상당히 쓰기가 어렵고 Frameset은 써본적도 없고 써보려고 해본적도 없다. 그리고 DOCTYPE은 HTML문서의 최상단에 있어야 한다.

XHTML 1.0 Strict
<!DOCTYPE html PUBLIC "-//W3C//DTD XHTML 1.0 Strict//EN" "http://www.w3.org/TR/xhtml1/DTD/xhtml1-strict.dtd">

XHTML 1.0 Transitional
<!DOCTYPE html PUBLIC "-//W3C//DTD XHTML 1.0 Transitional//EN" "http://www.w3.org/TR/xhtml1/DTD/xhtml1-transitional.dtd">

XHTML 1.0 Frameset
<!DOCTYPE html PUBLIC "-//W3C//DTD XHTML 1.0 Frameset//EN" "http://www.w3.org/TR/xhtml1/DTD/xhtml1-frameset.dtd">

XHTML 1.1 Strict
<!DOCTYPE html PUBLIC "-//W3C//DTD XHTML 1.1//EN" "http://www.w3.org/TR/xhtml11/DTD/xhtml11.dtd">
(DTD는 w3c의 Recommended list of DTDs 참고)

그 다음에는 네임스페이스를 선언해 주는데 그냥 위 템플릿이라는 포스팅에 써진대로 복사해서 쓰면 된다.


XHTML에서 지켜야 할 몇가지 규칙을 정리해보자.(W3C 문서 참고 )

모든 태그는 소문자로 적는다. 과거에는 대문자로 쓰는게 일반적이었지만 XHTML에서는 반드시 소문자로만 작성해야 한다. 단 속성값이나 내용은 대소문자에 상관없다.
<BODY></BODY> - (X)
<body><body>     - (O)


모든 속성값은 인용부호 안에 사용하고 속성들 사이에는 띄어쓰기를 해야한다.
<img src="banner.gif" alt=배너 />   - (X)
<img src="banner.gif" alt="배너" /> - (O)


모든 속성에는 값이 있어야 한다. 값을 지정안하고 선언하는 속성들이 있었지만 XHTML에서는 보기에는 어색하더라도 모두 속성을 지정해 주어야 한다.
<input type="text" readonly>                   - (X)
<input type="text" readonly="readonly" /> - (O)


모든 태그는 닫아준다. 이전에는 안닫아주었지만 모든 태극는 닫혀햐 한다. 여는 태그가 있으면 닫는 태그가 있어야 하고 단독적으로 쓰이는 태그(img, input, br 등등)도 반드시 닫아준다. 보통 단독태그에 닫아주는 표시를 할때는 슬래시(/)앞에 한칸을 띄워준다.
<p>내용        - (X)
<p>내용</p> - (O)
<br>   - (X)
<br /> - (O)


주석안에는 더블대시를 사용하지 않는다.
<!------------------------> - (X)
<!--====================--> - (O)


모든 <와 &는 변환을 해주어야 한다. 내용중에 <, &는 &lt; 와 &amp; 로 바꾸어 주어야 한다.
<div>you & me < test</div>           - (X)
<div>you &amp; me &lt; test</div> - (O)

id 사용 - 링크태그의 타겟으로 사용되던  name을 대체한다.(하위호환을 위해 name도 동시 사용)

모든 img태그에는 alt태그를 반드시 사용해 준다. alt는 이미지를 보여주지 못할때 이미지를 대체해서 보여줄 대체택스트로 이미지에 대한 설명을 뜻한다. 브라우저가 툴팁으로 보여주어서 잘못 사용하고 있기는 하지만 툴팁은 title속성을 사용하여야 한다.


좀 다른 얘기로 스크립트 얘기를 하자만 한 문서에는 여러 스트립트가 가능하므로 기본적인 사용 스크립트를 메타태그를 이용해서 지정할 수 있다.
<meta http-equiv="Content-Script-Type" content="text/javascript">
라고 작성하면 된다  보통 이 메타태그가 없으면 브라우저는 자바스크립트가 기본이라고 생각한다.
<script type="text/javascript"></script> 가 정상적이다. MIME타입으로 text/script가 많이 사용된다는 이유로 RFC 4329가 승인했다. application/javascript를 더 권장하고 있지만 실제 브라우저에서 잘 지원되지 않고 있다. 또한 스크립트 코드에 language="javascript"로 작성된 것을 많이 볼 수 있는데 이것은 type이 지원되지 않을 때의 잔재인데 하위 호환성을 위해서 사용할 수도 있다.

참고로 CSS의 경우는
<meta http-equiv="Content-Style-Type" content="text/css" />
코드를 통해서 문서의 CSS스타일을 정의할 수 있다.


아래 부분은 XHTML에 해당되는 내용은 아니지만 XHTML을 사용할 때 구조적인 HTML을 구성하려는 의도가 더 강하다고 생각했을 때나 웹접근성을 생각했을 때 고려해야 할 부분

  • <b>보다는 <strong>를, <i>보다는 <em>을 사용한다.
  • 텍스트의 경우는 div가 아닌 <p> 태그를 사용한다.
  • 해드라인의 경우 div에 적당한 클래스를 주는 것이 아니라 <h1>, <h2>태그 등을 사용한다.
  • table태그에는 summary 속성을 지정할 수 있다. 대부분의 브라우저는 summary를 보여주지 않지만 시각장애인용 스크린리더등에서는 summary를 읽어준다.
  • 태그에 accesskey 속성을 주면(ex: accesskey="1") 사용자가 단축키로 사용할 수 있게 해준다.(하지만 대부분의 브라우저는 이를 사용자에게 보여주지 않기 때문에 사용법에 대한 것을 따로 알려주어야 한다.)
  • tabindex를 사용하면(ex: tabindex="1", tabindex="2") 사용자가 탭을 눌렀을 때 옮겨지는 form 컨트롤를 지정할 수 있다. tabindex가 없으면 소스에 나와있는 순서로 옮겨진다.
Posted by 1010
반응형
웹이 점점 화려해 지고 인터넷속도가 빨라지면서 웹페이지들은 점점 빨라지고 있고 디자인은 갈수록 중요해지고 있기 때문에 웹사이트에는(특히 국내에서) 정말 많은 이미지가 들어가고 있다. 근데 HTML 코드를 보다보면 정말 흔히 볼 수 있는 이미지버튼의 형태가

<a href="#"><img src="경로" alt="" /></a>

이런 형태이다. 나도 회사처음 들어왔을때 내 바로 윗사람이 이렇게 쓰는것을 권고하기도 했었고 대부분의 사람들이 이런 형태로 이미지 버튼을 만들고 있는데 이건 정말 잘못된 형태의 html이다. 무엇보다 이렇게 써서 얹을 수 있는 잇점이 단 한개도 없다고 생각한다.

저렇게 허위 a태그를 거는 상황은 100% 이미지를 버튼으로, 즉 클릭용으로 사용하기 위함이다. 그래서 img에 onclick 속성을 사용하고 있다.

<a href="#"><img src="경로" alt="" onclick="clickBtn();" /></a>

이렇게 이벤트까지 추가된 형태가 일반적이다.(물론 onclick도 인라인으로 하지 않고 따로 빼는게 표현과 기능의 분리면에서 더 낫기는 하지만 이건 여기서 논할 얘기는 아니니...) IMG태그 만으로도 클릭은 되는데 굳이 이렇게 A태그를 걸어준 단하나의 이유는 다른이미지랑 다르게 버튼처럼 보이게 하기 위해서 이다. 즉 이미지위로 마우스 커서가 이동했을때 클릭이 가능하다는 걸 사용자에게 알려주기 위해서 마우스 커서가 화살표에서 손모양으로 바뀌게 하기 위함이다. 그냥 이미지태그만 있어도 되는걸 커서바꾸자고 a태그로 감싸버린 것이다.

그럼 이렇게 하면 끝이냐... 브라우저마다 특성이 있긴 하지만 기본적으로 이미지에 A태그를 걸면 IE에서는 보기싫은 파란색의 테두리가 생겨버린다. 하이퍼링크가 달렸다는 것을 알려주기 위해서인데 요즘은 이걸 쓰는 사람이 없기 때문에 대부분은 border="0"을 주어서 해결한다.

<a href="#"><img src="경로" alt="" onclick="clickBtn();" border="0" /></a>

그럼 코드가 이렇게 되어버린다. 이미지버튼하나인데 코드가 너무 길어져버렸다. 단지 커서 바꾸자고???

이건 CSS를 사용하면 금방 해결할 수 있다.

  1. <style> 
  2. .btn {cursor:pointer;}  
  3. </style> 
  4. <img src="경로" alt="" class="btn" onclick="clickBtn(); /> 


커서의 모양을 바꾸는 것은 스타일로 해버리면 된다. (보통은 img에도 border:0을 기본적으로 주기는 하지만 이 상황에서 꼭 필요한건 아니다.) 그리고 심플한 img태그만 사용하면 된다. CSS를 사용한게 훨씬 많아 보인다면 웹사이트에 버튼이 한 100개쯤 있다고 생각해봐라. CSS는 공통적으로 쓸수 있으니 이미지 태그부분만 작성하면 끝이다.


A태그를 이미지를 감싸줄 필요가 없음을 얘기했고 그냥 하던대로만 하기에도 A태그를 사용했을 때의 문제가 있다. 좀 원론적인 웹표준얘기대로 A태그는 하이퍼링크를 위한 것이기 때문에 A태그는 하이퍼링크만 사용해 주는 것이 좋다. 이건 머 웹표준을 동의하지 않는 사람들에게는 그리 통하지 않을 논리고....

A태그의 구조를 보면 Anchor를 사용한 것임을 할 수 있다. Anchor는 다들 알고 있을꺼라고 생각하지만 간단히 설명하자면

<a href="#title">제목으로 이동</a>
........중간내용.............
<h3 id="title">제목</h3>

과 같이 사용하는 것이 Anchor이다. #과 같이 사용하며 #이 있으면 해당경로로 페이지를 이동시키는 것이 아니라 현재페이지에서 해당 id를 가지고 있는 엘리먼트를 찾아서 이동한다. 이걸 이용해서 #은 주고 id는 null을 주어버린 것이다. 그래서 페이지는 다른페이지로 이동하지 않고 현재 페이지에서 Anchor를 찾지만 찾지 못하는 허위 Anchor를 사용한 것이다.

말했듯이 Anchor는 현재 페이지의 해당위치로 이동하는데 이건 스크롤이 있어도 이동된다. 여기서 문제가 발생하는데 href="#"을 해 놓으면 무조건 페이지 최상단으로 이동한다. 이미지 버튼이 윗쪽에 있을 경우에는 상관없지만 스크롤 내려서 아래에 있다고 생각하면 버튼을 누를때마다 페이지 스크롤은 맨위로 올라가고 다시 스크롤 내려서 다른걸 해야하는 사용자의 편의성을 무진장 해친다...

거기에다가 Anchor도 URL에 포함되기 때문에 저 버튼을 누르면 주소맨뒤에 #가 붙게 된다. 크게 문제가 있다고 할 수는 없지만 보기에 좋지 않은건 사실이다. 그리고 자바스크립트 펑션을 호출해서 location.href로 페이지 이동만 할꺼라면 그냥 A태그에 경로를 주자!!


별거 아닌 내용으로 은근 길게 작성해 버렸다. 그냥 작업하는데 버튼마다 계속 A태그 달려있는거 보다가 짜증나서.. ㅎㄷㄷ

덧) 약간은 도전적인 제목이었는데 역시나 내 영역은 아니라 약간의 논란이 있었다. 보통 작성뒤에 잘못된 내용은 빨리 수정하는 편이지만 이번에는 애매모호한 면이 있어서 이 포스트를 읽으시는 분들은 아래 댓글들도 꼭 읽어주시기 바람. 위에 얘기한대로는 링크이동이 아닌 버튼의 경우에 a를 안쓸경우 선택할때 점선이 생기지 않아서 접근성을 해칠우려가 있음. 명확한 결론을 내리기 어려운 관계로 나라디자인의 정찬명님의 포스트 를 참고로 건다. 많이 고민해 보아야 할 문제...   2008. 11. 11
Posted by 1010
반응형
오랜만에 툴에 대한 소개를 하려고 한다. 내가 클라인트사이드 개발에 주로 사용하고 있는 aptana Studio 다. 전에부터 한번 하려고 했는데 IDE를 소개한다는 것은 기능이 워낙 많기 때문에 만만치 않은 일인데 머 간단히 소개정도만 하고 그 뒤로는 새로운 기능파악할 때마다 포스팅해야할 듯 하다.(전체소개 없이 각 기능 소개하기도 좀 머해서....)

사용자 삽입 이미지

제목에는 클라이언트 사이드 IDE라고 소개하기는 했지만 이곳에 중점이 되어 있을 뿐 PHP, Python도 개발이 가능하다. RadRails라고 해서 플러그인을 깔면 Ruby on Rails개발도 할 수 있다. 툴을 이것 저것 써보았지만 클라이언트 사이드(자바스크립트, CSS, HTML)에서는 aptana Studio만큼 맘에 드는 것을 아직 발견하지 못해서 클라언트사이드 개발에는 메인 IDE로 사용하고 있다. (흔히 괜찮은 자바스크립트 에디터가 없다고 하는데 aptana Studio는 그 이상이다.)

aptana사이트에서 다운로드 를 받을수 있고 무료이기 때문에 맘편히 사용할 수 있다. 초기에 나올때는 Communication버전과 Pro버전이 나뉘어져 있었는데 이번에 보니까 커뮤니케이션 버전이라는 말은 아예 사라진듯하다. 기본적으로 무료로 이용할 수 있도록 제공하고 있고 추가 기능이 필요한 사람들을 위해서 aptana Studio Pro(Pro의 추가 기능 )를 위한 구매메뉴를 제공하고 있다. (Jaxer와 Cloud도 있는데 둘다 사용해 보지는 않은데 내가 대충 개념잡기로는 Jaxer는 서버이고 Cloud는 호스팅서비스 같은거다.)

08년 12월 31일 현재 1.2.1버전까지 나와있고 Standalone과 Eclipse 플러그인 2가지 타입으로 다운을 받을 수 있다. 난 Standalone타입을 선호하는 편인데 취향에 따라 쓰면 되겠다. OS는 Windows, Linux, Mac을 모두 제공하고 있다. Linux나 Mac에서는 안서봤지만 다양한 플랫폼을 지원한다는 것은 무조건 좋은거다.. ㅎㅎㅎ 현재는 Standalone로 풀인스톨러로 받으면 130MB정도 한다. 다운받아서 그냥 설치해주면 된다.

사용자 삽입 이미지

자바개발자라면 너무나도 익숙한 인터페이스이다. 위에서 플러그인 형태로 제공하는 걸 보고 눈치챘겠지만 Aptana Studio는 오픈소스 IDE인 Eclipse 를 가지고 만든것이기 때문에 이클립스와 거의 흡사하다. 이클립스기반이기 때문에 이클립스가 요구하는 Requirements 는 그대로 요구하고 있다. 1.5이상의 JRE가 필요하다는 얘기이다. 자바런타임환경만 있으면 달리 구성할 환경은 별로 없다.

나는 툴 사용의 효율성에 관심을 많이 가지고 있는데 개발의 속도를 높이려면 툴의 익숙함이 상당히 중요하다고 생각한다. 그런면에서 이클립스를 사용하는 개발자라면 서버사이드와 클라이언트 사이드의 개발툴이 통일화되어서 따로 익숙해지는 과정이 필요없다는 것은 매우 큰 장점이다. 물론 이클립스를 쓴다면 특별히 클라이언트사이드의 코딩이 엄청나지 않는 이상은 이클립스에서 코딩하기도 하지만 지원하는 면에서 비교가 안된다고 생각한다. 나도 일일이 벌갈아가면서 하지는 않지만 aptana Studio의 기능이 이클립스에서 안되서 답답한 적이 많다.(물론 플러그인형태로도 제공하니까 플러그인을 쓰면 된다.)

그리고 또하나의 장점은 이클립스에서 사용하는 플러그인을 그대로 사용할 수 있다는 것이다. 오픈소스 이클립스를 지원하는 방대한 양의 플러그인의 규모는 엄청난데 SVN, MyLyn등등 그대로 다 쓸수 있는 것이다.


그럼 aptana Studio의 몇가지 기능을 살펴보자. 머 거창한건 아니고 간단한 기본기능들 위주로....이클립스를 안써본 사람도 있겠지만 기본적인 프로젝트 생성같은거는 이클립스랑 동일하기 때문에 굳이 언급하지 않겠다.

IDE의 기본 기능이면서도 개발자에게 가장 크게 와닿는 것중 하나가 코드 어시스트이다. 클라이언트 사이드에서 aptana Studio가 제공하는 코드어시스트는 강력하다. 많은 툴을 다뤄본 것은 아니지만 내가 만져본 것들 중에는 aptana Studio가 제공하는 코드 어시스트가 가장 강력한것 같다.

사용자 삽입 이미지 사용자 삽입 이미지 사용자 삽입 이미지

html, CSS, javascript할 꺼 없이 거의 완벽하게 코드어시스트를 제공해주고 있다. CSS경우는 각 속성에 대한 이름뿐만 아니라 사용할 수 있느 값들까지도 제공하고 있으면 자바스크립트의 경우는 키워드, 함수명, DOM을 다 제공해 줄뿐만 아니라 위의 이미지처럼 사용자가 만든 function까지도 파라미터값까지도 보여준다. 사용할수 있는 키워드를 타이핑할 때마다 직관적으로 보여주고 그 오른쪽에는 지원되는 브라우저가 아이콘으로 표시되기 때문에 크로스브라우징에 맞추어서 개발하는데 정말 편하다. 오른쪽에는 해당 키워드에 대한 간단한 설명까지 나오기 때문에 부족함이 없을 정도이다.

html, css, javascript에서 자주 사용하는 엘리먼트를 바로 추가할 수 있도록 상단에는 아이콘들이 있는데 마우스를 써야 되니까 잘 쓰게 되지는 않는것 같다. ㅎ

사용자 삽입 이미지

코드 어시스트에서 보여주는 브라우저 호환에 대한 부분은 [window] - [Preferences]에 들어가서 [Aptana] - [Browsers/User Agents]에서 설정해 줄 수 있다. 여기서 필요한 브라우저를 체크할 수 있다. (아직 크롬은 없다. ㅎ) 이렇게 설정하면 아래처럼 선택한 브라우저의 호환성을 코드어시스트에서 제공 받을 수 있다.

코드어시스트 브라우저 호환성

위에서 본 에디터 부분에서 기본적으로 소스창을 보지만 따로 브라우저를 띄우지 않고 aptana Studio안에서 IE와 FF에서 미리보기를 해 볼 수 있다.

에디터 하단

아래쪽 탭을 선택하면 바로 볼 수 있으면 추가를 누르면 미리보기 셋팅을 추가해 볼 수 있다.(현재는 브라우저는 IE, FF만 제공하고 있다.) 여기서 볼때도 스크립트 에러가 나는 경우는 바로 표시가 된다.


CSS파일을 만들때도 preview를 제공하고 있는데(HTML에 들어가는 스타일부분 말고 확장자가 .css로 된 파일들....)

CSS 미리보기

CSS파일을 편집할때는 하단쪽 탭이 Preview로 나오게 되는데 실제 html에 적용된걸 보려면 html을 실행시켜서 봐야하기는 하지만 내가 작성한 css를 바탕으로 기본으로 제공되는 텍스트를 통해서 각 엘리먼트가 어떤식으로 보여지는 지를 간단하게 미리볼 수 있다. 오른쪽 톱니바퀴 아이콘을 눌러서 Edit Default preview template를 누르면 CSS preview에서 제공하는 텍스트를 수정해서 사용할 수 있다. file preview setting을 클릭해서 현재 프로젝트의 html파일을 선택해주면 프리뷰를 원하는 형태로 볼 수도 있다.

사용자 삽입 이미지

그리고 이게 코드어시스트말고  내가 aptana Studio를 좋아하는 큰 이유중 하나인데 html파일에서(jsp, asp, php같은 서버측코드는 해석할 수 없으므로...) Run AS - JavaScript Web Application을 시작하면 aptana Studio 내부의 Jaxer서버가 시작되면서 해당 페이지를 구동시켜준다.(정확히는 프로젝트째..)

http://127.0.0.1:8000/Test/new_file.html 와 같은 형태의 주소로 구동되기 때문에 주소를 이용해서 다양한 브라우저에서 쉽게 테스트해볼 수 있다. 수정하면 바로바로 확인해 볼 수 있고 프로젝트 이름이 붙기는 하지만 적대주소도 사용할 수 있기 때문에 아주 유용하다. ㅎㅎ

사용자 삽입 이미지

Run As에서 Run을 눌러서 설정창을 띄우면 서버실행할 때 자동으로 구동시킬 웹브라우저 및 여러가지 설정사항을 지정해 줄 수 있다.


이렇게 개발하는데 도움이 될만한 대략적인 기능들을 살펴봤다. IDE이기 때문에 그 기능은 엄청나고 많이 알면 알수록 개발의 효율은 높아질 것이다.

이외에도 클라이언트사이드개발을 위해서 많은 기능들을 가지고 있다.

프로젝트를 생성할 때 다양한 자바스크립트 프레임워크들을 선택해서 기본적으로 프로젝트에 포함 시킬수 있고 FTP연결연결하거나 Outline뷰에서 DOM트리를 보거나 js파일에서 함수구조를 본다던가 하는 등 많은 기능을 가지고 있다. aptana Studio 짱좋아.. ㅎㅎㅎ
Posted by 1010
반응형
웹개발을 하는데 있어 성능에서 중요한 요소중 하나는 용량을 줄이는 것이다. 전송해야할 파일의 용량이 줄어들면 사용자입장에서는 더 빠르게 로딩할 수 있고 서버측에서는 트래픽이 줄어들기 때문에 많은 이점을 가질 수 있다. 그래서 자바스크립트 코드를 압축해서 js파일의 용량을 줄이는걸 도와주는 툴들이 있다. 이번에 Ajaxian에서 YUI Compressor Online 가 나왔다는 기사가 떴길래 겸사겸사해서 정리해서 올린다.

자바스크립트 압축(Minification)이란 것은 보통 자바스크립트 코딩을 할 때 가독성을 위해서 들여쓰기등 공백이 많이 들어가게 되어 있는데 이런 것을 없애고 코드를 다닥다닥 붙혀서 크기를 줄여주는 것이다. 압축은 말그대로 크기를 줄여주는 것이고 암호화(obfuscation)라는 것도 있는데 이것은 변수나 함수명을 이상하게 바꾸어서 코드를 읽기 어렵게 만든다. 당연히 둘다 함께 할수도 있다.

하지만 암호화의 경우는 자바스크립트의 특성상 약각 읽기만 어렵게 만들어 놓은것 뿐이고 해독툴들을 써서 다시 어느정도 보기좋게 할 수도 있기 때문에 결과적으로 암호화라는 큰 의미는 없다. "웹사이트 최적화 기법"을 보면 사이즈면에서 압호화의 효과는 미비하기 때문에 별로 추천하고 있지 않고 있는데 선택은 각자 나름이고 혹 관심이 있다면 YUI의 글 을 참고바란다.

내가 아는 것으로는 3가지 서비스가 있다.


JSMIN

JSMIN 부터 보자. 자바스크립트계의 요다라고도 불리는 JSON 을 창시한 더글라스 크록포드(Douglas Crockford)가 만든 JavaScript Minifier이다.

JSMIN 사이트

JSMIN은 JS파일을 압축하는 기능을 가지고 있는 간단한 프로그램(?)형태로 제공되고 있다. 위에 보는다와 같이 사이트에서 다양한 언어로 제공되고 있기 때문에 취향에 따라서 가져다가 사용할 수 있다. 일반적인 윈도우 환경에서는 MS-DOS.exe형태로 배포되는 JSMIN을 가져다가 사용하면 된다.

JSMIN 실행화면

JSMIN.EXE를 받아서 js파일이 있는 곳에 놓고는 위와같이 실행하면 된다.  명령어는

jsmin <압축할파일> 새로만들 파일명 "주석"

와 같은 형태로 사용하면 된다. 뒤에 주석부분을 적지 않아도 되고 적을 경우는 새로만들 js파일 최상단에 주석에 넣은 부분이 주석형태로 추가된다.

압축된

  1. /*********** before Minification **************/ 
  2. var checker = false; // 체커  
  3.  
  4. function test() {   
  5.     alert(checker);  
  6. }  
  7.  
  8. test(); // 실행  
  9.  
  10. /*********** after Minification **************/ 
  11. var checker=false;function test(){alert(checker);}  
  12. test();  

JSMIN으로 prototype.js를 압축한 모습이다. 보는바와 같이 주석과 공백등은 모두 없애고 특정단위별로 한줄씩 적어주어 용량을 줄여주고 있다.


/packer/

Dean Edwards 가 만든 자바스크립트 압축기 packer 이다.

packer

웹상에서 간단하게 사용할 수 있다는게 큰 장점이고 옵션으로 Base62 압호화와 변수이름 축소(Shrink variables)를 적용할 수 있다.

  1.  
  2. /*********** before Minification **************/ 
  3. var checker = false; // 체커  
  4.  
  5. function test() {   
  6.    alert(checker);  
  7. }  
  8.  
  9. test(); // 실행  
  10.  
  11. /*********** after Minification **************/ 
  12. var checker=false;function test(){alert(checker)}test();  
  13.  
  14. /*********** after Minification : Base62 encode **************/ 
  15. eval(function(p,a,c,k,e,r){e=String;if(!''.replace(/^/,String)){while(c--)r[c]=k[c]||c;k=[function(e){return r[e]}];e=function(){return'\\w+'};c=1};while(c--)if(k[c])p=p.replace(new RegExp('\\b'+e(c)+'\\b','g'),k[c]);return p}('2 0=3;4 1(){5(0)}1();',6,6,'checker|test|var|false|function|alert'.split('|'),0,{}))  
  16.  
  17. /*********** after Minification : Shrink variables **************/ 
  18. var checker=false;function test(){alert(checker)}test();  
  19.  

예제소스가 짧아서 Shrink variables가 차이가 없게 나타나버렸다  ㅡ..ㅡ 암호화는 코드읽는 능력이 좋아서 읽을수 있다면 어쩔수 없지만 저 간단한 코드를 도저희 머하겠다는 건지 모를 코드로 만들어 놓았다. 하지만 딘에드워즈가 친절하게 unpacker 도 만들어주었고 변수이름까지 고대로 잘 디코딩 된다는거~~


YUI Compressor

Yahoo User Interface Library에서 제공하는 YUI Compressor 이다. jar파일 형태로 제공되고 있고 사용하려면 자바 1.4이상이 필요하다. 그냥 사용하기는 좀 불편한것 같고(사용까진 안해봤다.) 이걸 이용해서 만든 서비스들이 있다.

사용자 삽입 이미지

이 포스팅의 계기를 만들어 준 Rodolphe STOCLIN 가 만든 YUI Compressor Online 이다. 깔끔한 인터페이스에 얼마나 압축이 되었는지도 시각적으로 표시해 준다.

  1.  
  2.  
  3. /*********** before Minification **************/ 
  4. var checker = false; // 체커  
  5.  
  6. function test() {   
  7.    alert(checker);  
  8. }  
  9.  
  10. test(); // 실행  
  11.  
  12. /*********** after Minification **************/ 
  13. var checker=false;function test(){alert(checker)}test();  
  14.  
  15. /*********** after Minification : Minify only, do not obfuscate **************/ 
  16. var checker=false;function test(){alert(checker)}test();  
  17.  
  18. /*********** after Minification : Preserve all semicolons **************/ 
  19. var checker=false;function test(){alert(checker)}test();  
  20.  
  21. /*********** after Minification : Disable all micro optimizations **************/ 
  22. var checker=false;function test(){alert(checker)}test();  
  23.  
  24.  


먼 차이냐 ㅡ..ㅡ 소스가 간단해서 그런가... 어쨌든 이녀석은 약간 문제가 있다. 한글이 들어갈 경우는 EUC-KR이든 UTF-8이든 한글이 모두 ?로 깨져버린다. 코드에 한글이 들어가 있으면 사용못한다는 얘기다.

Online Javascript/CSS Compression Using YUI Compressor 사이트

Online JavaScript/CSS Compression Using YUI Compressor 는 디자인이 평이해서 그렇지 완성도가 더 좋은편이다. 웹상에서 직접 압축하는 것과 파일로 하는 것을 모두 지원하면 js뿐만아니라 CSS의 압축까지도 지원하고 있다. 압축후에는 용량이 어떻게 어떻게 달라졌고 몇퍼센트가 달라졌는지 표시해 주고 있다.

  1. /*********** before Minification **************/ 
  2. var checker = false; // 체커  
  3.  
  4. function test() {   
  5.    alert(checker);  
  6. }  
  7.  
  8. test(); // 실행  
  9.  
  10. /*********** after Minification **************/ 
  11. var checker=false;function test(){alert(checker)}test();  
  12.  
  13. /*********** after Minification : Minify only, do not obfuscate **************/ 
  14. var checker=false;function test(){alert(checker)}test();  
  15.  
  16. /*********** after Minification : Preserve unnecessary semicolons **************/ 
  17. var checker=false;function test(){alert(checker);}test();  
  18.  
  19. /*********** after Minification : Disable all the built-in micro optimizations  **************/ 
  20. var checker=false;function test(){alert(checker)}test();  
  21.  
  22.  

여기서는 Preserve all semicolons 옵션이 적용되는군....


한꺼번에 툴을 여러개 소개하다보니 포스팅이 좀 길어지긴 했는데 얼마나 줄어드나 보자. 테스트는 2가지 파일로 했다. 소스를 작성하는 형태가 각자 다르기 때문에 압축률에서도 상황에 따라 달라질것으로 생각한다. 내가 최근 프로젝트에서 만들고 있는 49KB짜리 script.js랑 보편화된 127KB짜리 prototype.js를 가지고 테스트 했다.

JSMIN
script.js -> 36KB
prototype.js -> 94KB

/packer/
script.js -> 36KB
script.js -> 22KB (Base62 encode)
script.js -> 32KB (Shrink variables)
prototype.js -> 93KB
prototype.js -> 51KB (Base62 encode)
prototype.js -> 76KB (Shrink variables)

YUI Compressor Online
script.js -> 33KB
script.js -> 35KB (Minify only, do not obfuscate)
script.js -> 35KB (Preserve all semicolons)
script.js -> 35KB (Disable all micro optimizations)
prototype.js -> 74KB
prototype.js -> 93KB (Minify only, do not obfuscate)
prototype.js -> 94KB (Preserve all semicolons)
prototype.js -> 94KB (Disable all micro optimizations)

Online JavaScript/CSS Compression Using YUI Compressor
script.js -> 34KB
script.js -> 36KB (Minify only, do not obfuscate)
script.js -> 34KB (Preserve unnecessary semicolons)
script.js -> 34KB (Disable all the built-in micro optimizations)
prototype.js -> 75KB
prototype.js -> 94KB (Minify only, do not obfuscate)
prototype.js -> 75KB (Preserve unnecessary semicolons)
prototype.js -> 75KB (Disable all the built-in micro optimizations)


다양하게 테스트한건 아니라서 절대성능비교라고 하기는 좀 그렇고 그냥 참고용이다.

압축화할때는 조심해야 할게 있다. 보면 약간 걱정되는 것처럼 이게 돌아갈까? 하는 생각인데 생각대로 이건 조심해야 된다. 공백이 없어지는 바람에 소스가 달라붙어서 의도하지 않은 오류가 나지 않아야 한다. 이건 충분히 일어날 수 있는 일이기 때문에 평소 코딩습관을 잘 들이는게 좋다고 생각한다. 더글라스 크록포드는 이런 자바스크립트 검증을 위해서 Javascript VarifierJSLint 를 제공하고 있다.

압축을 하고 난 다음에는 솔직히 유지보수를 할수 없는 지경이기 때문에 개발소스는 그대로 유지하고 배포할때 압축하는 게 맞는 방법인것 같다. 그래서 다들 Java파일 같은 라이브러리로 쓸수 있는 형태로 제공하는 것으로 보인다.
Posted by 1010
반응형
보통 웹사이트를 구축하면 헤더나 푸터등 공통된 부분이 있기 때문에 이런 부분은 별도로 만들어서 공통으로 사용하게 한다. 각페이지에 헤더,푸터파일을 인클루드해서 사용할 수도 있지만 그렇게 되도 반복코드가 많이 발생하니까 일반적으로는(그냥 내 생각에.. ㅡ..ㅡ) 템플릿 파일을 만들고 contents부분만 바꿔가면서 사용하지 않을까 싶다.(일단 난 그렇게 한다 ㅡ..ㅡ 전에 올렸던 포스팅처럼...)

이렇게 할때 가장 큰 문제가 자바스크립트 초기화 코드이다. 항상 바꿔치기할 contents부분은 <body>의 정중앙에 들어있는데 보통 스크립트는 <head>안에 있거나 <body>맨아래 있단 말이지. contents부분에 들어갈 페이지에 스크립트코드를 같이 써줘도 되기는 하지만 완성된 html에서 중간에 스크립트 코드가 들어가기 때문에 별로 좋은 방법은 아니라고 본다.

여기서 초기화코드라는 것은 머 여러가지가 될수 있는데 쉽게 페이지 로딩후(onload)에 자동으로 수행할 함수를 말한다. 가장 많이 쓰는데 이벤트 핸들러 등록이라던가 하는거고 onload후에 focus를 어디에 둔다던지 하는등의 코드를 말한다. 페이지가 다 다르게 생겼으므로 이런 코드도 다 다를 수 밖에 없는데 contents에 들어갈 페이지에서는 이걸 다룰수가 없다는게 고민거리였다. 물론 if-else문으로 해당 엘리먼트가 있는지 라든가 페이지 주소를 이용해서 억지로 할수야 이겠지만 쓸데없이 검사해야 하기 때문에 성능도 떨어지고 별로 알흠답지 못한 방법같았다. 이벤트 핸들러의 경우 html 엘리먼트에 직접 써넣는게 일반적이지만(<input type="button" onclick="test();"> 이렇게...) 요즘 추세는 자바스크립트도 완전히 분리하는 것이기 때문에 이걸 분리하자면 초기화코드가 꽤 많아진다. (이게 Unobtrusive Javascript.... 이렇게 하면 디자인 바뀌어도 많이 손 안대도 된다. 물론 Unobtrusive Javascript가 말하고자 하는건 저게 중점은 아니지만 개인적으로는 큰범주에서 보면 같은 흐름이라고 생각한다.)


어쨌든 이번에 플젝하면서는 이걸 좀 해결해 보고 싶었기 때문에 OKJSP 에 질문글을 올렸더니 임은천님이 답변 을 해 주셨다.(거의 익명사이트긴 하지만 도움얻은걸 혼자한척 하진 않는다.. ㅡ..ㅡ) 딱 내가 기다리던 명쾌한 답변.... 너무 자세하게 답변을 주셔서 구현하는데 별로 어렵지 않았다.

  1. document.observe('dom:loaded', function() {  
  2.     <% if (request.getAttribute("jsDispatcher") != null && !request.getAttribute("jsDispatcher").equals("")) { %>  
  3.     var dispatcher = new Dispatcher();  
  4.     var jdName = "<%= request.getAttribute("jsDispatcher") %>";  
  5.     eval(dispatcher.get(jdName));  
  6.     <% } %>  
  7. });  

위의 코드를 Template의 부모(?)가 되는 페이지의 스크립트 부분에 넣어준다. 물론 저 코드는 Prototype Framework의 코드이다. 쉽게 가자면 window.onload에다가 이벤트를 건거다. 여기선 JSP코드니까 JSP로 jsDispatcher이 파라미터로 넘어왔는지를 검사하고 jsDispatcher값이 있으면 디스패쳐를 실행한다. 물론 템플릿에 어떤 페이지를 contents부분에 띄워줄지 파라미터로 넘겨줄때 jsDispatcher의 값도 같이 넘겨주어야 한다. 어차피 템플릿으로 구성되는게 구현되어 있을테니까 파라미터 하나 더 넘겨주는건 그리 어렵지 않은 일이다.

디스패쳐가 각 jdName별로 실행할 함수목록을 가지고 있고 파라미터로 넘겨받은 jsDispatcher의 이름으로 디스패쳐에다가 조회해서(get) 해당 실행할 함수들을 가져오고 그자리에서 eval()해서 실행해 버리는거다. 이것 자체가 window.onload때 실행되니까(Prototype.js의 dom:loaded는 약간은 다른의미지만 여기선 별로 중요하지 않다.) 디스패쳐로 가져온 값도 페이지 초기화코드로 실행된다. 물론 여기서 Dispatcher은 이어서 만들 클래스이다. 원래 제공되는게 아니라...


그럼 Dispatcher클래스를 보자.

  1. var Dispatcher = Class.create();  
  2. Dispatcher.prototype = {  
  3.     initialize : function() {},  
  4.     get : function(name) {  
  5.         return this.map[name];  
  6.     },  
  7.     map : { listform: 'ListenerCollection.registEventListFrom()',  
  8.                   writeform: 'ListenerCollection.registEventWriteFrom()',  
  9.                   modifyform: 'ListenerCollection.registEventModifyForm()' 
  10.     }  
  11. }  
  12.  
  13. var ListenerCollection = {  
  14.     registEventListFrom: function() {  
  15.         // 리스트 페이지의 초기화 코드들  
  16.     },  
  17.     registEventWriteFrom: function() {  
  18.         // 작성 페이지의 초기화 코드들  
  19.     },  
  20.     registEventModifyForm: function() {  
  21.         // 수정 페이지의 초기화 코드들  
  22.     }  
  23. }  

여기에는 Dispatcher와 ListenerCollection 2가지 클래스가 있다.(Prototype.js의 관점에서는 Dispatcher만 클래스이지만 그냥 넘어가자.)

Dispatcher클래스는 3가지 매서드가 있다.  initialize는 보는바와같이 아무것도 없는데 prototype.js의 클래스에선 필수로 만들어주어야 하는거라서 신경안써두 되고 get하고 map이사용할 메서드이다. map은 넘겨받은 이름과 함수가 쌍으로 맵핑되어 있고 get에서 넘겨받은 name으로 map에서 찾아서 해당 함수를 돌려준다.

ListenerCollection은 등록할 이벤트리스너(꼭 이벤트리스너일 필욘 없지만)의 코드목록을 담는 곳이다. map내애서 funcion(){}으로 바로 적어줄 수도 있지만 코드량이 많아서 분리했다. 약간 꼬아놔서 그렇지 구조는 별로 어렵지 않다.


이렇게 하면 템플릿을 유지하면서도 페이지별로 초기화 자바스크립트 코드를 따로 둘 수 있다. 모든 페이지에서 이코드가 들어가긴 하지만 위쪽에서 onload로 이벤트를 건 곳을 제외하고는 외부 js파일로 빼면 어차피 캐시가 되기 때문에 성능면에서는 별로 신경안써도 될듯하다. prototype.js를 기반으로 작성되서 prototype.js를 안써본 사람은 약간 코드이해에 어려움이 있을까 좀 걱정되긴 한다...
Posted by 1010
반응형
Script.aculo.Us에서는 드래그앤드롭(Drag N Drop)을 쉽게 구현할 수 있는 클래스가 있는데 Draggable(Droppables)과 Sortable 2개의 클래스이다. 둘다 드래그앤드롭을 위한 클래스인데 Draggable는 객체를 드래그 가능하게 만드는 클래스이고 Sortable은 드래그앤드롭이 되면서 정렬이 가능하도록 하는 클래스이다. 정렬을 하고자 한다면 Sortable을 사용하는 것이 편하고 여기서 정리하려는 것은 Sortable이다.

Sortable.create('id_of_container',[options]);

위 코드이 Sortable 을 사용하는 기본 문법이다. id_of_container에 드래그앤드롭을 가능하게 할 엘리먼트의 id를 주고 options에 드래그앤드롭에 대한 옵션을 JSON형태로 던져주면 바로 정렬가능한 드래그앤드롭을 사용가능하다.  id_of_container이라고 쓴 것처럼 드래그할 객체가 아니라 드래그할 객체들을 담고 있는 container의 id를 주면 되고 options는 안주면 디폴트옵션으로 동작하게 된다.

예를 들어

  1. <ul id="contailner"> 
  2.     <li id="dnd_1">Test 1</li> 
  3.     <li id="dnd_2">Test 2</li> 
  4. <ul> 
  5. <script type="text/javascript"> 
  6.     Sortable.create("contailner");  
  7. </script> 

위와같이 작성하면 dnd_1, dnd_2객체가 바로 드래그앤드롭이 가능하다. (이 얼마나 간단하단 말인가. ㅎㅎㅎ)

이제 옵션을 보자. 자유롭게 사용하려면 옵션을 주어서 원하는 형태로 사용하여야 한다. 옵션은 Draggable과 공통적인 것도 있고 아닌것들도 있다.(아직 Script.aculo.us의 API리스트는 솔직히 좀 아쉽다.) API와 내가 테스트해본걸 바탕으로 적었지만 빠진 부분이 있을수도 있다.

tag : 여기에 HTML태그명을 주면 해당 태그에 대해서 Sortable이 동작하게 된다. 디폴트는 li태그이고 container아래 한단계 밑까지만 동작한다. 쉽게 말해 li안에 li가 또 들어있다고 하더라도 안에 있는 li에는 드래그앤드롭이 동작하지 않는다. Block엘리먼트에만 가능하고 table같은걸 블가능하다.

only : 이 옵션을 주고 여기서 class명을 지정하면 tag에 설정한 태그명이라고 할지라도 only에서 준 class명과 맞지 않으면 드래그앤드롭이 동작하지 않는다.

overlap : 가로 리스트는 horizontal, 세로 리스트는 vertical로 설정하라는데 정확한 동작은 잘 모르겠다.

constraint : horizontal, vertical, false 3가지가 있고 드래그앤드롭의 방향을 설정한다. horizontal/vertical로 설정할 경우에는 가로/세로로만 이동하며 false나 옵션을 주지 않았을 경우에는 어떤 방향이든지 이동이 가능하다.

containment : 이곳에 container 리스트를 지정하고 이곳에 지정한 container간에는 드래그앤드롭이 가능하다.

handle : 드래그앤드롭을 할 엘리먼트에서 전체가 아닌 특정부분만을 이용해서 드래그앤드롭이 가능하도록 하고 싶을때 handle이용한다. 이곳에 id 혹은 class명을 지정하면 핸들러로 사용할 수 있다.

delay : 드래그앤드롭으로 반응할 시간을 미리세컨단위로 설정할 수 있고 기본은 0이다. 너무 민감하게 반응하지 않기를 바랄때는 delay의 숫자를 크게 지정할 수 있다.

dropOnEmpty : true로 설정하면 container가 비어있을때도 drop이 가능하다. false일 경우에는 container에 다른 드래그앤드롭객체가 있을때만 드롭이 가능하다. 기본은 false

scroll : 기본으로는 지정되어 있지 않으며 window로 설정할 경우에는 드롭할 container가 화면밖에 있을경우에 드래그객체가 화면밖으로 나가면 자동으로 스크롤한다.

scrollSensitivity : 기본은 20이고 스크롤이 되게 하기 위해서 넘어가야하는 크기를 지정한다.

scrollSpeed : 스크롤 속도이고 픽셀로 지정하면 기본은 15이다.

onChange : 콜백함수로 드래그앤드롭을 시작하는 등 객체의 위치가 변경되면 계속 발생한다.

onUpdate : 콜백함수로 드래그앤드롭을 하여 실제 순서의 변화가 생겼을때만 발생한다.


아주 간단한 예제를 만들었다. 동작과 소스코드를 보면 쉽게 이해할 수 있을꺼라고 생각한다. 최근 작업을 하면서 몇가지 주의점(?)을 발견한 거라면...

  • container의 id에 언더바(_)가 들어가면 동작하지 않는다.
  • Sortable.serialize를 사용하려면 드래그앤드롭 엘리먼트의 아이디가 언더바(_)로 이어져야 한다. 언더바 뒤쪽에 있는 문자만 표시된다.
  • IE에서는 왼쪽 콘테이너에서 오른쪽 콘테이너로 갈때 드래그엘리먼트가 컨테이너 뒤쪽으로 가는 문제가 생긴다. 드롭하기 위해서 반이상 넘어갈 경우에는 위로 올라오는데 이건 IE의 z-index버그때문에 생기는 문제로 예상되는데 정확한 해결책은 아직 찾지 못했다.
Sortable.serialize는 해당 컨테이너에 있는 드래그앤드롭객체를 순서대로 보여준다. 이것은 위치정렬을 한 후에 Ajax등을 통해서 새로 정렬한 위치를 서버에 저장할 수 있도록 하는 역할을 한다.

그리고 예제의 소스를 보면 알겠지만 기본적으로는 드래그앤드롭을 할 때 해당위치의 공간은 표시하지만 따로 표시되지는 않는다. 이 문제를 해결하기 위해 더미 엘리먼트를 만들었다. OnChage가 발생할 때 해당 엘리먼트의 바로 앞쪽에 더미엘리먼트를 만들어서 insert한다. 이렇게 함으로써 드롭했을때 떨어질 위치가 명시적으로 보일수 있도록 하고 OnChange는 계속 발생하기 때문에 처음에 더미엘리먼트를 지우고 다시 넣어주기 때문에 다른 컨테이너로
Posted by 1010
02.Oracle/DataBase2009. 1. 28. 16:41
반응형
여러 행을 가지고 한번에 인서트를 해야할 경우가 최근에 꽤 있었다. 한쪽 테이블에서 어떤 조건으로 셀렉트해서 다른쪽 테이블에 한꺼번에 넣어주기... 그렇게 흔한 상황은 아니지만 충분히 있을법한 상황이다.

처음에는 이걸 할줄 몰라서 SELECT해와서 루프돌면서 인서트를 날려줬다. 아~ 느려.. ㅡ..ㅡ 갯수가 그렇게 많지 않았으니까 다행이지.......

  1. INSERT INTO table_a  
  2. ( title, name, regdate, register, memberid, categoryid )  
  3. SELECT title, name, regdate, register, memberid, categoryid  
  4. FROM table_b  
  5. WHERE categoryid=10  

위에처럼 해주면 인서트문 한방으로 수십, 수백줄의 행을 추가해 줄 수 있다. 솔직히 이거 하기 전에는 INSERT는 한번에 하나만 되는 줄 알았다. ㅋ WHERE절은 SELECT문에 딸린 조건문이다. INSERT문이 아니라.... 이렇게 SELECT로 할 때는 원래의 INSERT문에 들어가는 VALUES는 들어가지 않고 당연한 얘기로 INSERT할 컬럼수와 SELECT하는 컬럼수 및 타입이 동일해야 된다.

SQL책하나 보고 좀 감오나 했더니 복잡한 쿼리 오니까 다시 헷갈리는 구만...
Posted by 1010
01.JAVA/Java2009. 1. 28. 16:38
반응형
JDBC에 사용예제...

이클립스에서 작성하였기 때문에 package 사용하였슴.
각자환경에서 사용하려면 com.ksic.util에서 StudentsUtil의 DB부분을 설정에 맞게 수정해 주어야 함.

오라클 9i와 연동하여 작성한 것임.

DB테이블 명은 hkstudents이고 컬럼은 모두 varchar2타입으로 id, name, addr 3개가 있음.

테이블에 대한 DTO가 따로 하나 있고... DAO는 연결과 클로즈부분만 추상클래스로 따로 구성됨.

나름 주석 열심히 달아서 보면 이해가 될지도..


JDBC에 대한 설명

자바에서 오라클을 연결해서 사용할때 총 6단계의 과정을 거친다.

1. 드라이버 로딩
Class.forName("oracle.jdbc.driver.OracleDriver");

Class.forName으로 JDBC 드라이버를 로딩해 준다. 이 부분은 ClassNotFoundException 핸들링을 해주어야 하므로 try-catch문으로 감싸주어야 한다.

2. DB 연결
Connection conn = null;
conn = DriverManager.getConnection("jdbc:oracle:thin:@localhost:1521:ORA92", "scott", "tiger");


Connection을 사용하기 위해서는 java.sql.Connection 을 임포트 해주어야 한다. conn이라는 커넥션을 만든 후에 DriverManager의 getConnection을 통해서 DB를 연결해 준다. DriverManager를 사용하려면 java.sql.DriverManager를 import해주어야 한다.

첫 매계변수는 DB연결쪽이다. jdbc:oracle:thin:@부분은 동일하게 사용하고 localhost는 위치를 말한다. 다른PC이거나 할 경우는 IP를 입력해 주고 1521은 해당포트이며 ORA92는 오라클의 SID이다. 자신에 맞게 입력해준다.
두번째와 세번째는 오라클의 아이디와 패스워드이다.

이 연결부는 SQLException예외처리로 Try-Catch로 감싸 주어야 한다.

3. 쿼리 준비
PreparedStatement psmt = null;
psmt = conn.prepareStatement("DB쿼리문");
혹은
Statement stmt = null;
stmt = conn.createStatement("DB쿼리문");


를 사용한다. 각각 java.sql.PreparedStatement이나 java.sql.Statement을 임포트 해주어야 한다. Statement가 PreparedStatement보다 상위클래스이다.

실행하기 전에 DB쿼리를 준비하는 단계인데 둘의 차이는 PreparedStatement는 쿼리문에 ?를 사용해서 추가로 ?에 변수를 할당해 줄수 있다는 것이다.
psmt = conn.prepareStatement("select * from TableName where id=?");
psmt.setString(1, id);
와 같이 사용이 가능하다. setString(혹은 setInt 등등)을 이용해서 1번째 ?위치에 id를 할당할 수 있어서 유연성있게 쿼리준비를 할 수 있다.

4. 쿼리 실행
psmt.executeUpdate();
로 쿼리를 실행한다. insert, update, delete 등 값을 받아 오지 않는 쿼리문은 executeUpdate를 이용해서 실행해 준다.

5. 데이터 가져오기
select등 쿼리실행후에 값을 가져와야 하는 쿼리문의 경우는
ResultSet rs = null;
rs = psmt.executeQuery();


java.sql.ResultSet을 이용해서 쿼리실행 한 것을 ResultSet으로 받아들인다. 이때 쿼리실행은 executeQuery()를 사용한다.

그 후에

while(rs.next()) {
    int i=1;
    String id = rs.getString(i++);
    String name = rs.getString(i++);
    String addr = rs.getString(i++);
   }


rs.next()를 이용해서 한 줄씩 읽어들인다. 처음에는 시작위치에 있고 rs.next()를 실행하면 받아온 데이터의 첫줄 위치로 이동하게 된다. while문 혹은 if문을 통해서 rs.next()가 null인지를 확인하면서 반복문을 돌린다.
rs.get을 이용해서 값을 가져와 변수 혹은 dto객체등에 저장해서 사용한다. DB에 여러줄을 가져올때는 dto객체로 받아서 컬렉션 계열로 저정해야 한다.

6. 커넥션 닫기
if (rs!=null) {
   try {
      rs.close();
   } catch (SQLException e) {
   }
}
 
if(stmt!=null) {
   try {
      stmt.close();
   } catch (SQLException e) {
   }
}
 
if(conn!=null) {
   try {
      conn.close();
   } catch (SQLException e) {
   }
}

닫을때는 Open한 반대의 순서로 닫아주어야 한다. Statement가 PreparedStatement 보다 상위클래스이기 때문에 닫는 메서드를 만들때 Statement로 받을어도 PreparedStatement을 정상적으로 받을 수 있다. 닫을때는 습관적으로 null이 아닌지를 확인한 뒤에 받도록 만들면 생각지 못한 오류를 막을 수 있다.


이것이 JDBC의 기본적인 구조인데 실제적으로 사용할때는 제공되는 커넥션풀(ConnectionPool)등을 사용해서 이미 만들어진 커넥션을 사용하기 때문에 1번 과정은 pass하고 2번과정부터 커넥션풀에서 커넥션을 얻어오는 방식으로 사용하게 되는 경우가 많다.
Posted by 1010
98..Etc/weblogic2009. 1. 28. 16:27
반응형
웹로직에는 production mode와 development mode라는게 있다. 나도 잘 모르지만 대충 말하면 프로덕션 모드는 실제 서비스를 하는거고 development mode는 개발단계에서 쓰는거다. 개발단계에서 쓰므로 class파일을 교체해도 자동으로 리로드를 해주기 때문에 class파일을 재컴파일해도 바로 변경사항을 확인할 수 있다. production mode에서는 웹로직을 리스타트 해주어야 class 변경사항이 반영된다.

개발할때는 당연히 development mode에서 해야겠지...

C:\bea\user_projects\domains\mydomain\startWebLogic.cmd 파일을 보자.
(물론 여기서 mydomain은 내가 정해준 domain이름이다. 전에 올린 웹로직 설치문서 참고....)

set PRODUCTION_MODE=false

로 설정을 해주면 development mode가 되고 class가 바로바로 적용된다.(이거 안해놓으면 개발할때 엄청 불편하다.)

설정해주고 웹로직을 리스타해주면 된다. 물론 개발이 완료되고 서비스할때는 다시 true로...
Posted by 1010
98..Etc/weblogic2009. 1. 28. 16:26
반응형
JDBC를 이용해서 웹로직에서 제공하는 Data Source를 이용해서 DB 접속을 해보자. 웹로직에서 Data Source 설정을 해주어야 하는데 이건 웹로직 설치가이드 문서를 참고하기 바란다. 뒷부분에 보면 커넥션풀과 데이터소스를 설정하는 부분에 대해서 나와있다.

사용자 삽입 이미지
왼쪽 그림과 같이 설정이 되어야 한다.

먼저 Connection Pools를 만들고 만들어진 Connection Pools(여기선 ibisPool)을 이용해서 Data Sources를 만든다.

그리고 Java쪽에서는 만들어진 Data Sources(여기서는 ibisDS)를 사용하여 DB에 연결한다.


디비 연결 클래스를 보자.

  1. // Weblogic DBConnection Class  
  2. import java.sql.Connection;  
  3. import javax.naming.Context;  
  4. import javax.naming.InitialContext;  
  5. import javax.naming.NamingException;  
  6. import javax.sql.DataSource;  
  7.  
  8. import java.sql.ResultSet;  
  9. import java.sql.PreparedStatement;  
  10. import java.sql.Statement;  
  11.  
  12. public class DBConnection {  
  13.  
  14.     public DBConnection() {  
  15.     }  
  16.  
  17.     public Connection getConnection() throws Exception {  
  18.         return getConnection("jdbc/ibisDS");  
  19.     }  
  20.  
  21.     public Connection getConnection(String dsName) throws Exception {  
  22.         Context ctx = null;  
  23.         DataSource ds = null;  
  24.         try {  
  25.             ctx = new InitialContext();  
  26.             ds = (DataSource) ctx.lookup(dsName);  
  27.         } catch (NamingException e) {  
  28.             e.printStackTrace();  
  29.             return null;  
  30.         } finally {  
  31.             try {  
  32.                 if (ctx != null)  
  33.                     ctx.close();  
  34.             } catch (NamingException ne) {  
  35.                 System.err.println("comm.util.conPoool : can't close context resource !!");  
  36.             }  
  37.         }  
  38.         return (Connection) ds.getConnection();  
  39.     }  
  40.  
  41.     public void disConnection(ResultSet rs, PreparedStatement pstmt, Statement cstmt, Connection conn) {  
  42.         try { if(rs   != null) rs.close()   ; rs    = null; } catch(Exception e) { rs    = null;}  
  43.         try { if(pstmt!= null) pstmt.close(); pstmt = null; } catch(Exception e) { pstmt = null;}  
  44.         try { if(cstmt!= null) cstmt.close(); cstmt = null; } catch(Exception e) { cstmt = null;}  
  45.         try { if(conn != null) conn.close() ; conn  = null; } catch(Exception e) { conn  = null;}  
  46.     }  
  47. }  

기존의 JDBC 연결 클래스와 거의 동일하기 때문에 JDBC로 연결을 해본 사람이라면 웹로직에서도 크게 무리가 없으리라고 본다. (내가 그랬기 때문에.....)

일단 생성자인 DBConnection()에서는 아무것도 안하고 있고 오버로딩된 메서드 getConnection()이 2개 정의 되어 있다. 데이터소스 이름을 던져주면 2번째것이 실행되어서 데이터소스에서 해당이름으로 된것이 있는지 검색해서 커넥션을 리턴하고 파라미터를 던지지 않으면 기본으로 설정된 ibisDS(위에서 만든 이름이다. 당연히 각자 웹로직에서 사용한 이름으로...)의 커넥션을 리턴해준다. disConnection메서드에서는 사용한 디비자원을 닫아준다.
Posted by 1010
01.JAVA/Java2009. 1. 28. 16:24
반응형
Java로 OpenID Consumer 서비스 구현하기 #1 : OpenID란?
Java로 OpenID Consumer 서비스 구현하기 #2 : OpenID4Java로 인증요청하기
Java로 OpenID Consumer 서비스 구현하기 #3 : OpenID4Java로 인증확인하기


이제 간단하게 인증을 요청하고 인증확인을 구현하였는데 실제 서비스를 하려면 추가정보를 받아야 한다. 로그인처리를 하려면 추가정보가 필요하다. 오른아이디를 통해서 회원가입 처리를 하려고 해도 그렇고 아이디야 당연히 넘어오지만 이름, 닉네임, 전화번호등등의 정보를 받아와야 한다.

openid4java에 들어있는 SampleConsumer를 보면 아래와 같은 코드들이 있다.(앞에서 만든 SampleConsumer말고...)
FetchRequest fetch = FetchRequest.createFetchRequest();
fetch.addAttribute("email", "http://schema.openid.net/contact/email", true);
authReq.addExtension(fetch);
이 코드가 추가정보를 요청하는 코드인데 이 코드는 Attribute Exchange 스펙을 이용하는 코드이다. 스펙에 이름에서 알 수 있듯이 추가적인 정보를 교환하는 스펙이다. 나도 스펙들을 대충 보고 당연히 이걸 이용한다고 생각하고 열심히 삽질을 했는데 어찌된 일인지 정보를 받아올 수 있었다. 의외로 추가정보를 Attribute Exchange를 이용하는 것이 아니라 Simple Registration Extension 스펙(영문스펙 )을 이용한다. Simple Registration Extension을 이용해서 유저의 추가정보를 받아 올 수가 있다.(Attribute Exchange가 왜 안되는지는 나도 잘 모르겠다. 안된다기 보다는 내가 못하는 거겠지만... 이래서 스펙을 볼 줄 알아야 하는건데....)


어쨌든 Simple Registration Extension를 이용해서 정보를 요청하자.

  1. SRegRequest sreq = SRegRequest.createFetchRequest();  
  2. sreq.addAttribute("email", true);  
  3. sreq.addAttribute("nickname", true);  
  4. sreq.addAttribute("fullname", true);  
  5. sreq.addAttribute("dob", true);  
  6. sreq.addAttribute("gender", true);  
  7. authReq.addExtension(sreq);  

일단 인증을 요청할 때 추가정보도 같이 요청해야 하기 때문에 authRequest 메서드안에

AuthRequest authReq = manager.authenticate(discovered, returnToUrl, trustRoot);

아래쪽에 위의 코드를 추가해 준다. (SRegRequest를 AuthRequest객체에 추가해 주어야 하므로..) 그리고 SReqRequest를 사용하려면 org.openid4java.message.sreg.SRegRequest를 import 해주어야 한다. 이렇게만 하고 다시 실행을 하고 인증을 요청하면

사용자 삽입 이미지

위의 사진처럼 OP측에서 사용자의 추가정보를 넘겨주는 것을 사용자에게 보여준다. 당연히 End-User는 여기서 정보를 변경해 줄 수가 있다. End-User가 승인을 하면 OP는 인증정보와 함께 요청한 추가정보를 같이 담아서 RP측이 받을 수 있도록 해준다. 요청하는 정보는 Simple Registration Extension의 스펙을 확인하면 되고 당연히 OP측에거 가지고 있는 정보만 요청해서 받을수 있다.


추가정보를 요청하고 OP가 정보를 넘겨주었으니 그럼 이제 받아보자.

  1. if (verified != null) {                 
  2.     AuthSuccess authSuccess = (AuthSuccess) verification.getAuthResponse();  
  3.  
  4.     if (authSuccess.hasExtension(SRegMessage.OPENID_NS_SREG))  
  5.     {  
  6.         MessageExtension ext = authSuccess.getExtension(SRegMessage.OPENID_NS_SREG);  
  7.  
  8.         if (ext instanceof SRegResponse)  
  9.         {  
  10.             SRegResponse sregResp = (SRegResponse) ext;  
  11.  
  12.             String nickName = sregResp.getAttributeValue("nickname");  
  13.             String email = sregResp.getAttributeValue("email");  
  14.             String dob = sregResp.getAttributeValue("dob");  
  15.             String gender = sregResp.getAttributeValue("gender");  
  16.  
  17.             httpReq.setAttribute("nickName", nickName);  
  18.             httpReq.setAttribute("email", email);  
  19.             httpReq.setAttribute("dob", dob);  
  20.             httpReq.setAttribute("gender", gender);  
  21.         }  
  22.     }  
  23.  
  24.     return verified;  // success             
  25. }  

기존 코드의 verifyResponse 메서드 안에 있는 if (verified != null) {} 의 부분을 위의 코드로 바꾸어준다. 앞에서는Simple Registration Extension의 정보를 확인하는 부분이 없었기 때문에...(다시 한번 말하지만 소스의 세세한 부분은 이해하지 못하고 있다.) 간단히 설명하자면 SRegMessage가 있는지 확인하고 있으면 SRegResponse로 받아서 각 정보를 받아온다. 나는 이 메서드를 호출한 JSP파일에서 다시 정보를 받아야 하기 때문에 verifyResponse를 호출할 때 파라미터로 넘겨준 Request에 각 정보를 다시 심어주는 방식을 택했다.

의 코드를 사용하려면 org.openid4java.message.sreg.SRegMessage 와 org.openid4java.message.sreg.SRegResponse 를 import 해주어야 한다.


이제 JSP에서 받아오자. resultOpenid.jsp를 다음과 같이 변경하자.

  1. // resultOpenid.jsp  
  2. <%@ page contentType="text/html; charset=utf-8" %>  
  3. <% request.setCharacterEncoding("utf-8"); %>  
  4. <% response.setContentType("text/html; charset=utf-8"); %>  
  5. <%@ page import="org.openid4java.discovery.Identifier" %>  
  6. <%@ page import="kr.test.openid.SampleConsumer" %>  
  7. <%  
  8.     SampleConsumer sc = (SampleConsumer)application.getAttribute("cm");  
  9.     Identifier ver = sc.verifyResponse(request);  
  10.  
  11.     if (ver != null) {  
  12.         out.println(ver.getIdentifier() + "님 환영합니다.<br>");  
  13.         out.println("닉네임 : " + request.getAttribute("nickName") + "<br>");  
  14.         out.println("이메일 : " + request.getAttribute("email") + "<br>");  
  15.         out.println("생년월일 : " + request.getAttribute("dob") + "<br>");  
  16.         out.println("성별 : " + request.getAttribute("gender") + "<br>");  
  17.     } else {  
  18.         out.println("로그인에 실패하였습니다.");  
  19.     }  
  20. %>  

정상적으로 돌아간다면 위의 정보를 다 받아오고 화면에 출력해 준다.

사용자 삽입 이미지

근데 이상한건 fullname의 경우는 받아오지를 못한다. myid측에서는 인코딩의 문제점을 제기했는데 시간의 압박으로 그부분까지 확인해 보지는 못했다. 나같은 경우에는 fullname이 들어가면 인증자체가 실패해서 일단 fullname은 제외해 놓은 상태이다.(이름만 한글이 넘어왔으므로 인코딩 문제라는데 심증이 가기는 한다.) 참고로 End-User가 "승인"을 하면("이번만 승인"이 아닌..) 로그인 할 때 마다 요청한 정보가 넘어온다. 정보를 갱신하고자 한다면 로그인처리를 할 때 갱신에 대한 처리를 하면 End-User가 OP측에서 개인정보를 수정하면 새 정보를 받을 수 있을 것이다.

이것외에도 해야할 일은 많겠지만 일단 필요한 기능은 간단하게 다 구현했다. 난 여기까지만.... 소스가 많지 않아서 내용만 보아도 이해가 되겠지만 혹 더 도움이 될까봐 위의 결과로 나온 소스를 첨부로 올린다.


그리고 이부분은 해결은 안되었는데 다음과 같은 에러가 나는 경우가 있다.

사용자 삽입 이미지

URI is not absolute
라는데 URI가 절대경로가 아니라는건데 이건 엄청 찾아봤는데 죽어도 이유를 모르겠다. 절대경로인데 절대경로가 아니라니.. ㅡ..ㅡ 더군다나 java.lang에서 나는것처럼 보이니 이유를 모르겠다. 나같은 경우에는 Jeus환경에서 나타났고 웹에서 찾아보니 다른 분은 Resin환경에서 같은 문제가 발생했었다. 나는 자연스럽게 환경이 tomcat으로 바뀌면서 더이상 이문제를 가지고 고민할 필요가 없어지긴 했는데 일단 이문제는 tomcat에서는 발생하지 않는다.

그럼 이제 DB에 대한 부분이 남는다. DB구성을 어떻게 할 것인가. OpenID의 개념상에는 한명이 여러 OpenID를 사용할 수도 있고 그것들은 같은 유저로서 인식되어야 하는 것 같고 거기에 OpenID를 추가해고 삭제할 수도 있어야 하는데 사이트마다 적용하는 범위는 다를 수 있다. 어쨌든 A Recipe for OpenID-Enabling Your Site 라는 글에 DB에 대한 내용이 자세히 나와있다. 이곳에서는 기존유저가 있다는 가정하에 OpenID를 추가하는 것을 전제로 하고 있지만 내가 찾아본 자료중에 DB구성에 대해서 자세히 나와 있는 포스팅은 이곳말고는 보지 못했다.

그리고 OpenID Book 이라는 프로젝트가 있는데 OpenID에 대한 내용을 정리하는 것 같다. 해당 사이트에서 무료로 다운로드를 받을 수 있고 사이트에 가기 귀찮으신 분을 위해서 올려둔다. PDF파일로 되어 있으면 250page정도 되는데 아마 이걸 읽으면 거진다 이해할 수 있을듯 하다. 분량이 분량이니 만큼....(당연히 영문이고 나도 안읽었다. ㅎ)


이제 필요한 처리는 다 했다. 로그인처리도 했고 정보도 받아왔으니 이제 자신의 사이트에서 필요한 처리를 하면 된다. 로그인처리를 하려면 세션에 로그인정보를 심는다든가 회원가입을 받으려면 약관동의를 하고 디비에 넣는다든가 하는 각자 원하는 처리를 해주면 된다.

이제 정책적인 문제가 남는데 인증 확인후 회원가입등의 절차나 추가정보를 요청할 수 있다. 하지만 OpenID의 취지는 자신을 증명하는 것이기 때문에 사이트가 필요해서 요청하는 절차에 대해서 강제사항이 되지 않아야 한다. 즉 인증을 받은 뒤에 회원가입 요청을 한다고 하였을 때 회원가입을 하지 않는다 하더라고 로그인처리를 해주어 OpenID사용자가 사이트 사용에 무리가 없도록 해야한다. 다 구현하고 나서도 이때문에 고민을 많이 했는데 로그인과 회원가입을 같은 개념으로 두지 않아야 한다. OpenID는 회원가입을 하지 않아도 자신이 누군지를 증명해서 사이트를 이용할 수 있게 되는 것이다.(이부분은 비디오가게를 비회원으로 이용할 수도 있는 것과 같다.)

다음 문제는 로그아웃의 문제이다. 로그아웃은 어떻게 해야되는가... 여기서의 고민은 로그인이 RP와 OP에 둘다 된다는 것에 문제가 있다. RP측은 정보를 받아왔으니 RP에서 일반 회원이 로그인처리를 하는 것과 동일하게 처리하면 된다. 보통이면 세션에 정보를 심어서 처리할텐데 로그아웃할때는 세션을 날려버리면서 로그아웃을 처리한다. 하지만 테스트해보면 RP에서 로그아웃을 해도 OP쪽에는 로그인상태로 남아있는데 그런 RP가 로그아웃정보를 OP로 날려야 하는가 그럼 어떻게 날려야 하는가의 고민이 남았는데 다음 글을 참고하면 답을 얻을 수 있다.

http://cs.myid.net/issues/8737
http://cs.myid.net/issues/8747
http://cs.myid.net/issues/8748

결론부터 얘기하자면 RP측에서만 로그아웃을 처리해주면 되고 이에 큰 문제는 없어보인다. 위의 정책적인 부분들은(사실은 구현하면서 어렵던 부분들도 ㅎㅎ) myid측에서 많은 도움을 받았다. 달리 OpenID에 대해서 도움을 얻을 곳이 없고 그래도 myid에 계신분이 이해도가 제일 높다고 생각했기 때문에 여러차례 문의를 했는데 항상 빠르고 친절하게 답변을 주신데에 이자리를 빌어 감사드립니다. ^^


다음에 다시 OpenID를 구현할 때는 좀더 수준 높게 해볼 수 있게 되기를 바라면서.. ^^
Posted by 1010
01.JAVA/Java2009. 1. 28. 16:21
반응형
파일업로드를 하려면 기본적인 POST방식으로는 안되고 파일업로드를 처리할 수 있는 무언가(?) 있어야 한다.

일단 jsp에서 파일 업로드를 선택하는 form에서 entype이 multipart/form-data로 보내야 한다. 그렇지 않으면  받는쪽에서 파일을 받을 수가 없다. 파일이 없으면 보통의 form은 entype을 바꾸어 주지 않아도 된다.

  1. <form name="writeForm" method="post" action="writeProc.jsp" enctype="multipart/form-data" > 
  2.      <input type="file" name="attachFile" size="40" /> 
  3. </form> 

이제 받아야 하는데 이걸 받는 역할을 cos.jar 가 한다. 폼전송을 multipart/form-data로 보냈기 때문에 기존에 폼을 받던 request.getParameter()로는 받을 수가 없다. 그래서 cos.jar가 파일도 받고 폼의 다른 값들도 다 받아주는 역할을 한다.

cos는 com.oreilly.servlet의 약자이다. 보면 알겠지만 보통 java에서 package를 정의할 때 쓰는 방식이고 이 팩키지를 jar로 묶어서 cos.jar라고 배포를 하는 것이다. cos.jar의 페이지에서 cos-05Nov2002.zip 를 다운로드 가능하다.(파일명에서 보아 알겠지만 2002년 11월이 가장 최신판이다  ㅡ..ㅡ) 다운받은 파일안에 lib에 있는 cos.jar를 WAS쪽에 넣어도 되고 해당 프로젝트의 WEB-INF안에 lib안에 넣어도 된다. cos.jar를 사용한다고 했지만 정확히는 cos.jar의 MultipartRequest를 이용해서 파일을 받는다.

  1. <%@ page import="com.oreilly.servlet.MultipartRequest" %>   
  2. <%  
  3.      int maxPostSize = 10 * 1024 * 1024; // 10MB  
  4.      saveDirectory = config.getServletContext().getRealPath("/upload");  
  5.      MultipartRequest multi = new MultipartRequest(request, saveDirectory, maxPostSize, "utf-8");  
  6.  
  7.      Enumeration formNames=multi.getFileNames();  // 폼의 이름 반환  
  8.  
  9.      String fileInput = "";  
  10.      String fileName = "";  
  11.      String type = "";  
  12.      File fileObj = null;  
  13.      String originFileName = "";      
  14.      String fileExtend = "";  
  15.      String fileSize = "";  
  16.  
  17.      while(formNames.hasMoreElements()) {  
  18.           fileInput = (String)formNames.nextElement();                // 파일인풋 이름  
  19.           fileName = multi.getFilesystemName(fileInput);            // 파일명  
  20.           if (fileName != null) {  
  21.                type = multi.getContentType(fileInput);                   //콘텐트타입      
  22.                fileObj = multi.getFile(fileInput);                             //파일객체  
  23.                originFileName = multi.getOriginalFileName(fileInput);           //초기 파일명  
  24.                fileExtend = fileName.substring(fileName.lastIndexOf(".")+1); //파일 확장자  
  25.                fileSize = String.valueOf(fileObj.length());                    // 파일크기  
  26.           }  
  27.      }  
  28. %>  

위의 소스가 MultipartRequest를 이용한 파일 받기 예제이다. 소스가 그렇게 어렵지 않기 때문에 크게 어려운 부분은 없다고 생각한다. MultipartRequest에 파라미터를 넘기기 위해서 최대용량과 저장폴더의 실제경로를 미리 만들어 주고 MultipartRequest의 객체 생성을 할 때 request와 함께 넘겨준다. MultipartRequest는 아주 다양하게 오버라이딩되어 있기 때문에 전달해야하는 파라미터에 대해서는 원하는 대로 사용할 수 있다. MultipartRequest의 정의는 cos.jar쪽 페이지 에 자세하기 나와 있다.

파일이 몇개가 넘어오든 간에 MultipartRequest에서는5번라인의 객체생성 부분에서 모두 파일이 업로드 되어 저장되고 그 뒤에 저장한 파일들의 정보를 가져오는 형태로 되어 있다. 이 말은 정보를 얻기 전에 파일 저장이 먼저 되기 때문에 파일의 어떤 정보를 검사해서 저장할지 말지를 결정하는 것이 안된다는 얘기고 저장한 다음에 검사를 해서 삭제해 주는 형태가 되어야 할 것이다.

7번 라인에서는 Enumeration으로 multi객체로 부터 전달받은 폼의 이름을 구해온다. 9~14번에서 while루프 안에서 사용한 변수들을 초기화 하고 16번라인부터 7번에서 구해온 폼이름을 통해서 파일객체를 가져오면서 다 가져올때까지 루프를 돈다. while형태로 되어 있기 때문에 단일 파일이든 여러개의 파일이 올라오든 모두 처리가 가능하다. while문 안에서는 각 파일의 정보를 구해온다. 이렇게 구해온 정보는 보통은 Database에 넣을 목적으로 구해 올 것이며 필요한 것만 가져와서 사용하면 되겠다.

여기서 input=file외에 다른 input에 대한 값들을 가져오려면 request.getParameter()대신에 multi.getParameter()를 사용해주면 된다. (여기서 multi는 위에 예제소스에서 만든 MultipartRequest의 객체이다.) 사용법은 동일하다.


각자 다르겠지만 일반적으로 서버에 파일을 저장할 때는 사용자가 올린 파일명을 그대로 올리지 않는다. 이는 여러가지 이유가 있는데 jsp같은 경우는 올리지 못하게 하는게 일반적이고 올리더라도 실행되지 않도록 확장자를 날리는 등의 조치를 취함으로써 보안처리를 해준다. 또한 같은 파일명이 있을 경우에 이전파일을 덮어쓰면 안되기 때문에 같은 파일명이 있을 경우에 대한 처리를 해야하고 우리같은 경우는 한글로 된 파일명은 서버에 따라서 문제가 생길수도 읽고 띄어쓰기나 특수기호등 파일명에 대한 안정성을 보장할 수 없기 때문에 나같은 경우는 대게 영문이나 숫자의 조합으로 특정파일명을 만들어서 저장한 뒤에 디비에는 서버쪽 파일명과 초기파일명을 둘다 넣어좋고 서버쪽 파일명을 이용해서 찾고 다운할때나 보여줄때는 초기파일명을 가지고 처리한다.


이렇게하려면 업로드할때 파일명을 바꾸어 주어야 한다. MultipartRequest객체를 생성할 때 파일명을 수정하도록 파라미터를 하나 더 주면 된다.

MultipartRequest multi = new MultipartRequest(request, saveDirectory, maxPostSize, "utf-8", new DefaultFileRenamePolicy());

4번째 파라미터로 DefaultFileRenamePolicy를 넘겨준다. DefaultFileRenamePolicy는 cos.jar는 안에 존재하는 클래스이다. 파일명을 어떻게 바꾼다라는 규칙이 정해져 있는 클래스를 파라미터로 넘겨주고 파일을 업로드 할때 그 규칙에 따라 파일명이 바뀌어서 올라간다. 여기서 DefaultFileRenamePolicy는 같은 파일명이 있는지를 검사하고 있을 경우에는 파일명뒤에 숫자를 붙혀준다. ex: aaa.zip, aaa1.zip, aaa2.zip 이런 식으로...

이 규칙에 따르면 중복에 대한처리는 할 수 있지만 그 외의 경우에는 대응할 수가 없다. 그래서 DefaultFileRenamePolicy의 규칙을 필요하다면 수정해 주어야 한다. cos.jar안에 src파일도 있으니 직접 수정하고 다시 jar로 만들어도 되고 cos.jar는 그대로 두고 따로 클래스를 만들어서 MultipartRequest객체를 생성할 때 내가 만든 클랙스를 넘겨주어도 된다.

MultipartRequest multi = new MultipartRequest(request, saveDirectory, maxPostSize, "utf-8", new MyFileRenamePolicy());

MyFileRenamePolicy 클래스는 FileRenamePolicy로 부터 상속도 받아야 하고 혹시모를 다른 충돌도 막기 위해서 DefaultFileRenamePolicy와 동일하게 com.oreilly.servlet.multipart라는 팩키지를 만들어서 넣는다.

DefaultFileRenamePolicy.java
  1. package com.oreilly.servlet.multipart;  
  2. import java.io.*;  
  3.  
  4. public class DefaultFileRenamePolicy implements FileRenamePolicy {  
  5.      public File rename(File f) {  
  6.           if (createNewFile(f)) {  
  7.                return f;  
  8.           }  
  9.           String name = f.getName();  
  10.           String body = null;  
  11.           String ext = null;  
  12.  
  13.           int dot = name.lastIndexOf(".");  
  14.           if (dot != -1) {  
  15.                body = name.substring(0, dot);  
  16.                ext = name.substring(dot);  // includes "."  
  17.           }  
  18.           else {  
  19.                body = name;  
  20.                ext = "";  
  21.           }  
  22.  
  23.           int count = 0;  
  24.           while (!createNewFile(f) && count < 9999) {  
  25.                count++;  
  26.                String newName = body + count + ext;  
  27.                f = new File(f.getParent(), newName);  
  28.           }  
  29.           return f;  
  30.      }  
  31.  
  32.      private boolean createNewFile(File f) {  
  33.           try {  
  34.                 return f.createNewFile();  
  35.           }  
  36.           catch (IOException ignored) {  
  37.                return false;  
  38.           }  
  39.      }  
  40. }  

이게 기존에 있는 DefaultFileRenamePolicy.java의 소스이다. 소스는 처음에는 좀 어색하지만 그리 어렵지 않다. rename()이 처음 호출되는데 createNewFile()를 실행해서(5라인) 파일생성이 가능하면 그대로 끝을 내고 생성을 못했으면 파일명의 점(.)을 기준으로 파일명과 확장자를 나누어서 저장한다.(13라인) 그리고 파일생성이 가능할 때까지(중복파일이 없을때까지) 루프를 돌아서 파일명+숫자+확장자형태로 다시 만들어서 리턴한다.(23라인)


MyFileRenamePolicy.java
  1. package com.oreilly.servlet.multipart;  
  2. import java.io.*;  
  3. import java.util.Date;  
  4. import java.text.SimpleDateFormat;  
  5.  
  6. public class AlmapFileRenamePolicy  implements FileRenamePolicy {  
  7.      public File rename(File f) {  
  8.           long currentTime = System.currentTimeMillis();  
  9.           SimpleDateFormat simDf = new SimpleDateFormat("yyyyMMddHHmmss");  
  10.           int randomNumber = (int)(Math.random()*100000);  
  11.       
  12.           String uniqueFileName = "" + randomNumber + simDf.format(new Date(currentTime));  
  13.  
  14.           String name = f.getName();  
  15.           String body = null;  
  16.           String ext = null;  
  17.  
  18.           int dot = name.lastIndexOf(".");  
  19.           if (dot != -1) {  
  20.                body = name.substring(0, dot);  
  21.                ext = name.substring(dot);  // includes "."  
  22.           }  
  23.           else {  
  24.                body = name;  
  25.                ext = "";  
  26.           }  
  27.       
  28.           String tempName = uniqueFileName + ext;  
  29.           f = new File(f.getParent(), tempName);  
  30.           if (createNewFile(f)) {  
  31.                return f;  
  32.           }  
  33.  
  34.           int count = 0;  
  35.           while (!createNewFile(f) && count < 9999) {  
  36.                count++;  
  37.                String newName = uniqueFileName + "_" + count + ext;  
  38.                f = new File(f.getParent(), newName);  
  39.           }  
  40.  
  41.           return f;  
  42.      }  
  43.  
  44.      private boolean createNewFile(File f) {  
  45.           try {  
  46.                return f.createNewFile();  
  47.           }  
  48.           catch (IOException ignored) {  
  49.                return false;  
  50.           }  
  51.      }  
  52. }  

새로 만든 파일 명명규칙인 MyFileRenamePolicy이다. 기존에 있던 것에서 파일명명하는 방식만 약간 바꾼 것이다. 앞에것보다는 약간 길어졌지만 간단하다. 파일중복을 줄이기 위해서 5자리짜리 랜덤수와 현재날짜시간의 조합으로 유니크한파일명을 만든다(12라인) 앞에것과 동일하게 점(.)을 기준으로 파일명과 확장자를 분리하고(18라인) 분리한파일명대신 유니크한 파일명과 확장자를 조합해서 임시로 파일명을 만든 다음에 파일생성을 시도한다.(28라인) 성공하면 그대로 끝내고 실패하면 루프를 돌면서 파일생성가능할때까지 카운트를 올려서 유니크한 파일명_카운트.확장자형태가 되도록 만든다.


이렇게 모든 파일은 랜덤수+현재시간.확장자의 형태로 만든다.여기서는 파일명으로 수자만 사용했지만 원하는 규칙대로 만들어서 클래스를 구성해 주면 그에 맞게 리네임을 할 수 있다.
Posted by 1010
98..Etc/Etc...2009. 1. 28. 16:20
반응형
리다이렉트는 현재페이지를 다른페이지로 보내는 것을 말한다. 포워드와는 다르게 리다이렉트는 클라이언트단에서(브라우저) 발생하게 되고 결과적으로 보면 새로운 URL로 요청이 다시 일어나도록 하는 것이다. 자바의 입장에서 보면 리다이렉트에는 3가지 방법이 있다.

  1. 메타태그 이용
    <meta http-equiv="refresh" content="0; url=http://www.google.co.kr">

  2. 자바스크립트 이용
    document.location.href= "http://www.google.co.kr";

  3. sendRedirect이용
    <%
        response.sendRedirect("http://www.google.co.kr");
    %>

1,2번의 방법은 브라우저가 소스를 보고 판별해서 재요청을 하는것이고 3번째 방법은 전에 포스팅에 올렸던대로 header정보를 이용해서 브라우저가 리다이렉트를 하도록 서버쪽에서 코드를 심는 방법이다.(자바에선 이렇게 쓰고 헤더를 이용하는 방법은 다른 언어에도 있다.)

나는 1번은 잘 사용안하고 보통 2번을 사용하거나 3번을 사용한다. 솔직히 그냥 그때 기분내키는대로?? ㅡ..ㅡ

여러가지 용도가 있겠지만 가장 노말하고 일반적으로 쓰이는 곳이 게시판등의 글등록이 아닐까 싶다.

등록폼 페이지 -> 등록 처리 페이지 -> 처리 후 이동할 페이지

보통 이런 단계를 밟아서 페이지를 만든다. 이제 가장 노말한 형태이다. 등록폼에서 내용을 입력하고 submit을 누르면 등 등록처리 페이지에서 등록처리를 해서 DB에 넣고 alert() 메시지로 등록 성공 혹은 실패 메시지를 뿌려준 뒤에 상황에 맞는 페이지로 이동을 시킨다. 여기서 이동을 시킬때 리다이렉트를 할 필요가 있다. 이동자체야 큰 차이점은 없지만 사용자 입장에서 2번과 3번 방법에 큰 차이점이 있다.

이 2가지 방법 사이에 가장 큰 차이점은 "뒤로가기"의 활성화 여부이다. 이건 UX적인 면에서 큰 차이점이라고 생각한다. 흔히들 많이 보았을 것이다. 처리후 이동한 페이지에서 뒤로가기 버튼을 누르면 등록처리페이지로 뒤로가기가 되서 다시 alert이 뜨고 처리후 이동페이지로 다시 오게되는 현상(또는 에러가 나거나...) 의도대로 하면 되겠지만 처리페이지는 DB저장등을 위해서 존재하는 페이지이기 때문에 뒤로가기과정에서는 나타나지 않는게 정상이 아닌가 싶다. 그래서 좀 정리를 해 봤다.

자바스크립트 document.location.href= "http://www.google.co.kr";로 리다이렉트 했을 경우

IE6 : 등록처리 페이지로 뒤로가기 된뒤 다시 alert뜨고 원래페이지로 다시 돌아옴
IE7 : 등록처리 페이지로 뒤로가기 된뒤 다시 alert뜨고 원래페이지로 다시 돌아옴
Firefox2 : 등록폼 페이지로 뒤로가기 됨
Firefox3 : 등록폼 페이지로 뒤로가기 됨
Opera 9 : 등록처리 페이지로 뒤로가기 되지만 스크립트는 실행되지 않음.
Safari 3 : 등록처리 페이지로 뒤로가기 되지만 스크립트는 실행되지 않음.
Chrome : 등록처리 페이지로 뒤로가기 되지만 Confirm Form Resubmission라는 에러나옴


Http Header를 이용한 response.sendRedirect("http://www.google.co.kr");를 했을 경우

IE6 : 등록폼 페이지로 뒤로가기 됨
IE7 : 등록폼 페이지로 뒤로가기 됨
Firefox2 : 등록폼 페이지로 뒤로가기 됨
Firefox3 : 등록폼 페이지로 뒤로가기 됨
Opera 9 : 등록폼 페이지로 뒤로가기 됨
Safari 3 : 등록폼 페이지로 뒤로가기 됨
Chrome : 등록폼 페이지로 뒤로가기 됨

파이어폭스를 제외하고는 location.href를 사용하면 등록처리 페이지가 뒤로가기로 활성화가 된다. 사용자 편의성과 보안(?)면에서도 Http Header를 이용한 방식이 더 좋아보인다.

참고삼아 메타태그를 이용해서도 테스트를 해보았다.  메타태그를 이용했을때도 등록처리 페이지는 뒤로가기에 해당되지 않는다...
IE6 : 등록폼 페이지로 뒤로가기 됨
IE7 : 등록폼 페이지로 뒤로가기 됨
Firefox2 : 등록폼 페이지로 뒤로가기 됨
Firefox3 : 등록폼 페이지로 뒤로가기 됨
Opera 9 : 등록폼 페이지로 뒤로가기 됨
Safari 3 : 등록폼 페이지로 뒤로가기 됨
Chrome : 등록폼 페이지로 뒤로가기 됨


덧) 테스트한 웹브라우저 버전
IE6, IE 7.0, Firefox 2.0.0.14, Firefox 3.0.3, Opera 9.60 beta, Safari 3.1.2, Google Chrome 0.2.149.30
Posted by 1010
51.Struts22009. 1. 28. 16:17
반응형
Struts 2 는 MVC Model 2에 기반한 Web Application Framework(WAF)이다. 국내 SI업계에서는 거의 장악한 Struts 의 후속 프레임워크이다. 머 스트럿츠2에 대해서 소개하는 건 아니라서(사실 잘 모르기 때문에 은근슬쩍...) 생략하기로 하고 자세한 내용은 다른 루트를 통해서 검색해 보시길....

사용자 삽입 이미지

Struts2를 사용하려면 기본적인 셋팅을 약간 해야되기 때문에 Eclipse 에서 셋팅하는 법을 보자. 일단 프로젝트를 만들자 프로젝트를 만드는 것은 기본적인 자바프로젝트랑 동일하다.

사용자 삽입 이미지

웹어플리케이션이므로 Dynamic Web Project으로 만든다.

사용자 삽입 이미지

여기서는 Server를 Tomcat 5.5를 사용한다. 이클립스의 톰캣설정에 대한 부분은 여기서는 생략하고 넘어간다. (서버설정이 되어 있다는 전제하에서.....) 프로젝트를 만들었으면 이제 Struts2를 올려야 한다.Struts2는 다운로드 페이지 에서 받을 수 있다. 다운로드 받은 파일의 압축을 풀고 안에 lib안에 보면 스트럿츠2에서 필요한 jar들이 들어 있다.

사용자 삽입 이미지

많은 jar파일들이 있는데 스트럿츠2를 구동하는데 이 모든 jar가 다 필요한 것은 아니다. 기본적으로 필요한 파일들은 다음과 같고 나머지는 다른 플러인등을 위한 파일들이다.

  • antlr-2.7.2.jar
  • commons-beanutils-1.6.jar
  • commons-chain-1.1.jar
  • commons-logging-1.0.4.jar
  • commons-logging-api-1.1.jar
  • commons-validator-1.3.0.jar
  • freemarker-2.3.8.jar
  • ognl-2.6.11.jar
  • oro-2.0.8.jar
  • struts2-core-2.0.11.2.jar
  • struts-core-1.3.5.jar
  • xwork-2.0.5.jar
위의 파일들을 WebContent/WEB-INF/lib 에 복사를 한다.

WebContent/WEB-INF/에 있는 web.xml 을 다음과 같이 수정한다.
  1. <?xml version="1.0" encoding="UTF-8"?> 
  2. <web-app id="WebApp_ID" version="2.4" xmlns="http://java.sun.com/xml/ns/j2ee" xmlns:xsi="http://www.w3.org/2001/XMLSchema-instance" xsi:schemaLocation="http://java.sun.com/xml/ns/j2ee http://java.sun.com/xml/ns/j2ee/web-app_2_4.xsd"> 
  3.     <display-name> 
  4.     Struts2Setting</display-name> 
  5.     <welcome-file-list> 
  6.         <welcome-file>index.html</welcome-file> 
  7.         <welcome-file>index.htm</welcome-file> 
  8.         <welcome-file>index.jsp</welcome-file> 
  9.         <welcome-file>default.html</welcome-file> 
  10.         <welcome-file>default.htm</welcome-file> 
  11.         <welcome-file>default.jsp</welcome-file> 
  12.     </welcome-file-list> 
  13.       
  14.     <filter> 
  15.         <filter-name>struts</filter-name> 
  16.         <filter-class>org.apache.struts2.dispatcher.FilterDispatcher</filter-class> 
  17.     </filter> 
  18.       
  19.     <filter-mapping> 
  20.         <filter-name>struts</filter-name> 
  21.         <url-pattern>/*</url-pattern> 
  22.     </filter-mapping> 
  23. </web-app> 

이제 struts.xmlstruts.properties 2개의 파일이 필요하다. 만들어진 웹어플리케이션이 배포될 때의 이 2개의 파일의 위치는 WebContent/WEB-INF/classes/ 이다. 이클립스에 src폴더 아래 있는 것은 자동으로 classes로 배포하기 때문에 src폴더 안에 넣으면 된다. 이클립스의 Project뷰에서는 java파일 말고는 생성되지 않기 때문에 Navigator뷰에서 만들어 넣으면 된다.(이걸 어디다 넣어야 되는지 몰라서 어찌나 고생했는지....)

사용자 삽입 이미지

struts.xml
  1. <?xml version="1.0" encoding="UTF-8"?> 
  2.  
  3. <!DOCTYPE struts PUBLIC "-//Apache Software Foundation//DTD Struts Configuration 2.0//EN" "http://struts.apache.org/dtds/struts-2.0.dtd"> 
  4.  
  5. <struts> 
  6.     <package name="default" extends="struts-default" namespace=""> 
  7.     </package> 
  8. </struts>   


struts.properties
  1. struts.i18n.reload=true 
  2. struts.devMode = false 
  3. struts.configuration.xml.reload=true 
  4. struts.continuations.package = org.apache.struts2.showcase  
  5. struts.custom.i18n.resources=globalMessages 
  6. #struts.action.extension=jspa 
  7. struts.url.http.port = 8080 
  8. #struts.freemarker.manager.classname=customFreemarkerManager 
  9. struts.serve.static=true 
  10. struts.serve.static.browserCache=false 
  11. struts.multipart.maxSize=2097252 

이렇게 하면 스트럿츠2를 구동하기 위한 셋팅은 완료되었다. (아~ 글 길다... ㅡ..ㅡ) 그럼 이제 돌려보자... 셋팅이 잘 되었는지 봐야되니까...

다음과 같은 PrintStringAction.java 파일을 만든다.(팩키지생성같은 설명을 생략한다.) 이 파일이 비즈니스로직을 담당한다.
  1. package ex.struts;  
  2.  
  3. public class PrintStringAction {  
  4.     private String greetings;  
  5.       
  6.     public String execute() throws Exception {  
  7.         greetings = "Hello World!";  
  8.         return "success";  
  9.     }  
  10.       
  11.     public String getGreetings() { return greetings; }  
  12.     public void setGreetings(String greetings) {  
  13.         this.greetings = greetings;  
  14.     }  
  15. }  

그리고 WebContent/ 아래에 printString.jsp를 만들어 준다. 이 jsp파일이 뷰단을 담당한다.
  1. <!DOCTYPE html PUBLIC "-//W3C//DTD XHTML 1.0 Transitional//EN" "http://www.w3.org/TR/xhtml1/DTD/xhtml1-transitional.dtd"> 
  2. <%@ page contentType="text/html; charset=utf-8" %> 
  3. <% request.setCharacterEncoding("utf-8"); %> 
  4. <% response.setContentType("text/html; charset=utf-8"); %> 
  5. <%@ taglib prefix="s" uri="/struts-tags" %> 
  6. <html xmlns="http://www.w3.org/1999/xhtml" xml:lang="ko" lang="ko"> 
  7.   <head> 
  8.     <meta http-equiv="Content-Type" content="text/html; charset=utf-8" /> 
  9.     <title>pringtString</title> 
  10.   </head> 
  11.       
  12.   <body>      
  13.     <s:property value="greetings" /> 
  14.   </body> 
  15. </html> 

이제 struts.xml파일에 위 2파일에 대한 맵핑을 추가한다.
  1. <?xml version="1.0" encoding="UTF-8"?> 
  2.  
  3. <!DOCTYPE struts PUBLIC "-//Apache Software Foundation//DTD Struts Configuration 2.0//EN" "http://struts.apache.org/dtds/struts-2.0.dtd"> 
  4.  
  5. <struts> 
  6.   <package name="default" extends="struts-default" namespace=""> 
  7.         <action name="printString" class="ex.struts.PrintStringAction"> 
  8.             <result>/printString.jsp</result> 
  9.         </action> 
  10.   </package> 
  11. </struts>   

이제 프로젝트를 실행하면 된다. Run As. > Run on Server를 실행하고 주소에 printString.action을 실행한다.

사용자 삽입 이미지

위처럼 Hello World! 가 찍히면 struts 셋팅이 완료된거다.

셋팅에만 집중했기 때문에 다른 부분에 대한 설명은 거의 하지 않았다. 다른것들은 나중에...
Posted by 1010
01.JAVA/Java2009. 1. 28. 16:15
반응형
MDB를 별로 좋아하지는 않지만 상황에 따라서 솔직히 편할때가 있는 것도 사실이고 뭐 MDB로 해야된다는데 어쩌랴... Java에서 MDB를 연결해야 하는데 알아보니 여러가지가 방법이 있었는데 여기서는 윈도우즈에서 제공하는 ODBC를 이용해서 연결하는 방법을 사용한다.(윈도우즈서버에서만 가능하다는 얘기다.)

[제어판] - [관리도구] - [데이터 원본 (ODBC)]에 들어간다.

사용자 삽입 이미지

"시스템 DSN"탬에서 새로운 ODBC를 연결하기 위해서 추가버튼을 누른다.

사용자 삽입 이미지

여기서는 MDB를 사용할 것이므로 mdb용 드라이벌를 선택한다.

사용자 삽입 이미지

데이터 원본 이름에 원하는 디비의 이름을 넣고 이제 MDB를 연결하기 위해서 데이터베이스의 "선택"을 눌러서 들어간다.

사용자 삽입 이미지

사용할 MDB를 찾아서 지정하고 이제 다시 ODBC Microsoft Access 설정화면에서 "고급"을 눌러서 들어간다.

사용자 삽입 이미지

사용할 로그인 아이디와 비밀번호를 지정한다. 이렇게 하면 ODBC의 등록과정이 완료된다.


이제 자바쪽에서 JDBC를 이용해서 연결할 차례다.
  1. import java.sql.Connection;  
  2. import java.sql.DriverManager;  
  3. import java.sql.PreparedStatement;  
  4. import java.sql.ResultSet;  
  5. import java.sql.SQLException;  
  6. import java.sql.Statement;  
  7. import java.util.Properties;  
  8.  
  9. public class DBConnection {      
  10.     private String DB_URL = "Jdbc:Odbc:Testdata";  
  11.     private String DB_USER = "test";  
  12.     private String DB_PASSWORD= "test";  
  13.       
  14.     Connection conn = null;  
  15.       
  16.     public Connection getConnection() {  
  17.         try {  
  18.             Class.forName("sun.jdbc.odbc.JdbcOdbcDriver");  
  19.         } catch (ClassNotFoundException e1) {  
  20.             e1.printStackTrace();  
  21.         }  
  22.           
  23.         try {  
  24.             Properties props = new Properties();  
  25.             props.put("charSet", "8859_1" );   
  26.             props.put("user", DB_USER);  
  27.             props.put("password", DB_PASSWORD);  
  28.  
  29.             conn = DriverManager.getConnection(DB_URL, props);  
  30.         } catch (SQLException e) {  
  31.             e.printStackTrace();  
  32.         }  
  33.         return conn;  
  34.     }  
  35. }  

여기서는 연결을 위한 설명이라서 연결부분의 코드만 가져왔다. disconnect를 예제소스에서 뺐다는 말이다.

jdbc 연결 URL로는 "Jdbc:Odbc:데이터원본이름"을 사용하고 username과 password는 ODBC등록할 때 사용한 것을 적는다.(근데 없어도 잘 돌아가는것 같다.. ㅡ..ㅡ) 드라이버 클래스는 "sun.jdbc.odbc.JdbcOdbcDriver"를 사용한다.

그리고 여기서는 Properties를 사용하였는데 이건 mdb의 한글문제때문이다. mdb는 한글을 8859_1로 사용하기 때문에 한글을 안깨지고 받아오기 위해서는 Connection을 연결할 때 charSet을 8859_1로 설정해 주어야 한다.
  1. DBConnection dbConn = new DBConnection();  
  2. Connection conn = null;   
  3. PreparedStatement psmt = null;  
  4. ResultSet rs = null;  
  5.       
  6. try{          
  7.     String sql = " SELECT username FROM member ";  
  8.     conn = dbConn.getConnection();    
  9.     psmt = conn.prepareStatement(sql);          
  10.       
  11.     rs = psmt.executeQuery();  
  12.               
  13.     while (rs.next()) {  
  14.         String username = new String(rs.getString("username").getBytes("8859_1"), "euc-kr");  
  15.     }    
  16. }catch(Exception e){  
  17.     e.printStackTrace();  
  18. }finally{  
  19.     dbConn.disConnection(rs,psmt, conn);  
  20. }  

이제 Connection을 사용해서 Select 쿼리를 날리는 부분이다. import등의 필요없는 부분은 빼버렸다. 결과적으로는 14번째 라인만 보면 된다. 영문이나 숫자는 괜찮지만 한글의 경우 디비커넥션에서 사용할 때 Access에서 한글을 8859_1(ISO-8859-1)을 사용했기 때문에 여기서도 받아온 스트링을 14번 라인처럼 엔코딩을 변경해 주어야 받아온 한글이 깨지지 않고 표시된다. (특이하게도 문서의 encoding이 euc-kr이든 utf-8이든 동일하게 위처럼 euc-kr로 인코딩을 해주어야 한글이 깨지지 않는다.)

INSERT나 UPDATE등 자바쪽에서 mdb로 한글을 넣을때도 동일하게 인코딩 타입을 변경해서 넣어주어야 한다. 당연히 인코딩은 반대로 해서...

String str = new String("한글".getBytes("euc-kr"), "ISO-8859-1");

위처럼 하면 된다. ( ISO-8859-1와 8859_1는 동인한 인코딩이다.)

디비를 mdb를 쓰면 한글을 넣고 빼는 일은 빈번할테니까 위 2가지를 메서드로 따로 만들어두면 편할것이다. (뭐 일일이 인코딩을 바꿔주면서 넣는걸 편하다고 할 수는 없지만... ㅡ..ㅡ)
Posted by 1010
01.JAVA/Java2009. 1. 28. 16:13
반응형
문자열을 만들때는 보통 StringBuffer를 사용한다. StringBuilder인가도 있지만 사용해 본적도 없고 StringBuffer대신 쓸 이유는 아직 잘 모르겠다. 하지만 문자열을 만드는데는 단연코 String으로 +로 이어붙히는것보다는 훨씬 빠르다.

  1. StringBuffer sql = new StringBuffer(" SELECT col1, col2, col3, col4 ");  
  2. sql.append(" FROM table1  ");  
  3. sql.append(" WHERE col1 = 1  ");  


머 위의같은 코드들... append()를 이용해서 계속 이어붙힐 수 있고 속도도 빠르지만 이 StringBuffer객체를 재사용해야할 때가 있다. sql2를 만들기는 좀 그러니까...

가장 쉽게 생각할 수 있는 건 null이다.

  1. sql = null;  
  2. sql = new StringBuffer(" SELECT col1, col2, col3, col4 ");  

null로 객체 없애버리고 다시 새로 생성하는 것이다.  일반적으로 초기에 가장 많이 쓰는 방식이지 싶다.

또 하나는 setLength(0)이다.

  1. sql.setLength(0);  
  2. sql.append(" SELECT col1, col2, col3, col4  ");  

StringBuffer객체는 그대로 놔두고 setLength함수를 이용해서 길이를 0으로 설정해서 기존에 가지고 있던 문자열을 날려보리고 append로 새로 이어붙히는 것이다.


성능테스트는 안해봤지만 크게 차이는 나지 않을것 같기는 하지만 그래도 객체를 새로 생성하는 것보다는 길이를 0으로 만드는 것이 좀더 빠르지 않을까 생각한다.

간단한 것들은 잘 안적었더니 이런게 더 잘 찾기 힘들단 말야 ㅎ
Posted by 1010
01.JAVA/Java2009. 1. 28. 16:12
반응형
웹개발하면서 DB의 사용은 필연적이기 때문에 java.sql.PreparedStatement의 사용은 필연적이다. Statement도 있기는 하지만 PreparedStatement는 한번 사용한 SQL문이저장되기 때문에 반복해서 사용할 경우 성능이 좋기 때문에 일반적으로는 PreparedStatement를 사용한다.

  1. StringBuffer sql = new StringBuffer(" INSERT INTO poll (col1, col2 ) VALUES (?, ?) ");  
  2.  
  3. psmt = conn.prepareStatement(sql.toString());  
  4. psmt.setString(1, "test");  
  5. psmt.setString(2, "test");  
  6. psmt.executeUpdate();  

일반적으로 위와 같이 사용하는데 저렇게 사용해서 결과값 받아서 결과값 리턴해주고 끝인데 상황에 따라서는 쿼리를 반복적으로 사용해야할 때가 있다. 보통은 저게 DAO에 들어있기 때문에 메서드를 여러번 실행해도 되겠지만 그렇게 하면 Connection도 끝었다 다시하기 때문에 별로 효율적이지 못하다.

  1.  
  2. StringBuffer sql = new StringBuffer(" INSERT INTO poll (col1, col2 ) VALUES (?, ?) ");  
  3.  
  4. for(int i = 0; i<5; i++) {  
  5.     psmt = conn.prepareStatement(sql.toString());  
  6.     psmt.setString(1, "test");  
  7.     psmt.setString(2, "test");  
  8.     psmt.executeUpdate();  
  9. }  
  10.  

하지만 여러번 반복해서 쿼리를 실행하기 위해서 위처럼 사용하면 안된다. 보기에는 크게 문제가 없고 일반적인 객체의 경우는 저렇게 재할당해서 사용해도 되기는 하지만 PreparedStatement는 다르다. 저렇게한 다음에 psmt.close();를 실행하면 아래쪽 맨 마지막psmt만 닫히고 앞의 psmt들은 닫히지 않는다. 정확히 말하면  앞에서 할당한 psmt는 결코 닫을수 없는 형태가 되어버린다.

  1.  
  2. StringBuffer sql = new StringBuffer(" INSERT INTO poll (col1, col2 ) VALUES (?, ?) ");  
  3.  
  4. for(int i = 0; i<5; i++) {  
  5.     psmt.setString(1, "test");  
  6.     psmt.setString(2, "test");  
  7.     psmt.executeUpdate();  
  8.     psmt.clearParameters();  
  9. }  
  10.  
  11.  

이걸 위처럼 사용하고 있다. PreparedStatement의 객체를 새로할당하는게 아니라 파라미터를 할당하고 실행한 다음에 psmt.clearParameters();로 파라미터를 클리어해버린다. 루프돌면서 다시 할당하고 이렇게 돌리면 PreparedStatement객체를 여러번 사용할 수 있다.

  1.  
  2.  
  3. StringBuffer sql = new StringBuffer(" INSERT INTO poll (col1, col2 ) VALUES (?, ?) ");  
  4.  
  5. for(int i = 0; i<5; i++) {  
  6.     psmt.setString(1, "test");  
  7.     psmt.setString(2, "test");  
  8.     psmt.addBatch();  
  9. }  
  10. psmt.executeBatch();  
  11.  
  12.  
  13.  

이걸 좀 더 세련(?)되게 하면 위와같이 사용할 수 있다. JDBC의 배치기능을 사용한 것이다. PreparedStatement의 배치기능은 다수의 쿼리를 한꺼번에 실행하기 위한 기능이다. 여러번에 나누어서 실행하지않고 배치기능을 이용해서 한번에 송신해서 실행함으로써 퍼포먼스를 높일 수 있다.

addBatch()는 쿼리와 파라미터 셋을 배치에 추가하고 이렇게 추가된 배치를 executeBatch()를 통해서 한꺼번에 실행한다. 정확한 테스트까지는 못해봤지만 이렇게 사용하는 배치 메모리의 크기 제한이 있기 때문에 너무 많은 배치를 추가할 경우에는 out of memory가 발생할 수 있기 때문에 많은 addBatch()를 실행해야 할 경우에는 중간중간 executeBatch()를 실행해 주어야 한다.
Posted by 1010
01.JAVA/Java2009. 1. 28. 16:11
반응형
새로운 디비 연결할때마다 혹은 사용하던것도 굳이 외우고 있지는 않아서 이전소스를 찾아봐야하는 JDBC Drivers. 날잡아서 정리... ㅎ 실제 적용할때 한번더 찾아봐야겠지만 그래도 일일이 찾아다니는거 힘들어서.. ㅎ


Informix
Driver Class : com.informix.jdbc.IfxDriver
JDBC URL : jdbc:informix-sqli://<host>:<port>/<database>:informixserver=<dbservername>
Required File : ifxjdbc.jar  Download


JavaDB/Derby
Driver Class : org.apache.derby.jdbc.ClientDriver
JDBC URL : jdbc:derby:net://<host>:<port1527>/<databaseName>
Required File : derbyclient.jar  Download


Microsoft SQL Server 2000
Driver Class : com.microsoft.jdbc.sqlserver.SQLServerDriver
JDBC URL : jdbc:microsoft:sqlserver://<host>:<port1433>;DatabaseName=<database>
Required File : msjdbc.jar  Download


Microsoft SQL Server 2005
Driver Class : com.microsoft.sqlserver.jdbc.SQLServerDriver
JDBC URL : jdbc:sqlserver://<host>[:<port1433>];databaseName=<database>
Required File : sqljdbc.jar  Download


MySQL (Connector/J)
Driver Class : com.mysql.jdbc.Driver
JDBC URL : jdbc:mysql://<host>:<port3306>/<database>
Required File : mysql-connector-java-nn-bin.jar  Download


Oracle (Thin JDBC Driver)
Driver Class : oracle.jdbc.driver.OracleDriver
JDBC URL : jdbc:oracle:thin:@<host>:<port>:<SID>
                       jdbc:oracle:thin:@<host>:<port>/<service>
                       jdbc:oracle:thin:@<TNSName>
Required File : ojdbcxx.jar  Download
Oracle JDBC FAQ


Oracle (OCI JDBC Driver)
Driver Class : oracle.jdbc.driver.OracleDriver
JDBC URL : jdbc:oracle:thin:@<host>:<port>:<SID>
                      jdbc:oracle:thin:@<host>:<port>/<service>
                      jdbc:oracle:thin:<TNSName>
Required File : ojdbcxx.jar  Download    Oracle Database Instant Client
Oracle JDBC FAQ


PostgreSQL
Driver Class : org.postgresql.Driver
JDBC URL : jdbc:postgresql://<host>:<port5432>/<database>
Required File : postgresql-nn.jdbc3.jar   Download


Sun에서 제공하는 JDBC Driver 리스트
Posted by 1010
반응형

jQuery로 작업하기, 3부: jQuery와 Ajax로 RIA 만들기: JQuery: 내일 나올 웹 응용을 오늘 구현해보자

Effects 모듈과 Ajax

developerWorks
문서 옵션
수평출력으로 설정

이 페이지 출력

이 페이지를 이메일로 보내기

이 페이지를 이메일로 보내기

샘플 코드

영어원문

영어원문


제안 및 의견
피드백

난이도 : 중급

Michael Abernethy, 제품 개발 관리자, Optimal Auctions

옮긴이 : 박재호 이해영 dwkorea@kr.ibm.com

원문 게재일 : 2008 년 10 월 28 일
번역 게재일 : 2009 년 1 월 13 일

JQuery는 동적 RIA를 쉽게 개발하는 방법에 목마른 개발자를 위한 자비스크립트 라이브러리로 각광을 받고 있습니다. 브라우저 기반 응용이 데스크톱 응용을 계속 대체하고 있기에, 이런 라이브러리 활용 역시 꾸준히 증가 추세에 있습니다. jQuery 연재물에서 jQuery로 웹 응용 프로젝트를 구현하는 방법을 살펴봅시다.

도입

jQuery는 지난 몇 개월 동안에 웹 개발자를 위한 유력한 자바스크립트 라이브러리로 급속도로 세를 넓혀가고 있다. 이런 현상은 브라우저 기반 응용으로 데스크톱 응용을 교체하기 위한 RIA(Rich Internet Application) 활용과 필요성이 급격하게 늘어나는 상황과 맞물려 돌아간다. 스프레드시트부터 급여 계산에서 전자편지 응용에 이르기까지 브라우저로 데스크톱 응용을 교체해 나가는 현실이다. 이런 응용 개수가 많아지고 복잡해지면서 자바스크립트 라이브러리는 응용을 만드는 튼튼한 기초로 더욱 더 중요성이 높아질 것이다. jQuery는 개발자를 위한 필수 라이브러리가 되었다. 이 연재물에서는 jQuery를 깊숙하게 탐험하며, 개발자가 RIA를 빠르고 쉽게 만들기 위한 튼튼한 토대를 제공한다.

직전 기사에서 RIA를 만드는 세 가지 기본 구성 요소와 페이지에 상호 작용을 추가하는 방법을 배웠다. 첫 번째로 살펴본 Event 모듈은 페이지에서 사용자가 일으킨 사건을 잡아서 프로그램 상에서 반응하도록 만들었다. 이런 기능을 사용해 버튼 누르기, 마우스 이동과 같은 사용자 행동 처리용 코드를 붙인다. 다음으로 살펴본 Attributes 모듈은 페이지 엘리먼트에서 값을 얻고 엘리먼트에 값을 설정하는 방법과 변수값을 포함한 자료 객체로 취급하는 방법을 설명했다. 이런 변수값은 사용자에게 어떤 반응을 보일지 결정하는 과정에 필요한 정보 대다수를 포함한다. 마지막으로 CSS 조작 방법을 살펴보고 페이지를 다시 읽어들이지 않고서도 배치, 색상, 글꼴 등을 변경하는 방법을 익혔다. 이런 세 가지 모듈에 익숙해지면, 상호대화식 웹 페이지를 구성하는 세 가지 기초 구성 요소를 익힌 셈이다. 사용자 반응을 잡아(Event), 정보를 획득하고(Attributes), 사건과 정보를 조합한 내용을 토대로 피드백을 제공한다(CSS).

이 기사에서 동적인 웹 페이지를 구성하는 세 가지 기본 요소를 사용한다. 이런 요소는 오늘날 볼 수 있는 좀 더 첨단 웹 응용의 일부로 자리잡은 "화끈한" 효과와 기능을 제공한다. 추가 모듈이 RIA에 핵심은 아니지만, 사용자가 기억할 만한 추가 기능을 제공하며 RIA에서 사용 가능한 범위와 기능을 엄청나게 넓혀준다. 살펴볼 첫 모듈은 Effects 모듈로 엘리먼트 감추기, 엘리먼트 이동, 페이드 인/아웃과 같은 기능을 포함한다. 다시 말해 웹 페이지를 화끈하게 만드는 기능이다. 이 기사에서 설명하는 마지막 모듈은 비동기식 자바스크립트 + XML(Ajax) 모듈이다. Ajax는 RIA 하면 가장 먼저 떠오르는 단어다. Ajax는 웹 응용에 서버와 통신하는 능력을 부여해 페이지를 다시 읽어들이지 않고서도 정보를 전달하고 인출하는 기능을 제공한다(웹에 떠도는 잘못된 의견과는 달리 AJax는 단순히 멋진 자바스크립트 애니메이션 기능은 아니다). jQuery가 믿기 어려울 정도로 손쉬운 AJax 도구를 제공하며, 실제로 Ajax 사용을 자바스크립트 메서드 호출 수준으로 단순하게 만들어준다.

이 기사에서 소개하는 예제 응용은 Effects와 Ajax 모듈을 데모 웹 응용인 웹 메일로 집어넣는 방법을 보여주면서 끝을 맺는다. 몇 가지 Effects를 데모에 추가해 활력을 불어넣고, 더욱 중요하게 몇 가지 Ajax 코드를 추가해 웹 메일이 페이지를 다시 읽지 않고서도 메시지를 출력하도록 만든다.

Effects

Effects 모듈은 이름처럼 "심각한" 웹 페이지가 회피해야 하는 애니메이션과 특수 효과만 포함한다고 지레짐작하기 쉽다. 하지만 이런 기능으로 끝나지 않는다. 거의 모든 응용에서 특정 페이지 엘리먼트를 가리거나 다른 페이지 엘리먼트 상태에 맞춰 끄고 켤 필요가 있다. 이런 변화 유형이 RIA에 중요한 이유는 페이지를 한 번만 읽으면서 모든 페이지 엘리먼트를 가져온 다음에 특정 엘리먼트를 표시하고 가리는 방식으로 필요한 정보만 보여주기 때문이다. 페이지를 다시 읽는 대안은 좋은 해법이 아니다. div를 감추고 보여주는 두 가지 선택이 가능한 콤보 박스를 생각해보자. 명백히 콤보 박스가 바뀔 때마다 div를 감추고 보여주려고 페이지를 다시 읽어들이는 것보다 클라이언트 쪽 코드에서 단순히 div를 감추고 보여주는 방식이 훨씬 더 쉽고 효율적이다. 단순히 감추고 보여주느냐 페이드 인/아웃 효과를 주느냐는 설계자 마음이다.

위에서 언급한 바와 같이 가장 기초적인 효과는 show()hide() 함수다. 두 함수는 아주 직관적이며, 척 보면 알겠지만 페이지에 있는 특정 엘리먼트를 보여주고 감춘다.


Listing 1. show()와 hide() 함수
				
// 페이지에 나오는 모든 <p>를 보여준다.
$("p").show();

// 페이지에 나오는 모든 <p>를 감춘다.
$("p").hide();

// 페이지에 나오는 모든 <p:odd>를 감춘다.
$("p:odd").hide();

이런 기본적인 기능 이외에, show()hide() 함수는 보여주고 감추는 동작 방식을 좀 더 세부적으로 제어하는 기능도 제공한다. 문서에 따르면 "우아한" 보여주기/감추기 기능은 show()를 페이드 인과 슬라이딩 아웃 조합으로 해석한다.

몇 가지 예제를 살펴보기 앞서, 잠시 한 걸음 물러서서 Effects 함수에 인수를 전달하는 방법을 살펴보자. (일반적인 show()hide() 함수는 예외지만) 함수마다 효과를 완료하고 나서 부르는 함수와 얼마나 빠르거나 느리게 효과를 보여줄지 제어하는 속력을 전달할 수 있다. 속력 인수로 "slow", "fast", "normal"이라는 문자열 중 하나를 지정한다. 추가로 애니메이션 주기를 정확하게 제어할 필요가 있다면 인수로 밀리 초 단위의 숫자를 넘긴다. Effects 함수로 넘기는 두 번째 인수는 함수이며, 효과를 끝내고 나서 호출되는 함수다. 이렇게 하는 이유는 여러 효과를 좀 더 큰 효과 하나로 결합할 때 특정 효과가 끝나고 나서 다음 효과를 지시하는 안정적인 제어 방법을 제공하기 때문이다.


Listing 2. 복잡한 효과
				
// "picture"라는 ID를 지정한 img는 감춰진 상태로 시작한다.
// "showPicture" 버튼이 눌러졌을 때 "picture"라는 ID를 지정한 img를 보여주고
// 애니메이션을 한다. 따라서 잽싸게 페이드인과 슬라이드 아웃을 보여준 다음에
// 쇼가 끝나면 그림에 달린 캡션을 보여준다.
// 캡션은 항상 <img> 태그 오른쪽으로 펼쳐진다.

<input type="button" id="showPicture">

<img src="/pic.jpg" id="picture"><span>This is the picture's caption</span>

// document.ready() 함수 내부에 들어갈 jQuery 코드

$("#picture").hide().next().hide();
$("#showPicture").click(function(){
   $("#picture").show("fast", function(){
       $("#picture").next().show();
   });
});

// 실제 프로그램 코드보다 설명이 더 길어졌음에 주목하자!

Effects 모듈은 show()hide()와 아주 비슷해서 궁극적으로 똑같은 작업을 수행하는 다른 함수를 지원한다. 여기서는 아주 구체적인 동작을 수행하게 만드는 함수 군을 소개하겠다. slideDown()slideUp() 함수는 페이지 엘리먼트를 보여주고 감추는 함수다. 하지만 슬라이딩 다운/업으로 엘리먼트에 애니메이션 효과를 준다(작명에 아주 머리가 파았을 테다!). 조금 전에 설명한 개선된 hide()show() 함수처럼, 슬라이드 속력과 작업이 끝나면 호출될 함수를 제어할 수 있다. 한걸음 더 나가서 여기에는 페이지 엘리먼트를 보여주고/감추기 위한 다른 옵션도 있다. fadeIn()fadeOut() 함수는 이름이 의미하듯이 페이지 엘리먼트를 투명해질 때까지 페이드 효과를 줘서 최종적으로 사라지게 만든다. 이 옵션에도 속력과 작업이 끝나면 호출될 함수를 지정할 수 있다.

페이지 엘리먼트를 완전히 감추거나 보여주지 않는 흥미로운 함수가 하나 더 있다. fadeTo()라는 함수는 페이지 엘리먼트를 일부 투명하게 만든다. RIA에서 이런 기능이 아주 중요한 이유는 투명도는 특정 엘리먼트를 페이지에서 강조하는 훌륭한 수단이며, 페이지에서 비활성 영역을 보여주는 데 사용할 수 있기 때문이다. 예를 들어, 페이지에 여러 탭이 있는 상황에서 다른 탭이 선택하지 못한다는 사실을 강조하려고 나머지 탭에 투명도를 적용할 수 있다. 아니면 페이지 폼에서, 현재 초점이 어떤 Form 엘리먼트에 맞춰져 있는지 사용자에게 알려주고 싶을 때도 초점이 없는 모든 엘리먼트에 투명도를 가하면 구분이 가능하다. 또한 투명도 자체 효과만 해도 정말 멋지다. 뭔가를 디자인할 때 "애플이 하면 진짜 멋지다"라는 일반적인 후광 효과를 따르면 된다.


Listing 3. 멋진 효과를 추가하기 위해 fadeTo() 활용하기
				
// 페이지에 있는 모든 form 엘리먼트에 60%라는 투명도를 준다.
// 현재 초점이 있는 엘리먼트는 투명도 효과에서 제외한다.
// 애플처럼 보이지 않는가?

$(":input").fadeTo("fast", .60);
$(":input").focus(function(){
    $(this).fadeTo("fast", 1);
});
$(":input").blur(function(){
    $(this).fadeTo("fast, .60);
    });

Effects 모듈에서 소개하고픈 마지막 함수는 가장 멋지지만 가장 실수도 저지르기 쉬운 함수다. 이는 전용 애니메이션 메서드로 애니메이션에 필요한 모든 매개변수를 지정하면 나머지는 jQuery가 알아서 처리한다. 매개변수 배열에 최종값으로 넘기면 jQuery는 배열에 정의된 값을 판단해 역시 매개변수로 넘긴 속력을 적용해서 마지막 값에 이를 때까지 페이지 엘리먼트를 부드럽게 움직여준다. Listing 4는 전용 애니메이션 메서드 예를 보여준다. 말하지 않아도 알겠지만 이 함수 응용 분야는 제한이 없으므로, 독자적인 전용 애니메이션이 필요하다고 느낄 때 유용하게 써먹기 바란다.


Listing 4. 전용 애니메이션 메서드
				
// 버튼을 클릭하면, "movingDiv"라는 ID가 붙은 div에 전용 애니메이션 효과를 적용한다.
$("#myButton").click(function(){
   $("#movingDiv").animate({
      // "movingDiv"에 속한 width, opacity, fontSize를 늘리며, 5초 동안 지속한다.
      width: 700;
      opacity: 0.5;
      fontSize: "18px";
   }, 5000);
   });

Ajax

최근에 "Ajax를 사용합니까?"라는 유행어가 모든 웹 페이지에 등장하고 있지만, 모든 사람이 Ajax가 진짜로 무엇을 의미하는지 아는 건 아니다. "Ajax"를 구글에서 검색해 보면 (다른 검색 결과와 마찬가지로) 수백만 건에 이르는 결과가 나타나지만 Ajax 용어가 품고 있는 사상이 무엇인지를 혼동하고 있다는 증거처럼 보인다. Ajax는 몇몇 페이지에서 보여주는 진짜 멋진 애니메이션도 아니며 진짜 멋진 그림자가 아래에 깔린 팝업 창도 아니다. 단지 Ajax가 멋지기 때문에 웹 페이지에서 보여주는 모든 흥미로운 효과를 Ajax라고 부르지는 않는다. Ajax의 핵심은 간단하게 말해 클라이언트 쪽 웹 페이지가 페이지를 다시 읽어들일 필요 없이 서버와 정보를 주고받는 수단일 따름이다. Ajax가 페이지에서 화끈한 효과를 주지는 못하지만, 웹 응용이 데스크톱 응용을 흉내내기 위한 수단을 제공한다. 따라서 Ajax를 둘러싼 소문은 근거가 있다. Ajax를 광범위하게 사용하는 관례는 오늘날 볼 수 있는 RIA 부문의 급격한 성장을 견인하고 있다.

jQuery는 Ajax를 엄청나게 쉽게 만들어준다! 과장해 추켜세울 의도는 없다. 자바스크립트 라이브러리의 도움 없이 Ajax로 작업한다면 XMLHttpRequests를 사용해야 하는데, 마이크로소프트(Microsoft®)와 파이어폭스가 사용하는 XMLHttpRequests 사이에 벌어진 차이점을 인지하고 반환 코드를 파싱하고 그 밖에 온갖 작업을 몸소 진행해야 한다. jQuery는 Ajax를 함수 호출 한방에 끝내버린다. 농담이 아니다. 과거 100행에 이르는 코드는 현재 서너 줄이면 끝난다. 믿기 어려운 시간 절약이 아닌가? 개인적으로 jQuery를 알기 전에는 여기저기 Ajax 함수를 추가하는 데 상당한 작업이 필요한 듯이 보였다. jQuery를 사용하면 Ajax가 너무나도 단순한 작업으로 변하기에 Ajax가 제공하는 모든 기능을 십분 활용하도록 응용 프로그램을 수정해왔다. 일반 함수 호출처럼 단순하다면 사용하지 못할 이유가 무엇이랴?

독자적인 Ajax 코드를 만드는 데 가장 널리 사용하는 함수인 post()get() 메서드에 초점을 맞추자. 두 함수는 현재 이 기사를 읽고 있는 시점에서 일반적인 jQuery 함수와 상당히 비슷하게 동작한다. URL과 넘길 매개변수를 명세하고 Ajax 메서드를 종료할 때 수행하는 함수를 명세하면 된다. 두 함수를 설정하는 방식 때문에 jQuery에서 다른 함수 호출과 정확하게 일치하는 방식으로 Ajax 메서드를 호출할 수 있게 되었다. Listing 5를 살펴보자.


Listing 5. Ajax post()와 get() 메서드
				
// 이 코드는 myTest.php라는 php 파일에 들어간다.
// Ajax 예제를 설명하다가 PHP를 다룬 이유가 무엇일까?
// 자바/JSP를 설명하자면 지면이 부족하다.
// 서블릿 코드도 보여줘야 하기 때문이다. 하지만 PHP를 사용하면 이런 번거로움이 없다.
// 물론 두 함수는 PHP와 자바/JSP에서 제대로 동작한다.
<?php
     echo "This is my return String";
?>

// jQuery에서 Ajax를 호출하는 방법이 얼마나 간단한지를 보여준다.
// post 함수
$.post("myTest.php", {}, function(data){
   $("p").text(data);
});

// get 함수
$.get("myTest.php", {}, function(data){
   $("p").text(data);
   });

두 예제를 보면 알겠지만, 해당 함수는 다른 jQuery 함수와 거의 흡사하며, 자바스크립트 라이브러리 없이 Ajax 프로그램을 작성하는 경우와 비교해 훨씬 더 사용하기 쉽다. Ajax 호출 함수를 확장하기 위해 사용 가능한 몇 가지 인수가 있다. 첫 번째 인수는 두말할 필요없이 호출할 URL이 되어야 한다. PHP 파일, JSP 파일, 서블릿이 될 수 있으며, 실제로 요청을 처리할 수만 있다면 뭐든 가능하다. (나중에 예제 응용을 보면 알겠지만) 요청에 반드시 반응할 필요도 없다. 두 번째 인수는 옵션으로 post/get으로 넘길 자료를 담는다. 이 인수는 배열 형태다. 일반적으로 페이지에서 사용자 ID 등 Form 엘리먼트에 들어있는 정보를 넘길 때 사용한다. 서버 쪽 파일에서 요청을 처리하는 데 필요한 모든 내용을 담고 있다. 세 번째 인수는 역시 옵션이며 Ajax 함수가 성공적으로 끝나고 나서 호출할 함수다. 이 함수는 일반적으로 서버에서 전달하는 정보 결과를 처리하는 코드를 포함한다. Listing 6은 네 번째 인수 설명에 앞서 첫 세 인수를 활용하는 예제를 보여준다.


Listing 6. 추가 인수를 받아들이는 post 메서드
				
// username과 password 입력 필드를 페이지에 추가한다.
<input type=text id="username">
<input type=password id="pass">

// 서버 기반 PHP 파일을 호출한다. 서버쪽으로 전달한 정보를 이 파일 내부에서 처리한다.
$.post("myFormProcessor.php", {username: $("#username").val(), 
                               password: $("#pass").val()});

// 거꾸로, 이 PHP 파일은 받은 결과를 처리할 함수에게 정보를 반환할 수 있다.
$.post("myFormProcessor.php", {username: $("#username").val(), 
                               password: $("#pass").val()},
       function(data){
           // data 변수는 서버에서 반환된 텍스트를 포함한다.
           // 미리 설정할 내용은 없으며, jQuery가 알아서 대신 처리해준다.
           if (data != "ERROR")
              $("#responseDiv").text(data);
       }
       );

지금까지 jQuery로 Ajax를 다루는 방법은 아주 직관적이고 쉽다는 사실을 확인했다. 하지만 단순히 텍스트 문자열이 아니라 서버에서 좀 더 복잡한 정보를 다루기 시작하면 일이 꼬이기 시작한다. 더 많은 Ajax 호출이 걸려있는 좀 더 복잡한 웹 페이지에서 반환 자료는 XML 형태도 가능하다. 반환 자료는 또한 JSON 객체 형태가 될 수도 있다(JSON은 기본적으로 자바스크립트 코드에서 사용 가능한 객체를 정의하는 프로토콜이다). jQuery는 네 번째 옵션 인수로 서버에서 기대하는 반환 값 유형을 미리 정의하는 get/post 메서드에 넘기도록 허용한다. XML 문자열을 위해 "xml"이라는 문자열을 넘기고, HTML 문자열(또는 평문)을 위해 "html"이라는 문자열을 넘기고, 자바스크립트 코드를 위해 "script"라는 문자열을 넘기고, JSON 객체를 위해 "json"이라는 문자열을 넘긴다. 따라서 예를 들어, 반환 객체를 "json" 유형으로 지정하면 jQuery는 자동으로 서버에서 오는 반응 문자열을 JSON 객체로 바꿔 즉시 참조가 가능하게 만든다.


Listing 7. Ajax에서 반환 유형 명세하기
				
// 반환 객체를 JSON 객체 유형으로 정의하고, 객체 형 변환이나 평가 과정을 거치지
// 않고서 내부 필드를 참조하도록 반환 객체를 JSON 객체로 처리한다.

$.post("myFormProcessor.php", {username: $("#username").val(), 
                               password: $("#pass").val()},
       function(data){
          // jQuery는 이미 결과 자료를 JSON 객체로 변환했기에, 
          // 즉시 내부 필드를 참조할 수 있다.
          // 좀 더 깔끔한 코드를 제공하며, 향후 변경에 대응이 가능하다.
          // XML 결과를 직접 처리하는 경우와 비교하면 작업이 훨씬 쉬워진다.
          $("#username").text(data.username);
          $("#address").text(data.address);
          $("#phone").text(data.phone);
       }, 
       "json"  // 여기서 반환 유형이 JSON이라고 명세한다.
       ); 

설명에 시간을 들일 만한 또 다른 Ajax 함수는 load()이며, 사용자가 특정 페이지를 읽어서 결과로 HTML을 얻도록 만들어준다. 설명만 보면 그다지 흥미를 못 느낄지도 모르겠다. 하지만 시작 시점에서 웹 페이지를 파싱하듯이 jQuery 코드를 사용해 반환된 정보를 파싱하는 능력이 생긴다. 이게 무슨 이야기일까? 웹 페이지를 읽은 다음에 jQuery로 파싱이 가능한 능력을 토대로 아주 효율적이고 프로그램 작성이 쉬운 웹 로봇을 직접 만들 수 있다. 특정 페이지에서 어떤 정보 유형도 수집할 수 있다. 예제를 한번 살펴보자.


Listing 8. load() 함수 예
				
// 야후 주식 시세를 호출하는 방법으로 아주 기본적인 주식 시세 시스템을 구축한 다음에
// 야후 주식 시세 페이지에서 정보를 긁어온다.
// 여기서는 IBM 주식 가격을 찾아 "stockPrice"로 ID를 설정한 텍스트 필드에서 보여준다.
// 주식 가격을 포함한 ID는 "yfs_190_ibm"이다.
$("#stockPrice").load("http://finance.yahoo.com/q?s=ibm #yfs_l90_ibm").text();

Ajax 모듈에서 소개할 마지막 두 함수는 Ajax 작업을 훌륭하게 보조해 주는 진짜 유틸리티 함수다. 이미 여러 차례 지적한 바와 같이 클라이언트와 서버 사이에서 일어나는 상호 작용 대다수는 폼과 폼이 포함하는 엘리먼트를 둘러싸고 일어난다. 이런 통신 유형이 아주 일반적이므로 jQuery에는 두 가지 유틸리티 함수가 있어서 HTTP 질의 문자열이거나 JSON 문자열 형태로 서버 쪽에 전달할 매개변수 생성을 도와준다. Ajax가 요구하는 조건에 맞춰 지원하는 유틸리티 함수를 골라 활용한다. 활용법이 아주 간단한 이유는 전체 폼을 캡슐화하므로 개발 도중에 자유롭게 엘리먼트를 추가, 삭제, 변경할 수 있기 때문이다. Listing 9는 이런 예제를 보여준다.


Listing 9. serialize()serializeArray() 함수
				
// serialize() 함수는 지정 엘리먼트에 들어있는 모든 폼 엘리먼트를 살핀 다음에
// 자동으로 엘리먼트의 모든 정보를 포함하는 <element name>=<element value>&
// 형태로 HTTP 문자열을 만든다.
// 예는 "firstname=Michael&lastname=Abernethy"와 같다.
// 이렇게 만든 문자열을 Ajax 호출로 정보를 전달할 URL 뒤에 덧붙인다.
$.post("myFormProcessor.php?" + $("#myForm").serialize());

// 또한 serializeArray() 함수로 비슷한 작업을 수행할 수도 있다.
// 폼을 JSON 형태로 변환한다.
$.post("myFormProcessor.php", {json: $("#myForm").serializeArray()});

여기서 배운 모든 내용을 하나로 합치기

모든 내용을 하나로 합쳐서 만든 데모 웹 응용인 웹 메일을 마지막으로 살펴보자. 이미 지난 연재물에서 충분히 익숙하게 살펴보았을 것이다. 정보 획득을 위해 클라이언트 쪽에서 서버 쪽으로 여러 Ajax 호출을 수행한다. 여기서는 메시지를 읽고 메시지를 지울 때 AJax를 활용한다. 그러고 나서 Effects를 활용해 사용자가 메시지를 지울 때 즉시 화면에서 메시지를 사라지게 만든다. 심지어 사용자가 페이지를 다시 읽지 않으며 Ajax 호출을 활용해 비동기식으로 실제 삭제가 일어나지만 이런 삭제 동작이 즉시 일어난다. 직접 만든 웹 응용에서 Ajax 호출이 얼마나 쉬운지를 살펴보고 데스크톱 응용을 진짜로 흉내내기 위해 Ajax를 활용하는 방법을 살펴보고, Effects를 활용해 응용 프로그램 사용성을 높이는 방법을 예제를 보면서 최종적으로 확인한다.


Listing 10. 예제 웹 응용: 메시지 삭제하기
				
// 먼저 메시지 삭제를 처리하는 방법을 살펴보자.

// 첫 단계는 실제로 메시지를 지울 버튼 생성이다.
<input type=button id="delete" value="Delete">

// 다음으로 테이블 각 행에 체크박스를 추가해 사용자가 삭제를 원하는 메시지를
// 선택하도록 만든다. 이런 체크박스를 나중에 활용할 텐데, 여기에 들어있는 정보는
// 아주 중요하다(예시라고 부른다).
// 각 체크박스 값이 message.id라는 사실에 주목하자.

<tr class="messageRow" id="<%=message.id %>">
<input type=checkbox name="delId" value="<%=message.id%>" class=selectable>

// 이제 HTML이 완료되었으므로 삭제를 수행하는 jQuery 코드를 살펴보자.

// 먼저, 삭제 버튼에 이벤트를 추가한다. 버튼을 누르면 체크된 메시지를 지우기 시작한다.

$("#delete").click(function() {
   deleteMessages();
});

// 마지막으로 deleteMessage() 함수를 정의하자. 오늘 배운 내용에서 가장
// 중요한 내용을 담고 있다.
// 모든 기사에서 다룬 내용을 완성하는 함수이므로, 동작 원리를 자세히 설명하겠다.
// 참고 1 - 아주 구체적인 검색 매개변수를 넘겨 체크된 체크박스를 하나씩
// 순회하며 "selectable" 클래스 멤버만 찾도록 만든다.
// 참고 2 - 체크박스 값이 포함된 테이블 행 ID와 동일하므로, Effects 모듈을 사용해
// 전체 테이블 행을 감출 수 있다. 체크박스 값을 전달하고 표 행을 다시 얻은 다음에 감춘다.
// 참고 3 - Ajax를 호출해 실제로 DB에서 메시지를 삭제한다. messageID를 서버에 전달해
// 삭제될 항목을 알도록 만든다. 체크박스 값에 포함된 정보를 Ajax 호출 과정에서 전달한다.
// 성공인지 아닌지 신경쓰지 않기 때문에 서버에서 돌아오는 대답을 무시한다.

function deleteMessages()
{
    $(".selectable:checked").each(function() {
        $("#"+$(this).val()).remove();
        $.post("<%=HtmlServlet.DELETE_MESSAGES%>.do", {delId: $(this).val()});
    });
    }

두 번째 예제로, 메시지를 읽는 방법을 살펴보자. jQuery에서 Ajax를 활용하는 예를 보여준다.


Listing 11. 예제 웹 응용: 메시지 읽기
				

// 지금까지 예제에서 코드 대부분을 살펴보았으므로, 코드에서 Ajax 부분만 초점을 맞춘다.
// 참고 1 - Ajax 호출을 하면서 인수 네 개를 정의해 넘긴다.
// 메시지를 읽으려면 서버에 두 변수를 넘겨야 한다.
// 첫 번째는 메시지 ID로 읽기를 원하는 메시지가 무엇인지 알아야 하기 때문이다.
// 두 번째는 현재 뷰로 .. 어떤 목적으로 사용했는지 기억나지 않는다.
// (그다지 중요하지 않는 듯이 보인다)
// 참고 2 - Ajax 함수로 넘기는 네 번째 인수는 "json"이다.
// Ajax 호출로 JSON 객체를 반환하라는 표식이다. jQuery는 결과로 반환되는
// 문자열을 JSON 객체로 자동으로 변환한다.
// 참고 3 - eval() 함수를 사용하지 않고 JSON 객체를 직접 다루고 있다는 점에 주목하자.
// jQuery가 객체를 만들었기 때문이다. 따라서 필드를 직접 참조할 수 있다.
$(".messageRow").dblclick(function() {
    if ($(this).hasClass("mail_unread"))
    {
        $(this).removeClass("mail_unread");
    }
    $.post("<%=HtmlServlet.READ_MESSAGE%>.do", {messageId: $(this).attr("id"),
                                                     view: "<%=view %>"}, 
      function(data){
        if (data != "ERROR")
        {
             // JSON 객체를 활용한다.
             $("#subject").val(data.subject);
             $("#message").val(data.message);
             $("#from").val(data.from);
         }
      }, "json");
    $.blockUI(readMess, {width:'540px', height:'300px'});
    });

결론

jQuery와 같은 자바스크립트 라이브러리는 데스크톱에서 브라우저로 응용 프로그램을 이식함에 따라 점점 더 중요해진다. 이런 응용은 점점 더 복잡해지므로, 웹 응용 프로젝트에서 jQuery와 같은 튼튼한 교차 브라우저 해법을 필수로 요구한다. jQuery는 다른 자바스크립트 라이브러리와 격차를 벌이기 시작했으며, 필요한 모든 작업을 수행하는 능력과 함께 손쉬운 개발 특성 때문에 많은 개발자가 jQuery를 핵심 라이브러리로 선택하고 있다.

연재물 세 번째 기사에서, 응용에 풍부함을 더해 데스크톱 응용과 웹 응용 사이에 경계를 허무는 두 가지 모듈을 익혔다. 이번 기사에서 가장 강력하게 추가한 내용은 Ajax 모듈로, 다른 jQuery 메서드 호출처럼 간단하고 직관적인 인터페이스를 제공함으로써 Ajax를 아주 쉽게 활용하도록 만든다. 페이지를 다시 읽느라 지연되는 짜증을 겪지 않고서 응용 프로그램 반응 속력을 높이는 훌륭한 도구로 몇 가지 예제를 곁들여 Ajax의 위력도 살펴보았다. Effects 패키지에 대한 내용도 빠지지 않았다. 애니메이션과 페이지 엘리먼트 감추기/보여주기 기능을 적절하게 사용한다면 좋은 UI 디자인이라는 강력한 지원군을 얻게 된다. Ajax와 Effect를 결합해 효율적으로 활용하면 웹 사이트에 동적인 능력을 상당히 강화할 수 있다.

마지막으로 웹 응용 예제를 다시 한번 살펴보았고, AJax 모듈을 추가해 페이지를 다시 읽어들이지 않고도 메시지를 읽고 삭제하는 방법을 익혔다. 그러고 나서 Ajax와 Effect 조합으로 페이지를 다시 읽어들이지 않고도 사용자 페이지와 DB 웹 응용에서 메시지를 삭제하는 방법을 익혔다. 사용자에게 메시지 삭제는 투명한 과정이며, 미리 정해진 방식에 맞춰 프로그램 상에서 동작한다.

이 기사는 모든 jQuery 배포판에 따라오는 핵심 라이브러리에 대한 소개 내용으로 마무리를 한다. 연재물에서 jQuery에 포함된 모든 모듈을 살펴보았으며, jQuery로 작업하는 과정이 쉽고 직관적이라는 사실을 보여줬다. 또한 어떤 웹 응용을 만들거나 jQuery는 RIA 유형에 무관하게 제 자리를 잡고 있다는 사실을 확인했다. 자바스크립트가 요구하는 수준에 맞춰 튼튼한 토대를 제공하기 때문이다. 연재물은 직접 코드를 작성하는 과정에서 jQuery를 아주 자연스럽게 활용하는 수준에 이르도록 독자들을 이끌었다. 첫 번째 기사는 jQuery 동작 방식, 페이지 엘리먼트 탐색을 위한 활용 방법, 엘리먼트를 순회하는 방법, Array 객체와 같은 방식으로 접근하는 방법을 설명했고, 두 번째 기사는 풍부함을 제공하는 토대로 세 가지 모듈을 소개했다. 마지막으로 세 번째 기사는 완벽하고 복잡한 웹 응용을 만들기 위한 프레임워크를 위한 마지막 퍼즐 조각을 보여줬다.


위로


다운로드 하십시오

설명 이름 크기 다운로드 방식
예제 애플리케이션을 담은 Zip 파일 jquery.zip 69KB HTTP
다운로드 방식에 대한 정보
Posted by 1010
05.JSP2009. 1. 23. 15:58
반응형


JavaTM EE (J2EE) Programming (with Passion!)


Message to potential attendees

The next and 15th session will start from Feb. 1st, 2009.  Just like other online courses I teach, this course is offered online only.   For those of you who are not sure what it's like to take this course online, please see What it's like to take Sang Shin's online courses.  Just to set the expectation correctly, there is no real-time webcasting. 

How to register for this course

In order to register for this course, all you have to do is sending a blank email to the following email alias. 

Basically, when you send a blank email to the above, you are subscribing our class forum. This forum can be used for posting questions/answers.  Please use this forum for all class related communication (technical or non-technical). 

If you have any further questions on this course, please see the course FAQ (Frequently Asked Questions).


Topics and Schedule


Note that only the topics with the dates assigned will be covered in this course. (You need to submit homeworks only on the topics that have dates.)  It is my plan to provide presentation slides and hands-on labs for the topics that do not have dates whenever I find time.


  1. Introduction
  2. Web Core Technologies: Servlet and JSP
  3. JDBC, SQL,
    • SQL (1 hour lecture + 1 hour lab) - (March 12th, 2009: Week #6)  - there is no homework
    • JDBC (1 hour lecture + 1 hour lab) - (March 12th, 2009: Week #6) (homework #9)
  4. Web-tier Security
  5. Struts
  6. Struts 2
    • Struts 2 Basics (2 hour lecture + 1 hour lab) - (April 25th, 2009: Week #10) (homework #13)
    • Struts 2 and Ajax ()
    • Struts 2 and Tiles
    • Struts 2 and view technologies
  7. JavaServer Faces (JSF)
    • JSF basics I
    • JSF basics II
    • Validation
    • Conversion 
    • Data tables
    • Sample apps
    • Tiles 
    • Using JSF-enabled IDE
    • Building JSF components
    • Related frameworks
    • JSF and Portal/Portlets
    • Testing and Debugging tools
  1. Other Web-tier Frameworks
  2. EJB 2.x
  3. Java EE 5, EJB 3.0, Java Persistence API (JPA)
  4. Design patterns, Best practices, Performance tuning, etc
  5. Hibernate
  6. Spring framework
    • Spring framework basics
    • Spring framework and persistence
    • Spring framework Web-tier technologies
    • Spring AOP
    • Spring and Java EE
    • Misc.
  7. Portlets and Portal
  8. GlassFish
If you submitted all homeworks - the deadline for the homework submission is Dec. 11th, 2009 -, please send an email to the homework alias (j2eehomeworks@sun.com) with the following information in order to get a certificate and listed in the Graduates of this course by Dec. 14th, 2009. The subject of the email should be J2EECourse-2009-Fall.
  • <First-name Last-name>, <Nationality or Country of Origin>, <One paragraph you want to say about this course (optional)>
  • Sang Shin, Korea, This is a great course ...


Introduction


Introduction of this course

1. Presentation slides (0.5 hour)

Java EE Overview

The objective of this session is to give you a big picture of Java EE architecture and platform and get yourself prepared for the rest of the course.  You don't have to understand everything that is described in the presentation below.  If you get reasonably good idea on what Java EE is, that should be good enough to proceed.  Please browse through the Resources below.

There is no homework in the week #1.

1. Presentation slides (1 hour)

                                                                                                                              return to topics


Web Core Technologies: Servlets, JSP, and JSTL


Web Application Structure

In this session, you will learn how a typical Web application is built.  You will also learn the internal structure of Web application as well as web.xml file.

1. Presentation slides (1 hour)

2. Lab (1 hour) and homework - The hands-on lab is updated with NetBeans 6.1.
  • 4001_webappstructure.zip (Unzip it in a directory of your choice and read lab document from <unzip-directory>/webappstructure/index.html to proceed)
  • Online lab document (This is the same document you will find in the hands-on lab zip file)
  • Homework (This is the same homework you will find in the hands-on lab zip file)
  • Change log

                                                                                                                   return to topics

Servlet Basics


You are getting into a very important topic, Servlet.  I expect many of you who get exposed to the Servlet for the first time might feel overwhelmed by the amount of things you feel you have to absorb. Given that the Servlet technology is the most-used functionality of J2EE platform, there are in fact lots of things to learn. 

1. Presentation slides (2 hours)

2. Lab and homework (1 hour) 
3. Resources
                                                                                                                              return to topics

JSP Basics


I assume by now, most of you are relatively comfortable with building and deploying Servlet based Web applications.  In this session, you will learn basic concept of JSP (JavaServer Pages) which is as equally important Web-tier technology as Servlet.  You will also learn how to build a simple JSP pages using JavaBeans.

1. Presentation slides (2 hours)

2. Lab and homework (2 hours)
3. Resources
                                                                                                                              return to topics

Using NetBeans for Developing Web Applications


In this session, you are going to do a lab during which you exercise various features of NetBeans IDE. 

1. Lab and homework (1 hour)
2. Resources
                                                                                                                     return to topics

Servlet Advanced


By now, you have reasonably good idea on how you can use basic features of Servlets and JSP to build Web applications.  In this session, you are going to learn advanced features of Sevlets, mainly filters and life-cycle events.

1. Presentation slides - ServletAdvanced (1 hour)

2. Presentation slides - Servlet 2.4 Enhancements
3. Lab and homework (1 hour)
4. Resources

                                                                                                                              return to topics

Session Tracking


Session tracking is a mechanism that servlets use to maintain state about a series of requests from the same user (that is, requests originating from the same browser) across some period of time.

1. Presentation slides (1 hour)

2. Lab and homework (1 hour)
3. Resources
                                                                                                                              return to topics

Expression Language


A primary feature of JSP technology version 2.0 is its support for an expression language (EL). An expression language makes it possible to easily access application data stored in JavaBeans components. For example, the JSP expression language allows a page author to access a bean using simple syntax such as ${name} for a simple variable or ${name.foo.bar} for a nested property.

1. Presentation slides


2. Lab and homework (0.5 hour)
3. Resources

                                                                                                                              return to topics

JSP 1.2 Custom Tags - We are not covering this topic in this course


Since the introduction of JSP 2.0 style tag files, the JSP 1.2 style development of custom tags should be avoided whenever possible meaning if you can develop your custom tags using tag files, you should use tag files.  Because of that reason, we are skipping this topic in this course. 

1. Presentation slides (2 hours)


2. Lab
3. Resources


                                                                                                                   return to topics

JSP 2.0 Custom Tags


In this session, you are going learn how to build and use simple tag handler and tag file features of JSP 2.0.

1. Presentation slides (1 hour)

2. Lab and homework(1 hour) 
3. Resources
                                                                                                                              return to topics

JSTL


The JavaServer Pages Standard Tag Library (JSTL) encapsulates core functionality common to many JSP applications. Instead of mixing tags from numerous vendors in your JSP applications, JSTL allows you to employ a single, standard set of tags. This standardization allows you to deploy your applications on any JSP container supporting JSTL and makes it more likely that the implementation of the tags is optimized.

1. Presentation slides (2 hours)

2. Labs (2 hours)
3. Resources
                                                                                                                              return to topics

Building BookStore Sample Application


In this session, you will build the "Duke's Bookstore" sample application, which is reasonably sophisticated application using different Web-tier technologies, first by using Servlets only, second by using JSP pages only, third by using JSP pages and custom tags, fourth by using JSP pages and JSTL in native format, fifth by using JSPpages and JSTL in XML format

1. Labs (2 hours)

Applets


1. Presentation slides (2 hours)

  • PDF: 1 slide per page
  • StarOffice file
2. Labs (2 hours)
  • 4015_jstlexamples.zip (Unzip it in a directory of your choice and read lab document from <unzip-directory>/jstlexamples/index.html to proceed) - work in progress
  • Online lab document (This is the same document you will find in the hands-on lab zip file
  • Homework
  • Change log
3. Resources
                                                                                                                              return to topics


JDBC, SQL


SQL

SQL is a standard computer language for accessing and manipulating relational databases.  Even though Java persistence technologies such as EJB 3.0 Java Persistence API (JPA) or Hibernate could insulate developers from having to know the detailes of SQL, it is still important to know the intricacies of SQL in order to be able to write highly performant Java EE applications which involves persisting data to the relational database.

1. Presentation slides (1 hour)


2. Lab (1 hour)

Since the SQL tutorial from w3cschools.com seems to be the best tutorial, I have decided to use the material as the hands-on lab for the topic of SQL.  There is no homework on this topic.
3. Resources
4. Configuration paramater values for databases
  • Java DB (Derby)
    • jdbc:derby://localhost:1527/mydatabase (URL)
    • org.apache.derby.jdbc.ClientDriver (Driver class)
    • app (Username)
    • app (Password)
  • MySQL
    • jdbc:mysql://localhost:3306/test (URL)
    • com.mysql.jdbc.Driver (Driver class)
    • MySQL Connector/J  (Driver name)
    • no username
    • no password
    • org.hibernate.dialect.MySQLDialect
  • HSQL
    • jdbc:hsqldb:file:messagedb
    • org.hsqldb.jdbcDriver
    • sa
    • no password
    • org.hibernate.dialect.HSQLDialect
                                                                                                                             return to topics

JDBC

JDBC is standard Java API for accessing amdn manipulating relational database through SQL.  Even though Java persistence technologies such as EJB 3.0 Java Persistence API (JPA) or Hibernate could provide higher layer abstraction than JDBC, JDBC is still one of the most popular Java APIs for persisting data to the relational database.

1. Presentation slides (1 hour)


2. Lab (1 hour)
3. Resouces
                                                                                                                              return to topics


Web-tier Security


Security Basics

Security is one of the most important areas of distributed computing. 


1. Presentation slides (1 hour)

                                                                                                                              return to topics

Web Application Security

1. Presentation slides (1 hour)

2. Lab (1 hour)
3. Resouces
                                                                                                                              return to topics

SSL

1. Presentation slides (1 hour)

2. Resources
                                                                                                                              return to topics

Web Application Security Threats and Counter-Measures

1. Presentation slides (1 hour)


2. Labs (1 hour)
  • 4010_websecthreats.zip (Unzip it in a directory of your choice and read lab document from <unzip-directory>/websecthreats/index.html to proceed)
  • Online lab document (This is the same document you will find in the hands-on lab zip file)
3. Resources
                                                                                                                              return to topics


Struts


MVC (Model-View-Controller) Framework

1. Presentation slides (1 hour)

                                                                                                                              return to topics

Struts Basics


In its short existence, Struts has established itself as a popular web application framework that is based on MVC (Model-View-Controller) architecture.  Even though new generation of Web application frameworks such as JavaServer Faces (JSF) and Tapestry are providing more advanced features, Struts is still being used widely in the field.

1. Presentation slides (1 hour)

2. Lab (2 hours)
3. Resources
                                                                                                                              return to topics

Step by Step Guide for Building a Simple Struts Application


1. Presentation slides (1 hour)

                                                                                                                              return to topics

Struts Sample Applications


1. Lab (2 hours)  - the contents will be updated in the future
  • 4207_strutsexamples.zip (Unzip it in a directory of your choice and read lab document from <unzip-directory>/strutsexamples/index.html to proceed)
  • Online lab document (This is the same document you will find in the hands-on lab zip file)
                                                                                                                              return to topics

Struts Tags


1. Presentation slides (1 hour)

2. Labs (2 hours)  - the contents will be updated in the future
  • 4209_strutstags.zip (Unzip it in a directory of your choice and read lab document from <unzip-directory>/strutsttags/index.html to proceed)
  • Online lab document (This is the same document you will find in the hands-on lab zip file)
                                                                                                                              return to topics

Struts Advanced


1. Presentation slides (1 hour)

2. Labs (2 hours) - they are not ready yet!
  • 4209_strutsadv.zip (Unzip it in a directory of your choice and read lab document from <unzip-directory>/strutsadv/index.html to proceed)
  • Online lab document (This is the same document you will find in the hands-on lab zip file)
                                                                                                                              return to topics

Struts Validation Framework

1. Presentation slides (1 hour)


2. Lab (1 hour) - the contents will be updated in the future
  • 4210_strutsvalidator.zip (Unzip it in a directory of your choice and read lab document from <unzip-directory>/strutsvalidation/index.html to proceed)
  • Online lab document (This is the same document you will find in the hands-on lab zip file)
                                                                                                                              return to topics

Tiles Framework

1. Presentation slides (1 hour)


2. Lab (1 hour)  - the contents will be updated in the future
3. Resources
                                                                                                                              return to topics

Struts Testing, Debugging, Logging, and Performance

1. Presentation slides (1 hour)


2. Lab (1 hour)
  • 4220_strutstestcase.zip (Unzip it in a directory of your choice and read lab document from <unzip-directory>/strutstestcase/index.html to proceed)
  • Online lab document (This is the same document you will find in the hands-on lab zip file)
3. Resources
                                                                                                                              return to topics

Struts Best Practices

1. Presentation slides (1 hour)

2. Best practices

                                                                                                                              return to topics

Struts and Databases

1. Presentation slides (1 hour)


2. Lab (1 hour)
  • 4222_strutsdatabase.zip (Unzip it in a directory of your choice and read lab document from <unzip-directory>/strutsdatabase/index.html to proceed)
  • Online lab document (This is the same document you will find in the hands-on lab zip file)
3. Resources
                                                                                                                              return to topics


Struts Security

1. Presentation slides (1 hour)


                                                                                                                              return to topics


JavaServer Faces (JSF)


Building "Hello World" JSF applications


This is to build and run a simplest possible JSF application step by step and make sure the software is working correctly.

1. Lab  (1 hour)
  • 4101_jsfhelloworld.zip (Unzip it in a directory of your choice and read lab document from <unzip-directory>/jsfhelloworld/index.html to proceed)
  • Online lab document (This is the same document you will find in the hands-on lab zip file)

                                                                                                                    return to topics

Step by step for building "Guess a Number" JSF application

You are going to build a simple "Hello World" sample JavaServer Faces (JSF) application exercising the basic features of a typical MVC-based Web application framework of JSF architecture such as request dispatching, navigation, event handling, and so on.  These features will be more clearly explanined in the following presentation - JSF Basics - but the goal is to build an application first and see how it works.


1. Presentation slides

2. Lab  1 - Do Exercise 1 & 2! (1 hour)

                                                                                                                    return to topics


JSF basics

The basic concepts of JSF architecture and features will be discussed.

1. Presentation slides (1.5 hour)

2. Resources

                                                                                                                    return to topics


JSF Component Model

1. Presentation slides (1.5 hour)

2. Lab (1 hour)

In JSF framework, a component tree gets constructed whenever a page (that contains JSF UI components are used) is accessed.  Since this component tree is a fundamental piece of JSF architecture, it is important to understand the concept of it.  This lab lets you access and display this component tree.
3. Resources


JSF tags

One popular markup language that your application will support is obviously HTML.  In this session, you will learn various JSF-based tags for the HTML browser client.


1. Presentation slides (1 hour)

2. Lab 1 (0.5 hour)
  • Review Examples of JSF HTML tags from JSF tags list from horstmann.com
3. Lab 2
4. Resources

                                                                                                                    return to topics


Managed Beans


1. Presentation slides (1 hour)

2. Lab 1 - Do the exercise 3 (1 hour)
  • 4104_jsfguessnumber.zip (Unzip it in a directory of your choice and read lab document from <unzip-directory>/jsfguessnumber/index.html to proceed)
  • Online lab document (This is the same document you will find in the hands-on lab zip file)
3. Resources

                                                                                                                    return to topics


Navigation

1. Presentation slides (1 hour)

2. Lab 1 - Do the exercise 4 (1 hour)
  • 4104_jsfguessnumber.zip (Unzip it in a directory of your choice and read lab document from <unzip-directory>/jsfguessnumber/index.html to proceed)
  • Online lab document (This is the same document you will find in the hands-on lab zip file)
3. Lab 2
  • 4129_jsfnavigation.zip (Unzip it in a directory of your choice and read lab document from <unzip-directory>/jsfnavigation/index.html to proceed)
  • Online lab document (This is the same document you will find in the hands-on lab zip file)
4. Resources

                                                                                                                    return to topics


Event model

1. Presentation slides (1.5 hour)  - todo: add differences between action and actionListerner in JSF 1.2

2. Lab (1.5 hour)
3. Resources


                                                                                                                    return to topics

Life-cycle and PhaseListener

1. Presentation slides (1.5 hour)

2. Lab 

3. Resources

                                                                                                                    return to topics

Immediate Attribute

1. Presentation slides (0.5 hour)

2. Lab 

3. Resources

                                                                                                                    return to topics

Styling with CSS

1. Presentation slides (1.5 hour)

2. Lab

3. Resources

                                                                                                                    return to topics

Validation

1. Presentation slides (1.5 hour) - todo: make sure all validation strategies are covered

2. Lab 1 - Do the exercise 5! (20 minutes)
3. Lab 2
3. Resources

                                                                                                                    return to topics


Client-side Vadliation

1. Presentation slides (1.5 hour)

  • PDF: 1 slide per page
  • StarOffice file
2. Lab

3. Resources

                                                                                                                    return to topics

Converter

1. Presentation slides (1.5 hour) - todo: list all built-in converters

2. Lab
  • 4125_jsfconverter.zip (Unzip it in a directory of your choice and read lab document from <unzip-directory>/jsfconverter/index.html to proceed)
  • Online lab document (This is the same document you will find in the hands-on lab zip file)
3. Resources

                                                                                                                    return to topics


Data Table

1. Presentation slides (1.5 hour)

2. Lab
  • 4123_jsfdatatable.zip (Unzip it in a directory of your choice and read lab document from <unzip-directory>/jsfdatatable/index.html to proceed)
  • Online lab document (This is the same document you will find in the hands-on lab zip file)
3. Resources

                                                                                                                    return to topics

JSF and Persistence (JPA)

1. Presentation slides (1.5 hour)

2. Lab
  • 4133_jsfjpa.zip (Unzip it in a directory of your choice and read lab document from <unzip-directory>/jsfjpa/index.html to proceed)
  • Online lab document (This is the same document you will find in the hands-on lab zip file)
3. Resources

                                                                                                                    return to topics

Walk-through of CarStore Sample Application

1. Presentation slides (1.5 hour)

2. Lab 
  • 4111_jsfcarstore.zip (Unzip it in a directory of your choice and read lab document from <unzip-directory>/jsfcarstore/index.html to proceed)
  • Online lab document (This is the same document you will find in the hands-on lab zip file)

                                                                                                                    return to topics


Walk-through of BookStore6 Sample Application


Java EE 5 tutorial comes with sample JSF application called bookstore6 in the form of NetBeans project.

1. Lab 
  • 4119_jsfbookstore.zip (Unzip it in a directory of your choice and read lab document from <unzip-directory>/jsfbookstore/index.html to proceed)
  • Online lab document (This is the same document you will find in the hands-on lab zip file)

                                                                                                                    return to topics


Building Some JSF Sample Applications


1. Lab
  • 4102_jsfsimpleapps.zip (Unzip it in a directory of your choice and read lab document from <unzip-directory>/jsfsimpleapps/index.html to proceed)
  • Online lab document (This is the same document you will find in the hands-on lab zip file)

                                                                                                                    return to topics

Tiles

1. Presentation slides (1.5 hour) - todo: How tiles are integrated with JSF

2. Lab 
  • 4124_jsftiles.zip (Unzip it in a directory of your choice and read lab document from <unzip-directory>/jsftiles/index.html to proceed)
  • Online lab document (This is the same document you will find in the hands-on lab zip file)

3. Resources

                                                                                                                 return to topics

NetBeans Visual Web Pack Basics

1. Presentation slides (1.5 hour)

2. Lab 
3. Resources

                                                                                                                 return to topics

NetBeans Visual Web Pack Advanced


1. Lab 
  • 4136_jsfvisualjsf.zip (Unzip it in a directory of your choice and read lab document from <unzip-directory>/jsfvisualjsf/index.html to proceed)
  • Online lab document (This is the same document you will find in the hands-on lab zip file)
2. Resources

                                                                                                                 return to topics


Building a JSF Component

1. Presentation slides (1.5 hour)

2. Presentation slides - this is JavaOne 2007 presentation by Kito Man

3. Lab 1
  • 4113_jsfcomponentbuild.zip (Unzip it in a directory of your choice and read lab document from <unzip-directory>/jsfcomponentbuild/index.html to proceed)
  • Online lab document (This is the same document you will find in the hands-on lab zip file)

4. Lab  2
  • 4430_jsfcustom.zip (Unzip it in a directory of your choice and read lab document from <unzip-directory>/jsfcustom/index.html to proceed)
  • Online lab document (This is the same document you will find in the hands-on lab zip file)


                                                                                                                    return to topics


RenderKit

1. Presentation slides (1.5 hour)

  • PDF: 1 slide per page
  • StarOffice file
2. Lab  
  • 4109_jsfrenderkit.zip (Unzip it in a directory of your choice and read lab document from <unzip-directory>/jsfrenderkit/index.html to proceed) Note: You should do this lab whil
  • Online lab document (This is the same document you will find in the hands-on lab zip file)

Shale Dialog

1. Presentation slides (1.5 hour)

2. Lab
  • 4131_jsfshale.zip (Unzip it in a directory of your choice and read lab document from <unzip-directory>/jsfshale/index.html to proceed) Note: You should do this lab whil
  • Online lab document (This is the same document you will find in the hands-on lab zip file)
3. Lab 2
4. Resources


                                                                                                                              return to topics

Facelets

1. Presentation slides  (originally by Çagatay Çivici, modified slightly by Sang Shin)

2. Lab 1 (1.5 hour)
  • 4106_jsffacelets.zip (Unzip it in a directory of your choice and read lab document from <unzip-directory>/jsffacelets/index.html to proceed) Note: You should do this lab whil
  • Online lab document (This is the same document you will find in the hands-on lab zip file)
3. Lab 2 (1 hour)
  • 4107_jsffaceletscdstore.zip (Unzip it in a directory of your choice and read lab document from <unzip-directory>/jsffaceletscdstore/index.html to proceed) Note: You should do this lab whil
  • Online lab document (This is the same document you will find in the hands-on lab zip file)
4. Lab 4 (1 hour) - Optional
5. Resources
                                                                                                                              return to topics

Spring Web Flow and JSF

1. Presentation slides (1 hour)


2. Presentation slides (1.5 hour) - This is JavaOne 2007 presentation
3. Lab  
4. Resources

                                                                                                                    return to topics

Spring framework and JSF integration

1. Presentation slides (1.5 hour) - This is JavaOne 2007 presentation by Kito Mann and Chris Richardson

2. Lab
4. Resources

                                                                                                                    return to topics


Seam

1. Presentation slides (1.5 hour) - This is JavaOne 2007 presentation by xxx

  • PDF: 1 slide per page
  • Video
2. Lab  
  • core-seam
3. Resources

                                                                                                                    return to topics


JSFTemplating

1. Presentation slides (1.5 hour) - This is JavaOne 2007 presentation by xxx

  • PDF: 1 slide per page
  • Video
2. Lab  
  • core-seam
3. Resources

                                                                                                                    return to topics

Building Useful Components (from Core JSF book)

1. Presentation slides (1.5 hour)

  • PDF: 1 slide per page
  • Star Office
2. Lab  1
  • 4115_jsfcomponentbuild2.zip (Unzip it in a directory of your choice and read lab document from <unzip-directory>/jsfcomponentbuild2/index.html to proceed)
  • Online lab document (This is the same document you will find in the hands-on lab zip file)
3. Lab 2
  • core-popup
  • core-resolver
  • core-error
  • core-applet


Tomahawk JSF Components (from MyFaces Apache project)

1. Presentation slides (1.5 hour)

  • PDF: 1 slide per page
  • Video
2. Lab 
  • 4116_jsftomahawk.zip (Unzip it in a directory of your choice and read lab document from <unzip-directory>/jsftomahawk/index.html to proceed)
  • Online lab document (This is the same document you will find in the hands-on lab zip file)
3. Resources

                                                                                                                    return to topics

ADF components

1. Presentation slides (1.5 hour)

  • PDF: 1 slide per page
  • Video
2. Lab
  • 4117_jsfadf.zip (Unzip it in a directory of your choice and read lab document from <unzip-directory>/jsfadf/index.html to proceed)
  • Online lab document (This is the same document you will find in the hands-on lab zip file)

3. Resources

                                                                                                                    return to topics


Misc. 3rd party JSF components

1. Presentation slides (1.5 hour)

  • PDF: 1 slide per page
  • StarOffice
2. Lab  
3. Resources

                                                                                                                    return to topics


Woodstock components

1. Presentation slides (1.5 hour)

  • PDF: 1 slide per page
  • StarOffice
2. Lab
  • 4118_jsfwoodstock.zip (Unzip it in a directory of your choice and read lab document from <unzip-directory>/jsfwoodstock/index.html to proceed)
  • Online lab document (This is the same document you will find in the hands-on lab zip file)

3. Resources

                                                                                                                    return to topics

Building Woodstock components

1. Presentation slides (1.5 hour)

  • PDF: 1 slide per page
  • StarOffice
2. Lab
  • 4118_jsfwoodstock.zip (Unzip it in a directory of your choice and read lab document from <unzip-directory>/jsfwoodstock/index.html to proceed)
  • Online lab document (This is the same document you will find in the hands-on lab zip file)

3. Resources

                                                                                                                    return to topics

Woodstock components and Ajax

1. Presentation slides (1.5 hour)

  • PDF: 1 slide per page
  • StarOffice
2. Lab
  • 4118_jsfwoodstock.zip (Unzip it in a directory of your choice and read lab document from <unzip-directory>/jsfwoodstock/index.html to proceed)
  • Online lab document (This is the same document you will find in the hands-on lab zip file)

3. Resources

                                                                                                                    return to topics


Building Ajax applications using JSF

1. Presentation slides (1.5 hour)

  • PDF: 1 slide per page
  • StarOffice
2. Lab
  • 4121_jsfajax.zip (Unzip it in a directory of your choice and read lab document from <unzip-directory>/jsfajax/index.html to proceed)
  • Online lab document (This is the same document you will find in the hands-on lab zip file)
3. Resources

                                                                                                                    return to topics

DynaFaces


1. Presentation slide - Introduction to DynaFaces

2. Presentation slide - Using DynaFaces

3. Labs (2 hours)
3. Resources

                                                                                                                    return to topics


Ajax4jsf

1. Presentation slides (1.5 hour)

  • PDF: 1 slide per page
  • StartOffice
2. Lab 
  • 4122_jsfajax4jsf.zip (Unzip it in a directory of your choice and read lab document from <unzip-directory>/jsfajax4jsf/index.html to proceed)
  • Online lab document (This is the same document you will find in the hands-on lab zip file)

3. Resources

                                                                                                                    return to topics

JSF and Portlets

1. Presentation slides (1.5 hour)

  • PDF: 1 slide per page
  • StartOffice
2. Lab 
  • 4122_jsfajax4jsf.zip (Unzip it in a directory of your choice and read lab document from <unzip-directory>/jsfajax4jsf/index.html to proceed)
  • Online lab document (This is the same document you will find in the hands-on lab zip file)
3. Resources


                                                                                                                    return to topics

Testing tools

1. Presentation slides (1.5 hour)

  • PDF: 1 slide per page
  • StarOffice
2. Lab  
3. Resources

                                                                                                                    return to topics

Localization

1. Presentation slides (1.5 hour)

2. Lab  
3. Resources

                                                                                                                    return to topics


EJB 2.x (as part of J2EE 1.4)


EJB 2.x Overview

1. Presentation slides (1 hour)

2. Lab and homework (2 hours) - work in progress
  • 4281_j2eeejb2.zip (Unzip it in a directory of your choice and read lab document from <unzip-directory>/ajaxshale/index.html to proceed)
  • Online lab document (This is the same document you will find in the hands-on lab zip file)
                                                                                                                              return to topics

Message Driven Bean (MDB)


                                                                                                                              return to topics

JMS

1. Pre-class reading

2 Presentation slides (1 hour)

3. Lab and homework (2 hours)
  • 4281_j2eejms.zip (Unzip it in a directory of your choice and read lab document from <unzip-directory>/ajaxshale/index.html to proceed)
  • Online lab document (This is the same document you will find in the hands-on lab zip file)
4. Resources

                                                                                                                              return to topics

Session Bean (EJB 2.x)

1. Presentation slides (1 hour)

                                                                                                                              return to topics

Entity Beans (EJB 2.x)

1. Presentation slides (1 hour)

                                                                                                                              return to topics


Java EE 5 & EJB 3.0 & JPA


Introduction to Java EE 5


Java EE 5 is a major major release in the evolution of Java EE with lots of new features. It has a huge emphasis on the ease of development.  The ease of development features include using annotations instead of deployment descriptors, simplified EJB development, use of dependency injection for accessing resources, Java Persistence API (JPA), and annotation based Web service development.  The goal of this presentation and hands-on lab is to give you overall sense of the Java EE features.

1. Presentation slides  - Java EE 5 Overview (1 hour)

2. Presentation slides - Java EE 5 support in NetBeans 5.5

3. Resources
                                                                                                                    return to topics

EJB 3.0 Enterprise Beans


The new EJB 3.0 API makes software development easier by reducing and simplifying the amount of work required from the developer. In other words, fewer classes and less code. This is possible because more of the work is now performed by the container.

1. Presentation slides (1 hour)

2. Presentation slides 2

This is JavaOne 2006 presentation by Michael Keith and Linda DeMichiel, Peter Walker, and Ron Ten-Hove.  You have to register to Sun Developer Network in order to watche the video.
3. Lab and homework
4.  Resources
                                                                                                                    return to topics

Java Persistence API (JPA) Basics


The Java EE 5 platform introduces the new Java Persistence API, which was developed as part of JSR-220. The Java Persistence API can also be used outside of EJB components, for example, in web applications and application clients, and also outside the Java EE platform, in Java SE applications. 

1. Presentation slides 1 (1 hour)

2. Presentation slides 4

This is JavaOne 2006 presentation by Michael Keith and Linda DeMichiel, Peter Walker, and Ron Ten-Hove.  You have to register to Sun Developer Network in order to watche the video.
3. Lab and homework
4. Resources

                                                                                                                              return to topics

Java Persistence API (JPA) Mapping


1. Presentation slides
2. Lab  (1 hour)

3. Resources

                                                                                                                             return to topics


JPA Query Language


1. Presentation slides
2. Lab  (1 hour)
  • 3412_javaee5jpajpql.zip (Unzip it in a directory of your choice and read lab document from <unzip-directory>/javaee5jpajpql/index.html to proceed) 
  • Online lab document (This is the same document you will find in the hands-on lab zip file)

                                                                                                                             return to topics

JPA Advanced


1. Presentation slides
2. Lab  (1 hour)
  • 3412_javaee5jpajpql.zip (Unzip it in a directory of your choice and read lab document from <unzip-directory>/javaee5jpajpql/index.html to proceed) 
  • Online lab document (This is the same document you will find in the hands-on lab zip file)
3. Resources

                                                                                                                             return to topics

Java Persistence API (JPA) Transaction


1. Presentation slides
2. Presentation slides  2

This is JavaOne 2007 presentation by Michael Keith.  You have to register to Sun Developer Network in order to watche the video.
3. Presentation slides 3

This is JavaOne 2007 presentation by Rima Patel and Marina Vatkina.  You have to register to Sun Developer Network in order to watche the video.
         4. Lab  (1 hour)

                                                                                                                   return to topics


Design Patterns, Best Practices, and Performance Tuning


Java EE Design Patterns


1. Presentation slides (1 hour)


                                                                                                                              return to topics


Performance Tuning


1. Presentation slides (1 hour): Servlet Performance

2. Lab  (1 hour) using NetBeans Enterprise Pack
  • 5115_netbeansprofiler.zip (Unzip it in a directory of your choice and read lab document from <unzip-directory>/javaswing/index.html to proceed)
  • Online lab document (This is the same document you will find in the hands-on lab zip file)

                                                                                                                              return to topics

UML


1. Presentation slides - Object-oriented Concepts

2. Presentation slides  - OO Analysis

3. Presentation slides -  OO Design

4. Presentation slides - UML

5. Lab  (1 hour) using NetBeans Enterprise Pack

  • 8105_nbeuml.zip (Unzip it in a directory of your choice and read lab document from <unzip-directory>/nbeuml/index.html to proceed)
  • Online lab document (This is the same document you will find in the hands-on lab zip file)
                                                                                                                            return to topics


Other Web-tier Frameworks


Shale

1. Presentation slides (1 hour)

2. Lab and homework (2 hours) - work in progress
  • 4261_webshale.zip (Unzip it in a directory of your choice and read lab document from <unzip-directory>/webshale/index.html to proceed)
  • Online lab document (This is the same document you will find in the hands-on lab zip file)
3. Resources

                                                                                                                              return to topics


Echo2


1. Presentation slides

  • PDF: 1 slide per page
  • StarOffice file
2. Lab 2 (2 hours) - work in progress
  • 4282_ajaxecho2.zip (Unzip it in a directory of your choice and read lab document from <unzip-directory>/ajaxecho2/index.html to proceed)
  • Online lab document (This is the same document you will find in the hands-on lab zip file)
3. Resouces
                                                                                                                              return to topics

Tapestry


1. Presentation slides

  • PDF: 1 slide per page
  • StarOffice file
2. Resources

                                                                                                                              return to topics


Wicket


1. Presentation slides

  • PDF: 1 slide per page
  • StarOffice file
2. Resources


                                                                                                                              return to topics

Comparing various Java Web Application frameworks


1. Presentation slides

2. Resources

                                                                                                                              return to topics


Hibernate


Hibernate Step By Step


This session takes you through the basics of building a simple HelloWorld Hibernate application.  Even though you are building the simplest possible Hibernate application, you will get an exposure to the relatively complete concept of Hibernate.  You will also learn how to display context sensitive Java document on Hibernate classes.
                                                                                                                              return to topics

Hibernate Basics


In this session, you are going to learn the basic concepts of Hibernate including transaction demarcation, using DAO pattern, generating keys using different schemes, event handling, and session management.
                                                                                                                              return to topics

Hibernate Mapping


In this session, you are going to learn various mapping strategies including cadinalities (one to many relationship, many to many relationship), and how class hierarchy is represented in the database tables through inheritance strategies.
                                                                                                                              return to topics

Hibernate Support in NetBeans IDE 6.5


                                                                                                                              return to topics

Hibernate Query Language


In this session, you are going to learn how to perform query operations using Criteria Query API, Query By Example, HQL, and native SQL.

                                                                                                                              return to topics

Hibernate Transaction and Concurrency


                                                                                                                              return to topics

Hibernate Interceptors & Events - Work in progress


                                                                                                                              return to topics


Hibernate Join Fetch (N+1 Select Problem, Join Fetch, Lazy Fetch)


The fetch mode you choose in using Hibernate will have performance consequences especially if you fall into a trap of N+1 selet problem. In this session, you will learn the basic concepts of the fetch modes and also N+1 select problem and how to avoice it.

                                                                                                                              return to topics

Hibernate Caching


In this session, some of the advanced topics of Hibernate such as caching strategies will be talked about.

                                                                                                                              return to topics

Hibernate Annotation - work in progress


                                                                                                                              return to topics

Hibernate Best Practices - work in progress


                                                                                                                              return to topics


Spring Framework


Refactoring HelloWorld Application using Spring Framework


You are going to learn how to refactor the good old "HelloWorld" application in various ways including the usage of Dependency Injection (DI) scheme of the Spring framework.
                                                                                                                              return to topics

Spring Framework Dependency Injection Basics


Dependency Injection (DI) is the one of the foundation of the Spring framework.  You are going to learn how to use the basic usage of DI in this session.

                                                                                                                              return to topics

Spring Framework Dependency Injection Advanced


                                                                                                                              return to topics

Spring framework and Hibernate


                                                                                                                              return to topics


Spring framework and JPA


                                                                                                                              return to topics


Spring MVC


                                                                                                                              return to topics

Spring Validation, Data-binding, BeanWrapper, and Property Editor


  • Presentation
    • PDF: 1 slide per page
    • StarOffice 8 file
  • Lab
    • 4918_springmvc.zip (Unzip it in a directory of your choice and read lab document from <unzip-directory>/springmvc/index.html to proceed)
    • Online lab document (This is the same document you will find in the hands-on lab zip file)
    • Homework
    • Change log
  • Resources
                                                                                                                              return to topics

Spring Web Flow


Spring Web Flow is a next generation Java web application framework that allows developers to model user actions as high-level modules called flows that are runnable in any environment.  The framework delivers improved productivity and testability while providing a strong solution to enforcing navigation rules and managing application state. 
                                                                                                                              return to topics

Spring Integration with Struts


                                                                                                                              return to topics

Spring Integration with JavaServer Faces (JSF)


                                                                                                                              return to topics

Spring AOP Basics


                                                                                                                              return to topics


Spring framework and J2EE (EJB and JMS)


                                                                                                                              return to topics

Spring framework and Web Services


                                                                                                                              return to topics

Spring framework and Transaction


                                                                                                                              return to topics

Spring and Testing


                                                                                                                              return to topics

Spring framework sample applications - PetClinic


  • Presentation
    • PDF: 1 slide per page
    • StarOffice 8 file
  • Lab
                                                                                                                              return to topics


Advanced Spring Framework


                                                                                                                              return to topics

Acegi Security with Spring framework


                                                                                                                              return to topics


Portlets and Portals


Portlet Basics -


                                                                                                                              return to topics


Struts 2


Struts 2 Basics


                                                                                                                              return to topics

Struts 2 and Other View Technologies


  • Presentation
    • PDF: 1 slide per page
    • StarOffice 8 file
  • Lab
    • 4221_struts2basics.zip (Unzip it in a directory of your choice and read lab document from <unzip-directory>/struts2basics/index.html to proceed)
    • Online lab document (This is the same document you will find in the hands-on lab zip file)
    • Homework
    • Change log
  • Resources
                                                                                                                              return to topics

Struts 2 and Ajax


  • Presentation
    • PDF: 1 slide per page
    • StarOffice 8 file
  • Lab
    • 4221_struts2basics.zip (Unzip it in a directory of your choice and read lab document from <unzip-directory>/struts2basics/index.html to proceed)
    • Online lab document (This is the same document you will find in the hands-on lab zip file)
    • Homework
    • Change log
  • Resources
                                                                                                                              return to topics

Sun Provisioning Server (SPS)


                                                                                                                              return to topics


GlassFish


GlassFish Overview


1. Presentation slides (1 hour)

2. Presentation slides 2

This is from JavaOne 2006 presentation.  You have to register to Sun Developer Network in order to watche the video.

3. Labs
  • Building GlassFish using Netbeans tutorial from netbeans.org

                                                                                                                              return to topics


GlassFish V3


                                                                                                                              return to topics

SailFin Project


Posted by 1010
반응형

도메인이 다른 경우

도메인 a1
도메인 a2

a1에서 a2를 호출해서 popup을 띄운다.

a2 버튼 클릭 후 a1을 reload 하고 a2를 close 시키려면 문제가 생긴다.

window.opener.location.reload(); 호출 시 도메인이 달라서 opener를 못찾기 때문이다.

<script>document.domain="도메인 명";</script>

==> cross domain 이라고 검색하면 나옴..

http://coolengineer.com/entry/avoid-cross-domain-1

Posted by 1010
05.JSP2009. 1. 23. 15:10
반응형

먼저 다음 페이지 이동 특성들을 미리 알아볼 필요가 있습니다

JSP에서는 페이지 이동시 다음 4가지 정도의 방법이 있습니다


JavaScript를 이용

window.open, location.href, location.replace 등을 이용할수 있습니다


login_process.jsp

<% if (a == null) { %>

      <script>location.href = "admin.jsp"; </script>

<% } else { %>

      <script>alert('권한이 없어요!'); window.history.back(); </script>

<% } %>


특징적인부분은 브라우져의 주소창이 변경되며

(이말은 즉슨 클라이언트가 다시 admin.jsp를 서버에 요청한다는 말입니다)

login_process.jsp 에서 jsp가 다 실행되고 브라우져에 out put된 html 및 javascript들만으로

실행된 코드들이라는 것입니다


response.sendRedirect를 이용

login_process.jsp

<% if (a == null) {

          response.sendRedirect("admin.jsp");

     } else {

          response.sendRedirect("login.jsp");

     }


     a = "test 입니다";

     System.out.println(a);

%>


이 코드에서 a가 출력될까요 안될까요?

출력 됩니다.

sendRedirect가 되더라도 밑에 jsp 코드들은 모두 실행 된다는 말입니다

response.sendRedirect는 기본적으로 모든 로직들을 다 처리한 후 코드 맨 마지막 부분에

사용하는 것이 올바른 방법입니다

만약 그렇지 못한 경우는 response.sendRedirect 다음 바로 return; 이라는 코드를 집어 넣어야 합니다


response.sendRedirect은 HTTP 헤더정보를 변경하여 redirect시키기 때문에 역시 브라우져의 주소창이 변경되며 sendRedirect가 실행되기전 html이나 javascript로 out put되는 코드들은 모두 실행되지 않습니다.


forward 이용

jsp 태그의 <jsp:forward> 나 servlet의 RequestDispatcher.forward 를 이용할수 있습니다


login_process.jsp

<% if (a == null) { %>

          <jsp:forward page="admin.jsp"/>

<% } else { %>

          <jsp:forward page="login.jsp"/>

<% }


     a = "test 입니다";

     System.out.println(a);

%>


그럼 위의 코드의 경우 a가 출력 될까요 안될까요?

정답은 출력 안됩니다. 바로 forward 되어 버립니다.

클라이언트로 응답주지 않고 바로 서버측에서 admin.jsp로 이동하기 때문에

주소창이 바뀌지 않고 그로인해 브라우져에 출력되는 응답속도 또한 사용자가 보기에는

응답이 빠른 장점이 있습니다


하지만 forward 이후 JSP 코드들이 실행되지 않는것 사실이지만 만약 finally절이 있는경우

finally절은 실행 됨으로 확실히 알아둡시다.


meta 태그 이용

마지막으로 meta 태그를 이용할 수도 있습니다.


<META http-equiv=refresh content="0;url=admin.jsp">


즉 요약하자면..

페이지 이동 방법이 여러가지가 있습니다.

그 특성들을 잘 알고 올바르게 사용하여야 합니다.

Posted by 1010
51.Struts22009. 1. 23. 15:10
반응형
1. 이클립스 설치 http://eclipse.org -> Download 3.3 version
    - tomcatplugin
      http://www.sysdeo.com/eclipse 아래쪽에 tomecatplugin 클릭
      tomcatPluginV31.zip 다운
2. TomCat http://tomcat.apache.org 다운후 설치 struts도 다운

3. 이클립스에서 스트럿츠를 편리하게 사용하기 위해서는
    GEF(Graphical Editing Framework), htmleditor, strutsIDE가 필요하다.
    GEF : http://www.eclipse.org/gef/ 
    htmleditor :
    http://amateras.sourceforge.jp/cgi-bin/fswiki_en/wiki.cgi?page=EclipseHTMLEditor
    strutsIDE : https://sourceforge.jp/projects/amateras/files/?release_id=24130#24130

4. 라이브러리 다운후 각 파일을 압축을 풀고
    - GEF는 eclipse가 설치된 폴더에 붙여넣기 한다.
    - htmleditor과 strutsIDE 는 eclipse설치파일/plugins에 붙여넣기 한다.

5. 이제 프로젝트를 시작해 보자.
    이클립스를 켜고 프로젝트를 생성한다. 프로젝트 - 동적 웹

6. 프로젝트 생성 후 struts를 추가한다.
    프로젝트를 클릭후 마우스 오른쪽 - new - other을 선택
    Amateras/struts 폴더 밑에 add struts support를 선택하고 next한다.
    tiles와  validator plugin을 사용하겠다는 것!! finish 클릭

7. web-inf아래에  Struts-config파일이 생성되었다면 성공 이제 스트럿츠를 사용해 보자!!

8. 설정
<tomcat 설정>
    윈도우 - 설정 - tomcat5.5 - context file 설정 - 확인
    포트바꾸기 : tocathome\conf\server.xml 8080을 원하는것으로
<java 설정>
    윈도우 -  설정 - Java - 설치된 jre - 추가 클릭
Posted by 1010
98..Etc/velocity2009. 1. 23. 15:06
반응형

<%
int count;
%>

<h3>A sample <%= count %></h3>

<% if ("foo".equals(request.getParameter("a"))) { %>
  <h3>Foo!</h3>
<% } else { %>
  <h3>Bar!</h3>
<% } %>

접기

velocity의 경우 :

접기

<jsp:directive.page velocity='true'/>
#{
int count;
}#

<h3>A sample ${count}</h3>

#if ("foo" == params.a)
  <h3>Foo!</h3>
#else
  <h3>Bar!</h3>
#end

Posted by 1010