'분류 전체보기'에 해당되는 글 2491건

  1. 2008.12.16 유닉스에서 개발 웹 서버 설치, 설정하기5
  2. 2008.12.16 유닉스에서 개발 웹 서버 설치, 설정하기4
  3. 2008.12.16 유닉스에서 개발 웹 서버 설치, 설정하기3
  4. 2008.12.16 유닉스에서 개발 웹 서버 설치, 설정하기2
  5. 2008.12.16 유닉스에서 개발 웹 서버 설치, 설정하기1 1
  6. 2008.12.16 How to Quickly Install the Solaris 10 10/08 OS on x86 Systems
  7. 2008.12.16 Quick Installation Guide for Solaris Operating System (SPARC)
  8. 2008.12.16 oracle 11g 설치 가이드(모든 OS)
  9. 2008.12.16 Linux에서 CPU 사용률 구하기
  10. 2008.12.16 솔라리스 어드민 요약본
  11. 2008.12.16 solaris 해상도/그래픽 카드 설정 및 확인 1
  12. 2008.12.16 솔라리스 10 오라클 10g 설치
  13. 2008.12.16 솔라리스10 x86에서 오라클 10g 설치 하기
  14. 2008.12.15 Solaris 정보확인 명령어
  15. 2008.12.15 Solaris 10 Public Ftp 구축 하기
  16. 2008.12.15 C 프로그래밍에서 MySQL을 사용하기 위한 준비
  17. 2008.12.15 웹사이트를 통째로 다운로드 할 수 있는 무료 소프트웨어
  18. 2008.12.15 어제 오픈한 네이버 개발자 센터 오픈소스 프로젝트들.
  19. 2008.12.15 훌륭한 무료 소프트웨어로 내 PC를 토핑해볼까?
  20. 2008.12.15 RMI_원격서비스 만드는법
  21. 2008.12.15 Java - RMI통신 기본개념 이해
  22. 2008.12.15 [RMI] 간단한 계산식
  23. 2008.12.15 Struts로 게시판 만들기 - View(jsp)
  24. 2008.12.15 Apache AXIS를 이용한 웹서비스 강좌
  25. 2008.12.15 솔라리스에서 호스트 이름 혹은 IP 주소 변경하기
  26. 2008.12.15 시스템 디스크 교체 후 E3500 부팅 절차
  27. 2008.12.15 솔라리스 네트워크 명령어
  28. 2008.12.15 솔라리스 아이피 설정 3
  29. 2008.12.15 솔라리스 랜카드 설정 (solaris lan card setting)
  30. 2008.12.15 웹 서버를 위한 솔라리스 튜닝
60.Unix2008. 12. 16. 17:10
반응형

유닉스에서 개발 웹 서버 설치, 설정하기

빠르고 기능이 풍부하고 자유롭게 사용 가능한 웹 서버를 만들면서 여러분의 유닉스 실력을 한 단계 높여보자

developerWorks
Go to the previous page 12 페이지 중 6 페이지 Go to the next page

문서 옵션
수평출력으로 설정

이 페이지 출력


제안 및 의견
피드백

튜토리얼 평가

이 컨텐츠를 개선하기 위한 도움을 주십시오.


서버 설정, 컴파일 시작

필자가 작업해온 모든 아파치 제품에는 설정, 컴파일, 시작 단계가 포함된다. 이 과정은 코드를 준비하고 소프트웨어가 어떻게 그리고 어디에 설치될지 등에 대해 알려주게 된다.

소프트웨어 설정하기

톰캣 소프트웨어를 설정하려면 다음과 같이 타이핑한다.

cd $CATALINA_HOME/bin

./configure --with-java=/usr/java

또는 다음과 같다.

export JAVA_HOME
./configure


위로


코드 컴파일하기

톰캣 코드를 컴파일했다면 이제 컴파일한다.

바이너리와 라이브러리 빌드하기

Listing 5에 톰캣 바이너리와 라이브러리를 빌드하는 코드를 보였다.


Listing 5. 바이너리와 라이브러리 빌드하기
                    
# gunzip jsvc.tar.gz

# pwd
/opt/apache-tomcat-6.0.16/bin

# tar -xvf jsvc.tar

# gmake 

gmake가 위치한 경로가 PATH에 있는지 확인하기 바란다(예를 들어 ./sfw/bin/).

기억해둘 것: 톰캣 사이트에서는 FreeBSD 시스템의 자체 BSD make 명령어 대신 GNU make(gmake)를 사용해야 한다고 언급하고 있다.

Listing 6의 코드로 실행 파일인 .jsvc를 생성한다. 이 파일은 톰캣을 데몬으로 성공적으로 구동하는 데 필요하다.

jsvc에 대한 간단 명료한 정의

jsvc는 런처(launcher) 프로세스, 통제(controller) 프로세스, 통제되는(controlled) 프로세스 이렇게 세 개의 프로세스를 사용한다. 통제되는 프로세스는 주 자바 쓰레드다. 이 주 자바 가상 머신(JVM)이 비정상적으로 종료되면 통제 프로세스, 즉 컨트롤러 다음에 재시작한다. jsvc는 데몬 프로세스이므로 root로 시작해야 한다. 인자값으로 -user를 주면 root 권한이 없는 사용자로도 동작시킬 수 있다.


Listing 6. jsvc에 권한을 설정하여 복사하기
                    
chmod 775 jsvc
cp jsvc ..
cd ..


위로


서버 시작하기

CLI나 내장된 서버 형태로 된 자바 프로그램으로 서버를 시작할 수 있다. 게다가 서버는 데몬 형태로 구동할 수 있는데 이렇게 하면 윈도 환경에서 서비스와 비슷한 형태로 자동 구동된다.

기본 시작 스크립트 구동하기

Listing 7에서는 톰캣용 기본 시작 스크립트를 보였다.


Listing 7. 기본 시작 스크립트
                    
cd $CATALINA_HOME/bin
./startup.sh 
cd ../logs

에러가 나는지 catalina.out을 확인하기 바란다. cat, vi, more, less를 쓴다면 파일 아래로 갈 때 시프트+G키를 누른다. 아니면 다음과 같이 타이핑할 수도 있다.

tail -50 catalina.out

위처럼 하면 에러 파일의 마지막 50번째 줄까지 체크할 수 있다.

이렇게 하는 게 이 튜토리얼의 범위를 넘어가긴 하지만 톰캣 코드를 수정하거나 스스로 LifecycleListeners를 구현하여 시작 프로세스를 입맛에 맞게 고칠 수도 있다.

시작 데몬 구동하기

데몬은 다양한 옵션을 사용해 시작할 수 있다. 이를테면 root가 아닌 사용자로 구동하려면 -user를 주거나, 특정 .pid 파일 위치를 명시하려면 -pid 옵션을 준다거나, 에러 및 출력 파일 로그를 설정하려면 각각 -errfile-outfile을 준다거나 할 수 있다. 어떤 옵션이 지원되는지 전체 내용을 보려면 ./jsvc -help라고 타이핑한다. Listing 8에서 jsvc 시작 스크립트의 예를 보였다.

데몬이란 무엇인가?

데몬은 비 대화형(non-interactive) 서버 애플리케이션으로서 명시한 시그널(signal)들을 운영체제가 통제하게 된다. 윈도에서 서비스를 떠올려보자. 윈도의 서비스는 서버 애플리케이션의 정상적인 셧다운을 위해 제공된다. 운영체제는 셧다운이 절박한 상황인 경우 서버 애플리케이션에게 이를 고지하게 되고 애플리케이션은 수행중인 과정을 끝내기 전에 어떤 작업을 수행할 수 있도록 할 여지가 생기게 된다.


Listing 8. jsvc 시작 스크립트의 예
                    
Bash#./jsvc –home /usr/jdk/instances/jdk1.5.0 \
–Dcatalina.home=/opt/apache-tomcat-6.0.16 \
-cp ./bin/bootstrap.jar -outfile ./logs/catalina.out \
-errfile ./logs/catalina.err \
       org.apache.catalina.startup.Bootstrap

jsvc/bin 디렉터리에 포함되어 있는 Tomcat.sh 스크립트를 사용하는 것도 꽤 도움이 된다. 하지만 여러분 환경에 맞게끔 경로 같은 것들을 맞춰서 변수를 편집할 필요는 있을 것이다.


위로


톰캣 설치 테스트하기

기본 톰캣은 http 포트 8080에 내부 HTTP 서버를 설치한다(Coyote HTTP/1.1). 이 아키텍처와 설정을 위해 아파치 HTTP 서버가 별도로 필요하지는 않다. $CATALINA_HOME 디렉터리의 server.xml 파일을 수정해서 80 같은 전형적인 웹 서버 포트 번호로 간단히 변경할 수 있다. 또한 기본 SSL(Secure Sockets Layer) 포트도 전형적인 SSL 포트 번호인 443으로 간단히 변경할 수 있다. server.xml 파일은 톰캣이 핵심 설정 서버 정보를 얻는 곳이라 할 수 있다.

http://localhost:8080/을 가보는 것으로서 톰캣이 성공적으로 구동되었는지 여부를 판별해볼 수 있다. 제대로 되었다면 그림 3과 비슷한 시작 페이지를 볼 수 있어야 한다.


그림 3. 톰캣 관리 콘솔 환영 페이지
톰캣 최초의 시작 페이지
Posted by 1010
60.Unix2008. 12. 16. 17:09
반응형

유닉스에서 개발 웹 서버 설치, 설정하기

빠르고 기능이 풍부하고 자유롭게 사용 가능한 웹 서버를 만들면서 여러분의 유닉스 실력을 한 단계 높여보자

developerWorks
Go to the previous page 12 페이지 중 5 페이지 Go to the next page

문서 옵션
수평출력으로 설정

이 페이지 출력


제안 및 의견
피드백

튜토리얼 평가

이 컨텐츠를 개선하기 위한 도움을 주십시오.


서버 설치 파일 다운로드, 추출하기

서버 설치 파일을 추출하는 다양한 방법을 찾아보자.

설치 파일을 찾아 옮기기

GUI를 사용하고 있다면 Launch > Applications > Utilities > Terminal을 선택해 터미널 창을 연다. 파일을 바탕 화면에 저장했고 아직 root 사용자라면 cd /Desktop 명령어를 입력한다. ls -ltr이라고 명령어를 실행하여 톰캣의 tar.gz 파일이 거기에 있는지 살핀다. 그러고 나서 그 파일을 /opt 디렉터리 아래로 옮긴다(/opt 디렉토리는 대부분의 신규 소프트웨어가 설치되는 디렉터리다). 설치 파일을 옮기려면 다음과 같이 타이핑한다.

mv *tar.gz /opt

그러고 나서 ls -ltr /opt를 타이핑하여 파일이 제 위치에 있는지 확인한다.

권한 설정하기

권한은 유닉스 시스템의 근원이다. 적절한 권한이 없다면 아무것도 할 수가 없다. 어떤 것에 대한 권한 제한 없이는 어떠한 사용자라도 어떠한 일이든 할 수가 있다. 이는 우선 설치에서 여러분 스스로에게 가장 높은 수준의 권한을 주어서 여러분(혹은 다른 사용자가) 적절히 실행 가능하도록 하게끔 해야 하는 이유다. 다음으로 Listing 4에 보인 대로 설치 코드를 풀어낼 때 모든 임시 및 설치 디렉터리에 적절히 쓰기가 이뤄질 수 있도록 umask 명령어를 사용한다.


Listing 4. 적절한 권한과 umask 설정
                    
cd /opt
chmod +x *gz (same as chmod 775)
umask 007 (사용자가 770 권한을 갖고 신규 파일을 생성할 수 있도록 한다. chmod를 역으로 생각해 보라.)


위로


설치 파일 추출하기

대부분의 코드 패키지는 .tar 파일 형태이며 좀 더 크기를 줄이고자 .gz 파일 형태를 갖고 있다. 간단히 gunzip 명령어를 써서 압축을 해제할 수 있다.

gunzip *.gz


위로


.tar 파일 추출하기

마지막으로 코드를 "untar"(풀어내기) 해야 한다. 묶어 놓았던 것을 정확히 그대로 코드를 추출해내는 것이다(디렉터리를 비롯하여 모두 다). 이것이 바로 필요한 디렉터리 경로 하에 파일을 untar하는 것이 중요한 이유다. 유닉스에서는 /opt가 최상의 위치다.

tar -xvf *.tar

이 명령어를 쓰면 애플리케이션 파일이 추출된다. ls -latr을 쓰면 추출된 파일을 볼 수 있다. 몇 가지 .bat나 .exe 파일로 설치가 되었다면 다음과 같이 타이핑해 삭제한다.

rm *.exe
rm *.bat

톰캣 디렉터리가 만들어졌으니 서버 설정, 컴파일, 시작으로 가보자.

Posted by 1010
60.Unix2008. 12. 16. 17:09
반응형

유닉스에서 개발 웹 서버 설치, 설정하기

빠르고 기능이 풍부하고 자유롭게 사용 가능한 웹 서버를 만들면서 여러분의 유닉스 실력을 한 단계 높여보자

developerWorks
Go to the previous page 12 페이지 중 4 페이지 Go to the next page

문서 옵션
수평출력으로 설정

이 페이지 출력


제안 및 의견
피드백

튜토리얼 평가

이 컨텐츠를 개선하기 위한 도움을 주십시오.


서버 준비하기

변수를 설정하고 설정 파일을 수정한 뒤 사용자를 생성하는 등 여러 작업을 하여 서버를 준비하자.

경로 설정

서버에 설치해야 하는 도구뿐 아니라 셸에 대해 PATH 변수 설정을 정확히 할 필요가 있다. PATH 변수는 셸이 어떤 소프트웨어와 도구 등이 어디에 있는지 찾는 위치를 알려준다.

자바 버전 점검

사용중인 자바 기술 버전을 점검하려면 java -version 명령을 사용하라. 그러면 다음과 같은 내용을 보게 될 것이다.

bash-3.00# java -version
java version "1.5.0_12"
Java(TM) 2 Runtime Environment, Standard Edition (build 1.5.0_12-b04)
Java HotSpot(TM) Client VM (build 1.5.0_12-b04, mixed mode, sharing)

JAVA_HOME

먼저 릴리스에 포함된 지시에 따라 JRE를 설치해야 한다. 필자는 보통은 JRE보다는 자바 소프트웨어 개발 키트(JDK)를 사용한다. 여러분도 그렇게 하기로 했다면 JDK를 설치한 디렉터리의 경로 이름(예를 들어 /usr/local/java/j2sdk5.0)을 JAVA_HOME 환경 변수에 설정한다. JAVA_HOME 변수를 설정하려면 다음 코드를 사용한다.

bash-3.00# export JAVA_HOME=/usr/jdk/instances/jdk1.5.0

다음과 같이 할 수도 있다.

JAVA_HOME=/usr/bin/java; export JAVA_HOME'

(차이점은 없다).

명령이 제대로 동작하는지 체크하기 위해 echo 명령어를 타이핑해 본다.

bash-3.00# echo $JAVA_HOME
/usr/jdk/instances/jdk1.5.0

CATALINA_HOME(톰캣의 기본 홈 디렉터리)

CATALINA_HOME은 릴리스 디렉터리의 완전한 경로 이름을 참조하는 데 사용한다. 이 변수를 설정하려면 다음 코드를 사용한다.

bash-3.00# export CATALINA_HOME=/opt/apache-tomcat-6.0.16 

이 코드는 설치한 톰캣 버전에 따라 달라진다. 의심이 간다면 추출한 .tar 파일을 보고 이름을 붙이기 바란다. 이름에 정확한 버전이 붙어있기 때문이다.

셸과 설정 파일 편집

예제 명령어에서 bash에 대한 몇 가지 참조할 내용을 얻었을 것 같다. 유닉스에 로그인한 사용자들은 지루하게 자세한 내용에는 매달리지 않고 서버를 살펴보고 관리할 수 있는 CLI를 수행하고 서버를 벗어난다. 다른 운영체제와 다른 점이라고 할 수는 없지만 본 셸(Borune shell, sh)이나 본 어게인 셸(Bourne-again shell, bash) 같은 것들을 타이핑하여 해당 셸을 정의할 수 있다는 점에서 좀 더 유연성을 제공한다.

추가로 사용하는 셸에 따라 자동으로 PATH 변수를 설정하고 서버 상의 유용한 공통 명령어를 표현하는 별칭(alias) 설정도 할 수 있는 등 CLI에 맞게 맞춤 셸 프로파일을 수정할 수 있다. 그러기 위해선 .bashrc, .profile(bash의 기본 파일) 등을 수정해야 한다. 이 파일을 생성하려면 vi 편집기를 사용한다. 그러고 나서 root, 개인 계정, 톰캣 사용자 ID에 맞게 서버에 로그인할 때마다 PATH 변수가 적절히 설정될 수 있도록 편집해준다.

홈 디렉터리 하에서 .profile 파일을 생성한다(Listing 1 참조). 없다면 표준 유닉스 편집기인 vi를 사용하여 생성한다.


Listing 1. 표준 유닉스 편집기를 사용하여 .profile 생성하기
                    
cd ~/ (home dir)
vi .profile

문자 삽입(insert)을 위해 i를 누른다. 그러고 나서 위에서 설정할 경로를 추가한다. 다음과 같을 것이다.

# /bin/sh
stty istrip
PATH=$PATH:/usr/bin:/usr/local/bin:/usr/ucb:/etc
export PATH
umask 077

export SHELL=/usr/bin/ksh
export ENV=$HOME/.kshrc
export EDITOR=vi
export FCEDIT=vi

#Tomcat specific PATHs

export JAVA_HOME=/usr/jdk/instances/jdk1.5.0
export CATALINA_HOME=/opt/apache-tomcat-6.0.16

또한 이번이 앞으로 참조할 도구를 설치할 모든 영역을 커버할 PATH 변수에 덧붙일 좋은 때일 수도 있겠다. 필자가 설정한 걸 예로 들면 필자는 다음과 같이 두 경로를 넣었다.

bash-3.00# PATH=/usr/ccs/bin:$PATH; export PATH (for make cmd)
bash-3.00# PATH=/usr/sfw/bin:$PATH; export PATH


위로


사용자와 그룹

여러 사용자가 서버를 사용하게 된다면 당연히 각기 다른 사용자가 다양한 도구와 파일 시스템에 접근할 수 있도록 허용할 사용자와 그룹 권한을 설정하고 싶을 것이다. root가 아닌 사용자로 톰캣을 설치하여 동작시키려 한다면 이 또한 필수다(대부분의 실 서비스 환경에서 추천되는 방식이다). 튜토리얼 뒷 부분에서 이에 대해 자세히 다루겠다. 다만 여기서 명령어 몇 개 정도 나열하도록 한다.

톰캣 그룹을 생성하려면 Listing 2의 코드를 사용한다.


Listing 2. 톰캣을 구동할 그룹 생성하기
                    
/usr/sbin/groupadd -g {구체적인 gid 명시. 명시하지 않으면 OS가 gid를 알아서 할당해줄 것이다.} 
{그룹 이름}
말하자면 다음과 같다.
/usr/sbin/groupadd -g 10004 tomcatgroup

톰캣 사용자를 생성하려면 Listing 3의 코드를 사용한다.


Listing 3. 톰캣을 구동할 사용자 생성하기
                    
/usr/sbin/useradd -d {사용자 홈 디렉터리} -g {사용자가 속한 주 그룹} -u 
{구체적인 UID 명시. 이 란은 비워둘 수 있다. 명시하지 않으면 운영체제가 UID를 알아서 할당해줄 것이다.)  
-s {해당 사용자에 대한 기본 셸} -c "{사용자에 대한 상세 정보 명기}" {사용자 이름}
말하자면 다음과 같다.
/usr/sbin/useradd -d /export/home/tomcat -g tomcatgroup -u 10010 -s /bin/ksh -c 
"Main Tomcat Administrative User" tomcat
Posted by 1010
60.Unix2008. 12. 16. 17:08
반응형

유닉스에서 개발 웹 서버 설치, 설정하기

빠르고 기능이 풍부하고 자유롭게 사용 가능한 웹 서버를 만들면서 여러분의 유닉스 실력을 한 단계 높여보자

developerWorks
Go to the previous page 12 페이지 중 3 페이지 Go to the next page

문서 옵션
수평출력으로 설정

이 페이지 출력


제안 및 의견
피드백

튜토리얼 평가

이 컨텐츠를 개선하기 위한 도움을 주십시오.


아키텍처 개요

톰캣의 제약 사항과 전형적인 엔터프라이즈 환경이 어떻게 구성되는지 알아보자.

제약 사항

톰캣이 개발 환경에서 단일 서버로 돌아가도록 할 것인가? 꽤나 제한적이지 않은가? 그렇다. 사실이다! 톰캣은 사실 다운로드 횟수만 수백만 회이고 여러 잘 알려진 웹 사이트의 실 서비스 환경에서도 성공적으로 동작하고 있다. 하지만 거기엔 제약 사항이 있다.

상용 소프트웨어 제품(특히 IBM WebSphere Application Server)은 실 서비스 환경에서 훨씬 더 우월한데 J2EE를 완벽히 준수하고 추가 기능과 보안 기능을 갖추고 있다는 것이 주된 이유다. 기능적으로 완벽한 실 서비스 환경에서 톰캣을 구현하려고 한다면 기초를 갖추는 데 이 튜토리얼을 이용할 수 있을 것이다.

엔터프라이즈 환경

그림 1에서 보인 엔터프라이즈 아키텍처에 대한 것은 브라우저에서 엔터 키를 눌렀을 때 벌어지는 일들을 다소 정확하게 표현한 것이다. 이 아키텍처에는 IBM과 미 공군(United States Air Force)의 수억 달러짜리 미션 크리티컬 애플리케이션을 포함한 내가 봐온 나라 전역에서 고객을 위해 동작하는 애플리케이션들의 반복되는 요소들로 구성되어 있다.


그림 1. 엔터프라이즈 아키텍처의 예
엔터프라이즈 아키텍처의 예

A. 네트워크에 대한 경계

보통은 네트워크에 경계가 있다. 라우터나 방화벽, 그리고 웹 요청과 적절한 도메인을 일치시켜 주는 프록시 서버(엄밀히 말하면 리버스 프록시) 같은 것들 말이다. 어떤 인증의 수준이 있을 수도 있고, 심지어 DMZ(demilitarized zone)에 의해 보호받게 될 네트워크 상의 첫 서버에 도달하기도 전에 앞단의 IBM Tivoli® Access Manager(TAM)/TAM WebSEAL 서버 수준에서 허가를 받아야 할지도 모른다.

B. 웹 서버

다음엔 웹 서버다. 이런 서버들은 모두 수직적 그리고 수평적 장애 극복(failover) 기능을 갖추고 있는데 이 말 뜻은 각 단에서 분리되었지만 쌍둥이인 하드웨어가 존재하고 가능한 한 소프트웨어 단에서 복제해 둠을 의미한다. 웹 서버가 웹 요청을 받아서 정적인 내용을 제공하는 일을 한다면 또 다른 계층의 네트워크 디스패처(dispatcher: ND)를 갖거나 최소한 추가적인 라우팅을 수행하는 플러그인(IBM HTTP 서버(IHS) 플러그인 같은 것)을 가질 수도 있다.

C. 애플리케이션 서버(서블릿 엔진)

이제 J2EE 엔진(WebSphere Application Server)이다. J2EE 엔진은 웹 혹은 서블릿 컨테이너뿐 아니라 기본적인 것에서 전문적인 자바 함수와 비즈니스 로직을 다루는 EJB(Enterprise JavaBean) 컨테이너로 구성되어 있다. 웹 서비스와 IBM WebSphere MQ 메시지를 연결하는 등 무수히 많은 일을 하기 위해 여러 어댑터를 쓸 수도 있다. 그리고 자주 MySQL, IBM DB2®, 오라클(Oracle) 백엔드와 연결하는 데이터베이스 연결 풀도 갖는다.

LDAP(Lightweight Directory Access Protocol) 서버 그리고 옛날 방식의 서버들과 연결할 가능성이 있다면 실제 n-티어 아키텍처를 갖는다. 이제 웹 서버 환경을 시작해 보자.


위로


개발 환경

그림 2를 보자. 브라우저를 통해 인터넷에 접근할 수 있는 도구를 일부 갖고 있는 단일 유닉스 운영체제에 단일 서버 설치에 기반을 둔다고 가정하자. 이 서버에는 톰캣, 여러 운영체제 수준의 도구들뿐만 아니라 (가능하다면) 자체 로컬 데이터베이스나 최소한 로컬 저장소(로컬 디렉터리 구조)에 저장되는 소프트웨어와 애플리케이션 코드도 함께 저장될 것이다.

기억해둘 것: 필자가 톰캣 서버라 함은 전체 컨테이너를 의미한다.


그림 2. 독립형 서버 아키텍처의 예
독립형 톰켓 서버

실제 엔터프라이즈 아키텍처처럼 보이진 않겠지만 적어도 서버에서 기본적인 애플리케이션 기능을 복제할 수 있을 것이다. 제한적이긴 하지만 의도와 목적면에서 여러분이 관리자라면 이번에 설치해 보는 것은 예제로 테스트 개발 서버를 설치한다거나 그저 연습삼아 써볼 서버를 설치한다고 생각하자.

아파치 HTTP 서버 프런트 엔드와 톰캣을 분리해서 설정하여 구동할지 선택할 수 있으나 이 튜토리얼의 목적 상 추천하지는 않는다. 좀 더 해야 할 일도 많고 관리하고 설정할 것도 많아지기 때문이다. 또한 mod_jk 모듈도 필요할 것이고 적절히 라우팅도 설정해야만 한다.

어느 쪽을 택하든 설치와 설정을 하기 전에 공통 질문으로 가자.

Posted by 1010
60.Unix2008. 12. 16. 16:52
반응형

유닉스에서 개발 웹 서버 설치, 설정하기

빠르고 기능이 풍부하고 자유롭게 사용 가능한 웹 서버를 만들면서 여러분의 유닉스 실력을 한 단계 높여보자

developerWorks
12 페이지 중 1 페이지 Go to the next page

문서 옵션
수평출력으로 설정

이 페이지 출력


제안 및 의견
피드백

튜토리얼 평가

이 컨텐츠를 개선하기 위한 도움을 주십시오.


난이도 : 중급

Matthew Skamser, 소프트웨어 컨설턴트, Solution Destination, Inc.

2008 년 9 월 09 일

개발 또는 테스트 용도로 사용할 아파치 톰캣(Apache Tomcat) 서버 설치와 설정에 대해 단계별로 자세히 접근하여 알아봅니다. 아울러 유닉스(UNIX®) 환경에서 웹 혹은 애플리케이션 서버를 어떻게 만들어 관리할지 도움이 될 만한 팁을 살펴보겠습니다.

시작하기 전에

이 튜토리얼에서 기대하는 바와 이를 어떻게 하면 가장 잘 도출해낼 수 있을지 알아보자.

이 튜토리얼에 대해

그러면 자바(Java™) 2 플랫폼 엔터프라이즈 에디션(J2EE™) 애플리케이션 개발, 테스팅, 배치(deploy), 튜닝을 수행하기 위해 완벽한 기능을 갖춘 애플리케이션 서버를 설치하고 싶은 것인가? 아니면 단지 새로운 걸 배워보고 싶은 상태이고 여러분 스스로의 애플리케이션 서버 환경은 확립하기로 결정한 상태인 것인가? 어디서 시작하고 싶은가?

동기가 어떻든 간에 이 튜토리얼을 읽고 있다면 웹 사이트가 어찌 돌아가는지 그리고 브라우저에서의 애플리케이션 접근에 대한 최소한의 공통 분모(도메인, 코드, 웹 브라우저, 데이터베이스 등)로 무엇이 필요할지 정도는 기본적으로 익숙해야 한다. 기본 사항을 숙지하고 있고 웹 혹은 애플리케이션 서버에 필요한 내용을 알며, 유닉스 서버에 접근할 수 있고, 웹 서버 관리에 대해 한 두세 개 정도 배울 마음만 갖고 있다면 이 튜토리얼은 여러분을 위한 것이다.


위로


목적

이 튜토리얼은 다음 내용에 대해 담고 있다.

  • 아파치 톰캣과 유닉스에 대한 소개뿐 아니라 시작하기 위해 필요한 것들에 대한 소개
  • 엔터프라이즈 웹 아키텍처 대 독립형(stand-alone) 웹 아키텍처에 대한 비교
  • 아무것도 설정되어 있지 않은 유닉스 서버에 웹 혹은 애플리케이션 서버 설치 준비
  • 톰캣 웹 서버 설치와 시작 방법에 대한 상세한 단계별 지시
  • 톰캣 웹 애플리케이션 매니저(Tomcat Web Application Manager) 접근 설정 정보
  • 예제 애플리케이션 배치에 대한 지시 사항
  • 추가적인 내용

슬슬 곰팡이가 피는 거 같다... 긁어내자. 잽싸게 초보 유닉스 관리자로서 거듭나도록 갈고 닦을 때다.


위로


준비할 것들

이 튜토리얼에서는 기호에 맞게 기본 유닉스 운영체제가 이미 설치되었다고 가정하고 있다. 튜토리얼에서 예제를 구동하려면 톰캣 버전 6가 설치되어 구동되어야 한다.


위로


시스템 요구 사항

서버에는 적어도 가용한 하드디스크 용량이 10GB는 되어야 하고 최소 512MB의 램이 남아 있어야 한다. 시작할 수 있으려면 유닉스 서버에는 다음과 같은 추가 도구가 설치되어 있어야 할 필요가 있다.

  • 웹 브라우저: 어떤 브라우저라도 관계 없다.
  • 자바 2 표준 에디션 런타임 환경(JRE) 릴리스 버전 5.0 이상: 아파치 톰캣 버전 6에서는 JRE를 필요로 한다.
  • C 컴파일러: 안타깝지만 솔라리스나 IBM® AIX®의 기본 설치본에는 이런 컴파일러가 딸려오질 않는다. 좀 더 자세한 정보를 보려면 GNU GCC 관련 글에 대한 링크를 보기 바란다.
  • 파일 추출 도구: 서버에서 파일을 적절히 추출하려면 gunzip, tar, bzcat, 그리고 가능하다면 GNU maketar(gmake, gtar로서 GNU 사이트에서 다운로드 가능)가 필요하다.

    서버에서 도구들이 제대로 동작하는지 체크해 보려면 다음 명령어를 실행해본다.

    cd /usr
    find . –name *.tar (repeat for *make, *zip, etc.)
    

  • 톰캣 코드: 먼저 아파치 다운로드 사이트에서 톰캣 버전 6 코드를 다운로드해 둔다. 그러고 나서 여러분 서버에 다운로드한 tar.gz 파일을 저장한다.
Posted by 1010
60.Unix2008. 12. 16. 15:20
반응형
Solaris Operating System

How to Quickly Install the Solaris 10 10/08 OS on x86 Systems

How to Quickly Install the Solaris 10 10/08 OS on x86 Systems

This How to Guide instructs users unfamiliar with Solaris 10 installation on how to install the Solaris 10 OS on a Sun supported x86 system. This step-by-step guide, complete with screen shots, takes users through the installation process, in 22 simple steps. Novice users should be able to complete a Solaris 10 10/08 Operating System installation on a standalone x86 system using the instructions in this guide.

1030KPDF[3.8MB]
Table of Contents


Installation Assumptions

This guide makes several assumptions, including:
  • The system is an x86 system
  • The system is compatible with the Solaris 10 OS and is listed on the Solaris Hardware Compatibility List (HCL).
  • The system has a graphical interface

While this guide is most appropriate for a stand-alone system that does not have a network connection, it can also be used as a step-by-step installation procedure for networked systems—systems with an IP address that are connected to a network infrastructure—assuming network configuration information is available.

If problems arise during the installation process that are not discussed in this guide, refer to the Solaris 10 OS Installation Guide: Basic Installations for more information. This guide is part of the Solaris 10 Release and Installation Collection located on the Sun Web site at http://docs.sun.com/app/docs/prod/solaris.10.

Back To Top


Check the Hardware Compatibility List

The first step before the installation process is to verify that the system to be installed is on the hardware compatibility list located at: http://www.sun.com/bigadmin/hcl/.
Note: The term "x86" refers to the "family" of 32-bit x86-compatible architecture and 64-bit AMD64 and Intel EM64T.

Back To Top


Basic System Requirements

Verify the computer system meets the following requirements.
NOTE: The requirements below are recommended minimums.

While it is possible to install the Solaris OS on a system with less disk capacity and CPU speed, it is not recommended.
  • Minimum 512 MB of physical RAM
  • Minimum 10 GB of available hard drive space
  • Minimum 400 MHz CPU speed
  • DVD or CD-ROM drive/li>
  • Attached monitor or integrated display
For more information on Solaris System requirements, visit http://www.sun.com/solaris/specs.jsp. For a detailed list of 3rd-party applications available on Solaris 10, visit http://www.sun.com/partners/10moves/solutions.html.  


Obtaining Media for the x86 Platform

The Solaris 10 OS 10/08 release is available via download from the Sun Web site.

  1. Go to http://www.sun.com/solaris/ to obtain information about the Solaris 10 OS.
  2. Go to http://www.sun.com/solaris/get.jsp to begin the download process.
  3. Choose Solaris 10 on the list of available downloads.
  4. Click on the appropriate media format (Solaris for x64/x86 systems).
  5. Register at the Sun Download Center, if you have not already done so.
  6. Answer the short questionnaire.
  7. Read and accept the license agreement.
  8. Download and burn the CDs or DVDs.

    See the Solaris 10 Self Help FAQs located at http://www.sun.com/solaris/self_help.jsp for additional guidance, instruction, and tips on downloading the Solaris 10 OS or burning installation CD and DVD media.

    Back To Top


    Power Up and Media Boot

    The following procedure can be used whether another operating system is already running on the system, or for installation on a new system.

    1. Power up the system and insert the first installation CD or DVD into the drive tray.
    2. Restart the system.
    3. If the system appears to be booting from the hard disk, and the Solaris OS installer does not start, power cycle the system (power cycle is shutting the power on the system and then restarting the system). As the system begins to boot, enter setup mode. Typically, the system displays a message indicating which key (such as "Enter F2 to enter setup"). The key to press varies by manufacturer; the ESC and F12 keys are other common options. If you miss the message, simply restart the system a couple of times until you are able to view it.
    4. Once in setup mode, specify the boot device for the system. This example specifies the CD or DVD drive as the boot device. To do so, find the list that describes boot order and re-order as needed to ensure the CD or DVD drive appears first on the list. The system should then boot from the CD or DVD drive to start the install process, displaying a message resembling the one below:

      Loading stage 2....

      GNU GRUB version 0.95 ( xxK lower /
      xxK upper memory)

    Back To Top


    Installing the Solaris 10 10/08 Operating System

    The Solaris 10 10/08 Operating System install and boot process is based on the GNU GRUB loader. Therefore, the messages displayed throughout this process are unique to the GRUB loader and are different than in prior Solaris installations.

    Identifying the Console

    The next step in the installation process is to select the type of console for the hardware version on which the Solaris OS is being installed. Use the arrow keys to select the version of the Solaris OS that matches the hardware configuration. For most x86 systems, this is the default selection.

    [Two serial console options are available in the event a headless rack-mounted system is in use and a serial port is needed as an interface to a serial console. For older x86 systems, such as the Sun Fire" LX50, Sun Fire" V60x, or Sun Fire" V65x servers, select Solaris Serial Console ttyb.]

    Edit functions include using the arrow key to select or highlight an entry, the e key to edit a command, or the c key for a command line. Pressing the ENTER key, boot the version of operating system selected. The highlighted entry boots in 60 seconds even if a key is not pressed.

    NOTE: Prompts do not appear during the boot process. If a selection is not made, the screen times out and the system automatically boots the Solaris OS.

    Solaris
    Solaris Serial Console ttya (headless and rack-mounted systems only)
    Solaris Serial Console ttyb (for1x50, v60x and v65x)


    Selecting the Type of Installation

    After the ENTER key is pressed, or the counter times out, a series of dots will run on the screen, then six installation options are presented. Select an option using the arrow keys or space bar as appropriate, or let the counter time out to automatically select the default installation method:

    SunOS Release 5.10 version generic_120012-12 32-bit
    Copyright 1983-2005 Sun Microsystems, Inc. All rights reserved.
    Use is subject to license terms.
    Configuring devices.

      1. Solaris Interactive (default)
      2. Custom JumpStart
      3. Solaris Interactive Text (Desktop session)
      4. Solaris Interactive Text (console session)
      5. Apply driver updates
      6. Single user shell
    Automatically continuing in xx seconds

    (timeout)


    When the first option is selected, or the counter times out, the following output is displayed. Keep in mind that the hardware information displayed, such as "nge0", may differ from the exact data displayed below and that each step can take up to a couple of minutes to complete:

    Solaris Interactive

    Using install cd in /dev/dsk/c1t0d0p0
    Using RPC Bootparams for network configuration information.
    Attempting to configure interface nge0...
    Skipped interface nge0
    Setting up Java. Please wait...
    Extracting windowing system. Please wait...
    Beginning system identification...
    Searching for configuration files(s)...
    Search complete.
    Discovering additional network configuration...

    Starting Solaris Interactive (graphical user interface) Installation.

       You must respond to the first question within 30 seconds or the installer
       proceeds in a non-window environment (console mode).

       If the screen becomes blank or unreadable the installer proceeds in
       console mode.

       If the screen does not properly revert to console mode, restart the
       installation and make the following selection:

       Solaris Interactive Text (Console session)

    Press ENTER to continue.

    When the ENTER key is pressed, the system switches to graphics mode. If you are able to see the graphics window, press ENTER. If not, the system will time out and will continue the installation in Text (Console) Mode. Roll your mouse over the gray window and press ENTER:

    start

    System Configuration

    A series of screens guide you through the Solaris OS configuration process.
    NOTE: The graphical screens require a mouse to be rolled over the window in order to answer questions posed throughout the configuration process.

    1. After you press ENTER, the system configuration process will start through a series of windows. Please roll the mouse over the appropriate window and make your selections.
    2. Select a language for the system:

      Select Language

    3. A new window, the Solaris Install Console, appears in the bottom-right corner. This window is used to display pertinent installation messages. Another window appears in which the Solaris OS installation questions should be answered:

      Solaris Install Console

    4. The Welcome screen appears. Click Next to continue the installation process. Keep in mind the installation program checks the configuration entered. If the configuration information supplied is incorrect, the system will ask for the correct information to be re-entered on the appropriate screens:

      Welcome

    5. The Network Connectivity window appears:

      Network Connectivity
      x networked
        non-networked

    6. The Host Name window appears. Type in the name for the system and follow the guidelines on the screen, then click on the Next button:

      Host Name

    7. The NFSv4 Domain Name window appears. Let the system use the default option and click on the Next button:

      Domain Name

    8. The Time Zone window appears. Next, set the time zone for the system. This example sets the time zone by specifying the geographic region. Select "Geographic" and click Next:

      TimeZone

    9. Next, select the continent and country. Detailed information on the exact location is requested. For example, selecting "Americas" results in a screen that lists all time zones in the "Americas". Select the appropriate time zone and click Next:

      Continent and Country

    10. Next, set the date and time and click Next. A date and time is automatically displayed. If correct, click Next. If adjustments are needed, make corrections in the text boxes and click Next:

      Date and Time

    11. The Root Password window appears. Set the root password. Note the password typed remains invisible. Re-enter the password in the second box and click Next:

      Root Password

    12. The Remote Services window appears. In this window, you can choose a "Secure by default" Solaris installation, but afterwards individual services should be enabled. If you are unsure of your type of installation, follow the default, "Yes" to enable all remote services:

      Enabling Remote Services

    13. The Confirmation window appears. Please verify that your information is correct and then click the Next button, if any information is incorrect, click the Back button and fix it:

      Confirm Information

    14. The Solaris installation window appears. From here Solaris will start the installation process based on your preferences:

      Welcome

    15. The Installer options window appears. This option only applies in case you want to do some post-install customizations, for this installation process let the system go with the default options. "Yes" on automatic reboot, and "Yes" on Ejection of the install media:

      Installer Options

      15a. A pop-up window will appear to remind you to physically remove the CD/DVD. Click on the OK button to continue:

      Installer Options 2

    16. The Media window will appear. Unless you are using different media than a CD/DVD, this question does not apply to your case, please use the default CD/DVD and click the Next button:

      Specify Media

    17. The System initialization window will appear with a progress bar, and after a few seconds it will disappear indicating that the system is was initialized:

      Initalizing

    18. The License window appears. Please read the Solaris License Agreement, and if you agree, click on the Accept checkbox, then click on the Next button:

      License

    19. The Type of Install window appears. Advanced users may want to customize the installation, if not, leave the default and click on the Next button:


      Select Type of Install

    20. The confirmation window appears. On this window, you can see a more technical description of how Solaris will be installed on your system. Click on the Install Now button:

      Ready to Install

    21. The Install Progress window appears. Now just wait for a few minutes while Solaris installs on your system. After the installation is completed, remember to eject the CD/DVD. The system will reboot automatically and will start on Solaris:

      Installing...

    22. For Localization, please review the Solaris 10 10/08 installation guide that can be found at: http://docs.sun.com/app/docs/prod/solaris.10

    Back To Top


    For More Information

    For more information regarding the Solaris 10 OS, visit sun.com/solaris.

    Manuals
    Sun Documentation
    Big Admin System Administration Portal
    Sun BluePrint Articles
    Configuring JumpStart Servers to Provision Sun x86 Systems
    Performing Network Installations Without a Local Boot Server
    Configuring Multiboot Environments on Sun x64 Systems with AMD Processors
    Related Web Sites
    Solaris Laptop List (x86)
    Solaris Hardware Compatibility List
    Solaris 10 System Requirements
    Solaris 10 11/06 OS Features Comparison Chart
    Next Steps to Solaris 10 Adoption
    Get hands on experience with Solaris 10 using "Solaris 10 How To Guides"
    Get trained on Solaris 10—free!
    Count on Sun's full enterprise support—whenever you're ready. Get a support contract.
    Participate in the OpenSolaris community
Posted by 1010
02.Oracle/DataBase2008. 12. 16. 15:14
반응형

Oracle® Database

Quick Installation Guide

11g Release 1 (11.1) for Solaris Operating System

B32313-02

August 2008

This guide describes how to quickly install Oracle Database 11g on Solaris systems. It includes information about the following:

1 Reviewing Information About This Guide

This guide describes how to install Oracle Database by using the default installation options.

Tasks Described in This Guide

The procedures in this guide describe how to:

  • Configure your system to support Oracle Database

  • Install Oracle Database on a local file system by using the Basic Installation option

  • Configure a general-purpose Oracle Database installation that uses the local file system for database file storage

Results of a Successful Installation

After you successfully install Oracle Database:

  • The database that you created and the default Oracle Net listener process run on the system.

  • Oracle Enterprise Manager Database Control run and can be accessed by using a Web browser.

Tasks Not Described in This Guide

This guide covers the Basic Installation scenario and does not describe how to complete the following tasks:

  • Using the Advanced Installation option to install the software

  • Installing the software on a system that has an existing Oracle software installation

  • Installing Oracle Clusterware and Oracle Real Application Clusters (RAC) on a cluster

  • Enabling Enterprise Manager e-mail notifications or automated backups

  • Using alternative storage options such as Automatic Storage Management or raw devices for database storage

Where to Get Additional Installation Information

For more information about installing Oracle Database, including information about the tasks not described in this guide, refer to one of the following guides:

Both these guides are available on the product disc. To access them, use a Web browser to open the welcome.htm file located in the top-level directory of the installation media, and then select the Documentation tab.

2 Logging In to the System as root

Before you install Oracle Database, you must complete several tasks as the root user. To log in as the root user, complete one of the following procedures:

Note:

You must install the software from an X Window System workstation, an X terminal, or a PC or other system with X server software installed.
  • If you are installing the software from an X Window System workstation or X terminal, then:

    1. Start a local terminal session, for example, an X terminal (xterm).

    2. If you are not installing the software on the local system, then enter the following command to enable the remote host to display X applications on the local X server:

      $ xhost fully_qualified_remote_host_name
      

      For example:

      $ xhost somehost.us.example.com
      
    3. If you are not installing the software on the local system, then use the ssh, rlogin, or telnet command to connect to the system where you want to install the software:

      $ telnet fully_qualified_remote_host_name
      
    4. If you are not logged in as the root user, then enter the following command to switch user to root:

      $ su -
      password:
      #
      
  • If you are installing the software from a PC or other system with X server software installed, then:

    Note:

    If necessary, refer to your X server documentation for more information about completing this procedure. Depending on the X server software that you are using, you may need to complete the tasks in a different order.
    1. Start the X server software.

    2. Configure the security settings of the X server software to permit remote hosts to display X applications on the local system.

    3. Connect to the remote system where you want to install the software, and start a terminal session on that system, for example, an X terminal (xterm).

    4. If you are not logged in as the root user on the remote system, then enter the following command to switch user to root:

      $ su -
      password:
      #
      

3 Checking the Hardware Requirements

The system must meet the following minimum hardware requirements:

3.1 Memory Requirements

The following are the memory requirements for installing Oracle Database 11g Release 1:

  • At least 1 GB of RAM

    To determine the physical RAM size, enter the following command:

    # /usr/sbin/prtconf | grep "Memory size"
    

    If the size of the physical RAM is less than the required size, then you must install more memory before continuing.

  • The following table describes the relationship between installed RAM and the configured swap space requirement:

    RAM Swap Space
    Between 1024 MB and 2048 MB 1.5 times the size of RAM
    Between 2049 MB and 8192 MB Equal to the size of RAM
    More than 8192 MB 0.75 times the size of RAM

    To determine the size of the configured swap space, enter the following command:

    # /usr/sbin/swap -s
    

    If necessary, refer to the operating system documentation for information about how to configure additional swap space.

  • To determine the available RAM and swap space, enter the following command:

    # sar -r -i n 
    

    where, n is the number of seconds to delay for the next iterations and i is the number of iterations you want to test.

Note:

Oracle recommends that you take multiple values for the available RAM and swap space before freezing on a value. This is because the available RAM and swap space keep changing depending on the user interactions with the computer.

3.2 System Architecture

To determine whether the system architecture can run the software, enter the following command:

# /bin/isainfo -kv

Note:

This command displays the processor type. Verify that the processor architecture matches the Oracle software release that you want to install. If you do not see the expected output, then you cannot install the software on this system.

3.3 Disk Space Requirements

The following are the disk space requirements for installing Oracle Database 11g Release 1:

  • Between 225 and 275 MB of disk space in the /tmp directory

    To determine the amount of disk space available in the /tmp directory, enter the following command:

    On Solaris 10:

    # df -h /tmp
    

    Other Solaris Platforms:

    # df -k /tmp
    

    If there is less than 400 MB of free disk space available in the /tmp directory, then complete one of the following steps:

    • Delete unnecessary files from the /tmp directory to meet the disk space requirement.

    • Set the TMP and TMPDIR environment variables when setting the oracle user's environment (described later).

    • Extend the file system that contains the /tmp directory. If necessary, contact the system administrator for information about extending file systems.

  • To determine the amount of free disk space on the system, enter the following command:

    On Solaris 10:

    # df -h
    

    Other Solaris Platforms:

    # df -k
    
  • The following table shows the approximate disk space requirements for software files for each installation type:

    Installation Type Requirement for Software Files (GB)
    Enterprise Edition 4.68
    Standard Edition 4.62
    Custom (maximum) 4.71

  • Between 1.5 GB and 2 GB of disk space is required for preconfigured database that uses file system storage (optional)

    Note:

    The disk space requirement for databases that use Automatic Storage Management is described later in this chapter.

    Additional disk space, either on a file system or in an Automatic Storage Management disk group, is required for the flash recovery area if you choose to configure automated backups.

4 Checking the Software Requirements

Depending on the products that you intend to install, verify that the following software are installed on the system.

Note:

Oracle Universal Installer performs checks on the system to verify that it meets the listed requirements. To ensure that these checks pass, verify the requirements before you start Oracle Universal Installer.

4.1 Operating System Requirements

The following are the operating system requirements for Oracle Database 11g Release 1:

  • Solaris 9 Update 7 or later

  • Solaris 10

To determine the distribution and version of Solaris installed, enter the following command:

# uname -r
5.9

In this example, the version shown is Solaris 9 (5.9). If necessary, refer to your operating system documentation for information about upgrading the operating system.

To determine the update level of Solaris installed, enter the following command:

$ cat /etc/release
Solaris 9 4/03 s9s_u3wos_

In the output of the command, _u3 refers to update 3 of Solaris 9.

4.2 Package Requirements

The following packages (or later versions) must be installed:

SUNWarc
SUNWbtool
SUNWhea
SUNWlibC
SUNWlibm
SUNWlibms
SUNWsprot
SUNWtoo
SUNWi1of
SUNWi1cs
SUNWi15cs
SUNWxwfnt
SUNWsprox

Note:

The SUNWsprox package is not supported on Solaris 10.

You may also require additional font packages for Java, depending on your locale. Refer to the following Web site for more information:

http://java.sun.com/j2se/1.4.2/font-requirements.html

To determine whether the required packages are installed, enter commands similar to the following:

# pkginfo -i SUNWarc SUNWbtool SUNWhea SUNWlibm SUNWlibms SUNWsprot \
 SUNWsprox SUNWtoo SUNWi1of SUNWi1cs SUNWi15cs SUNWxwfnt

If a package is not installed, then install it. Refer to your operating system or software documentation for information about installing packages.

4.3 Compiler Requirements

Starting with Oracle Database 11g release 1, Sun One Studio 11 is the supported compiler for Pro*C/C++ , Oracle Call Interface, Oracle C++ Call Interface, and Oracle XML Developer's Kit (XDK) with Oracle Database 11g release 1.

4.4 Additional Software Requirements

Depending on the components you want to use, you must ensure that the following software are installed:

4.4.1 Oracle Messaging Gateway

Oracle Messaging Gateway supports the integration of Oracle Streams Advanced Queuing (AQ) with the following software:

  • IBM MQSeries V6, client and server

  • TIBCO Rendezvous 7.2

If you require a CSD for WebSphere MQ, then refer to the following Web site for download and installation information:

http://www-306.ibm.com/software/integration/wmq/support

4.4.2 Oracle JDBC/OCI Drivers

You can use the following optional JDK versions with the Oracle JDBC/OCI drivers. However, these are not mandatory for the installation:

Sun JDK 1.5.0

4.4.3 Browser Requirements

Web browsers must support Java Script and the HTML 4.0 and CSS 1.0 standards. The following browsers meet these requirements. On Oracle Enterprise Manager Database Control:

  • Netscape Navigator 7.2

  • Netscape Navigator 8.1

  • Mozilla version 1.7

  • Microsoft Internet Explorer 6.0 SP2

  • Microsoft Internet Explorer 7.0

  • Firefox 1.0.4

  • Firefox 1.5

  • Firefox 2.0

4.5 Patch Requirements

The following are the list of patches required for Oracle Database 11g Release 1.

4.5.1 Operating system-specific patches

Installation Type or Product Requirement
All installations Patches for Solaris 9:
  • 112233-11, SunOS 5.9: Kernel Patch

  • 118558-22, SunOS 5.9: Kernel Patch

  • 111722-04, SunOS 5.9: Math Library (libm) patch

  • 112874-39 SunOS 5.9 : libc patch

The following additional patches are required for Numa Systems:

  • 115675-01, SunOS 5.9: liblgrp API

  • 113471-08, SunOS 5.9: Miscellaneous SunOS Commands Patch

  • 115675-01, SunOS 5.9: /usr/lib/liblgrp.so Patch

Patches for Solaris 10:

  • 127111-02 SunOS 5.10: libc patch

  • 137111-04 SunOS 5.10: kernel patch

Pro*C/C++, Pro*FORTRAN, Oracle Call Interface, Oracle C++ Call Interface, Oracle XML Developer's Kit (XDK) Patch for Solaris 9 :

112760-05, C 5.5: Patch for S1S8CC C compiler

Patches For Solaris 10:

  • 117837-05: C++ compiler optimizer patch

  • 117846-08: C++ compiler Optimization patch

  • 118682-01


To determine whether an operating system patch is installed, enter a command similar to the following:

# /usr/sbin/patchadd -p | grep patch_number(without version number)

For example, to determine if any version of the 111713 patch is installed, use the following command:

# /usr/sbin/patchadd -p | grep 111713

If an operating system patch is not installed, then download it from the following Web site and install it:

http://sunsolve.sun.com

5 Creating Required Operating System Groups and User

The following local operating system groups and users are required if you are installing Oracle Database:

  • The Oracle Inventory group (oinstall)

  • The OSDBA group (dba)

  • The Oracle software owner (oracle)

To determine whether these groups and users already exist, and if necessary, to create them, follow these steps:

  1. To determine whether the oinstall group exists, enter the following command:

    # more /var/opt/oracle/oraInst.loc
    

    If the output of this command shows the oinstall group name, then the group already exists.

    Note:

    In Oracle documentation, Oracle Inventory group is called oinstall. However, it is not mandatory to use the same name, you can enter a different name for the group.

    If the oraInst.loc file exists, then the output from this command is similar to the following:

    inventory_loc=/u01/app/oracle/oraInventory
    inst_group=oinstall
    

    The inst_group parameter shows the name of the Oracle Inventory group, oinstall.

  2. To determine whether the dba group exists, enter the following command:

    # grep dba /etc/group
    

    If the output from this commands shows the dba group name, then the group already exists.

  3. If necessary, enter the following commands to create the oinstall and dba groups:

    # /usr/sbin/groupadd oinstall
    # /usr/sbin/groupadd dba
    
  4. To determine whether the oracle user exists and belongs to the correct groups, enter the following command:

    # id -a oracle
    

    If the oracle user exists, this command displays information about the groups to which the user belongs. The output should be similar to the following, indicating that oinstall is the primary group and dba is a secondary group:

    uid=440(oracle) gid=200(oinstall) groups=201(dba),202(oper)
    
  5. If necessary, complete one of the following actions:

    • If the oracle user exists, but its primary group is not oinstall or it is not a member of the dba group, then enter the following command:

      # /usr/sbin/usermod -g oinstall -G dba oracle
      
    • If the oracle user does not exist, enter the following command to create it:

      # /usr/sbin/useradd -g oinstall -G dba oracle
      

      This command creates the oracle user and specifies oinstall as the primary group and dba as the secondary group.

  6. Enter the following command to set the password of the oracle user:

    # passwd -r files oracle
    

6 Configuring Kernel Parameters

Note:

The kernel parameter and shell limit values shown in the following section are recommended values only. For production database systems, Oracle recommends that you tune these values to optimize the performance of the system. Refer to your operating system documentation for more information about tuning kernel parameters.

Verify that the kernel parameters shown in the following table are set to values greater than or equal to the recommended value shown on Solaris 9 operating systems. The procedure following the table describes how to verify and set the values.

6.1 Configuring Kernel Parameters On Solaris 9

On Solaris Operating System (SPARC 64-bit) installations running Solaris 9, verify that the kernel parameters shown in the following table are set to values greater than or equal to the recommended value:

Parameter Recommended Value
noexec_user_stack 1
semsys:seminfo_semmni 100
semsys:seminfo_semmns 1024
semsys:seminfo_semmsl 256
semsys:seminfo_semvmx 32767
shmsys:shminfo_shmmax 4294967296
shmsys:shminfo_shmmni 100

Use the following procedure to view the current value specified for resource controls, and to change them if necessary:

  1. To view the current values of these parameters, enter the following commands:

    # grep noexec_user_stack /etc/system
    # /usr/sbin/sysdef | grep SEM
    # /usr/sbin/sysdef | grep SHM
    
  2. If you must change any of the current values, then:

    1. Create a backup copy of the /etc/system file, for example:

      # cp /etc/system /etc/system.orig
      
    2. Open the /etc/system file in any text editor and, if necessary, add lines similar to the following (edit the lines if the file already contains them):

      set noexec_user_stack=1
      set semsys:seminfo_semmni=100
      set semsys:seminfo_semmns=1024
      set semsys:seminfo_semmsl=256
      set semsys:seminfo_semvmx=32767
      set shmsys:shminfo_shmmax=4294967296
      set shmsys:shminfo_shmmni=100
      
    3. Enter the following command to restart the system:

      # /usr/sbin/reboot
      
    4. When the system restarts, log in and switch user to root.

  3. Repeat this procedure on all other nodes in the cluster.

6.2 Configuring Kernel Parameters on Solaris 10

On Solaris 10, verify that the kernel parameters shown in the following table are set to values greater than or equal to the recommended value shown. The table also contains the resource controls that replace the /etc/system file for a specific kernel parameter. As Oracle Database does not set project information when starting processes, some /etc/system processes that are deprecated but not removed must still be set for Oracle Database.

Note:

In Solaris 10, you are not required to make changes to the /etc/system file to implement the System V IPC. Solaris 10 uses the resource control facility for its implementation. However, Oracle recommends that you set both resource control and /etc/system/ parameters. Operating system parameters not replaced by resource controls continue to affect performance and security on Solaris 10 systems. For further information, contact your Sun vendor.
Parameter Replaced by Resource Control Recommended Value
noexec_user_stack NA 1
semsys:seminfo_semmni project.max-sem-ids 100
semsys:seminfo_semmns NA 1024
semsys:seminfo_semmsl process.max-sem-nsems 256
semsys:seminfo_semvmx NA 32767
shmsys:shminfo_shmmax project.max-shm-memory 4294967296
shmsys:shminfo_shmmni project.max-shm-ids 100

On Solaris 10, use the following procedure to view the current value specified for resource controls, and to change them if necessary:

  1. To view the current values of the resource control, enter the following commands:

    # id -p // to verify the project id
    uid=0(root) gid=0(root) projid=1 (user.root)
    # prctl -n project.max-shm-memory -i project user.root
    # prctl -n project.max-sem-ids -i project user.root
    
  2. If you must change any of the current values, then:

    1. To modify the value of max-shm-memory to 6 GB:

      # prctl -n project.max-shm-memory -v 6gb -r -i project user.root
      
    2. To modify the value of max-sem-ids to 256:

      # prctl -n project.max-sem-ids -v 256 -r -i project user.root
      

Note:

When you use the prctl command (Resource Control) to change system parameters, you do not need to restart the system for these parameter changes to take effect. However, the changed parameters do not persist after a system restart.

Use the following procedure to modify the resource control project settings, so that they persist after a system restart:

  1. By default, Oracle instances are run as the oracle user of the dba group. A project with the name group.dba is created to serve as the default project for the oracle user. Run the command id to verify the default project for the oracle user:

    # su - oracle
    $ id -p
    uid=100(oracle) gid=100(dba) projid=100(group.dba)
    $ exit
    
  2. To set the maximum shared memory size to 2 GB, run the projmod command:

    # projmod -sK "project.max-shm-memory=(privileged,2G,deny)" group.dba
    

    Alternatively, add the resource control value project.max-shm-memory=(privileged,2147483648,deny) to the last field of the project entries for the Oracle project.

  3. After these steps are complete, check the values for the /etc/project file using the following command:

    # cat /etc/project
    

    The output should be similar to the following:

    system:0::::
    user.root:1::::
    noproject:2::::
    default:3::::
    group.staff:10::::
    group.dba:100:Oracle default
    project:::project.max-shmmemory=(privileged,2147483648,deny)
        
    
  4. To verify that the resource control is active, check process ownership, and run the commands id and prctl, as in the following example:

    # su - oracle
    $ id -p
    uid=100(oracle) gid=100(dba) projid=100(group.dba)
    $ prctl -n project.max-shm-memory -i process $$
    process: 5754: -bash
    NAME                    PRIVILEGE     VALUE     FLAG     ACTION    RECIPIENT
    project.max-shm-memory  privileged    2.00GB     -       deny 
    

    Note:

    The value for the maximum shared memory depends on the SGA requierments and should be set to a value greater than the SGA size.

    For additional information, refer to the Solaris Tunable Parameters Reference Manual.

7 Creating Required Directories

Create directories with names similar to the following, and specify the correct owner, group, and permissions for them:

  • The Oracle base directory

  • An optional Oracle data file directory (optional)

The Oracle base directory must have 3 GB of free disk space, or 4 GB of free disk space if you choose not to create a separate Oracle data file directory.

Note:

If you do not want to create a separate Oracle data file directory, you can install the data files in a subdirectory of the Oracle base directory. However, this is not recommended for production databases.

To determine where to create these directories:

  1. Enter the following command to display information about all mounted file systems:

    # df -k
    

    This command displays information about all the file systems mounted on the system, including:

    • The physical device name

    • The total amount, used amount, and available amount of disk space, in kilobytes

    • The mount point directory for that file system

  2. From the display, identify either one or two file systems that meet the following requirements:

    • A single file system with at least 1.2 GB of free disk space

    • Two or more file systems with at least 1.2 GB of free disk space in total

  3. Note the name of the mount point directory for each file system that you identified.

In the following examples, /u01 is the mount point directory used for the software, and /u02 is the mount point directory used for the Oracle data file directory. You must specify the appropriate mount point directories for the file systems on your system.

To create the required directories and specify the correct owner, group, and permissions for them:

Note:

In the following procedure, replace /u01 and /u02 with the appropriate mount point directories that you identified in Step 3 previously.
  1. Enter the following command to create subdirectories in the mount point directory that you identified for the Oracle base directory:

    # mkdir -p /u01/app/oracle
    
  2. If you intend to use a second file system for the Oracle Database files, then create an oradata subdirectory in the mount point directory that you identified for the Oracle data file directory (shown as /u02 in the examples):

    # mkdir /u02/oradata
    
  3. Change the owner and group of the directories that you created to the oracle user and the oinstall group:

    # chown -R oracle:oinstall /u01/app/oracle
    # chown -R oracle:oinstall /u02/oradata
    
  4. Change the permissions on the directories that you created to 775:

    # chmod -R 775 /u01/app/oracle
    # chmod -R 775 /u02/oradata
    

8 Configuring the oracle User's Environment

You run Oracle Universal Installer from the oracle account. However, before you start Oracle Universal Installer, you must configure the environment of the oracle user. To configure the environment, you must:

  • Set the default file mode creation mask (umask) to 022 in the shell startup file.

  • Set the DISPLAY environment variable.

To set the oracle user's environment:

  1. Start a new terminal session.

  2. Enter the following command to ensure that X Window applications can display on this system:

    $ xhost fully_qualified_remote_host_name
    
  3. Complete one of the following steps:

    • If the terminal session is not connected to the system where you want to install the software, then log in to that system as the oracle user.

    • If the terminal session is connected to the system where you want to install the software, then switch user to oracle:

      $ su - oracle
      
  4. To determine the default shell for the oracle user, enter the following command:

    $ echo $SHELL
    
  5. Open the oracle user's shell startup file in any text editor:

    • C shell (csh or tcsh):

      % vi .login
      
  6. Enter or edit the following line in the shell startup file, specifying a value of 022 for the default file mode creation mask:

    umask 022
    
  7. If the ORACLE_SID, ORACLE_HOME, or ORACLE_BASE environment variable is set in the file, then remove the appropriate lines from the file.

  8. Save the file, and exit from the editor.

  9. To run the shell startup script, enter the following command:

    • Bourne shell, Bash shell on SUSE, or Korn shell:

      $ . ./.profile
      
    • C shell:

      % source ./.login
      
  10. If you are not installing the software on the local computer, then run the following command on the remote computer to set the DISPLAY variable:

    • Bourne, Bash or Korn shell:

      $ export DISPLAY=local_host:0.0    
      
    • C shell:

      % setenv DISPLAY local_host:0.0
      

    In this example, local_host is the host name or IP address of the local computer that you want to use to display Oracle Universal Installer.

    Run the following command on the remote computer to check if the shell and the DISPLAY environmental variable are set correctly:

    echo $SHELL
    echo $DISPLAY
    

    Now to enable X applications, run the following commands on the local computer:

    $ xhost + fully_qualified_remote_host_name
    

    To verify that X applications display is set properly, run a X11 based program that comes with the operating system such as xclock:

    $ xclock_path
    

    In this example, xclock_path is the directory path. For example, you can find xclock at /usr/X11R6/bin/xclocks. If the DISPLAY variable is set properly, then you can see xclock on your computer screen.

    See Also:

    PC-X Server or Operating System vendor documents for further assistance
  11. If you determined that the /tmp directory had insufficient free disk space when checking the hardware requirements, then enter the following commands to set the TMP and TMPDIR environment variables. Specify a directory on a file system with sufficient free disk space.

    • Bourne, Bash, or Korn shell:

      $ TMP=/directory
      $ TMPDIR=/directory
      $ export TMP TMPDIR
      
    • C shell:

      % setenv TEMP /directory
      % setenv TMPDIR /directory
      
  12. Enter commands similar to the following to set the ORACLE_BASE and ORACLE_SID environment variables:

    • Bourne, Bash, or Korn shell:

      $ ORACLE_BASE=/u01/app/oracle
      $ ORACLE_SID=sales
      $ export ORACLE_BASE ORACLE_SID
      
    • C shell:

      % setenv ORACLE_BASE /u01/app/oracle
      % setenv ORACLE_SID sales
      

    In these examples, /u01/app/oracle is the Oracle base directory that you created earlier, and sales is the name that you want to call the database (typically no more than five characters).

  13. Enter the following commands to ensure that the ORACLE_HOME and TNS_ADMIN environment variables are not set:

    • Bourne, Bash, or Korn shell:

      $ unset ORACLE_HOME
      $ unset TNS_ADMIN
      
    • C shell:

      % unsetenv ORACLE_HOME
      % unsetenv TNS_ADMIN
      
  14. To verify that the environment has been set correctly, enter the following commands:

    $ umask
    $ env | more
    

    Verify that the umask command displays a value of 22, 022, or 0022 and the environment variables that you set in this section have the correct values.

9 Mounting the Product Disc

On most Solaris systems, the product disc mounts automatically when you insert it into the drive. If the disc does not mount automatically, then follow these steps to mount it:

  1. Switch user to root:

    $ su - root
    
  2. If necessary, enter a command similar to the following to eject the currently mounted disc, then remove it from the drive:

    # eject
    
  3. Insert the disc into the disc drive.

  4. To verify that the disc mounted automatically, enter a command similar to the following:

    # ls /dvd/dvd0
    
  5. If this command fails to display the contents of the disc, then enter a command similar to the following:

    # /usr/sbin/mount -r -F hsfs /dev/dsk/cxtydzs2 /dvd
    

    In this example, /dvd is the disc mount point directory and /dev/dsk/cxtydzs2 is the device name for the disc device, for example /dev/dsk/c0t2d0s2.

  6. If Oracle Universal Installer displays the Disk Location dialog box, then enter the disc mount point directory path. For example:

    • Disc mounted automatically:

      /dvd/dvd0
      
    • Disc mounted manually:

      /dvd
      

10 Installing Oracle Database

After configuring the oracle user's environment, start Oracle Universal Installer and install Oracle Database as follows:

  1. To start Oracle Universal Installer, enter the following command:

    $ /mount_point/db/runInstaller
    

    If Oracle Universal Installer does not start, then refer to Oracle Database Installation Guide for Solaris Operating System for information about how to troubleshoot X Window display problems.

  2. The following table describes the recommended action for each Oracle Universal Installer screen. Use the following guidelines to complete the installation:

    Note:

    • If you have completed the tasks listed previously, then you can complete the installation by choosing the default values on most screens.
    • In Oracle documentation, Oracle Inventory group is called oinstall. However, it is not mandatory to use the same name, you can enter a different name for the group.

    Screen Recommended Action
    Select a Product to Install This screen enables you to install any one for the following products:
    • Oracle Database 11g

    • Oracle Client

    • Oracle Clusterware

    Click Next.

    Select Installation Method The Basic Installation option is selected by default.

    Specify the directory path of the Oracle home. Ensure that the oinstall group is selected. If you want to create a starter database, then specify a name and password for it. Then, click Next.

    Specify Inventory Directory and Credentials This screen is displayed only during the first installation of Oracle products on a system.

    Specify the full path of the Oracle Inventory directory. Ensure that the operating system group selected is oinstall. Then, click Next.

    Product-Specific Prerequisite Checks Verify that all of the prerequisite checks succeed, and then click Next.

    Oracle Universal Installer checks the system to verify that it is configured correctly to run Oracle software. If you have completed all of the preinstallation steps in this guide, all of the checks should pass.

    If a check fails, then review the cause of the failure listed for that check on the screen. If possible, rectify the problem and rerun the check. Alternatively, if you are satisfied that your system meets the requirements, then you can select the check box for the failed check to manually verify the requirement.

    Oracle Configuration Manager Enter the Customer Identification Number, Metalink User Name, Country code, and Click Next. The new screen prompts you to accept the license agreement. Click Accept license Agreement to accept the agreement.

    If you decline this agreement, then Oracle Configuration Manager is installed but not configured.

    Summary Review the information displayed on this screen, and then click Install.
    Install This screen displays status information while the product is installed.
    Configuration Assistants This screen displays status information for the configuration assistants that configure the software and create a database. When the message is displayed at the end of this process, click OK to continue.
    Execute Configuration Scripts When prompted, read the instructions and then run the scripts mentioned on this screen. Click OK to continue.
    End of Installation The configuration assistants configure several Web-based applications, including Oracle Enterprise Manager Database Control. This screen displays the URLs configured for these applications. Make a note of the URLs used. The port numbers used in these URLs are also recorded in the following file:
    oracle_home/install/portlist.ini
    

    To exit from Oracle Universal Installer, click Exit and then click Yes.


11 Installing Oracle Database Examples

If you plan to use the following products or features, then download and install the products from the Oracle Database Examples media:

  • Oracle JDBC Development Drivers

  • Oracle Database Examples

  • Oracle Context Companion

  • Various Oracle product demonstrations

For information about installing software and various Oracle product demonstrations from the Oracle Database Examples media, refer to Oracle Database Examples Installation Guide.

12 What to Do Next?

To become familiar with this release of Oracle Database, it is recommended that you complete the following tasks:

  • Log in to Oracle Enterprise Manager Database Control using a Web browser.

    Oracle Enterprise Manager Database Control is a Web-based application that you can use to manage a single Oracle Database installation. The default URL for Database Control is similar to the following:

    http://host.domain:1158/em/
    

    To log in, use the user name SYS and connect as SYSDBA. Use the password that you specified for this user during the Oracle Database 10g installation.

  • Refer to Oracle Database Installation Guide for Solaris Operating System for information about required and optional postinstallation tasks, depending on the products that you want to use.

  • Refer to Oracle Database Installation Guide for Solaris Operating System for information about how to use Database Control to learn about the configuration of your installed database.

  • To learn more about using Oracle Enterprise Manager Database Control to administer a database, refer to Oracle Database 2 Day DBA.

    This guide, designed for new Oracle DBAs, describes how to use Database Control to manage all aspects of an Oracle Database installation. It also provides information about how to enable e-mail notifications and automated backups, which you might not have configured during the installation.

13 Additional Information

This section contains information about the following:

Product Licenses

You are welcome to install and evaluate the products included in this media pack for 30 days under the terms of the Trial License Agreement. However, you must purchase a program license if you want to continue using any product after the 30 day evaluation period. See the following section for information about purchasing program licenses.

Purchasing Licenses, Version Updates, and Documentation

You can purchase program licenses, updated versions of Oracle products, and printed versions of Oracle documentation from the Oracle Store Web site:

http://oraclestore.oracle.com

Contacting Oracle Support Services

If you have purchased Oracle Product Support, you can call Oracle Support Services for assistance 24 hours a day, seven days a week. For information about purchasing Oracle Product Support or contacting Oracle Support Services, go to the Oracle Support Services Web site:

http://www.oracle.com/support

Locating Product Documentation

Documentation for Oracle products is available in both HTML and Adobe portable document format (PDF) formats from several locations:

  • On discs in the media pack:

    • Platform-specific documentation is available on the product discs. To access this documentation, see the welcome.htm file located in the top-level directory of the installation media.

    • Generic product documentation is available in the Oracle Documentation Library.

  • From the Oracle Technology Network Web site:

    http://www.oracle.com/technology/documentation/index.html

To view PDF documents, download the free Adobe Acrobat Reader from the Adobe Web site, if necessary:

http://www.adobe.com

14 Documentation Accessibility

Our goal is to make Oracle products, services, and supporting documentation accessible, with good usability, to the disabled community. To that end, our documentation includes features that make information available to users of assistive technology. This documentation is available in HTML format, and contains markup to facilitate access by the disabled community. Accessibility standards will continue to evolve over time, and Oracle is actively engaged with other market-leading technology vendors to address technical obstacles so that our documentation can be accessible to all of our customers. For more information, visit the Oracle Accessibility Program Web site at http://www.oracle.com/accessibility/.

Accessibility of Code Examples in Documentation

Screen readers may not always correctly read the code examples in this document. The conventions for writing code require that closing braces should appear on an otherwise empty line; however, some screen readers may not always read a line of text that consists solely of a bracket or brace.

Accessibility of Links to External Web Sites in Documentation

This documentation may contain links to Web sites of other companies or organizations that Oracle does not own or control. Oracle neither evaluates nor makes any representations regarding the accessibility of these Web sites.

TTY Access to Oracle Support Services

Oracle provides dedicated Text Telephone (TTY) access to Oracle Support Services within the United States of America 24 hours a day, 7 days a week. For TTY support, call 800.446.2398. Outside the United States, call +1.407.458.2479.


Oracle Database Client Installation Guide, 11g Release 1 (11.1) for Solaris Operating System

B32313-02

Copyright © 2008, Oracle. All rights reserved.

The Programs (which include both the software and documentation) contain proprietary information; they are provided under a license agreement containing restrictions on use and disclosure and are also protected by copyright, patent, and other intellectual and industrial property laws. Reverse engineering, disassembly, or decompilation of the Programs, except to the extent required to obtain interoperability with other independently created software or as specified by law, is prohibited.

The information contained in this document is subject to change without notice. If you find any problems in the documentation, please report them to us in writing. This document is not warranted to be error-free. Except as may be expressly permitted in your license agreement for these Programs, no part of these Programs may be reproduced or transmitted in any form or by any means, electronic or mechanical, for any purpose.

If the Programs are delivered to the United States Government or anyone licensing or using the Programs on behalf of the United States Government, the following notice is applicable:

U.S. GOVERNMENT RIGHTS Programs, software, databases, and related documentation and technical data delivered to U.S. Government customers are "commercial computer software" or "commercial technical data" pursuant to the applicable Federal Acquisition Regulation and agency-specific supplemental regulations. As such, use, duplication, disclosure, modification, and adaptation of the Programs, including documentation and technical data, shall be subject to the licensing restrictions set forth in the applicable Oracle license agreement, and, to the extent applicable, the additional rights set forth in FAR 52.227-19, Commercial Computer Software—Restricted Rights (June 1987). Oracle USA, Inc., 500 Oracle Parkway, Redwood City, CA 94065

The Programs are not intended for use in any nuclear, aviation, mass transit, medical, or other inherently dangerous applications. It shall be the licensee's responsibility to take all appropriate fail-safe, backup, redundancy and other measures to ensure the safe use of such applications if the Programs are used for such purposes, and we disclaim liability for any damages caused by such use of the Programs.

Oracle, JD Edwards, PeopleSoft, and Siebel are registered trademarks of Oracle Corporation and/or its affiliates. Other names may be trademarks of their respective owners.

The Programs may provide links to Web sites and access to content, products, and services from third parties. Oracle is not responsible for the availability of, or any content provided on, third-party Web sites. You bear all risks associated with the use of such content. If you choose to purchase any products or services from a third party, the relationship is directly between you and the third party. Oracle is not responsible for: (a) the quality of third-party products or services; or (b) fulfilling any of the terms of the agreement with the third party, including delivery of products or services and warranty obligations related to purchased products or services. Oracle is not responsible for any loss or damage of any sort that you may incur from dealing with any third party.

Posted by 1010
02.Oracle/DataBase2008. 12. 16. 15:06
반응형

Solaris Installation Guides

Release Notes for Solaris Operating System HTML PDF
Quick Installation Guide for Solaris Operating System (SPARC) HTML PDF
Installation Guide for Solaris Operating System HTML PDF
Client Quick Installation Guide for Solaris Operating System (SPARC) HTML PDF
Client Installation Guide for Solaris Operating System HTML PDF
Clusterware Installation Guide for Solaris Operating System HTML PDF
Real Application Clusters Installation Guide for Linux and UNIX HTML PDF

HP-UX Installation Guides

Release Notes for HP-UX HTML PDF
Quick Installation Guide for HP-UX Itanium HTML PDF
Quick Installation Guide for HP-UX PA-RISC (64-Bit) HTML PDF
Installation Guide for HP-UX HTML PDF
Client Quick Installation Guide for HP-UX Itanium HTML PDF
Client Quick Installation Guide for HP-UX PA-RISC (64-Bit) HTML PDF
Client Installation Guide for HP-UX HTML PDF
Clusterware Installation Guide for HP-UX HTML PDF
Real Application Clusters Installation Guide for Linux and UNIX HTML PDF

AIX Installation Guides

Release Notes for AIX Based Systems HTML PDF
Quick Installation Guide for AIX Based Systems HTML PDF
Installation Guide for AIX Based Systems HTML PDF
Client Quick Installation Guide for AIX Based Systems HTML PDF
Client Installation Guide for AIX Based Systems HTML PDF
Clusterware Installation Guide for AIX Based Systems HTML PDF
Real Application Clusters Installation Guide for Linux and UNIX HTML PDF

Supplementary Installation Guides

Products installed separately from the database.

Examples Installation Guide HTML PDF
Gateway for APPC Installation and Configuration Guide for AIX 5L Based Systems (64-Bit), HP-UX PA-RISC (64-Bit), Solaris Operating System (SPARC 64-Bit), and Linux x86 HTML PDF
Gateway for APPC Installation and Configuration Guide for Microsoft Windows HTML PDF
Gateway for IMS, VSAM, and Adabas Installation and Configuration Guide for AIX 5L Based Systems (64-Bit), HP-UX PA-RISC (64-Bit), Solaris Operating System (SPARC 64-Bit), Linux x86, and Linux x86-64 HTML PDF
Gateway for IMS, VSAM, and Adabas Installation and Configuration Guide for Microsoft Windows HTML PDF
Gateway Installation and Configuration Guide for AIX 5L Based Systems (64-Bit), HP-UX PA-RISC (64-Bit), Solaris Operating System (SPARC 64-Bit), Linux x86, and Linux x86-64 HTML PDF
Gateway Installation and Configuration Guide for Microsoft Windows HTML PDF
Warehouse Builder Installation and Administration Installation and Administration Guide for Windows and UNIX HTML PDF
Posted by 1010
61.Linux2008. 12. 16. 14:20
반응형
Linux에서 CPU 사용률 구하기
procps 패키지에서 top 소스를 까보면 쉽게 알 수 있다.
일단 CPU개수를 구해야하는데, sysconf(_SC_NPROCESSORS_ONLN)로 쉽게 구할 수 있다. (아쉽게도 표준이 아니므로 다른 OS에서 잘 돌아간다는 보장은 없다)

다음은 현재 CPU 사용률을 구해야하는데 리눅스는 이것을 /proc/stat에 텍스트 형태로 저장한다. 형태는 아래와 같다.
cpu user system nice idle wait hi si zero
cpu? user system nice idle wait hi si zero
(반복...)
첫 라인은 전체 cpu 평균을 가르키는 것 같다.(막가는거지요?) 다음 줄부터는 CPU 정보를 cpu0부터 표기하였다. 각 필드는 리눅스 시간 단위인 jiffies로 내용은 아래와 같다.
  • user : 사용자 영역 코드 실행 시간
  • system: 커널 영역 코드 실행 시간
  • nice : 기본보다 낮은 우선순위로 실행한 사용자 영역 코드 실행 시간
  • idle : I/O 완료가 아닌 대기 시간
  • wait : I/O 완료 대기 시간
  • hi : Hard Interrupt(IRQ)
  • si : Soft Interrupt(SoftIRQ)
  • zero : 끝
위 필드는 stat파일을 열 때, 컴퓨터를 켠 시점부터 jiffies누적이므로 top에서 보여주는 사용률을 구하기 위해서 이전 값을 저장해서 현재 값과 차를 구해야한다. 각 사용률(percent)를 위한 총합은 위에 제시한 모든 필드를 몽땅 더하는 것으로 구할 수 있다.

참고로 위 값은 커널 버전에 따라 wait, hi, si 필드가 없을 수 있다. 2.6 이상 버전은 모두 표시하기때문에 가볍게 넘어가도록 하자.


Powered by ScribeFire.

Posted by 1010
60.Unix2008. 12. 16. 14:08
반응형

출처 : http://blog.naver.com/cgshome/120002699779

- OS 버전의 확인
# uname -a
SunOS sonamu 5.8 Generic_108528-15 sun4u sparc SUNW,Ultra-1

- 솔라리스 정보
솔라리스 9
http://kr.sun.com/products/software/os_platforms/solaris/index.html
솔라리스 8
http://kr.sun.com/products/software/os_platforms/solaris/8/index.html
전체 버전 간의 차이 비교
http://wwws.sun.com/software/solaris/fcc/fcc.html
솔라리스 x86(Intel) 하드웨어 호환 리스트(HCL)
http://www.sun.com/bigadmin/hcl/


6. SUN & Solaris 관련 사이트

1) 썬 관련 레퍼런스 (추천)
http://www.stokely.com/unix.sysadm.resources/faqs.sun.html

2) 썬 공식 도큐먼트
http://docs.sun.com
http://www.sun.com/bigadmin/ (BigAdmin System Administration Portal)

3) SUN관련 FAQ
http://www.science.uva.nl/pub/solaris/solaris2.html (Solaris2 FAQ)
http://www.mreriksson.net/faqs/solaris8/ (Ola Eriksson's FAQ for Sun Solaris )
http://wks.uts.ohio-state.edu/sun/faqs/s86faq.html ( Intel FAQ)
http://item-hunter.com/~chang/src/lecture/faq/sol2faq.html (한글)
http://hawk.com.kyungnam.ac.kr/~opti21/unix/faq/index.html (han.comp.sys.sun FAQ 한글)

4) Sun Managers Summaries & Archives Search
http://www.sunmanagers.org ( 공식 홈페이지)
http://www.sunmanagers.org/archives.html ( 아카이브 리스트)
http://www.latech.edu/sunman-search.html ( 아카이브 검색)
http://news.google.co.kr ( 모든 뉴스 그룹 검색)

5) 장비 관련
http://sunsolve.sun.com/handbook_pub/Systems/ ( SUN 시스템 핸드북)
http://sunsolve.sun.com/handbook_pub/Devices/ ( SUN 부붐별 핸드북)


2부. 솔라리스의 접근과 사용자 관리

1. 시스템의 접근

1) Consol로 직접 로그인과 telnet, rsh, ssh (Shell 사용), Xmanager(Windows 사용) 등의 원격 로그인
- telnet : 이 기종간의 시스템 접근 가능 ( Port 23)
- rsh : Unix 기종간의 시스템 접근 가능
- ssh: Unix 기종간의 시스템 접근 가능 (보안쉘, Port 22)
http://www.openssl.org
http://www.openssh.org

2) 시스템 사용자: root와 일반 사용자
root: 슈퍼유저, 시스템 어드민, 초기 설치 시 패스워드 결정, 모든 권한, 기본쉘은 /sbin/sh
일반유저: 일반사용자.

3) 관련 파일
/etc/passwd 파일
user1:x:102:10:User Account 1: /export/home/user1:/bin/ksh
/etc/shadow 파일
user01:haN3NqcDfof.2:::::::
/etc/group 파일
other::1:user01,user02

4) 사용자 관리
/usr/bin/passwd 명령 : 자신의 패스워드 변경 (일반 유저), 다른 사용자의 패스워드 변경(root)
* 패스워드 생성 규칙(일반유저)
- 6~8 문자
- 두 개의 알파벳과 하나의 특수문자 또는 숫자 포함
- 로긴 이름과 다르게
- 변경 전 패스워드와 다르게
- 공백을 포함할 수 있다.

/usr/sbin/groupadd 명령 : 그룹을 생성 ( GID는 100 ~ 60000 번까지)
ex) # groupadd -g 100 class1

/usr/sbin/useradd 명령 : 유저를 생성 ( UID는 100 ~ 60000 번까지)
ex) # useradd -u 501 -g 100 -d /export/home/user01 -m -c "User Account 1" -s /bin/ksh user01

/usr/sbin/groupdel 명령 : 그룹을 제거
ex) # groupdel class1

/usr/sbin/userdel 명령: 유저를 제거
ex) # userdel [-r] user01

/usr/sbin/usermod, /usr/sbin/groupmod 는 수정 시 사용

* 어드민 GUI 툴 : 사용자, 그룹, 호스트, 프린터, 직렬포트, 소프트웨어, 14(sysadmin) 그룹은 사용가능.
/usr/bin/admintool


3부. 사용자 기본 명령

사용자 기본명령은 다음을 참고한다.
http://www.gohtml.pe.kr/lec/unix1.html
http://unix.co.kr/data/solaris/?p=16
http://whoami21.com/~kimlee/telnet1.htm
http://www.hwaseong.ms.kr/unix1.htm

1. 정보 출력

1) 시스템 이름 및 OS버전 확인
$ uname -a
$ cat /etc/release (=> OS의 릴리즈 확인)

2) 현재 로그인한 사용자 정보
$ who (/var/adm/utmpx)

3) 최근 로긴했던 사용자 정보 + 재 부팅 정보
$ last (/var/adm/wtmpx)
$ last user01
$ last reboot

4) 프로세스 정보
$ ps -ef | grep netscape
$ pgrep netscape (solaris 8부터)

5) 날짜 및 시간 출력
$ date
$ cal

6) 맨 페이지
$ man man
$ man -k calendar
cf. # catman -w (관리자 root가 실행)
$ man -s5 man (5 section manual)

- Section Definition -
관련 파일: /usr/share/man/man.cf, /usr/share/man/entities/*
1: User Commands
1M: System Administration Commands
2: System Calls
3: Basic Library Functions
4: File Formats
5: Standards, Environments and Macros
6: Demos
7: Device and Network Interfaces
9: Device Driver Interfaces

- 맨페이지 위치
/usr/share/man/
/usr/openwin/man/
/usr/dt/man

- 맨페이지 추가
# vi /etc/profile
...
MANPATH=/usr/share/man:/usr/openwin/man:/usr/dt/man:<추가할 맨페이지 디렉토리>
export MANPATH

2. 파일과 디렉토리 접근

주의 - 파일과 디렉토리, 명령 등은 모두 대소문자를 구별한다.

1) 패스이름
- 절대경로(Absolute Path Name) : root(/)를 기준으로 기술, /usr/local/src/file1
- 상대경로(Relative Path Name) : 현재 디렉터리를 기준으로 .또는 ..으로 기술, dir1/subdir1/file2

2) 관련 명령어
- ls(list) : 파일 또는 디렉터리의 리스트를 출력
- pwd(print working directory) : 현재 작업 디렉터리의 위치를 출력
- cd(change directory) : 작업 디렉토리를 변경

3. 파일과 디렉토리를 다루는 명령

- file : 파일 타입을 확인 (text, data, executable or binary)
- cat(catenate) : 주로 짧은 text파일을 볼 때
- more : 주로 긴 text파일을 볼 때
- strings: 바이너리 파일의 문자열만 보고자 할 때
- head: text파일의 머리부분(디폴트 10줄)만 보고자 할 때
- tail: text파일의 끝부분(디폴트 10줄)만 보고자 할 때 (tail -f /var/log/messages)
- wc(word count) : text파일의 라인 수, 단어 수, 문자 수를 알고자 할 때 ( wc file1)
- touch : 빈 파일을 생성할 때
- tee : 화면 출력과 파일 저장을 동시에 하고자 할 때 (ls -lR | tee logfile | more)
- mkdir : 디렉토리를 생성할 때
- rmdir : 빈 디렉토리를 제거할 때
- rm -r : 디렉토리를 제거할 때
- cp : 파일을 복사할 때
- cp -r : 디렉토리를 복사할 때
- mv : 파일 또는 디렉토리를 이름변경 또는 옮길 때

4. 파일과 텍스트 검색

- find : 파일 또는 디렉토리를 찾을 때
$ find / -name core
$ find ~ -name core -exec rm {} \;
$ find . -mtime +90
$ find ~ -size +57
$ find /usr -name '*tif'
- cmp, diff : 두 파일의 차이를 비교할 때
- sort : 파일의 내용 또는 리스트를 정렬할 때
$ ls -l | sort
$ du -ks /etc/* | sort -nr
- grep : 파일의 특정 문자열이 있는 라인을 출력
$ grep user01 /etc/passwd
$ ps -ef | grep ksh

5. 파일의 보안

$ ls -l
-rw-r--r-- 1 borisu staff 8239 2002년 8월 29일 backup.txt
-rw-r--r-- 1 borisu staff 2361 2002년 9월 3일 memo.txt
drwx------ 5 borisu staff 512 5월 20일 11:55 shell/
-rw-r--r-- 1 borisu staff 1660 4월 25일 01:37 ssh-setup.sh

File Type: -, f , d, c, b
Permission: read(r:4), write(w:2), execute(x:1)
User, Group, Others

1) 퍼미션 설정
$ chmod u+x file1 (symbolic mode)
$ chmod a=rx file1 (symbolic mode)
$ chmod 644 file1 (octal mode)

2) 소유권 변경 (root)
# chown user01 file1 (파일 소유자 변경 시)
# chgrp class1 file1 (파일 그룹 소유자 변경 시)
# chown -R user01:class1 dir1 (디렉토리 변경 시)

3) umask : 기본 퍼미션 제한
$ umask (확인)
$ touch file1
$ mkdir dir1
$ umask 027 (재설정)
$ touch fie2
$ touch dir2

6. Visual Editor (VI)

유닉스의 기본 편집기는 vi가 있고, 그밖에 emacs 등이 있다. GUI로는 dtpad가 있다.

- vi의 세가지 모드
Command Mode (명령 모드)
Edit Mode (편집 모드)
Last Line Mode (마지막 명령 라인 모드)

- vi 레퍼런스 카드 및 메뉴얼
http://kldp.org/응용_프로그램/에디터/Vi/


7. Archiving User Data

1) Archive 관련 명령

tar - Creates and extracts files from a tape device or file archive
compress, uncompress - Compress and uncompress a file
zcat - Uncompress a compressed file and sends the output to the screen without changing the compressed file.
gzip, gunzip - Compresses and uncompressed
gzcat - Uncompress a gzipped file and sends the output to the screen without changing the gzipped file
zip, unzip - Packages and compresses files and uncompressed files.
jar - Packages and comresses multiple files to a single archive file
cpio - Copies and extracts files fro a file archive or tape device.

[ tar ]

내용만 볼 때: tar tvf name.tar
풀 때 : tar xvf name.tar
만들 때 : tar cvf name.tar file1 file2 file3
tar cvf name.tar dir1

$ cd
$ mkdir testdir
$ cd testdir
$ cp /etc/profile file1
$ man ls | col -b > file2
$ tar cvf first.tar file1 file2
$ rm file? ; ls
$ tar tvf first.tar
$ tar xvf first.tar

$ cd ..
$ tar cvf second.tar testdir
$ rm -rf testdir
$ tar tvf second.tar
$ tar xvf second.tar

[ compress & uncompress ]

$ compress second.tar
$ ls
$ uncompress second.tar.Z
$ tar xvf second.tar

cf. zcat second.tar.Z | tar xvf -
cf. compress -dc second.tar.Z | tar xvf -
cf. uncompress -c second.tar.Z | tar xvf -

[ gzip ]

$ cd
$ cd ..
$ ls
$ tar cvf /var/tmp/myhome.tar user01
$ cd /var/tmp; ls
$ gzip myhome.tar
$ ls

$ gzip -d myhome.tar.gz
$ tar tvf myhome.tar
$ tar xvf myhome.tar

cf. gzcat myhome.tar.gz | tar xvf -
cf. gzip -dc myhome.tar.gz | tar xvf -
cf. gunzip -c myhome.tar.gz | tar xvf -
cf. gtar xvfz myhome.tar.gz

[ jar ]
$ jar cvf dir1.jar dir1
$ jar tvf dir1.jar
$ jar xvf dir1.jar

8. 원격지 접속

원격지 접속은 telnet, rlogin, ftp, ssh등이 있다.

1) telnet
원격 호스트의 user name과 password가 필요
$ telnet host1
...(접속해서 사용)
$ exit (로그 아웃)

2) rlogin

원격 호스트에서 허락된 호스트 또는 유저의 경우 패스워드가 필요 없다.
자세한 사용법은 다음을 참고한다.
http://nscp.upenn.edu/aix4.3html/cmds/aixcmds4/rlogin.htm

- 일반유저: /etc/hosts.equiv, $HOME/.rhosts
- root : /.rhosts
- 파일 형식 : 호스트 명 유저

$ rlogin host2
...(접속해서 사용)
$ exit (로그 아웃)

cf. rsh host1 hostname
cf. rcp file1 host1:/tmp

3) ssh (secure Shell)

명령어: ssh, scp, sftp
관련사이트:
http://www.openssl.org
http://www.openssh.org
관련 문서:
ssh howto
http://kldp.org/~eunjea/ssh/index.html
ssh install for solaris
http://www.sunfreeware.com/openssh.html

4) ftp

[ 접속 및 연결 끊기 ]

1) 일반 유저로 로긴
$ ftp server_name
또는
$ ftp
ftp> open server_name
ftp> user login_id
ftp> close
ftp> open new_server
ftp> quit

2) Anonymous 로긴
$ ftp server_name
Login: ftp ( or anonymous)
password: user01@suned.co.kr

[ 기본 설정 옵션 ]

ftp> hash (on/off: 전송상태를 표시)
ftp> ver (on/off: Verbose mode)
ftp> bin (Binary mode)
ftp> asc (ASCII mode)
ftp> prompt (on/off: 다중 파일 전송시 프롬프트 on/off)

[ 기본 명령 ]

ftp> cd (디렉토리를 옮길 때: REMOTE )
ftp> ls (디렉토리 내용을 볼 때: REMOTE )
ftp> pwd (현재 디렉토리 위치 확인: REMOTE)

ftp> lcd (디렉토리를 옮길 때: LOCAL )
ftp> !ls (디렉토리 내용을 볼 때: LOCAL )
ftp> !pwd (현재 디렉토리 위치 확인: LOCAL)
ftp> ! (Shell로 잠시 빠져나감: LOCAL)

[ 파일 전송 ]

ftp> get remote_file [local_file] (받을 때)
ftp> mget file1 file2 file3 file4 (여러 파일을 받을 때)

ftp> put local_file [remote_file] (올릴 때)
ftp> mput file1 file2 file3 file4 (여러 파일을 받을 때)

[ 기타 명령어 ]

ftp> del file_name (파일 지우기: REMOTE)
ftp> mkdir dir_name (디렉토리 만들기: REMOTE)
ftp> help (도움말 보기: REMOTE)

5) X 서버로의 접근
윈도우용 Client프로그램으로는 Xmanager가 유명하다. 다음 문서를 참조한다.
- 사용법
http://compedu.inue.ac.kr/~chlee56/wowlinux/xmanager.htm
- 다운로드
http://netsarang.co.kr/download/download.html

9. 시스템 프로세스

process : 프로그램이 메모리에 올라와 동작하고 있는 상태.
PID : 프로세스의 고유 ID (커널이 관리)
Daemon: 백그라운드로 실행, 부팅 시 동작, 서버 프로세스

1) 프로세스 정보
$ ps -ef | more
UID PID PPID C STIME TTY TIME CMD
root 0 0 0 4월 25 ? 0:00 sched
root 1 0 0 4월 25 ? 0:05 /etc/init -
root 2 0 0 4월 25 ? 0:00 pageout
root 3 0 0 4월 25 ? 86:09 fsflush
root 279 1 0 4월 25 ? 0:00 /usr/lib/saf/sac -t 300
root 204 1 0 4월 25 ? 0:00 /usr/lib/utmpd
root 134 1 0 4월 25 ? 0:02 /usr/sbin/rpcbind
$ ps -ef | grep lp
$ pgrep -l lp (solaris 8부터)

2)프로세스 종료

- 시그널 정의
$ man -s 3HEAD signal

Name Value Default Event
SIGHUP 1 Exit Hangup (see termio(7I))
SIGINT 2 Exit Interrupt (see termio(7I))
SIGKILL 9 Exit Killed
SIGTERM 15 Exit Terminated (==> Control + C)

- 프로세스 종료
$ kill [-signal] PID ...
$ kill <PID>
$ kill -9 <PID>
$ kill -KILL <PID>
$ pgrep -l mail
215 sendmail
12047 dtmail
$ kill 12047
$ pkill -KILL 프로세스 이름

- 자신이 사용하는 워크스테이션이 윈도우 hang시 처리요령
다른 시스템에서 다음과 같이 한다.
$ telnet (또는 rlogin) host1
$ pkill -9 <자신의 쉘이름, ex) ksh>
또는
$ pkill -KILL <자신의 쉘이름 ex) ksh>

3) 잡 제어 ( Job Control )
여러 개의 작업을 수행하고 이를 제어할 수 있다. 단 본쉘(sh)는 불가

$ find . -name core > list & ( Job을 background로 실행)
$ jobs ( Job을 확인)
[1] = running find . -name core > list &
$ fg %1 ( 백그라운드 잡을 포그라운드로)
Control + Z ( 포그라운드 잡을 중지)
$ jobs ( job을 확인)
$ bg %1 (중지된 잡을 백그라운드로 실행)
$ kill %1 (잡을 종료)


10. 쉘 (Shell)

명령해석기, 사용자 인터프리터라고도 한다. 쉘 각각의 자세한 문서는 다음을 참고한다.
http://dir.yahoo.com/Computers_and_Internet/Software/Operating_Systems/UNIX/Shells/


Shell 종류 Shell 프로그램 위치 프롬프트 프롬프트 변수 쉘초기화 파일
Bourn Shell /bin/sh, /sbin/sh #, $ PS1 /etc/profile, $HOME/.profile
Korn Shell /bin/ksh #, $ PS1 /etc/profile, $HOME/.profile, $HOME/.kshrc
C Shell /bin/csh hostname#, hostname% prompt /etc/.login, $HOME/.cshrc, $HOME/.login


- 현재 사용쉘 확인
$ ps
$ echo $SHELL
- 기타 쉘
bash, tcsh, zsh, ssh
- 관련 디렉토리
/etc/skell : 샘플 초기화 파일 위치

1) 입출력의 전환
$ mailx user1 < ~/myfile ( 입력의 방향을 파일로부터 )
$ ps -ef > file_list (출력의 방향을 파일로 전환)
$ cat /etc/passwd >> file_list (출력의 방향을 파일로 전환, append)
$ ls /var /no 1> dat 2>&1

2) 파이프 (프로세스 간 통신)
$ who | wc -l
$ ls -F /etc | grep "/"
$ head -10 file1 | tail -3 | lp
$ ps -ef | tail +2 | wc -l

3) Meta Character
- Backslashes (\)
- Dollar signs ($)
- Back quotation marks (` `)
- quotation marks (' ')
- double quotation marks (" ")

$ rm \*


$ echo '$SHELL'
$ echo "$SHELL"
$ echo "\$SHELL"

$ echo date
$ echo `date`

11. Korn Shell Features

1) Aliases
alias aliasname="command"
ex)
$ alias h=history
$ alias c=clear
$ alias home='cd;ls'
$ alias ls='ls -F'
$ alias copy="cp -r"

2) Command line Editing
- Command line 편집 기능
$ set -o vi
$ [esc] + k (=> vi command mode )

3) History
- 128개를 유지 ( 변수 HISTSIZE -> .kshrc)
- $HOME/.sh_history (변수 HISTFILE -> .kshrc)
ex)
$ history ( 최근 16개 명령을 list)
$ history 23 (23 ~ 최근명령)
$ history -10 (최근 명령 10개)
cf)
$ r ( 가장 최근 명령 실행)
$ r p ( p로 시작된 가장 최근 명령어 실행)
$ r 23 ( 히스토리가 23번인 명령어 실행)

4) Ignore Control-d (ignoreeof)
- Control-d의 기능: 1) EOF, 2) EXIT
ex)
$ ^d
$ set -o ignoreeof (=>설정 eof:on, exit:off)
$ ^d
$ set +o ignoreeof (=>해제 eof:on, exit:on)

5) .profile과 분리된 초기화 파일 (.kshrc)
- $HOME/.kshrc (C쉘: $HOME/.cshrc)
- 환경변수는 .profile에 기록
- 기타변수 및 콘쉘 제공 기능 등은 .kshrc에 기록
ex)
$ . ~/.kshrc ( 재 초기화 )

6) Job Control
ex)
$ find / -name core -exec rm {} \;
^Z (=> suspend)
[1] + stop ... (=> [1]은 잡번호)
$ bg %1 ( 1번 잡을 백그라운드로 실행)
$ jobs ( 잡 확인)
$ fg %1 ( 1번 잡을 포그라운드로 실행)
$ ^+C ( 포그라운드 잡을 종료)
$ jobs

7) 덮어쓰기 방지 (noclobber)
ex)
$ touch testfile
$ cat /etc/passwd > testfile
$ cat testfile
$ cat /etc/profile > testfile
$ cat testfile
$ set -o noclobber
$ cat /etc/hosts > testfile ( => 경고메시지가 떨어짐)

12. Korn Shell Initialization

- Korn Shell 초기화 순서

(1) /etc/profile
(2) $HOME/.profile
(3) $HOME/.kshrc


1) $HOME/.profile 설정하기

$ vi ~/.profile

stty cs8 erase '^H' -istrip ( -> 터미널 설정 )

PATH=$PATH:/usr/local/bin:/usr/ccs/bin:/usr/ucb (-> Path 설정)
EXINIT="set ai nu ts=3 showmode" (-> vi 환경설정)
ENV="$HOME/.kshrc" ( -> .kshrc 확장쉘 변수 설정)
LPDEST="lp1" (-> Default Printer Set )
EDITOR="vi" ( -> Default Editor Set )

export PATH EXINIT ENV LPDEST EDITOR ( 전역변수 선언 )

$ . ~/.profile ( .profile 재 초기화)


2) $HOME/.kshrc 설정하기

$ vi ~/.kshrc

HOSTNAME=`uname -n`
PS1='[$LOGNAME@$HOSTNAME:$PWD]$ ' (-> 프롬프트 변경)

export PS1 HOSTNAME (-> 전역변수 선언)

## My Alias Def (-> 엘리어스 설정 )
alias ls='ls -F'
alias rm='rm -i'
alias mv='mv -i'
alias cp='cp -i'
alias home='cd;ls'
alias c=clear
alias h=history
alias d=date

## Other ksh feature set
set -o noclobber
set -o vi
set -o ignoreeof

$ . ~/.kshrc (-> .kshrc 재 초기화)


13. 쉘 프로그래밍

- 쉘 프로그래밍 강좌

http://kldp.org/KoreanDoc/Shell_Programming-KLDP
http://myhome.naver.com/yskim511/21.htm

4부. 시스템 어드민

1. UNIX 파일의 종류와 특성

- 파일은 파일이름, inode, data block으로 구성되어 있다.
- 파일의 종류는 ls -l , ls -F, file 등의 명령어로 확인할 수 있다.

1) 파일의 종류
-: Regular File (Ordinary File) : vi, ed, cp, mv, cat, touch, cc 등에 의해 생성
d: Directory File : mkdir, cp -r 등에 의해 생성
c,b: Special File ( 디바이스 파일) : 장치 파일이며 drvconfig, devfsadm등에 의해 생성
brw-r----- 1 root sys 32, 0 2000년 7월 4일 /devices/sbus@1f,0/SUNW,fas@e,8800000/sd@0,0:a
crw-r----- 1 root sys 32, 0 2000년 7월 4일 /devices/sbus@1f,0/SUNW,fas@e,8800000/sd@0,0:a
l: Symbolic Link File: 심볼릭 링크 파일
lrwxrwxrwx 1 root root 12 2000년 7월 4일 /etc/hosts -> ./inet/hosts

$ ln -s file1 file2 (심볼릭 링크)
$ ln file2 file3 (하드 링크)
$ rm file1 (원본을 제거함)
$ cat file2 file3 ( file2는 볼 수 없음)

- 링크란 어떤 파일의 또 다른 이름이다.
- 하드링크는 같은 inode를 심볼릭 링크는 다른 inode를 갖는다.
- 하드링크는 디렉토리를 링크할 수 없다.
- 하드링크는 서로 다른 파일시스템 간에 링크할 수 없다.
- 하드링크는 원본파일의 데이터와 같은 데이터를 공유하며, 심볼릭 링크는 원본의 PATH값을 데이터로 갖는다.

- 심볼릭 링크의 예
/etc/hosts -> /etc/inet/hosts
/bin -> /usr/sbin
- 하드링크의 예
/etc/init.d/* -> /etc/rc#.d/*

2) inode
모든 파일은 하나의 inode를 가지며 이것은 해당 파일에 대한 정보를 가진다. inode table은 inode들로 구성되어 있으며
하나의 inode는 ls-l정보, 데이터블록 포인터, shadow inode 포인터로 이루어져 있다. 포인터들이 가리킬 수 있는 데이터 블록의
사이즈는 최대 1T까지 가능하다.

- 파일과 파일시스템의 최대 사이즈
solaris 2.6 이전 : 2G (파일), 1TB (파일 시스템)
solaris 2.6부터 : 2G이상 1TB (파일), 1TB (파일 시스템)

파일의 경우 실재로는 866G까지 가능하며, 파일 시스템의 1T이상은 Virtual Volume(Meta Device, Veritas Volume Manager)을 구성해야 한다.


2. Boot PROM (Programmable Read Only Memory)

- PROM 관련 문서
Frequently Asked Questions about Sun NVRAM/hostid
http://www.squirrel.com/squirrel/sun-nvram-hostid.faq.html
Sun Flash PROM Guide for Workstations and Workgroup Servers - Standalone Version
http://www.sun.com/products-n-solutions/hardware/docs/pdf/802-3233-23.pdf
Updating the Flash PROM on the Ultra 1, Ultra 2, Ultra 450, and Sun Enterprise 450 Systems
http://docs.sun.com/db/doc/816-2583-10/6m8u2cukc?a=view
Updating the Flash PROM on the Sun Enterprise 3x00, 4x00, 5x00, and 6x00 Systems
http://docs.sun.com/db/doc/816-2583-10/6m8u2cukk?a=view


1) PROM이 하는 역할
- Test the system hardware (POST: Power on Self Test)
- Boot the operating system

[ POST ]
- Initialize the system
- Probes Memory and the CPU
- Probes devices, interprets their devices and build a dev tree
- Install the console

2) PROM으로 가는 방법
- # halt
- # init 0
- # /usr/sbin/shutdown -y -g0 -i0
- Stop + A ( 부팅 시 바로 누르거나 시스템 hang시에만 적용)

3) PROM에서의 얻을 수 있는 정보
OK banner ( 시스템 모델명, 메모리, hostid, Ethernet Addr, Boot PROM 버전 )
OK probe-scsi ( 연결된 SCSI 장치들의 정보 확인)

4) PROM 버전
1.x : Original Sparc Boot PROM
2.x : Open Boot PROM (OBP) => sparc 시리즈 (sparc4,5,10,20...등)
3.x : Open Boot PROM with Flash Update (Flash PROM) => ultra sparc 시리즈

5) PROM에서 사용되는 명령어
OK help (도움말)
OK probe-scsi (스카시 장비 체크)
OK prebe-ide ( IDE장비 체크)
OK devalias (PROM에 설정되어 있는 장비의 물리적 장치명과 별명)
OK show-devs ( PROM에 설정되어 있는 물리적 장치의 트리구조 보기)
OK printenv (PROM에 설정되어 있는 부트 파라미터의 기본 값을 확인)
OK setenv <parameter_name> <value>
OK reset ( setenv에 의해 변경된 파라미터 값들을 재 저장하는 명령)
OK set-default <parameter_name> ( 지정한 파라미터 값을 초기화)
OK set-defaults ( 지정한 모든 파라미터 값들을 초기화 => STOP + N)

6) PROM의 부트 명령어
OK boot [ device name ] -[option]

OK boot [disk, net, cdrom] (=> default는 disk)
OK boot -s (싱글유저로 부팅)
OK boot -a (Interactive 모드로 부팅)
OK boot -r (Reconfiguration Boot => 장치를 추가했을 때)

7) OS의 PROM관련 시스템 명령어
# eeprom (확인)
# eeprom boot-device ( 확인)
# eeprom auto-boot?=false (설정)
# eeprom 'auto-boot?=false' (csh의 경우)


3. 부트 프로세스 (Boot Process)

1) 부팅의 단계는 다음과 같다.

(1) 부트 PROM 단계
- PROM이 POST(Power On Self Test)를 실행
- 부트 디바이스를 결정
- 부트 프로그램인 bootblk를 로드

(2) 부트 프로그램 단계
- bootblk는 두 번째 부트 프로그램인 ufsboot를 로드
- ufsboot는 커널을 로드( 32bit, 64bit kernel)

(3) 커널 초기화 단계
- 커널(/kernel/unix, /usr/kernel, /platform/`uname -m`/kernel)은 자신을 초기화하고 모듈을 로드 한다.
- Configuration 파일인 /etc/system을 읽는다.

(4) init 단계
- 커널이 /sbin/init을 실행한다.
- init은 /etc/initab을 읽는다.
- 필요한 데몬을 실행한다.


2) 32 또는 64 bit 커널의 확인 및 변경
64bit의 경우 OS는 Solaris7부터, 시스템 아키텍처는 sun4u(ultra sparc) 이상에서이다.

- 확인하기
# isainfo -kv
32-bit sparc kernel modules (=> 32일 경우)
64-bit sparc kernel modules (=> 64일 경우)

- 64bit -> 32bit
OK boot kernel/unix
- 32bit -> 64bit
OK boot kernel/sparcv9/unix

cf. 64bit 커널 지정하기
# vi /platform/sun4u/boot.conf
...
ALLOW_64BIT_KERNEL_ULTRASPARC_1_CPU=true

3) 커널 파라미터 수정
보다 자세한 사항은 다음을 참조한다.
- Solaris Tunable Parameters Reference Manual
http://docs.sun.com/db/doc/816-0607

i) 최대 사용자수 지정( maxusers)
set maxusers=100

ii) 최대 프로세스 개수 지정 (max_nprocs)
set max_nprocs=100

iii) 가상 단말기 개수 지정 ( pt_cnt)
- 리부팅시에는 반드시 reconfiguration boot
set pt_cnt=128
set npty=128

iiii) 최대 파일 디스크립트 개수 지정하기 (rlim_fd_cur)
- 하나의 프로세스가 동시에 오픈할 수 있는 최대 파일 개수
- # ulimit descriptors 512
- # ulimit -n 512
set rlim_fd_max=1500
set rlim_fd_cur=128

iiiii) 최대 UFS inode수 지정( ufs_ninode)
- 시스템에서 파일을 오픈 하면 하나의 파일에 대하여
하나의 ufs_ninode를 가지게 된다.
set ufs_ninode=10000

[ How to Setup Kernel Parameter ]

i) backup /etc/system file
# cp /etc/system /etc/system.org

ii) Edit /etc/system file
# vi /etc/system
... (다음을 추가)
set pt_max_pty=10

iii) Reconfiguration Boot
# reboot -- -r

iiii) 윈도우에서 터미널을 여러 개 띄워 max값을 확인

[ How to recover /etc/system File ]

i) Edit /etc/system file
# vi /etc/system
... (다음을 추가)
exclude: drv/dad

ii) reboot
# reboot

iii) Boots the system interactively
OK boot -a
...
Enter filename of kernel (kernel/unix): <Enter>
Enter default directory for modules (kernel, /usr/kernel): <Enter>
Enter name of system file (etc/system): /etc/system.org
Enter default root file system type (ufs): <Enter>
Enter physical name of root device: <Enter>

iiii) Recover /etc/system file
# cp /etc/system.org /etc/system
# init 6


4. init 단계

kernel은 init을 실행하고 init은 /etc/inittab파일을 일고 초기화 하며 해당 설정대로 관련 명령을
수행한다. 시스템 운영에 필요한 데몬 들을 실행하고 동작레벨(Run Level)을 관리하는 것이 주 역할이다.

1) /etc/inittab 파일
ap::sysinit:/sbin/autopush -f /etc/iu.ap (*)
ap::sysinit:/sbin/soconfig -f /etc/sock2path (*)
fs::sysinit:/sbin/rcS sysinit >/dev/msglog 2<>/dev/msglog </dev/console (*)
is:3:initdefault: (*)
p3:s1234:powerfail:/usr/sbin/shutdown -y -i5 -g0 >/dev/msglog 2<>/dev/msglog (*)
sS:s:wait:/sbin/rcS >/dev/msglog 2<>/dev/msglog </dev/console (*)
s0:0:wait:/sbin/rc0 >/dev/msglog 2<>/dev/msglog </dev/console
s1:1:respawn:/sbin/rc1 >/dev/msglog 2<>/dev/msglog </dev/console
s2:23:wait:/sbin/rc2 >/dev/msglog 2<>/dev/msglog </dev/console (*)
s3:3:wait:/sbin/rc3 >/dev/msglog 2<>/dev/msglog </dev/console (*)
s5:5:wait:/sbin/rc5 >/dev/msglog 2<>/dev/msglog </dev/console
s6:6:wait:/sbin/rc6 >/dev/msglog 2<>/dev/msglog </dev/console
fw:0:wait:/sbin/uadmin 2 0 >/dev/msglog 2<>/dev/msglog </dev/console
of:5:wait:/sbin/uadmin 2 6 >/dev/msglog 2<>/dev/msglog </dev/console
rb:6:wait:/sbin/uadmin 2 1 >/dev/msglog 2<>/dev/msglog </dev/console
sc:234:respawn:/usr/lib/saf/sac -t 300 (*)
co:234:respawn:/usr/lib/saf/ttymon -g -h -p "`uname -n` console login: " -T sun -d /dev/console -l console -m ldterm,ttcompat (*)

2) Run Level
0 : PROM monitor level. 부트 PROM의 OK 프롬프트 상태로 시스템을 종료하기 위한 Level이다. (==> halt, init 0, shutdown -i0)
s,S : Single User(관리자) 상태로서 마운트된 모든 파일 시스템을 접근할 수 있다.
1 : Single User(관리자) 상태로서 사용 가능한 모든 파일 시스템을 접근할 수 있다.
2 : 다중 사용자 레벨 (Multi User Level)
3 : 다중 사용자 레벨 (Multi User Level) with NFS(Network File Service)
4 : User Define Level (사용되지 않음)
5 : Shutdown(0) and power off (==> poweroff , init 5, shutdown -i5 )
6 : Shutdown(0) and reboot (==> reboot, init 6, shutdown -i6)

3) 각 Run Level별 데몬 프로세스의 실행
init --> /sbin/rc# --> /etc/rc#.d/{S##스크립트, K##스크립트} --> 데몬 실행
root(관리자) --> /etc/init.d/스크립트 --> 데몬 종료, 재실행

/etc/init.d/스크립트 ==> /etc/rc#.d/{S##스크립트, K##스크립트}는 하드링크 됨. 관련 파일 검색은 다음과 같다.
# ls -i /etc/init.d/nfs.server
28562 /etc/init.d/nfs.server*
# find /etc -inum 28562
/etc/init.d/nfs.server
/etc/rc0.d/K28nfs.server
/etc/rc1.d/K28nfs.server
/etc/rc2.d/K28nfs.server
/etc/rc3.d/s15nfs.server
/etc/rcS.d/K28nfs.server

4) RC 스크립트 추가하기

(1) Edit banner script in /etc/init.d
# cd /etc/init.d
# cp lp banner
# vi banner
#!/bin/sh
#
# Boot Process test script
#

case "$1" in
'start')
[ -f /usr/bin/banner ] && /usr/bin/banner "SYSTEM UP"
/usr/bin/audioplay /usr/demo/SOUND/sounds/rooster.au
;;
'stop')
[ -f /usr/bin/banner ] && /usr/bin/banner "SYSTEM DOWN"
/usr/bin/audioplay /usr/demo/SOUND/sounds/flush.au
;;
'*')
echo "Usage: $0 { start | stop }"
exit 1
esac
exit 0

(2) Test script
# chmod 744 banner
# chown root:sys /etc/init.d/banner
# ./banner start
# ./banner stop

(3) link to /etc/rc2.d
# cd /etc/rc2.d
# ln /etc/init.d/banner S22banner

(4) link to /etc/rcS.d
# cd /etc/rcS.d
# ln /etc/init.d/banner K99banner

(5) link to /etc/rc0.d
# cd /etc/rc0.d
# ln /etc/init.d/banner K99banner

(6) Test init state
# init s
...
# init 6
...
# halt


5. Device Configuration

1) 장치 명
- Logical Device Name ( 관리자)
- Physical Device Name ( kernel, system )
- Instance Name (kernel이 부팅 시 빠른 참조를 위해)

2) Logical Device Name
/dev/[r]dsk/c#t#t#d#s#
c# : Controller Number
t# : Target Number
d# : Disk Number
s# : Slice or partition number (0-7)
예) /dev/dsk/c0t0d0s0(raw device) /dev/rdsk/c0t3d0s (block device)

3) Physical Device Name
# ls -lL /dev/dsk/c0t0d0s0
brw-r----- 1 root sys 32, 0 2000년 7월 4일 /devices/sbus@1f,0/SUNW,fas@e,8800000/sd@0,0:a
# ls -lL /dev/rdsk/c0t0d0s0
crw-r----- 1 root sys 32, 0 2000년 7월 4일 /devices/sbus@1f,0/SUNW,fas@e,8800000/sd@0,0:a

4) Instance Name
시스템 커널에 의해 부여된 Physical Device Name의 축약된 이름이다.
# cat /etc/path_to_inst
"/sbus@1f,0" 0 "sbus"
"/sbus@1f,0/SUNW,fas@e,8800000" 0 "fas"
"/sbus@1f,0/SUNW,fas@e,8800000/sd@f,0" 14 "sd"
"/sbus@1f,0/SUNW,fas@e,8800000/st@6,0" 6 "st"
"/sbus@1f,0/SUNW,fas@e,8800000/sd@d,0" 12 "sd"
"/sbus@1f,0/SUNW,fas@e,8800000/st@4,0" 4 "st"
"/sbus@1f,0/SUNW,fas@e,8800000/sd@e,0" 13 "sd"
"/sbus@1f,0/SUNW,fas@e,8800000/st@5,0" 5 "st"
"/sbus@1f,0/SUNW,fas@e,8800000/sd@b,0" 10 "sd"
"/sbus@1f,0/SUNW,fas@e,8800000/st@2,0" 2 "st"
"/sbus@1f,0/SUNW,fas@e,8800000/sd@c,0" 11 "sd"
"/sbus@1f,0/SUNW,fas@e,8800000/st@3,0" 3 "st"
"/sbus@1f,0/SUNW,fas@e,8800000/st@0,0" 0 "st"
"/sbus@1f,0/SUNW,fas@e,8800000/sd@a,0" 9 "sd"
"/sbus@1f,0/SUNW,fas@e,8800000/st@1,0" 1 "st"
"/sbus@1f,0/SUNW,fas@e,8800000/sd@6,0" 6 "sd"
"/sbus@1f,0/SUNW,fas@e,8800000/sd@4,0" 4 "sd"
"/sbus@1f,0/SUNW,fas@e,8800000/sd@5,0" 5 "sd"
"/sbus@1f,0/SUNW,fas@e,8800000/sd@2,0" 2 "sd"
"/sbus@1f,0/SUNW,fas@e,8800000/sd@3,0" 3 "sd"
"/sbus@1f,0/SUNW,fas@e,8800000/sd@0,0" 0 "sd"
"/sbus@1f,0/SUNW,fas@e,8800000/sd@1,0" 1 "sd"
"/sbus@1f,0/SUNW,fas@e,8800000/sd@8,0" 7 "sd"
"/sbus@1f,0/SUNW,fas@e,8800000/sd@9,0" 8 "sd"
"/sbus@1f,0/sbusmem@2,0" 2 "sbusmem"
"/sbus@1f,0/sbusmem@3,0" 3 "sbusmem"
"/sbus@1f,0/sbusmem@0,0" 0 "sbusmem"
...

5) 디바이스의 재구성

장치를 새로 장착하고 /devices 및 /dev의 장치파일을 재구성하기 위한 명령어는 다음과 같다.
- (재)부팅이 필요
i) # reboot -- -r
ii) OK boot -r
iii) # touch /reconfigure
# reboot ( or init 6)
- (재)부팅이 불필요
i) # drvconfig -i sd ( Solaris 2.6부터 )
# disks (tapes, ports, devlinks)
ii) # devfsadm -c disk [ -c tape -c audio ]


6) 장치 추가 용례
- reconfigure file 생성
# touch /reconfigure
- 시스템의 정지
# init 5
- 시스템의 전원을 끈다
- 시스템에 새로운 디바이스를 연결한다.
- 외장형일 경우 외장 디바이스의 전원을 켠다.
- 시스템의 전원을 켠다.
- 부팅 후 추가된 장치의 Reconfiguration을 확인한다.

7) 장치의 연결확인
- PROM 단계에서
OK probe-scsi
- OS에서
# prtconf | grep -v not
# format (디스크의 경우, 확인만 하고 Control + d )
Searching for disks...done


AVAILABLE DISK SELECTIONS:
0. c0t0d0 <SUN2.1G cyl 2733 alt 2 hd 19 sec 80>
/sbus@1f,0/SUNW,fas@e,8800000/sd@0,0
1. c0t1d0 <IBM-DCAS-32160W-S65A cyl 8186 alt 2 hd 3 sec 171>
/sbus@1f,0/SUNW,fas@e,8800000/sd@1,0
Specify disk (enter its number):


6. DISK, SLICE, FORMAT

1) Disk Label (VTOC: Volume Table Of Contents)
- 디스크의 파티션 테이블 (Partition Table)
- 디스크 디바이스를 구별하는 볼륨명(volume name)
- Optional Partition Tag (각 파티션의 표준 마운트 포인트 이름으로 디스크 라벨에서만 사용되고 OS에서는 사용되지 않는 제한된 값)
- Optional Partition Flag (각 파티션이 Writable이지 Mountable인지를 결정하는 값으로 디스크 라벨에서만 사용되고 OS에서는 사용되지
않는 제한된 값)

VTOC의 정보확인은 prtvtoc로 변경(파티션)은 format을 이용한다

# prtvtoc /dev/rdsk/c0t3d0s2 (=> VTOC 정보 확인)
# format

2) 파티션 정하기
솔라리스에서는 하드디스크의 파티션을 하기 위해 format이라는 utility를 사용한다.
솔라리스에서는 하나의 디스크에 최대 8개의 파티션 까지 나눌 수 있으며 2번은 전체를 나타낸다. 따라서 실제 파티션 수는 7개이다.
디스크를 추가하고 파티션을 하기 위한 자세한 사용법은 다음을 참조한다.
http://www.ussg.iu.edu/usail/peripherals/disks/adding/solaris.html
http://docs.sun.com/db/doc/805-7228/6j6q7uet8

# format (==> 포맷하고자 하는 디스크 번호를 선택)
AVAILABLE DISK SELECTIONS:
0. c0t0d0 <SUN2.1G cyl 2733 alt 2 hd 19 sec 80>
/sbus@1f,0/SUNW,fas@e,8800000/sd@0,0
1. c0t1d0 <IBM-DCAS-32160W-S65A cyl 8186 alt 2 hd 3 sec 171>
/sbus@1f,0/SUNW,fas@e,8800000/sd@1,0
Specify disk (enter its number):

주의사항 1) 슬라이스 2번은 디스크 전체를 의미하므로 절대 수정하지 않는다.
주의사항 2) 파티션은 실린더 단위로 구성되는데 Offset이 정확히 일치해야 한다.
주의사항 3) 레이블 저장 명령 ( label)을 수행하지 않는다면 메모리에서만 변경되므로 디스크에는 영향을 주지 않는다.

[ 하드 디스크 추가하기 ]

# init 5
(디스크 연결하고 파워를 켠다)
OK probe-scsi
OK boot -r
# prtconf | grep -v not
# format (추가된 디스크를 선택하여 파티션 한다.)
# newfs /dev/rdsk/c0t1d0s6 (각 파티션을 파일시스템으로 만든다.)
# fsck /dev/rdsk/c0t1d0s6 (파일시스템을 체크한다.)
# mkdir /data (마운트할 디렉토리를 생성한다)
# mount /dev/dsk/c0t1d0s6 /data (마운트 한다)
# df -k 또는 mount (마운트 정보를 확인한다.)
# vi /etc/vfstab (해당 파티션의 정보를 추가하여 부팅 시 마운트 되도록 한다.)


7. Solaris 파일 시스템

1) 파일 시스템의 종류
- Disk Based File System : ufs(Unix File System), hsfs(High Sierra File System), pcfs(PC File System), udfs(Universal disk Format File System:sol7)
- Distributed File System: nfs ( Network File System)
- Pseudo File System: tmpfs(Temporary File System), swapfs(Swap File System), fdfs(File Descriptor File System), procfs(Process File System)

2) UFS의 파일 시스템 구조
- label(VTOC)(1 sector)
- Boot Bolck(15 sectors) : bootblk
- SuperBlock(16 sectors)
. 파일시스템 사이즈
. 레이블(파일 시스템명과 볼륨명)
. 파일 시스템의 Logical block 의 사이즈
. 마지막으로 업데이트된 날짜와 시간
. 실린더 그룹의 사이즈
. 실린더 그룹 안의 데이터 블록의 number의 fragment의 사이즈
. 데이터 블록의 요약 정보
. 파일 시스템 상태 값 (clean, stable, active, logging or unknown)
. 마지막 마운트 포인트의 경로명
- First Cylinder Group (보통 그룹당 16개의 실린더)
|__ backup Super Block
|__ Cylinder Group Block
| . inode 수
| . 실린더 그룹에서의 데이터 블록 수
| . 디렉터리의 수
| . free block의 map
| . 실린더 그룹에서 free block, free_inode, free fregment의 수
| . 사용된 inode의 map
|__ inode table
|__ Data Block(한 블록당 8K bytes, 1K는 fregment라 함)
- Second Cylinder Group
....

3) 파일 시스템의 생성
# newfs /dev/rdsk/c0t0d0s0
newfs: /dev/rdsk/c0t0d0s0 last mounted as /images
newfs: construct a new file system /dev/rdsk/c0t0d0s0: (y/n)? y
/dev/rdsk/c0t0d0s0: 4199508 sectors in 6603 cylinders of 4 tracks, 159 sectors
2050.5MB in 104 cyl groups (64 c/g, 19.88MB/g, 3392 i/g)
super-block backups (for fsck -F ufs -o b=#) at:
32, 40896, 81760, 122624, 162848, 203712, 244576, 285440, 325664, 366528,
407392, 448256, 488480, 529344, 570208, 611072, 651296, 692160, 733024,
773888, 814112, 854976, 895840, 936704, 976928, 1017792, 1058656, 1099520,
1139744, 1180608, 1221472, 1262336, 1302560, 1343424, 1384288, 1425152,
1465376, 1506240, 1547104, 1587968, 1628192, 1669056, 1709920, 1750784,
1791008, 1831872, 1872736, 1913600, 1953824, 1994688, 2035552, 2076416,
2116640, 2157504, 2198368, 2239232, 2279456, 2320320, 2361184, 2402048,
2442272, 2483136, 2524000, 2564864, 2605088, 2645952, 2686816, 2727680,
2767904, 2808768, 2849632, 2890496, 2930720, 2971584, 3012448, 3053312,
3093536, 3134400, 3175264, 3216128, 3256352, 3297216, 3338080, 3378944,
3419168, 3460032, 3500896, 3541760, 3581984, 3622848, 3663712, 3704576,
3744800, 3785664, 3826528, 3867392, 3907616, 3948480, 3989344, 4030208,
4070432, 4111296, 4152160, 4193024,

# newfs -m 1 /dev/rdsk/c0t0d0s0 ( Minfree 값을 조정, default는 10%)
# fstyp -v /dev/rdsk/c0t0d0s0 | grep minfree (기존의 minfree값을 확인)
# tunefs -m 2 /dev/rdsk/c0t0d0s0 ( newfs 이후 다시 재조정)


8. 파일 시스템 마운트 (File System Mount)

파일시스템을 사용하기 위해서는 트리구조의 임의 디렉토리(Mount Point)에 연결시켜야 하는데, 이를 마운트(mount)라 하며
마운트를 해제하는 것을 언마운트(unmount)라 한다.
마운트 포인트(mount point)는 빈 디렉터리로 파일 시스템을 연결할 포인트를 의미한다.

1) 마운트 정보
# mount
/ on /dev/dsk/c0t0d0s0 read/write/setuid/intr/largefiles/onerror=panic/dev=800000 on 금 4월 25 14:18:36 2003
/usr on /dev/dsk/c0t0d0s5 read/write/setuid/intr/largefiles/onerror=panic/dev=800005 on 금 4월 25 14:18:36 2003
/proc on /proc read/write/setuid/dev=3b00000 on 금 4월 25 14:18:35 2003
/dev/fd on fd read/write/setuid/dev=3bc0000 on 금 4월 25 14:18:37 2003
...

==> /etc/mnttab 을 참조함(마운트, 언마운트시 자동 업데이트. No Admin)

2) 마운트(Mount)
마운트는 mount 명령어를 이용하거나, 부팅 시 /etc/vfstab 파일 정보를 읽고 자동으로 마운트되는 두 가지 경우가 있다.

- 수동 마운트
# mount /dev/dsk/c0t3d0s7 /dir1
# mount -o ro /dev/dsk/c0t3d0s6 /dir2
# mount -o ro,nosuid,nolargefiles /dev/dsk/c0t0d0s5 /dir3
# mount -o ro,bg,soft host1:/usr/local /usr/local

- 자동 마운트
# mkdir /newdir
# mount /dev/dsk/c0t1d0s4 /newdir
# vi /etc/vfstab (엔트리를 추가)
# umount /newdir (테스트)
# mount /newdir (테스트)

cf. # mount /dir1 (=> /etc/vfstab에 이미 등록되어 있는 경우)
cf. # mountall [-r|-l] (=> /etc/vfstab에 "mount at boot" 값이 yes인 것만)

[ /etc/vfstab 파일 ]
#device device mount FS fsck mount mount
#to mount to fsck point type pass at boot options
#
#/dev/dsk/c1d0s2 /dev/rdsk/c1d0s2 /usr ufs 1 yes -
fd - /dev/fd fd - no -
/proc - /proc proc - no -
/dev/dsk/c0t0d0s1 - - swap - no -
/dev/dsk/c0t0d0s0 /dev/rdsk/c0t0d0s0 / ufs 1 no -
/dev/dsk/c0t0d0s5 /dev/rdsk/c0t0d0s5 /usr ufs 1 no -
/dev/dsk/c0t0d0s6 /dev/rdsk/c0t0d0s6 /var ufs 1 no -
/dev/dsk/c0t1d0s0 /dev/rdsk/c0t1d0s0 /usr/local ufs 2 yes -
/dev/dsk/c0t1d0s1 /dev/rdsk/c0t1d0s1 /export/home ufs 2 yes nosuid,rq
swap - /tmp tmpfs - yes -

3) 언마운트
# umount /dir1
# umount /dev/dsk/c0t3d0s7

cf. # umountall [-r|-l] (=> /, /usr, /var, /var/run, /proc, /dev/fd, /tmp 는 제외)

[ umount 되지 않은 경우 조치 사항 ]
- 자신 또는 다른 사용자가 해당 파일시스템을 사용하고 있다면, 모든 사용을 중지하고 작업 디렉터리도 다른 곳으로 이동한다.
- 특정 프로세스가 해당 파일시스템을 사용하는 경우 이를 종료한다.
# fuser -u /export/home
/export/home: 4006c(root) 6399c(user01)
# fuser -u -k /export/home
/export/home: 4006c(root)Killed 6399c(user01)Killed
또는
# umount -f /export/home ( Solaris 8 부터)

4) 플로피 디스크와 CDROM 마운트
솔라리스에서는 volume Management를 제공하며, 쉽게 사용할 수 있도록 자동으로 마운트하여 서비스 한다.

[ Volume Management ]
- 서비스 데몬 : /usr/sbin/vold
- 서비스 데몬 제어 스크립트 : /etc/init.d/volmgt {stop|start}
- 설정 파일 : /etc/vold.conf, /etc/rmmount.conf ( 특별히 설정을 할 필요는 없다)
- 플로피 마운트 포인트 : /floppy/floppy0
- CDROM 마운트 포인트 : /cdrom/cdrom0

[ 플로피의 마운트 ]
플로피를 삽입한다.
# volcheck
# mount (마운트 확인)
# cd /floppy/floppy0 (필요한 작업 수행)
# cd /
# eject floppy
# mount (언마운트 확인)

cf. 수동마운트
# /etc/init.d/volmgt stop
# pkill -9 vold
# mount -F pcfs /dev/diskette /mnt (=> msdos file system)
# mount /dev/diskette /mnt (=> ufs file system)

cf. 플로피 포맷
# fdformat -d /dev/rdiskette (msdos 포맷)
# newfs /dev/rdiskette (ufs포맷)

[ CDROM 마운트 ]
CDROM을 삽입한다.
# mount (마운트 확인)
# cd /cdrom/cdrom0 (필요한 작업 수행)
# cd /
# eject cdrom
# mount (언마운트 확인)

cf. 수동마운트
# /etc/init.d/volmgt stop
# pkill -9 vold ( vold가 종료되지 않는 경우에만)
# mount -F hsfs -o ro /dev/dsk/c0t2d0s0 /mnt

cf. CDROM이 빠져 나오지 않거나 마운트, 언마운트가 되지 않는 경우 조치사항
# ps -ef | grep vold (데몬을 확인)
# /etc/init.d/volmgt stop
# /etc/init.d/volmgt start
... (해결이 안되면)
# pkill -9 vold
# ps -ef | grep vold (vold 프로세스가 확실히 종료했는지 확인)
# /etc/init.d/volmgt start
# ps -ef | grep vold (vold가 새로 동작하였는지 확인)

[ ISO 9660 파일 시스템 마운트 ]

- ISO 파일 생성하기
# mkisofs -o test.iso /etc/init.d
# ls -l test.iso

- 루프 백 디바이스 설정하기
# lofiadm
Block Device File
# lofiadm -a /usr/local/test.iso
/dev/lofi/1
# lofiadm /dev/lofi/1
/usr/local/test.iso

- 마운트
# mount -F hsfs -o ro /dev/lofi/1 /mnt
# ls /mnt
(사용한 후)
# umount /mnt
# lofiadm
# lofiadm -d /dev/lofi/1

5) 파일 시스템을 정의하는 파일
mount 명령을 수행할 때 특별히 파일시스템 타입을 명시하지 안는 경우 로컬파일 시스템은 /etc/vfstab, /etc/default/fs순이며
원격파일 시스템은 /etc/vfstab, /etc/dfs/fstypes이다.

/etc/vfstab
ex) /dev/dsk/c0t0d0s5 /dev/rdsk/c0t0d0s5 /usr ufs 1 no -
/etc/default/fs
ex) LOCAL=ufs
/etc/dfs/fstypes
ex) nfs NFS Utilities
autofs AUTOFS Utilities
cachefs CACHEFS Utilities


9. 파일 시스템 관리

시스템의 부적절한 중지(정전, 비정상 종료 등..)로 인해 파일 시스템이 손상될 경우 fsck 유틸을 이용하여 복구해 주어야 한다.
fsck는 superblock, inode, indirect block, data block 을 검사하고 치료한다.

- Superblock 검사
파일 시스템 사이즈, inode number, free block count, free inode count
- inode 검사
format and type, link count, duplicate block, bad block number, inode size
- Indirect block 검사
블록이 다른 inode에 의해 이미 점유되어 있는 것
블록의 수가 파일 시스템의 범위에 어긋난 것
- data block 검사
평범한 data block
심볼릭 링크 data block
디렉토리 data block

1) fsck (file system check ) 명령의 수행 순서
- Phase 1 : Check Blocks and Sized
- Phase 2 : Check Pathnames
- Phase 3 : Check Connectivity
- Phase 4 : Check Reference Counts
- Phase 5 : Check Cyl groups

주의사항) 마운트 되어 사용하고 있는 파일 시스템은 fsck를 쓸 수 없다. 언마운트하거나 싱글유저 모드에서 처리한다.

2) fsck 명령 사용법
fsck [ -F FSType] [-V] [-m] [special] /dev/rdsk/장치 명

# umount /export/home
# fsck -V /export/home (실행하지는 않고 실행 명령어를 보여줌)
fsck -F ufs /dev/rdsk/c0t0d0s7 ( => /etc/vfstab을 참조한다.)
# fsck /dev/rdsk/c0t0d0s6

cf. SuperBlock 이 손상되어 복구되지 않는 경우
# newfs -N /dev/rdsk/c0t3d0s7 (=> 백업 수퍼블럭 번호를 확인)
/dev/rdsk/c0t3d0s7: 4199508 sectors in 6603 cylinders of 4 tracks, 159 sectors
2050.5MB in 104 cyl groups (64 c/g, 19.88MB/g, 3392 i/g)
super-block backups (for fsck -F ufs -o b=#) at:
32, 40896, 81760, 122624, 162848, 203712, 244576, 285440, 325664, 366528,
407392, 448256, 488480, 529344, 570208, 611072, 651296, 692160, 733024,
773888, 814112, 854976, 895840, 936704, 976928, 1017792, 1058656, 1099520,
1139744, 1180608, 1221472, 1262336, 1302560, 1343424, 1384288, 1425152,
1465376, 1506240, 1547104, 1587968, 1628192, 1669056, 1709920, 1750784,
1791008, 1831872, 1872736, 1913600, 1953824, 1994688, 2035552, 2076416,

# fsck -F ufs -o b=40896 /dev/rdsk/c0t3d0s7 (=> 파일 시스템 체크 )

3) 디스크 사용 관리
- df 명령 : 마운트된 각 파일 시스템의 사용에 관한 정보를 보여주는 명령어
# df -k (Kb 단위로 보여줌)
# df -n (파일 시스템의 유형을 보여줌)
# df -k -F ufs ( ufs 파일 시스템만 보여줌)

- du 명령 : 파일과 디렉터리에 대한 사용 정보를 보여주는 명령어
# du -k . (현재 디렉터리 이하의 사용량)
# du -ks /etc ( /etc 전체의 사이즈)

- quot 명령 : 각 파일시스템에 대한 유저별의 사용량을 보여줌
# quot -a ( 모든 파일시스템을 Kb 단위로 보여줌)
# quot -af ( 디스크 사용량과 함께 파일 수도 보여줌)

4) quota 에 대한 설정
사용자들에 제한된 용량만 사용할 수 있도록 설정하고 관리할 수 있다.
자세한 설정 방법은 다음을 참고한다.
http://docs.sun.com/db/doc/805-7229/6j6q8svfc?a=view
http://www.unix.co.kr/data/solaris/?p=sa13
http://www.jic.co.kr/ypct110.htm

5) swap의 추가
# swap -l (현재 설정된 스왑 정보를 출력)
# mkdir /files (추가할 swap파일이 위치할 디렉토리 생성)
# mkfile 24m /files/swapfile (스왑을 위한 덩어리 파일 생성)
# swap -a /files/swapfile (스왑을 추가, 주의: 절대경로로 써야 한다.)
# swap -l (확인)
# vi /etc/vfstab (부팅 시 자동으로 마운트 되도록 수정)
/files/swapfile - - swap - no -

# swap -d /files/swapfile ( 제거할 경우 )
# rm /files/swapfile
# vi /etc/vfstab (추가된 스왑 설정 라인을 제거)
# swap -l (확인)

10. 솔라리스 설치 (Solaris Installation)

* 솔라리스 9 소개
http://kr.sun.com/products/software/os_platforms/solaris/index.html
* 솔라리스 8 소개
http://kr.sun.com/products/software/os_platforms/solaris/8/index.html
* 전체 버전 간의 차이 비교
http://wwws.sun.com/software/solaris/fcc/fcc.html
* Solaris 9 Installation Guide
http://docs.sun.com/db/doc/806-5205
* Solaris 8 (SPARC Platform Edition) Installation Guide
http://docs.sun.com/db/doc/806-0955
* Solaris for Intel 설치(한글)
http://myhome.naver.com/yasicom/solaris.htm


1) 솔라리스 8 설치 전 준비 사항
설치에 필요한 최소한의 CD (국제판)
- Solaris 8 Installation CD
- Solaris 8 Software 1/2 CD
- Solaris 8 Software 2/2 CD
- Solaris 8 Language CD

2) 하드웨어 요구사항
- Sparc Base 또는 Intel Based 시스템
- 64 MB 메모리
- 2.1 GB 디스크 스페이스
- CD-ROM 드라이브

3) Solaris 8 설치 전 정보 수집
- 호스트 이름
- IP 주소
- 네이밍 서비스(DNS, NIS, NIS+, 없음)의 유형 및 구성 정보
- subnet mask
- root password
- 소프트웨어 그룹
Entire Distribution(2.1G 권장) + OEM, Entire Distribution(1.9G 권장), Developer(1.5G 권장), End User(1.2G 권장), Core(718M 권장)
- OS를 설치할 디스크 설정 및 파티션 설정

4) 설치 방법
- WebStart Installation ( Install CD)
- JumpStart Installation ( from Jumpstart Server System)
- Interactive Installation ( Software 1/2 CD)

5) 설치 순서
CDROM 넣고
# shutdown -i0 -y -g0 ( init 0 또는 Stop + A)
OK set-defaults
OK boot cdrom
- 시스템 식별
- 디스크 선택 및 파티션 설정
- 소프트웨어 그룹 설정
- 설치 후 재부팅
- Software 2/2 CD, Language CD 차례로 설치

6) 설치 시 유의사항
- 32Bit, 64Bit Kernel 선택 ( OS install 후 확인은 isainfo -kv)
- 설치 후 소프트웨어 그룹 유형확인 ( # cat /var/sadm/system/admin/CLUSTER )
SUNWCXall(Entire +OEM), SUNWCall(Entire), SUNWCprog(Developer), SUNWCuser(End User), SUNWCreq(Core)
- 파티션 권장사항 ( / 100M, /usr 500M~1G, /var 128M이상, swap 메모리2~3배, /opt 400M이상, /export/home 필요한 만큼)


11. 패키지 관리

1) 패키지 정보
# pkginfo | more (전체 보기)
# pkginfo | grep SUNWman (특정 패키지 설치여부)
# pkginfo -l SUNWman (특정 패키지의 자세한 정보)
# pkginfo -d /cdrom/solarisxxx/Solaris_8/Product | more (CDROM 내의 패키지 정보)
# pkginfo -d /cdrom/solarisxxx/Solaris_8/Product -l SUNWaudio (CDROM 내의 특정 패키지 정보)
# pkginfo | wc -l ( 설치된 총 패키지 수)

# grep /usr/bin/audioplay /var/sadm/install/contents (audioplay 의 패키지 이름 알아내기1)
# pkgchk -l -p /usr/bin/audioplay (audioplay의 패키지 이름 알아내기2)

# pkgchk SUNWaudio ( 설치 성공 여부 확인, 성공 시 메시지 없음)
# pkgchk -v SUNWaudio (특정 패키지에 대한 자세한 설치 위치)
# pkgchk -p /etc/passwd (특정 파일에 대한 초기 패키지 설치후의 변경 정보)

2) 패키지 추가
# pkgadd -d /cdrom/solxxxx/Solaris_8/Product SUNWaudio
# pkgadd -d /cdrom/solxxxx/Solaris_8/Product -s spool SUNWaudio ( /var/spool/pkg에 패키지 스풀)
# pkgadd -d /cdrom/solxxxx/Solaris_8/Product -s /export/pkgs SUNWaudio ( /export/pkgs에 패키지 스풀)
* GUI의 어드민 툴(admintool)을 이용하여 설치할 수도 있다.(cf. sysadmin(14) 가능)

3) 패키지 제거
# pkgrm SUNWaudio
# pkgrm -s spool SUNWaudio (/var/spool/pkg 의 스풀 패키지 제거)
# pkgrm -s /export/pkgs SUNWaudio (/export/pkgs의 스풀 패키지 제거)
* GUI의 어드민 툴(admintool)을 이용하여 제거할 수도 있다.(cf. sysadmin(14) 가능)

4) 기타 Freeware 패키지 활용
http://www.sunfreeware.com 에서 다양한 무료 패키지를 제공한다.

- 업데이트 및 설치를 위한 편리한 pkg-get 툴도 제공한다. 자세한 정보는 아래 참조.
http://www.sunfreeware.com/pkg-get.html
- 패키지를 직접 제작하고 싶을 경우에는 다음을 참조한다.
http://www.sunfreeware.com/pkgadd.html


12. 패치 관리

패치에 관한 다양한 정보와 패치 파일은 아래 사이트를 참조한다.
http://sunsolve.sun.com
ftp://sunsolve.sun.com/pub/patches

패치를 관리하거나 설치하기 위해서는 패치 번호를 먼저 파악해야 하고, 이는 Solaris#.PatchReport를 다운 받아 확인한다.
OS설치 후 반드시 Recommended Patch및 최신 보안 패치를 해 주어야 한다. 패치번호는 다음과 같이 구성되어있다.
109320-02 (패치번호-revision number)

1) 패치 정보
# showrev -p (시스템에 설치된 패치 정보 보기)
# patchadd -p (Solaris 2.6부터, Shell script)
# showrev -p | grep 109320
# patchadd -p | grep 109320

2) 초기 설치해야 할 패치와 참고 문서
Solaris8.PatchReport : Solaris8의 모든 recommended 패치 정보
8_Recommended.zip : Solaris8의 모든 recommended 패치 파일들
8_Recommended.README : Solaris8의 모든 recommended 패치 설치 방법과 설명

3) 패치 정보 및 저장 디렉토리
/var/sadm/patch

4) 패치 설치
# /usr/bin/unzip 109320-03.zip ( Solaris 7부터)
# /usr/bin/zcat 104040-01.tar.Z | tar xvf - (Solaris2.6)

# more 109320-03/README (반드시 관련 README를 읽어본다.)
# patchadd 109320-03 (패치를 수행)
# showrev -p | grep 109320 (설치 여부를 확인)

# patchrm 109320-03 (패치를 제거)
# showrev -p | grep 109320 (제거 여부를 확인)

- 주의사항 : Solaris2.6이전은 패치 디렉토리 내의 스크립트를 이용한다.
[설치 시]
# cd 109320
# ./installpatch .
[제거시]
# cd /var/sadm/patch/109320
# ./backoutpatch 109320

5) 패치 정보의 관리
http://sunsolve.sun.com의 Patch Portal에는 패치를 체계적이고 편리하게 다룰 수 있는 Patch finder, Patch Pro, Patch Check등을
제공한다.

6) 패치 에러 코드 정리
0 No error
1 Usage error
2 Attempt to apply a patch that's already been applied
3 Effective UID is not root
4 Attempt to save original files failed
5 pkgadd failed
6 Patch is obsoleted
7 Invalid package directory
8 Attempting to patch a package that is not installed
9 Cannot access /usr/sbin/pkgadd (client problem)
10 Package validation errors
11 Error adding patch to root template
12 Patch script terminated due to signal
13 Symbolic link included in patch
14 NOT USED
15 The prepatch script had a return code other than 0.
16 The postpatch script had a return code other than 0.
17 Mismatch of the -d option between a previous patch install and the current one.
18 Not enough space in the file systems that are targets of the patch.
19 $SOFTINFO/INST_RELEASE file not found
20 A direct instance patch was required but not found
21 The required patches have not been installed on the manager
22 A progressive instance patch was required but not found
23 A restricted patch is already applied to the package
24 An incompatible patch is applied
25 A required patch is not applied
26 The user specified backout data can't be found
27 The relative directory supplied can't be found
28 A pkginfo file is corrupt or missing
29 Bad patch ID format
30 Dryrun failure(s)
31 Path given for -C option is invalid
32 Must be running Solaris 2.6 or greater
33 Bad formatted patch file or patch file not found
34 The appropriate kernel jumbo patch needs to be installed

13. 백업

백업에 대한 자세한 문서는 다음을 참조한다.
http://docs.sun.com/db/doc/805-7228/6j6q7uf0u?a=view

- Full dump : 파티션 전체를 백업
- Incremental dump: 전체 백업 후 변경된 것만 백업
- 선택적 backup: 특정 파일이나 디렉토리를 백업
- Multivolume Backup : 여러 의 미디어를 이용한 백업

1) 백업 디바이스 종류
1/2-inch reel tape(140MB)
2.5-Gbyte 1/4 inch Cartridge(QIC) tape (2.5GB)
DDS3 4mm cartridge tape (DAT) (12-24GB)
14-Gbyte 8-mm cartridge tape (14GB)
DLT 7000 1/2-inch cartridge tape (35~70GB)

cf. /dev/rmt/xyn
x: 장치 번호 (0,1,2...)
y; 밀도 (h, m, l, c, u)
n: rewind 여부

2) mt 명령어 (tape을 제어하기 위해 사용)

# mt -f /dev/rmt/0 status (-> backup device의 상태를 표시 )
# mt -f /dev/rmt/0n eom (-> tape의 맨 끝으로 이동 )
# mt -f /dev/rmt/0 rewind (-> tape를 제일 처음으로 되감는다. )
# mt -f /dev/rmt/0n fsf [count] (-> count 개수 만큼 파일 뒤로 건너 띈다. )
# mt -f /dev/rmt/0n nfsf [count] ( -> count+1 개수 만큼 파일 뒤로 건너 띈다. )
# mt -f /dev/rmt/0n bsf [count] (-> count 개수 만큼 파일 앞으로 건너 띈다. )
# mt -f /dev/rmt/0n nbsf [count] (-> count+1 개수 만큼 파일 앞으로 건너 띈다. )
# mt -f /dev/rmt/0 erase (-> tape의 모든 내용을 지운다. tape나 device에 따라 다르나 시간이 많이 걸린다. )
# mt -f /dev/rmt/0 offline (-> tape가 eject 된다. )


3) tar, dd 명령어

# tar tvf /dev/rmt/0 ( -> tape의 내용을 확인함 )
# tar xvf /dev/rmt/0 ( -> tape에있는 내용을 Hard disk로 내림 )
# tar cvf /dev/rmt/0 /etc/hosts (-> Hard disk에있는 file 이나 directory를 tape로 받음 )
# tar cvfb - backup_dir | rsh host dd of=/dev/rmt/0 (-> remote host에있는 drive로 backup 받기)
# rsh -n host_name dd if=/dev/rmt/0 |tar xvBfb - restore_dir ( -> remote host에있는 drive로 backup 내리기 )


4) cpio 명령어

* 현재 디렉토리의 내용을 tape로 backup
# find . -print | cpio -ovcB > /dev/rmt/0
* tape에서 file을 extract
# cpio -ivcB /var/tmp/space < /dev/rmt/0
* 최근 일주일 내에 수정된 file을 tape로 받는다
# find . -mtime -7 -print | cpio -ovcB > /dev/rmt/0n
# find . -name 'file*' -print | cpio -ovcB > file.list
# cpio -ivt < file.list


5) ufsdump, ufsrestore 명령어

* /export/home이 /dev/rdsk/c0t0d0s3이라 가정

- dump할 파일 또는 파일시스템 용량확인
# df -k /export/home
# ufsdump 0S /export/home [ Mega ==> # / (1024 x 1024) ]

- Full Dump
# umount /export/home
# fsck /export/home
# ufsdump 0uf /dev/rmt/0 /export/home

- Incremental Dump
# umount /export/home
# fsck /export/home
# ufsdump 3uf /dev/rmt/0 /export/home
# cat /etc/dumpdates

- ufsrestore
# mount /export/home
# cd /export/home
# ufsrestore tvf /dev/rmt/0 (내용을 확인)
# ufsrestore rvf /dev/rmt/0 (내용을 모두 복구)
# ls /export/home ( Check filesystem restore)

# cd /var/tmp
# ufsrestore ivf /dev/rmt/0 (interactive로 일부만 복구)

- remove restoresymtable file
# rm /export/home/restoresymtable


14. 로그 관찰 및 성능 측정

1) 로그 분석

- /etc/syslog.conf (syslog 데몬 설정파일)
- /var/adm/sulog ( => su 관련 로그)
- /var/adm/messages ( => system 중요 로그 파일)
- /var/adm/loginlog (=> 로긴 관련 로그)
- /var/sadm/* (=> 패키지 관련 로그)

로그는 다음 문서를 참조한다.
http://www.certcc.or.kr/paper/tr2001/tr2001-05/unix_log_analysis.pdf (유닉스 로그 분석 1)
http://www.certcc.or.kr/paper/tr2001/tr2001-07/Unix_log_analysis_II.pdf (유닉스 로그 분석 2)

2) 시스템 퍼포먼스 관리

- System Administration Guide, Volume 2 >> 33. Managing System Performance Topics
http://docs.sun.com/db/doc/805-7229/6j6q8svgf?a=view
- SUN PERFORMANCE
http://www.sun.com/sun-on-net/performance.html
- Solaris Tunable Parameters Reference Manual
http://docs.sun.com/db/doc/816-0607
- 썬 시스템 메모리 정보 (Sun UNIX memconf utility)
http://www.4schmidts.com/memconf.html
- Unix and Windows NT System Tools
http://webperso.easyconnect.fr/sgarnaud/unixtools/index.html


5부. 네트웍 어드민

1. Network Setup

1) /etc/hostname.<Interface> 에 호스트 이름을 기록
ex) host1

2) /etc/hosts 파일에 ip설정
ex) 192.168.1.20 host1 loghost

3) /etc/defaultrouter 에 gw ip 설정
ex) 203.234.247.254

4) Netmask 설정
ex) 203.234.247.0 255.255.255.0

5) /etc/resolv.conf 에 DNS서버 등록
ex) domain ns.hananet.net
nameserver xxx.xxx.xxx.xxx

6) /etc/resolv.conf 에 dns 문자를 추가
....
hosts files dns ( ==> dns 추가)

7) 재부팅
# reboot

cf. 재부팅 없이 IP 변경
# ifconfig -a
# ifconfig hme0 down
# ifconfig hme0 203.234.247.30 net mask 255.255.255.0 broadcast + up (=> 설정)
# ifconfig hme0 (=> 확인)
# route add default 203.234.247.254 1 (=> 기본 게이트웨이 설정)

cf. 호스트 이름 변경
다음 6개 파일을 수정한다.
/etc/hosts
/etc/hostname.<interface>
/etc/nodename
/etc/net/*/hosts (3개)

cf. Network Interface Name
Lance Ethernet(10M Ethernet) : le
Fast Ethernet 1.0 : be
Fast Ethernet 2.0 이상 : hme
Quad Ethernet : qe
Quad FastEthernet 1.0 : hme
Quad FastEthernet 2.0 이상 : qfe
Gigabit Ethernet : vge
ATM 1.0 : sa
ATM 2.0 이상 : ba
FDDI : nf
Token Ring : tr


2. TCP/IP Network Layer

이론에 관한 문서는 다음을 참조한다.
- Introduction to TCP/IP
http://www.yale.edu/pclt/COMM/TCPIP.HTM
- SolarisTM 2.x - Tuning Your TCP/IP Stack and More
http://www.sean.de/Solaris/soltune.html
- TCP/IP 프로토콜
http://jkkang.net/unix/netprg/chap1/net1_2.html
- RFC 문서
ftp://ftp.isi.edu/in-notes/rfc793.txt

1) ifconfig
# ifconfig -a (모든 Network Interface 설정 정보 출력)

# ifconfig hme0 down (=> Interface disable)
# ifconfig hme0 up (=> Interface enable)

# ifconfig hme0 unplumb (=> Interface close)
# ifconfig hme0 plumb (=> Interface open)

# ifconfig hme0 203.234.247.30 netmask 255.255.255.0 broadcast + up (=> 설정)

2) rlogin, rsh, rcp

명령어: rlogin, rsh, rcp
설정파일(user): /etc/hosts.equiv, $HOME/.rhosts
설정파일(root): /.rhosts
서버호스트: sun01
클라이언트: sun02

- 서버 쪽 관리자가 설정
sun01# vi /etc/hosts ( 허락할 클라이언트 호스트 등록)
sun01# echo "sun02 user01" > /etc/hosts.equiv ( 허락할 호스트 및 유저등록)
sun01# chmod 600 /etc/hosts.equiv

- 클라이언트 관리자가 설정
sun02# vi /etc/hosts ( 접근할 서버 호스트 등록)

- test (클라이언트에서)
sun02# su - user01
sun02$ rlogin sun01
sun01$ hostname
sun01$ exit

- 서버 쪽 일반유저가 허락할 때
sun01# rm /etc/hosts.equiv
sun01# su - user01
sun01$ echo "sun02 user01" > $HOME/.rhosts
sun01$ chmod 600 $HOME/.rhosts

- Test (클라이언트에서)
sun02# su - user01
sun02$ rlogin sun01
sun01$ hostname
sun01$ exit

- 기타 r계열 명령어
sun02# su - user01
sun02$ hostname
sun02$ rsh sun01 hostname
sun02$ rcp /etc/profile sun01:a.txt
sun02$ rsh sun01 ls (a.txt가 복사되었는지 확인)

3) 기타 네트웍 명령어
# ping google.co.kr
# ping -s google.co.kr
# rusers (Local Network 사용자 정보, cf who)
# rusers -l hostA ( hostA에 대해 로긴한 사용자 정보)

4) 기타 Freeware
nmap(Port Scanning), traceroute(trace rote inform), nslookup(DNS info), dig(DNS info) ...

3. FTP Server

- 일반적으로 inetd에 의한 중재 방식과 standalone방식이 있다.
- anonymous ftp서비스를 위해서는 맨 페이지나 다음 사이트를 참고한다.
How to Set up a Secure Anonymous FTP Site
http://secinf.net/unix_security/How_to_Set_up_a_Secure_Anonymous_FTP_Site.html
- 보다 많은 설정과 기능을 제공하는 wu-fptd나 proftpd로 대체할 수 있다. (패키지는 www.sunfreeware.com)
WU-FTPD Development Group (http://www.wu-ftpd.org/)
The ProFTPD Project (http://www.proftpd.net/)
vsftpd (http://vsftpd.beasts.org/)

/usr/sbin/inetd (/etc/inetd.conf) ---> /usr/sbin/in.ftpd

4. Telnet Server

- 요즘은 보안 때문에 telnet 보다는 Secure Shell(ssh)을 사용하는 것이 일반적이다.


5. NFS (Network File System)

NFS는 썬에서 개발한 분산 환경 파일시스템으로서 원격지에서 공유한 일부를 로컬에서 쉽게 연결해서 쓸 수 있는 공유파일시스템이다.
자세한 문서는 다음을 참고한다.
- NFS FAQ
http://www.ebsinc.com/solaris/network/nfs.html
- Chapter 29 Solaris NFS Environment
http://docs.sun.com/db/doc/806-0916/6ja8539fd?a=view

1) NFS의 장점
- 여러 대의 컴퓨터가 모두 같은 자료에 접근하여 같은 파일을 사용할 수 있다.
- 데이터의 중복을 줄이고 관리를 최소화할 수 있다.
- 서로 다른 환경을 지원한다.
- 시스템 관리 오버헤드를 줄인다.

2) NFS Server
- 관련 파일
/etc/dfs/dfstab

Posted by 1010
60.Unix2008. 12. 16. 14:05
반응형

*** 조재구 강사님의 다음OS SCHOOL에서 퍼온 글입니다. ***


현재 모니터의 해상도를 바꿔 주는 방법입니다.
이 방법은 m64B 라는 그래픽 카드의 설정 방법입니다.

1. m64 그래픽 카드가 존재 하는지 확인 합니다.

[/]# prtconf | grep  -i  m64
SUNW,
m64B, instance #0        <==  이시스템은 m64B 그래픽 카드를 인식하고 있습니다.

2. 카드가 존재하면 커널 모듈이 있는지 확인합니다.
[/]# modinfo | grep m64
51  1027acd1  b6b8  202  1  m64 (m64.c 8.20 Jul 30 2001 12:11:41)

3. 아래의 명령으로 현재 카드에 설정 정보를 확인 합니다.
[/]# m64config  -dev  /dev/fb  -propt

--- OpenWindows Configuration for /dev/fb ---
OWconfig: machine
Video Mode: not set          <==  화면크기정보를 보여줌
Depth: not set                   <==  화면의 색상 (8bit or 24bit)

4. 현재 시스템이 사용할 수 있는 크기와 Hz 확인합니다.
(%%참고로 아래 출력된 결과물은 < 가로픽셀X세로픽셀Xhz >로 표시 됨 )

[/]# m64config -dev /dev/fb  -res \?
Valid values for  -res  option are:
720x400x70 [2]
720x400x85
640x480x60
640x480x67 [2]
640x480x72
640x480x75
800x600x56
800x600x60
800x600x72
800x600x75
832x624x75 [2]
1024x768x87 [2]
1024x768x60
1024x768x70
1024x768x75
1280x1024x75
1024x768x85 [1]
800x600x85 [1]
640x480x85 [1]
1280x1024x60 [1]
1152x900x66
1152x900x76
1280x1024x67
1600x1280x76 [1]
1920x1080x72 [1]
1280x800x76 [1]
1440x900x76 [1]
1600x1000x66 [1]
1600x1000x76 [1]
1920x1200x70 [1]
1280x1024x85 [1]
1280x1024x76 [3]
1152x864x75 [1]
1600x1200x75 [1]
1600x1200x60 [1]
1024x768x85 [1]
800x600x75
640x480x85 [1]
vga
svga
1152
1280
800x600
1024x768
1280x1024
1152x900
1600x1280 [1]
1920x1080 [1]
1600x1000 [1]
1920x1200 [1]
1600x1200 [1]

Notes:
[1] monitor does not support this resolution.
[2] card does not support this resolution.
[3] current resolution.

(% 바로 위의 출력내용중에
[1] 이면 설정할 모드는 모니터에서 지원하지 않음.
[2] 이면 m64B 카드(비디오 카드) 에서 지원하지 않음.
[3] 현재 설정되어 있는 모드임
아무런 내용이 없으면 설정이 가능한 모드임 )


==> 위의 출력된 내용에서 현재 시스템에 설정되어있는 정보는 1280x1024x76
이며 해상도를  800X600X75 로 바꿔봅니다.

5. 해상도를 설정 합니다.

[/]# m64config  -dev  /dev/fb  -res  800x600x75

6. 시스템을 rebooting 합니다.

[/]# reboot

7. 시스템이 부팅후 정상적으로 설정 되었는지 확인 합니다.

[/]# m64config -dev /dev/fb -propt
--- OpenWindows Configuration for /dev/fb ---
OWconfig: machine
Video Mode: 800x600x75
Depth: not set

---------------------- 해상도 변경법 2번째 글 -------------------------------------
1. VGA 카드 종류 확인
# prtconf -F
/SUNW,ffb@2,0:ffb0

2. vga 카드 관련 명령어 확인
# ls -l /usr/sbin/*config
lrwxrwxrwx 1 root root 9 2002년 8월 29일 /usr/sbin/GFXconfig -> pgxconfig*
-r-sr-xr-x 1 root bin 61508 1999년 12월 9일 /usr/sbin/afbconfig*
-r-xr-xr-x 1 root bin 27928 2000년 1월 6일 /usr/sbin/auditconfig*
-r-xr-xr-x 1 root bin 18968 2000년 3월 30일 /usr/sbin/bdconfig*
-r-xr-xr-x 1 root bin 184 2001년 5월 25일 /usr/sbin/dhcpconfig*
-rwxr-xr-x 7 root sys 71064 2001년 9월 13일 /usr/sbin/drvconfig*
-r-xr-xr-x 1 root bin 13552 2001년 6월 28일 /usr/sbin/fbconfig*
-r-sr-xr-x 1 root bin 58980 1999년 12월 9일 /usr/sbin/ffbconfig*
-r-r-sr-xr-x 1 root bin 28832 2001년 8월 15일 /usr/sbin/m64config*
-r-sr-xr-x 1 root bin 89780 2001년 8월 15일 /usr/sbin/pgxconfig*
-> 뭐 대충 보면 pgxconfig 라든지 m64config ffbconfig 등과 같은 명령이 그래픽 관련 명령입니다.
-> 여기서 ffb 그래픽 카드 사용하므로 ffbconfig 명령을 사용해야 합니다.
-> 보통은 m64config 를 사용하더군요

3. 현재 해상도 확인
# ffbconfig -prconf
--- Hardware Configuration for /dev/fbs/ffb0 ---
Type: double-buffered FFB2+ with Z-buffer
Board: rev 2 (Horizontal)
PROM Information: @(#)ffb2p.fth 2.9 98/07/14
FBC: version 0x3241906d
DAC: Brooktree 9070, version 1 (Pac2)
3DRAM: Mitsubishi 130b, version 2
EDID Data: Not Available
Monitor Sense ID: 7 (Unknown monitor type, defaulting to Sun 19" monitor)
Monitor possible resolution: 1152x900x66
Current resolution setting: 1152x900x66

현재 1152x900x66 으로 설정되어 있습니다.

4. 해상도 변경
# ffbconfig -res 1024x768x60
#

5. 적용하기
방법1) CDE 환경을 로그 아웃하고 재로그인 한다
방법2) /etc/init.d/dtlogin 을 재시작한다(stop/start)

5. 해상도 변경시 주의점
- 위에서 보다시피 possible resolution 이 1152x900x66 으로 한정되어 있는데..
그 이상의 해상도로 설정하면 화면자체가 안나올수 있습니다.
- 일반적으로 가능한 해상도 안에서 변경하면 정상적으로 나옵니다.
- 해상도 설정시에 아무런 메시지가 없으면 정상적으로 적용 가능한거고
지원하지 않으면 강제로 설정하겠느냐는 메시지가 나옵니다.
(별로 권장하지 않습니다)

6. 해상도 변경후 장애처리 방법
- 해상도 변경후 화면이 안먹으면 콘솔로 로그인을 할수가 없습니다.
- 이때는 telnet으로 로그인해서 m64config or ffbconfig 명령으로 해상도를 재설정하고
/etc/init.d/dtlogin 을 재시작하면 정상적으로 되돌아옵니다

Posted by 1010
60.Unix2008. 12. 16. 09:18
반응형
1. 가장 먼저 오라클 홈페이지에서 데이터베이스를 다운받아야 한다.

   www.oracle.co.kr 에 가서 계정을 만든다. 그런 다음 메인 페이지에서 오른쪽 위에 다운로드가 보인다. 

다운로드 페이지에서 Accept License Agreement 에 체크한 뒤 다운로드 리스트에서 SPARC 을 지원하는 오라클 데이터베이스를 선택한다

사용자 삽입 이미지

이동하면 그 곳에 10gr2_db_sol.cpio.gz 가 보일 것이다. Accept 에 체크한 뒤 다운로드 받는다.

설치 시 오라클 계정으로 설치하기 위해 /export/home/oracle 폴더에 다운로드 받는 것을 권장한다.

사용자 삽입 이미지


2. 오라클은 모두 /export/home/oracle 에 설치해야 한다.

   오라클에서 권장하는 사양은 512MB 이상의 램, 1GB 이상의 스왑공간이 필요하다.

   시스템 커널 파라미터를 변경해야 한다. 주로 공유 메모리와 관련된 파라미터를 늘려야한다.  /etc/system 파일은 매우 중요하므로 백업받은 후 수정하도록 한다.


  -bash-3.00$ cp /etc/system /etc/systemold

  -bash-3.00$ vi /etc/system


  vi 편집기로 파일을 연 뒤 맨 아래 부분에 다음을 추가해준다.


  set semsys:seminfo_semmni=100

set semsys:seminfo_semmns=1024

set semsys:seminfo_semmsl=256

set semsys:seminfo_semvmx=32767

set shmsys:shminfo_shmmax=4294967295

set shmsys:shminfo_shmmin=1

set shmsys:shminfo_shmmni=100

set shmsys:shminfo_shmseg=10

사용자 삽입 이미지

위와 같이 수정한 뒤 저장한다. 그리고 reboot 을 시켜야 한다.


 -bash-3.00$ sync; sync; reboot


3. 오라클 계정을 생성한다. 오라클은 root 로 설치할 수 없다. 오라클 설치를 위해 oinstall 그룹, dba 그룹, oracle 유저를 생성하는 것을 권장한다.


   -bash-3.00$ groupadd  g 101 oinstall

   -bash-3.00$ groupadd  g 102 dba

   -bash-3.00$ useradd  -d /export/home/oracle g oinstall G dba m u 103 s /usr/bin/bash oracle

   -bash-3.00$ passwd oracle


4. 오라클 계정의 환경을 설정한다.


-bash-3.00$ /usr/openwin/bin/xhost +   ß 디스플레이 활성화

-bash-3.00$ su oracle

-bash-3.00$ mkdir oraapp     ß 오라클 어플리케이션이 설치될 곳.

-bash-3.00$ mkdir oradata    ß 오라클 데이터가 설치될 곳.

-bash-3.00$ chmod R 755 oraapp

-bash-3.00$ vi .profile


.profile 을 연 뒤 다음과 같이 수정한다. 편집기를 사용하면 편리하다.


DISPLAY=localhost:0.0; export DISPLAY

 ORACLE_HOME=/export/home/oracle/oraapp/product/10.2.0; export ORACLE_HOME;

 ORACLE_SID=orcl; export ORACLE_SID;

 ORACLE_OWNER=oracle; export ORACLE_OWNER;

 NLS_LANG=KOREAN_KOREA. K016KSC5601; export NLS_LANG;

 ORA_NLS=$ORACLE_HOME/ocommon/nls/admin/data; export ORA_NLS

 PATH=$PATH:$ORACLE_HOME/bin; export PATH

 LD_LIBRARY_PATH=$LD_LIBRARY_PATH:$ORACLE_HOME/lib


사용자 삽입 이미지

수정이 끝났으면 활성화시킨다.


-bash-3.00$ source .profile


5. 이제 파일의 압축을 풀고 설치를 시작해야 한다.


-bash-3.00$ cksum 10gr2_db_sol.cpio.gz

-bash-3.00$ gunzip 10gr2_db_sol.cpio.gz

-bash-3.00$ cpio idcmv < 10gr2_db_sol.cpio


runInstaller 를 실행하면 GUI 화면이 뜨고 이제 설치를 시작한다.

-bash-3.00$ ./runInstaller

    UNIX DBA 그룹을 dba 로 선택한다.

사용자 삽입 이미지

인벤토리 및 인증서 지정

사용자 삽입 이미지

제품별 필요조건 검사를 수행한다.

사용자 삽입 이미지

일부 권장사항 검사에 실패하였어도 설치에 문제가 없다.


구성옵션 선택에서 데이터베이스 생성을 선택한다.

사용자 삽입 이미지

설치 요약 화면이다. 설치를 눌러 설치한다.

사용자 삽입 이미지

설치중인 화면이다.

사용자 삽입 이미지

데이터베이스 생성 화면

사용자 삽입 이미지

데이터베이스 생성 완료

사용자 삽입 이미지

설치가 완료되고 실행할 스크립트를 보여주는 화면이 뜬다.

사용자 삽입 이미지

화면에 나온대로 root 로 로그인한 뒤 스크립트를 실행하고 돌아와서 확인버튼을 클릭한다.

반드시 루트 계정으로 실행한다.


 -bash-3.00$ su

-bash-3.00$ /export/home/oracle/oraInventory/orainstRoot.sh

-bash-3.00$ /export/home/oracle/oraapp/product/10.2.0/root.sh


모든 설치가 완료된 화면이다.

사용자 삽입 이미지

종료버튼을 눌러 종료하면 설치가 끝난다.

Posted by 1010
60.Unix2008. 12. 16. 09:17
반응형
1. 오라클 사이트에서 오라클 10g를 다운로드(2008년1월31일현재 연결됨)


2. 오라클에서 권장하는 사양은 메모리 512MB 이상, 스왑 공간 1GB 이상 필요.

공유메모리와 관련된 시스템 커널 파라메터를 수정한다.

# cd /etc

# mv system system_old

# cp system_old system

# vi system

system 파일의 끝에 추가해 준다.

set noexec_user_stack=1

set semsys:seminfo_semmni=100
set semsys:seminfo_semmns=1024
set semsys:seminfo_semmsl=256
set semsys:seminfo_semvmx=32767
set shmsys:shminfo_shmmax=4294967295
set shmsys:shminfo_shmmin=1
set shmsys:shminfo_shmmni=100
set shmsys:shminfo_shmseg=10

system 파일을 수정 저장한 후 시스템을 리부팅한다

# sync; sync; reboot


3. 오라클 계정을 생성한다. 오라클은 root 로 설치할 수 없다.
오라클 설치를 위해 oinstall 그룹, dba 그룹, oracle 유저를 생성한다.

# groupadd oinstall

# groupadd dba

# useradd  -d /export/home/oracle -g oinstall -G dba -m -s /usr/bin/bash oracle

# passwd oracle

(오라클 비밀번호 설정)


4.오라클 계정의 환경 설정.

# /usr/openwin/bin/xhost +   // 디스플레이 활성화
# su - oracle       // 오라클 계정으로 로그인
$ mkdir oraapp     // 오라클 어플리케이션이 설치될 곳.
$ mkdir oradata    // 오라클 데이터가 설치될 곳.
$ chmod -R 755 oraapp
$ vi .profile

DISPLAY=localhost:0.0; export DISPLAY

ORACLE_HOME=/export/home/oracle/oraapp/product/10.2.0; export ORACLE_HOME;
ORACLE_SID=orcl; export ORACLE_SID;
ORACLE_OWNER=oracle; export ORACLE_OWNER;
LNS_LANG=KOREAN_KOREA.KO16MSWIN949; export NLS_LANG;
ORA_NLS=$ORACLE_HOME/ocommon/nls/admin/data; export ORA_NLS
PATH=$PATH:$ORACLE_HOME/bin; export PATH
LD_LIBRARY_PATH=$LD_LIBRARY_PATH:$ORACLE_HOME/lib


수정된 .profile 를 적용한다.
$ source .profile
$ vi .profile


5. 이제 파일의 압축을 풀고 설치 시작.

$ cksum 10gr2_db_sol.cpio.gz
$ gunzip 10gr2_db_sol.cpio.gz
$ cpio -idcmv < 10gr2_db_sol.cpio

$ ./runInstaller 을 해서 오라클 설치를 시작하면 된다.


주의 : 다시 설치해야 할때는 디스 플레이를 다시 활성화를 시켜줘야 한다

# /usr/openwin/bin/xhost +   // 디스플레이 활성화


- 일부 권장사항 검사에 실패하였어도 설치에 문제가 없다.


화면에 나온대로 root 로 로그인한 뒤 스크립트를 실행하고 돌아와서 확인버튼을 클릭한다.

반드시 루트 계정으로 실행한다.

$ su -
# /export/home/oracle/oraInventory/orainstRoot.sh
# /export/home/oracle/oraapp/product/10.2.0/root.sh


데이터베이스 설치중에 에러가 발생함.

시스템은 UTF-8 로 되어있고, oracle 계정의 .profile 에는

NLS_LANG  이 KOREAN_KOREA.K016KSC5601(euc-kr) 로 정의되어 있기 때문이었다.

그래서 재설치를 강행했다.


1.시스템 문자셋 euc-kr 로 변경
- root 로 로그인
# vi /etc/default/init
LANG=ko_KR.UTF-8 을
LANG=ko 로 수정한 후 저장

2.설치된 폴더 삭제

- oracle 계정으로 로그인

- oraInventory 폴더 삭제

$ rm -rf oraInventory
- oraapp 폴더안의 product 폴더 삭제

$ cd oraapp

$ rm -rf product

$ cd ..

3.NLS_LANG 변경
- NLS_LANG 을 KOREAN_KOREA.K016KSC5601 에서
  KOREAN_KOREA.KO16MSWIN949 으로 변경. (표현되는 문자가 더 많다고 해서)
$ vi .profile
..
LNS_LANG=KOREAN_KOREA.KO16MSWIN949
- .profile 적용
$ source .profile

4. 다시 설치 시작
$ ./runInstaller

설치 과정에서 "제품별 필요 조건 검사"에서
"사용 가능한 교체 공간 요구 사항을 확인하는 중..." 에서
예상결과보다 실제결과가 적게 나와서 swap 공간을 늘려 줬다.


출처 : http://frucyan.tistory.com/4?srchid=BR1http%3A%2F%2Ffrucyan.tistory.com%2F4
Posted by 1010
60.Unix2008. 12. 15. 17:02
반응형

1. 기본적인 정보 확인
 ■ CDE 환경에서 정보 확인 (GUI)
 ■ uname 명령어를 통한 정보 확인
 ■ /etc/release 파일을 통한 정보 확인
 ■ ipcs 명령어를 사용한 큐, 공유메모리, 세마포어 설정 확인

2. 시스템 장치의 정보 확인
 ■ /usr/platform/`uname -i`/sbin/prtdiag

3. 시스템 패치 정보 확인
 ■ 모든패치에 대한 확인
 ■ 커널 패치에 대한 확인

4. 가상 메모리의 확인
 ■ swap

5. 디스크 정보의 확인
 ■ 장착된 디스크(인식된 디스크, Device Reconfiguration)
    /etc/path_to_inst, prtconf | grep -v not
 ■ 디스크별 제조사와 모델명 확인
    iostat -nE, format(inquiry)

6. 파티션 정보 확인
 ■ prtvtoc

7. 여러가지 장치에 대한 확인
 ■ 인식된 모든 장치에 대한 목록 확인
 ■ 그래픽카드 확인
 ■ 네트워크 카드

8. CPU 정보 확인
 ■ psrinfo

9. Memroy 정보 확인
 ■ Physical Memory 확인(prtconf | grep Memory)
 ■ File Buffering Memory(prtmem)
 ■ Kernel Memory 확인(sar -k 1 1)
 ■ Free Memory(vmstat 3)
 ■ 각 프로세스 메모리 정보
 ■ 한개의 프로세스 메모리 사용량

10. 커널 모듈 정보 확인
 ■ sysdef | more

11. 네트워크 정보 확인
 ■ netstat

12. 사용자의 Disk 사용량에 대한 정보
 ■ quot -af

13. 서버의 모델 출력
 ■ prtconf -vp | grep banner-name

14. PROM Mode 현재 설정 정보 확인
 ■ eeprom


(공지사항)
- 테스트는 "VMWare Solaris 9 x86 / Sun Enterprise 3500" 에서 테스트 하였습니다.
- 운영체제 전반적인 장치들에 정보를 확인 한것이다.
  사용량을 점검 및 성능에 관련한 부분은 "백승찬"님의 다른 문서를 참고하기 바란다.
- /root/docs/Reference/성능에관련한문서.txt


1. 기본적인 정보 확인
________________________

■ CDE 환경에서 정보 확인 (GUI)
■ uname 명령어를 통한 정보 확인
■ /etc/release 파일을 통한 정보 확인
■ ipcs 명령어를 사용한 큐, 공유메모리, 세마포어 설정 확인


(1). CDE 환경에서 정보 확인 (GUI)

CDE > Pannel > System Info
- 사용자 이름
- 호스트이름
- 시스템 종류
- IP
- HostID
- Domain
- Physical Memory(RAM)
- Virtual Memory(SWAP)
- Virtual Memory in Use
- OS Release, Kernel Patch, CDE Version
- System Last Booted Time


(2). uname 명령어를 통한 정보 확인

# uname -a
SunOS solaris91 5.9 Generic_118559-11 i86pc i386 i86pc

(At E3500)
# uname -a
SunOS sun02 5.9 Generic_118558-11 sun4u sparc SUNW,Ultra-Enterprise


(3). /etc/release 파일을 통한 정보 확인

# cat /etc/release
                         Solaris 9 9/05 s9x_u8wos_05 x86
           Copyright 2005 Sun Microsystems, Inc.  All Rights Reserved.
                        Use is subject to license terms.
                            Assembled 01 August 2005

(At E3500)
# cat /etc/release
                        Solaris 9 9/05 s9s_u8wos_05 SPARC
           Copyright 2005 Sun Microsystems, Inc.  All Rights Reserved.
                        Use is subject to license terms.
                            Assembled 04 August 2005


(4). ipcs 명령어를 사용한 큐, 공유메모리, 세마포어 설정 확인

# ipcs
IPC status from <running system> as of Mon Oct 15 04:44:52 KST 2007
T         ID      KEY        MODE        OWNER    GROUP
Message Queues:
Shared Memory:
Semaphores:

[참고] sysdef 명령어를 사용해서도 확인이 가능하다.

(At E3500)
# ipcs
IPC status from <running system> as of Mon Feb 25 18:07:40 KST 2008
T         ID      KEY        MODE        OWNER    GROUP
Message Queues:
Shared Memory:
m          0   0x5e002f32 --rw-------     root     root
Semaphores:
s          0   0x1        --ra-ra-ra-     root     root


2. 시스템 장치의 정보 확인
_______________________________

# /usr/platform/`uname -i`/sbin/prtdiag | more

주의) Intel Platform 인 경우 명령어가 존재하지 않는다.
- 시스템의 종류(범주)와 시스템 클럭
- 총 메모리 크기
- 구성되어 있는 시스템 보드의 수
- 각 시스템 보드의 CPU와 메모리의 수와 종류
- 메모리 읽기 방식(Interleave)
- 설치된 I/O 카드(네트워크나 채널 I/O 등)
- 시스템에 구성된 보드 중 발생한 장애와 현재 구성되어 있지만 사용하지 않는 시스템
  정보도 언급된다. (이 경우 썬 서버만)

# /usr/platform/`uname -i`/sbin/prtdiag -v
# /usr/platform/`uname -i`/sbin/prtdiag -l

     -l    Log output. If failures or errors exist in the system,
           output this information to syslogd(1M) only.

     -v    Verbose mode. Displays the time of the most recent  AC
           Power  failure,  and  the  most  recent hardware fatal
           error information, and (if  applicable)  environmental
           status. The hardware fatal error information is useful
           to repair and manufacturing for  detailed  diagnostics
           of FRUs.

예) Brd Type MHz Slot Name Model
    1   SBus 25  0    SUNW,sbus-gem
SUNW,sbus-gem 모델의 네트워크 카드가 Sbus 타입의 I/O 보드 1번의 0번 슬롯에 설치 되
어 있는것을 의미한다. SUNW,sbus-gem은 썬에서 제작한 sbus용 gem(기가비트 멀티모드
파이버 연결)카드다.

(At E3500)
# prtdiag -v
System Configuration:  Sun Microsystems  sun4u 5-slot Sun Enterprise E3500
System clock frequency: 100 MHz
Memory size: 2048Mb

========================= CPUs =========================

                    Run   Ecache   CPU    CPU
Brd  CPU   Module   MHz     MB    Impl.   Mask
---  ---  -------  -----  ------  ------  ----
 7    14     0      400     8.0   US-II    10.0
 7    15     1      400     8.0   US-II    10.0
 9    18     0      400     8.0   US-II    10.0
 9    19     1      400     8.0   US-II    10.0


========================= Memory =========================

                                              Intrlv.  Intrlv.
Brd   Bank   MB    Status   Condition  Speed   Factor   With
---  -----  ----  -------  ----------  -----  -------  -------
 7     0    1024   Active      OK       60ns    2-way     A
 9     0    1024   Active      OK       60ns    2-way     A

========================= IO Cards =========================

     Bus   Freq
Brd  Type  MHz   Slot        Name                          Model
---  ----  ----  ----------  ----------------------------  --------------------
 1   SBus   25            0  SUNW,qfe                      SUNW,sbus-qfe
 1   SBus   25            0  SUNW,qfe                      SUNW,sbus-qfe
 1   SBus   25            0  SUNW,qfe                      SUNW,sbus-qfe
 1   SBus   25            0  SUNW,qfe                      SUNW,sbus-qfe
 1   SBus   25            3  SUNW,hme
 1   SBus   25            3  SUNW,fas/sd (block)
 1   SBus   25           13  SUNW,socal/sf (scsi-3)        501-3060
 3   SBus   25            0  cgsix                         SUNW,501-2325
 3   SBus   25            1  QLGC,isp/sd (block)           QLGC,ISP1000
 3   SBus   25            3  SUNW,hme
 3   SBus   25            3  SUNW,fas/sd (block)
 3   SBus   25           13  SUNW,socal/sf (scsi-3)        501-3060

No failures found in System
===========================

No System Faults found
======================

Most recent AC Power Failure:
=============================
Thu Feb 14 11:09:20 2008


========================= Environmental Status =========================
Keyswitch position is in Secure Mode
System Power Status: Redundant
System LED Status:    GREEN     YELLOW     GREEN
Normal                 ON        OFF       BLINKING


Fans:
-----
Unit   Status
----   ------
Disk    OK

System Temperatures (Celsius):
------------------------------
Brd   State   Current  Min  Max  Trend
---  -------  -------  ---  ---  -----
 1      OK       47     35   49  stable
 3      OK       54     43   57  stable
 7      OK       39     27   44  stable
 9      OK       42     30   47  stable
CLK     OK       42     30   44  stable


Power Supplies:
---------------
Supply                        Status
---------                     ------
1                                OK
3                                OK
5                                OK
PPS                              OK
    System 3.3v                  OK
    System 5.0v                  OK
    Peripheral 5.0v              OK
    Peripheral 12v               OK
    Auxilary 5.0v                OK
    Peripheral 5.0v precharge    OK
    Peripheral 12v precharge     OK
    System 3.3v precharge        OK
    System 5.0v precharge        OK
AC Power                         OK


========================= HW Revisions =========================

ASIC Revisions:
---------------
Brd  FHC  AC  SBus0  SBus1  PCI0  PCI1  FEPS  Board Type      Attributes
---  ---  --  -----  -----  ----  ----  ----  ----------      ----------
 1    1    5    1      1                 22   Dual-SBus-SOC+  100MHz Capable
 3    1    5    1      1                 22   Dual-SBus-SOC+  100MHz Capable
 7    1    5                                  CPU             100MHz Capable
 9    1    5                                  CPU             100MHz Capable

System Board PROM revisions:
----------------------------
Board  1:   FCODE 1.8.24 1999/12/23 17:30   iPOST 3.4.24 1999/12/23 17:34
Board  3:   FCODE 1.8.24 1999/12/23 17:30   iPOST 3.4.24 1999/12/23 17:34
Board  7:   OBP   3.2.24 1999/12/23 17:31   POST  3.9.24 1999/12/23 17:35
Board  9:   OBP   3.2.24 1999/12/23 17:31   POST  3.9.24 1999/12/23 17:35


3. 시스템 패치 정보 확인
___________________________

■ 모든패치에 대한 확인
■ 커널 패치에 대한 확인


(1). 모든패치에 대한 확인

# showrev -p | more
......
Patch: 114433-10 Obsoletes: 115485-01 Requires:  Incompatibles:  Packages: SUNWcsu,
        SUNWcsl, SUNWesu, SUNWtoo, SUNWmdb, SUNWscpu, SUNWtnfc, SUNWcpcu, SUNWrcapu,
 SUNWrmwbu
......

위의 내용을 해석하여 보면 114433-10 설치 되어 있으며 이 패치의 설치로 인해서
115485-01 쓸모없이 제거되었고(Obsoletes), 이 패치를 설치 하기위해서 먼저 필요한
패치는 없고(Requires), 관련 패키지는 SUNWcsu, SUNWcsl, SUNWesu....등이다.


(2). 커널 패치에 대한 확인

# uname -srv
SunOS 5.9 Generic_118559-11
위의 내용을 해석하여 보면 설치된 운영체제 커널에 적용된 최신패치를 보여준다.
uname 명령어의 -a 옵션을 사용한 경우에도 보여 준다. 그 부분을 참고 하자.


4. 가상 메모리의 확인
________________________

# swap -s
total: 45544k bytes allocated + 18984k reserved = 64528k used, 722236k available

# swap -l
swapfile             dev  swaplo blocks   free
/dev/dsk/c1d1s1     102,129      8 1048936 1048936

[참고] SolarisMemroyAdmin.txt 파일 참조

(At E3500)
# swap -s
total: 198296k bytes allocated + 59680k reserved = 257976k used, 5585912k available

# swap -l
swapfile             dev  swaplo blocks   free
/dev/dsk/c0t0d0s1   118,25     16 8392048 8392048


5. 디스크 정보의 확인
__________________________

■ 장착된 디스크(인식된 디스크, Device Reconfiguration
■ 디스크별 제조사와 모델명 확인


(1). 장착된 디스크(인식된 디스크, Device Reconfiguration)

# ls -l /dev/rdsk/*s2
lrwxrwxrwx   1 root     root          54 Dec  7 04:20 /dev/rdsk/c0d0s2 -> ../../devices/pci@0,0/pci-ide@7,1/ide@0/cmdk@0,0:c,raw
lrwxrwxrwx   1 root     other         54 May 12 08:18 /dev/rdsk/c0d1s2 -> ../../devices/pci@0,0/pci-ide@7,1/ide@0/cmdk@1,0:c,raw
lrwxrwxrwx   1 root     other         54 May 14 03:08 /dev/rdsk/c1d1s2 -> ../../devices/pci@0,0/pci-ide@7,1/ide@1/cmdk@1,0:c,raw
lrwxrwxrwx   1 root     root          52 Dec  7 04:20 /dev/rdsk/c1t0d0s2 -> ../../devices/pci@0,0/pci-ide@7,1/ide@1/sd@0,0:c,raw

# cat /etc/path_to_inst | grep sd
"/pci@0,0/pci-ide@7,1/ide@1/sd@0,0" 0 "sd"
"/pci@0,0/pci1000,30@10/sd@0,0" 1 "sd"
"/pci@0,0/pci1000,30@10/sd@1,0" 2 "sd"
"/pci@0,0/pci1000,30@10/sd@2,0" 3 "sd"
"/pci@0,0/pci1000,30@10/sd@3,0" 4 "sd"
"/pci@0,0/pci1000,30@10/sd@4,0" 5 "sd"
"/pci@0,0/pci1000,30@10/sd@5,0" 6 "sd"
"/pci@0,0/pci1000,30@10/sd@6,0" 7 "sd"
"/pci@0,0/pci1000,30@10/sd@7,0" 8 "sd"
"/pci@0,0/pci1000,30@10/sd@8,0" 9 "sd"
"/pci@0,0/pci1000,30@10/sd@9,0" 10 "sd"
"/pci@0,0/pci1000,30@10/sd@a,0" 11 "sd"
"/pci@0,0/pci1000,30@10/sd@b,0" 12 "sd"
"/pci@0,0/pci1000,30@10/sd@c,0" 13 "sd"
"/pci@0,0/pci1000,30@10/sd@d,0" 14 "sd"
"/pci@0,0/pci1000,30@10/sd@e,0" 15 "sd"
"/pci@0,0/pci1000,30@10/sd@f,0" 16 "sd"

# cat /etc/path_to_inst | grep dad

# cat /etc/path_to_inst | grep cmdk
"/pci@0,0/pci-ide@7,1/ide@0/cmdk@0,0" 0 "cmdk"
"/pci@0,0/pci-ide@7,1/ide@0/cmdk@1,0" 1 "cmdk"
"/pci@0,0/pci-ide@7,1/ide@1/cmdk@1,0" 2 "cmdk"


# prtconf | grep -v not
System Configuration:  Sun Microsystems  i86pc
Memory size: 352 Megabytes
System Peripherals (Software Nodes):

i86pc
    options, instance #0
    isa, instance #0
        asy, instance #0
        asy, instance #1
        fdc, instance #0
        i8042, instance #0
            mouse, instance #0
            keyboard, instance #0
    pci, instance #0
        pci-ide, instance #0
            ide, instance #0
                cmdk, instance #0
                cmdk, instance #1
            ide, instance #1
                cmdk, instance #2
                sd, instance #0
        display, instance #0
        pci1000,30, instance #0
        pci1022,2000, instance #0
    objmgr, instance #0
    pseudo, instance #0
    xsvc, instance #0


(At E3500)
# ls -l /dev/rdsk/*s2
lrwxrwxrwx   1 root     root          78 Apr 30  2007 /dev/rdsk/c0t0d0s2 -> ../../devices/sbus@2,0/SUNW,socal@d,10000/sf@0,0/ssd@w21000020376e08f1,0:c,raw
lrwxrwxrwx   1 root     root          78 Apr 30  2007 /dev/rdsk/c0t1d0s2 -> ../../devices/sbus@2,0/SUNW,socal@d,10000/sf@0,0/ssd@w21000020376e563b,0:c,raw
lrwxrwxrwx   1 root     root          78 Apr 30  2007 /dev/rdsk/c0t2d0s2 -> ../../devices/sbus@2,0/SUNW,socal@d,10000/sf@0,0/ssd@w21000020376e573e,0:c,raw
lrwxrwxrwx   1 root     root          78 Apr 30  2007 /dev/rdsk/c0t3d0s2 -> ../../devices/sbus@2,0/SUNW,socal@d,10000/sf@0,0/ssd@w21000020376e586f,0:c,raw
lrwxrwxrwx   1 root     root          54 Apr 30  2007 /dev/rdsk/c1t4d0s2 -> ../../devices/sbus@3,0/SUNW,fas@3,8800000/sd@4,0:c,raw

# cat /etc/path_to_inst | grep sd

"/sbus@2,0/SUNW,socal@d,10000/sf@0,0/ssd@w21000020376e586f,0" 0 "ssd"
"/sbus@2,0/SUNW,socal@d,10000/sf@0,0/ssd@w21000020376e563b,0" 1 "ssd"
"/sbus@2,0/SUNW,socal@d,10000/sf@0,0/ssd@w21000020376e573e,0" 2 "ssd"
"/sbus@2,0/SUNW,socal@d,10000/sf@0,0/ssd@w21000020376e08f1,0" 3 "ssd"
"/sbus@3,0/SUNW,fas@3,8800000/sd@0,0" 15 "sd"
"/sbus@3,0/SUNW,fas@3,8800000/sd@1,0" 16 "sd"
"/sbus@3,0/SUNW,fas@3,8800000/sd@2,0" 17 "sd"
"/sbus@3,0/SUNW,fas@3,8800000/sd@3,0" 18 "sd"
"/sbus@3,0/SUNW,fas@3,8800000/sd@4,0" 19 "sd"
"/sbus@3,0/SUNW,fas@3,8800000/sd@5,0" 20 "sd"
"/sbus@3,0/SUNW,fas@3,8800000/sd@6,0" 21 "sd"
"/sbus@3,0/SUNW,fas@3,8800000/sd@8,0" 22 "sd"
"/sbus@3,0/SUNW,fas@3,8800000/sd@9,0" 23 "sd"
"/sbus@3,0/SUNW,fas@3,8800000/sd@a,0" 24 "sd"
"/sbus@3,0/SUNW,fas@3,8800000/sd@b,0" 25 "sd"
"/sbus@3,0/SUNW,fas@3,8800000/sd@c,0" 26 "sd"
"/sbus@3,0/SUNW,fas@3,8800000/sd@d,0" 27 "sd"
"/sbus@3,0/SUNW,fas@3,8800000/sd@e,0" 28 "sd"
"/sbus@3,0/SUNW,fas@3,8800000/sd@f,0" 29 "sd"
"/sbus@6,0/QLGC,isp@1,10000/sd@0,0" 0 "sd"
"/sbus@6,0/QLGC,isp@1,10000/sd@1,0" 1 "sd"
"/sbus@6,0/QLGC,isp@1,10000/sd@2,0" 2 "sd"
"/sbus@6,0/QLGC,isp@1,10000/sd@3,0" 3 "sd"
"/sbus@6,0/QLGC,isp@1,10000/sd@4,0" 4 "sd"
"/sbus@6,0/QLGC,isp@1,10000/sd@5,0" 5 "sd"
"/sbus@6,0/QLGC,isp@1,10000/sd@6,0" 6 "sd"
"/sbus@6,0/QLGC,isp@1,10000/sd@8,0" 7 "sd"
"/sbus@6,0/QLGC,isp@1,10000/sd@9,0" 8 "sd"
"/sbus@6,0/QLGC,isp@1,10000/sd@a,0" 9 "sd"
"/sbus@6,0/QLGC,isp@1,10000/sd@b,0" 10 "sd"
"/sbus@6,0/QLGC,isp@1,10000/sd@c,0" 11 "sd"
"/sbus@6,0/QLGC,isp@1,10000/sd@d,0" 12 "sd"
"/sbus@6,0/QLGC,isp@1,10000/sd@e,0" 13 "sd"
"/sbus@6,0/QLGC,isp@1,10000/sd@f,0" 14 "sd"
"/sbus@7,0/SUNW,fas@3,8800000/sd@0,0" 30 "sd"
"/sbus@7,0/SUNW,fas@3,8800000/sd@1,0" 31 "sd"
"/sbus@7,0/SUNW,fas@3,8800000/sd@2,0" 32 "sd"
"/sbus@7,0/SUNW,fas@3,8800000/sd@3,0" 33 "sd"
"/sbus@7,0/SUNW,fas@3,8800000/sd@4,0" 34 "sd"
"/sbus@7,0/SUNW,fas@3,8800000/sd@5,0" 35 "sd"
"/sbus@7,0/SUNW,fas@3,8800000/sd@6,0" 36 "sd"
"/sbus@7,0/SUNW,fas@3,8800000/sd@8,0" 37 "sd"
"/sbus@7,0/SUNW,fas@3,8800000/sd@9,0" 38 "sd"
"/sbus@7,0/SUNW,fas@3,8800000/sd@a,0" 39 "sd"
"/sbus@7,0/SUNW,fas@3,8800000/sd@b,0" 40 "sd"
"/sbus@7,0/SUNW,fas@3,8800000/sd@c,0" 41 "sd"
"/sbus@7,0/SUNW,fas@3,8800000/sd@d,0" 42 "sd"
"/sbus@7,0/SUNW,fas@3,8800000/sd@e,0" 43 "sd"
"/sbus@7,0/SUNW,fas@3,8800000/sd@f,0" 44 "sd"


# cat /etc/path_to_inst | grep dad

# prtconf | grep -v not

System Configuration:  Sun Microsystems  sun4u
Memory size: 2048 Megabytes
System Peripherals (Software Nodes):

SUNW,Ultra-Enterprise
    options, instance #0
    central, instance #0
        fhc, instance #4
            zs, instance #0
            zs, instance #1
            clock-board, instance #0
    fhc, instance #0
        ac, instance #0
        simm-status, instance #0
        environment, instance #0
        sram, instance #0
    fhc, instance #1
        ac, instance #1
        simm-status, instance #1
        environment, instance #1
        sram, instance #1
    sbus, instance #0
        SUNW,socal, instance #0
            sf, instance #0
                ssd, instance #0
                ssd, instance #1
                ssd, instance #2
                ssd, instance #3
            sf, instance #1
        sbusmem, instance #0
        sbusmem, instance #1
        sbusmem, instance #2
    fhc, instance #2
        ac, instance #2
        environment, instance #2
    sbus, instance #1
        SUNW,hme, instance #0
        SUNW,fas, instance #0
            sd, instance #19
            st, instance #12
        SUNW,qfe, instance #0
        SUNW,qfe, instance #1
        SUNW,qfe, instance #2
        SUNW,qfe, instance #3
        sbusmem, instance #3
        sbusmem, instance #4
    sbus, instance #2
        SUNW,socal, instance #1
            sf, instance #2
            sf, instance #3
        QLGC,isp, instance #0
        sbusmem, instance #5
        sbusmem, instance #6
        sbusmem, instance #7
    fhc, instance #3
        ac, instance #3
        environment, instance #3
    sbus, instance #3
        SUNW,hme, instance #1
        SUNW,fas, instance #1
        cgsix, instance #0
        sbusmem, instance #8
        sbusmem, instance #9
    pseudo, instance #0


(2). 디스크별 제조사와 모델명 확인

# iostat -nE
c1t0d0          Soft Errors: 4 Hard Errors: 0 Transport Errors: 0
Vendor: NECVMWar Product: VMware IDE CDR10 Revision: 1.00 Serial No: VMware IDE CDR10
Size: 0.47GB <468254720 bytes>
Media Error: 0 Device Not Ready: 0 No Device: 0 Recoverable: 0
Illegal Request: 4 Predictive Failure Analysis: 0

     -n    Display names  in  descriptive  format  (for  example,
           cXtYdZ, rmt/N, server:/export/path).

     -E    Display all device error statistics.


[참고] format 명령어의 하위 명령어(inquirey)로도 확인이 가능하다.


(At E3500)
# iostat -nE
c1t4d0          Soft Errors: 6 Hard Errors: 0 Transport Errors: 0
Vendor: TOSHIBA  Product: XM6201TASUN32XCD Revision: 1103 Serial No: 
Size: 0.00GB <0 bytes>
Media Error: 0 Device Not Ready: 0 No Device: 0 Recoverable: 0
Illegal Request: 6 Predictive Failure Analysis: 0
c0t3d0          Soft Errors: 0 Hard Errors: 0 Transport Errors: 0
Vendor: SEAGATE  Product: ST318203FSUN18G  Revision: 034A Serial No: 0017G03542
Size: 18.11GB <18110967808 bytes>
Media Error: 0 Device Not Ready: 0 No Device: 0 Recoverable: 0
Illegal Request: 0 Predictive Failure Analysis: 0
c0t1d0          Soft Errors: 0 Hard Errors: 0 Transport Errors: 0
Vendor: SEAGATE  Product: ST318203FSUN18G  Revision: 034A Serial No: 0017F98616
Size: 18.11GB <18110967808 bytes>
Media Error: 0 Device Not Ready: 0 No Device: 0 Recoverable: 0
Illegal Request: 0 Predictive Failure Analysis: 0
c0t2d0          Soft Errors: 0 Hard Errors: 0 Transport Errors: 0
Vendor: SEAGATE  Product: ST318203FSUN18G  Revision: 034A Serial No: 0017G01935
Size: 18.11GB <18110967808 bytes>
Media Error: 0 Device Not Ready: 0 No Device: 0 Recoverable: 0
Illegal Request: 0 Predictive Failure Analysis: 0
c0t0d0          Soft Errors: 0 Hard Errors: 0 Transport Errors: 0
Vendor: SEAGATE  Product: ST318203FSUN18G  Revision: 034A Serial No: 0016F68092
Size: 18.11GB <18110967808 bytes>
Media Error: 0 Device Not Ready: 0 No Device: 0 Recoverable: 0
Illegal Request: 0 Predictive Failure Analysis: 0
rmt/0           Soft Errors: 0 Hard Errors: 0 Transport Errors: 0
Vendor: HP       Product: C1537A           Revision: L706 Serial No:   62


# format
c0t0d0 -> inquiry

Vendor:   SEAGATE
Product:  ST318203FSUN18G
Revision: 034A

c0t1d0 -> inquiry

Vendor:   SEAGATE
Product:  ST318203FSUN18G
Revision: 034A

c0t2d0 -> inquiry

Vendor:   SEAGATE
Product:  ST318203FSUN18G
Revision: 034A

c0t3d0 -> inquiry

format> inquiry
Vendor:   SEAGATE
Product:  ST318203FSUN18G
Revision: 034A


6. 파티션 정보 확인
___________________________

# prtvtoc /dev/rdsk/c0d0s2
* /dev/rdsk/c0d0s2 partition map
.....
*                          First     Sector    Last
* Partition  Tag  Flags    Sector     Count    Sector  Mount Directory
       0      2    00    5148360  15796620  20944979
       1      3    01       2835   1048950   1051784
       2      5    00          0  20944980  20944979
       7      8    00    1052730   4095630   5148359
       8      1    01          0       945       944
       9      9    01        945      1890      2834


# df -h
Filesystem             size   used  avail capacity  Mounted on
/dev/dsk/c1d1s0        7.4G   2.7G   4.6G    37%    /
/proc                    0K     0K     0K     0%    /proc
mnttab                   0K     0K     0K     0%    /etc/mnttab
fd                       0K     0K     0K     0%    /dev/fd
swap                   703M    32K   703M     1%    /var/run
swap                   703M   316K   703M     1%    /tmp
/dev/dsk/c1d1s7        1.9G   2.0M   1.8G     1%    /export/home


특정 슬라이스(파티션)의 폴더 단위의 용량 점검

# cd /export/home
# du -sh *
   7K   hacker
   8K   lost+found
   7K   mail01
   7K   mail02
   6K   mail03
   7K   permuser
  16K   quotas
   1K   snap_test.txt
   6K   team01
   6K   team02
 624K   test
   7K   user01


7. 여러가지 장치에 대한 확인
______________________________

■ 인식된 모든 장치에 대한 목록 확인
■ 그래픽카드 확인
■ 네트워크 카드


(1). 인식된 모든 장치에 대한 목록 확인

# cat /etc/path_to_inst
#
#       Caution! This file contains critical kernel state
#
"/options" 0 "options"
"/pci@0,0" 0 "pci"
"/pci@0,0/pci-ide@7,1" 0 "pci-ide"
"/pci@0,0/pci-ide@7,1/ide@0" 0 "ata"
"/pci@0,0/pci-ide@7,1/ide@0/cmdk@0,0" 0 "cmdk"
"/pci@0,0/pci-ide@7,1/ide@0/cmdk@1,0" 1 "cmdk"
"/pci@0,0/pci-ide@7,1/ide@1" 1 "ata"
"/pci@0,0/pci-ide@7,1/ide@1/sd@0,0" 0 "sd"
"/pci@0,0/pci-ide@7,1/ide@1/st@0,0" 0 "st"
"/pci@0,0/pci-ide@7,1/ide@1/cmdk@1,0" 2 "cmdk"
.....


(2). 그래픽카드 확인

(예) m64 그래픽카드라면
# prtconf | grep -i m64
(일반적인 그래픽카드 관리 명령어) : ffbconfig
 해상도, 수직 주파수등을 알아 낼수 있다.
(m64 그래픽카드 관리 명령어) : m64config
# m64config -prconf


(3). 네트워크 카드

# grep -i hme /etc/path_to_inst
# ifconfg -a

(At E3500)
# cat /etc/path_to_inst | grep hme
"/sbus@3,0/SUNW,hme@3,8c00000" 0 "hme"
"/sbus@7,0/SUNW,hme@3,8c00000" 1 "hme"

# cat /etc/path_to_inst | grep qfe
"/sbus@3,0/SUNW,qfe@0,8c00000" 0 "qfe"
"/sbus@3,0/SUNW,qfe@0,8c10000" 1 "qfe"
"/sbus@3,0/SUNW,qfe@0,8c20000" 2 "qfe"
"/sbus@3,0/SUNW,qfe@0,8c30000" 3 "qfe"


8. CPU 정보 확인
______________________

[/]# psrinfo
0       on-line   since 10/15/2007 03:24:27
1       on-line   since 10/15/2007 03:24:30


[/]# psrinfo -p
2

[/]# psrinfo -pv
The i386 physical processor has 1 virtual processor (0)
The i386 physical processor has 1 virtual processor (1)

[/]# psrinfo -v
Status of virtual processor 0 as of: 10/15/2007 04:00:02
  on-line since 10/15/2007 03:24:27.
  The i386 processor operates at 2400 MHz,
        and has an i387 compatible floating point processor.
Status of virtual processor 1 as of: 10/15/2007 04:00:02
  on-line since 10/15/2007 03:24:30.
  The i386 processor operates at 2400 MHz,
        and has an i387 compatible floating point processor.

[참고] uname -X


(At E3500)
# psrinfo 
14      on-line   since 02/14/2008 12:01:22
15      on-line   since 02/14/2008 12:01:30
18      on-line   since 02/14/2008 12:01:30
19      on-line   since 02/14/2008 12:01:30

# psrinfo -v
Status of virtual processor 14 as of: 02/25/2008 18:35:19
  on-line since 02/14/2008 12:01:22.
  The sparcv9 processor operates at 400 MHz,
        and has a sparcv9 floating point processor.
Status of virtual processor 15 as of: 02/25/2008 18:35:19
  on-line since 02/14/2008 12:01:30.
  The sparcv9 processor operates at 400 MHz,
        and has a sparcv9 floating point processor.
Status of virtual processor 18 as of: 02/25/2008 18:35:19
  on-line since 02/14/2008 12:01:30.
  The sparcv9 processor operates at 400 MHz,
        and has a sparcv9 floating point processor.
Status of virtual processor 19 as of: 02/25/2008 18:35:19
  on-line since 02/14/2008 12:01:30.
  The sparcv9 processor operates at 400 MHz,
        and has a sparcv9 floating point processor.

# psrinfo -p
4

# psrinfo -pv
The UltraSPARC-II physical processor has 1 virtual processor (14)
The UltraSPARC-II physical processor has 1 virtual processor (15)
The UltraSPARC-II physical processor has 1 virtual processor (18)
The UltraSPARC-II physical processor has 1 virtual processor (19)


9. Memroy 정보 확인
_________________________

 ■ Physical Memory 확인
 ■ File Buffering Memory
 ■ Kernel Memory 확인
 ■ Free Memory
 ■ 각 프로세스 메모리 정보
 ■ 한개의 프로세스 메모리 사용량


(1). Physical Memory 확인

# prtconf | grep Memory
Memory size: 352 Megabytes

(At E3500)
# prtconf | grep Memory
Memory size: 2048 Megabytes


(2). File Buffering Memory

File Buffering Memory는 MemTool을 이용하여 알아 볼수 있다. 결과는 다음과 같다.

# prtmem
Total Physical Memory: 384 Megabytes
Buffer Cache Memory: 112 Megabytes
Kernel Memory: 63 Megabytes
Free Memory: 17 Megabytes

[참고] prtmem 명령어는 솔라리스 기본 내장 명령어가 아니다. 설치 해서 사용해야 한다.
패키명은 RMCmem 이다.


(3). Kernel Memory 확인
sar명령어를 이용하여 byte단위로 알아 볼수 있다.

# sar -k 1 1
SunOS ns 5.7 Generic_106541-15 sun4u    08/16/01
09:56:59 sml_mem   alloc  fail  lg_mem   alloc  fail  ovsz_alloc  fail
09:57:00 7798784 7207416     0 10035200 9554856     0     2580480     0


(At E3500)
# sar -k 1 1

SunOS sun02 5.9 Generic_118558-11 sun4u    02/25/2008

18:38:06 sml_mem   alloc  fail  lg_mem   alloc  fail  ovsz_alloc  fail
18:38:07 8200512 6409848     0 100450304 79821800     0    19595264     0


(4). Free Memory

Free Memory는 거의 항상 0 이다. 왜냐 하면 Buffer cache가 있기 때문이다.
Free Memory는 vmstat 명령어로 알아 볼수 있다.
vmstat 결과 나오는 첫번째 라인은 bootinf후 나오는평균치 이기 때문에 2번째 라인 부터
가 실질적인 결과이다.

# vmstat 3
procs memory page disk faults cpu
r b w swap free re mf pi po fr de sr f0 s2 s3 s4 in sy cs us sy id
0 0 0 81832 74792 0 12 75 4 93 0 36 0 1 1 1 265 1940 303 5 1 93
0 0 0 560248 12920 0 0 0 0 0 0 0 0 0 0 0 217 872 296 0 0 100
0 0 0 560248 12920 0 0 0 0 0 0 0 0 0 0 0 205 870 296 0 0 99


(At 3500)
# vmstat 3
 kthr      memory            page            disk          faults      cpu
 r b w   swap  free  re  mf pi po fr de sr s1 sd sd sd   in   sy   cs us sy id
 0 0 0 5619304 1674408 2  1  2  0  0  0  0  0  0  0  0  725   96  175  0  0 100
 0 0 0 5583176 1647216 0  2  0  0  0  0  0  0  0  0  0  719  107  223  0  0 100
 0 0 0 5583176 1647216 0  0  0  0  0  0  0  0  0  0  0  717  102  219  0  0 100
 0 0 0 5583176 1647216 0  0  0  0  0  0  0  0  0  0  0  717  117  220  0  0 100


(5). 각 프로세스 메모리 정보

# ps -el | more
 F S   UID   PID  PPID  C PRI NI     ADDR     SZ    WCHAN TTY      TIME CMD
19 T     0     0     0  0   0 SY fec28df4      0          ?        0:03 sched
 8 S     0     1     0  0  40 20 d3c11808    331 d403ee16 ?        0:00 init
19 S     0     2     0  0   0 SY d3c11108      0 fec530a0 ?        0:00 pageout
19 S     0     3     0  0   0 SY d3c10a08      0 fed0d818 ?        0:00 fsflush
 8 S     0   422     1  0  40 20 d3c10308    463 d4033d68 ?        0:00 sac
 8 S     0   425   422  0  40 20 d45d6128    462 d4a40b16 ?        0:00 ttymon
 8 S     0    61     1  0  40 20 d3c0f508    634 d403e2b6 ?        0:00 sysevent
 8 S     0   676     1  0  50 20 d4d71748    564 d4cac592 ?        0:00 rpcbind
 8 S     0    75     1  0  40 20 d3c0d110    694 d41e2cb6 ?        0:00 picld
 8 S     0   212     1  0  40 20 d3c0ca10    933 d4035dc2 ?        0:00 automoun
 8 S     0   679     1  0  50 20 d45c7038    585 d4035cc2 ?        0:00 keyserv
 8 S     0   187     1  0  40 20 d3c0d810    624 d4035e82 ?        0:00 inetd
 8 S 60001   412   377  0  40 20 d45d2830   1329 d47622d0 ?        0:00 httpd
 8 S     0   191     1  0  40 20 d3c0b510    863 d4035ac2 ?        0:00 in.named
 8 S     0   206     1  0  40 20 d3c0a010    550 d3a0647a ?        0:00 lockd
 8 S    71   270   268  0  40 20 d45e3718    712 d44f0640 ?        0:00 httpd
 ..... (중략) .....

SZ 필드의 값이 프로세스가 사용하고 있는 가상메모리(Virtual Memory) 총량이다. 이 안
에는 매핑된 파일과 디바이스가 포함된다. 단위는 페이지 단위로 되어 있다.(pagesize(1))

예) PID 번호가 676번인 rpcbind 프로세스의 SZ 필드의 값은 564이다.

# pagesize
4096

# expr 4096 \* 564
2310144

# expr 2310144 / 1024
2256

위의 결과와 같이 약 2M(2256 Kbytes) 정도의 메모리를 사용하고 있다는 것을 알수 있다.


(At E3500)
# ps -el | more
 F S   UID   PID  PPID  C PRI NI     ADDR     SZ    WCHAN TTY      TIME CMD
19 T     0     0     0  0   0 SY        ?      0          ?        0:01 sched
 8 S     0     1     0  0  40 20        ?    167        ? ?        0:00 init
19 S     0     2     0  0   0 SY        ?      0        ? ?        0:00 pageout
19 S     0     3     0  0   0 SY        ?      0        ? ?       13:28 fsflush
 8 S     0   585     1  0  40 20        ?    229        ? ?        0:00 sac
 8 S     0   301     1  0  40 20        ?    137        ? ?        0:00 utmpd
 8 S     0   119     1  0  40 20        ?    424        ? ?        0:01 picld
 8 S     0    13     1  0  40 20        ?   1392        ? ?        0:04 vxconfig
 8 S     0    68     1  0  40 20        ?    329        ? ?        0:00 sysevent
 8 S     0   200     1  0  40 20        ?    303        ? ?        0:00 rpcbind
 8 S     0   167     1  0  40 20        ?   2742        ? ?        0:01 vxsvc
 8 S     0   290     1  0  40 20        ?    191        ? ?        0:00 powerd
 8 S     0   247     1  0  40 20        ?    431        ? ?        0:00 automoun
 8 S     0   285     1  0  40 20        ?    448        ? ?        0:04 nscd
 8 S     0   470     1  0  39 20        ?    242        ? ?        0:00 auditd
 8 S     0   250   247  0  40 20        ?    542        ? ?        0:00 automoun
 8 S     0   555     1  0  40 20        ?    285        ? ?        0:00 snmpdx
 8 S     0   242     1  0  40 20        ?    322        ? ?        0:01 inetd
 8 S     0   243     1  0  40 20        ?    279        ? ?        0:00 lockd
 8 S     1   244     1  0  40 20        ?    316        ? ?        0:00 statd
 8 S     0   263     1  0  40 20        ?    495        ? ?        0:01 syslogd
 8 S     0   269     1  0  40 20        ?    303        ? ?        0:00 cron
 8 S     0   867   866  0  40 20        ?    255        ? ?        0:00 Xsession
 8 S     0  2066  2038  0  70 30        ?    452        ? ?        0:00 remotedp
 8 S     0   347   345  0  40 20        ?    414        ? ?        0:00 htt_serv
 8 S     0  2063  2038  0  70 30        ?    473        ? ?        0:00 remotedp
 8 S     0   345     1  0  40 20        ?    135        ? ?        0:00 htt
 8 S     0  2058  2038  0  70 30        ?    451        ? ?        0:00 remotedp
 8 S    25   323     1  0  40 20        ?    565        ? ?        0:00 sendmail
 8 S     0   324     1  0  40 20        ?    568        ? ?        0:00 sendmail
..... (중략) .....

# pagesize
8192

# expr 8192 \* 167
1368064

# expr 1368064 / 1024
1336


(6). 한개의 프로세스 메모리 사용량

[/]# echo $$
925
[/]# /usr/proc/bin/pmap -x 925
925:    dtksh
 Address  Kbytes     RSS    Anon  Locked Mode   Mapped File
08045000      12      12       4       - rwx--    [ stack ]
08050000     532     388       -       - r-x--  dtksh
080E4000      52      52       8       - rwx--  dtksh
080F1000       8       -       -       - rwx--  dtksh
080F3000      88      84      12       - rwx--    [ heap ]
D2380000       4       4       -       - rwx--    [ anon ]
D2390000      12      12       -       - r-x--  libmp.so.2
D23A3000       4       4       -       - rwx--  libmp.so.2
D23B0000      72      56       -       - r-x--  libICE.so.6
D23D2000       4       4       -       - rwx--  libICE.so.6
D23D3000       8       -       -       - rwx--  libICE.so.6
D23E0000       4       4       4       - rwx--    [ anon ]
D23F0000      32      32       -       - r-x--  libSM.so.6
D2408000       4       4       -       - rwx--  libSM.so.6
D2410000      80      56       -       - r-x--  libXext.so.0
D2434000       4       4       -       - rwx--  libXext.so.0
..... (중략)......
D2960000     496     420       -       - r-x--  libtt.so.2
D29EC000      12      12       -       - rwx--  libtt.so.2
D2A00000     344     224       -       - r-x--  libDtSvc.so.1
D2A66000       8       8       -       - rwx--  libDtSvc.so.1
D2A68000       8       4       -       - rwx--  libDtSvc.so.1
D2A70000       4       4       4       - rwx--    [ anon ]
D2A80000     220     200       -       - r-x--  libDtWidget.so.2
D2AC8000      16      16       -       - rwx--  libDtWidget.so.2
D2ACC000       8       -       -       - rwx--  libDtWidget.so.2
D2AD0000     460      92       -       - r-x--  libDtHelp.so.1
D2B52000      28      28       -       - rwx--  libDtHelp.so.1
D2B6D000       4       4       4       - rwx--  libdl.so.1
D2B70000       4       4       -       - r--s-  dev:102,0 ino:36861
D2B80000       4       4       4       - rwx--    [ anon ]
D2B90000     324     324       -       - r-x--  ld.so.1
D2BF1000      16      16       4       - rwx--  ld.so.1
D2BF5000       8       8       4       - rwx--  ld.so.1
-------- ------- ------- ------- -------
total Kb    7092    5756      60       -

pmap명령의 결과 ksh 프로세서가 5756k의 real memory를 사용 한다는 것을 알수 있다.
60k는 시스템의 다른 프로세서와 shared한다는 것도 알수 있다.


(At E3500)
# echo $$
8060

# pmap -x 8060
8060:   -ksh
 Address  Kbytes     RSS    Anon  Locked Mode   Mapped File
00010000     200     200       -       - r-x--  ksh
00052000       8       8       8       - rwx--  ksh
00054000      40      40       8       - rwx--    [ heap ]
FF180000     688     688       -       - r-x--  libc.so.1
FF23C000      24      24       -       - rwx--  libc.so.1
FF242000       8       8       -       - rwx--  libc.so.1
FF280000     568     568       -       - r-x--  libnsl.so.1
FF31E000      40      40       -       - rwx--  libnsl.so.1
FF328000      24      16       -       - rwx--  libnsl.so.1
FF360000      16      16       -       - r-x--  libmp.so.2
FF374000       8       8       -       - rwx--  libmp.so.2
FF380000       8       8       8       - rwx--    [ anon ]
FF390000      40      40       -       - r-x--  libsocket.so.1
FF3AA000       8       8       -       - rwx--  libsocket.so.1
FF3B8000      16      16       -       - r-x--  libc_psr.so.1
FF3C0000     192     192       -       - r-x--  ld.so.1
FF3F0000       8       8       8       - rwx--  ld.so.1
FF3F2000       8       8       8       - rwx--  ld.so.1
FF3FA000       8       8       8       - rwx--  libdl.so.1
FFBFC000      16      16       8       - rw---    [ stack ]
-------- ------- ------- ------- -------
total Kb    1928    1920      56       -


10 커널 모듈 정보 확인
____________________________

# sysdef | more
.....
* Hostid
* Devices
* Loadable Objects
* Loadable Object Path = /kernel
* Loadable Object Path = /usr/kernel
* System Configuration
* Tunable Parameters
* Utsname Tunables
* Process Resource Limit Tunables (Current:Maximum)
* Streams Tunables
* IPC Semaphores
* IPC Shared Memory module is not loaded
* Time Sharing Scheduler Tunables
.....

# modinfo
 Id Loadaddr   Size Info Rev Module Name
  5 fe933000   3f32   1   1  specfs (filesystem for specfs)
  7 fe9383cd   2fea   1   1  TS (time sharing sched class)
  8 fe93af33    888   -   1  TS_DPTBL (Time sharing dispatch table)
 10 fe93afab    fad   -   1  pci_autoconfig (PCI BIOS interface 1.39)
 11 fe93bea4  30e2a   2   1  ufs (filesystem for ufs)
 12 fe96a962    18f   -   1  fssnap_if (File System Snapshot Interface)
 13 fe96aa99   3086   1   1  rootnex (i86pc root nexus 1.115)
 14 fe96d98b   1d83   -   1  busra (Bus Resource Allocator (BUSRA) )
 15 fe96f4ae    170  57   1  options (options driver)
 16 fe96f5ba   1267  12   1  sad (STREAMS Administrative Driver ')
 17 fe9706b1    4db   2   1  pseudo (nexus driver for 'pseudo')
 18 fe970acc    67a 104   1  objmgr (Object Manager 1.23)
 19 fe97105e   1fd9 102   1  cmdk (Common Direct Access Disk Drive)
 20 fe972b9f   22e2   -   1  snlb (Solaris Disk Label Object)
 21 fe974d9d   1f61   -   1  dadk (Direct Attached Disk Object)
 22 fe9766d6    6fd   -   1  gda (Generic Direct Attached Device )
..... (중략).....


# modinfo -i 5
 Id Loadaddr   Size Info Rev Module Name
  5 fe933000   3f32   1   1  specfs (filesystem for specfs)


프로세스의 정보 확인
___________________________

메모리를 많이 사용하고 있는 프로세스 10개정도 확인

# ps -elf | head -1 ; ps -elf | sort -k 10 -r | head
 F S      UID   PID  PPID  C PRI NI     ADDR     SZ    WCHAN    STIME TTY      TIME CMD
 8 S     root   378   329  0  40 20 d461a728   4376 d4a5ce0a 10:09:27 ?        0:05 /usr/openwin/bin/Xsun :0 -nobanner
 8 S     root   486   468  0  50 20 d4bce038   2431 d4a5c84a 10:10:17 pts/3    0:01 /usr/dt/bin/dtsession
 8 S     root   493   486  0  40 20 d4bcca40   2374 d4a5c58a 10:10:17 ?        0:01 dtwm
 8 S     root   519   495  0  40 20 d4bcae40   2162 d4d46d68 10:10:45 ?        0:00 dtfile -session dtdpaqSe
 8 S     root   495   486  0  50 20 d4bcfc38   2162 d4a5c5ca 10:10:22 ?        0:00 dtfile -session dtdpaqSe
 8 S     root   494   486  0  50 20 d4bcf538   1852 d4a5c60a 10:10:22 ??       0:00 /usr/dt/bin/dtterm -session dt89aOP
 8 S     root   496   486  0  40 20 d4bd0338   1803 d4a5c4ca 10:10:22 ?        0:01 /usr/dt/bin/sdtperfmeter -f -H -t c
 8 S     root   389   329  0  40 20 d3c0fc08   1645 d3c0fc74 10:09:35 ?        0:00 /usr/dt/bin/dtlogin -daemon
 8 S     root   448   447  0  40 20 d4bd1838   1438 d4a5c88a 10:10:13 ?        0:00 htt_server -nosm
 8 S   nobody   363   339  0  40 20 d461e020   1329 d476dc10 10:09:25 ?        0:00 /usr/apache/bin/httpd

[참고] 사용하고 있는 메모리 계산하는 방법
메모리 사용량 = SZ * `pagesize`
예) 4376 * 4096(or 8192) = 17924096 bytes(약 17Mbytes)


11. 네트워크 정보 확인
___________________________

(1). IP 설정 확인

[/]# ifconfig -a
lo0: flags=1000849<UP,LOOPBACK,RUNNING,MULTICAST,IPv4> mtu 8232 index 1
        inet 127.0.0.1 netmask ff000000
pcn0: flags=1000843<UP,BROADCAST,RUNNING,MULTICAST,IPv4> mtu 1500 index 2
        inet 192.168.8.2 netmask ffffff00 broadcast 192.168.8.255
        ether 0:c:29:7e:d2:e2


(2). Routing Table 확인

[/]# netstat -nr
 
Routing Table: IPv4
  Destination           Gateway           Flags  Ref   Use   Interface
-------------------- -------------------- ----- ----- ------ ---------
192.168.8.0          192.168.8.2          U         1     61  pcn0
224.0.0.0            192.168.8.2          U         1      0  pcn0
default              192.168.8.254        UG        1     62 
127.0.0.1            127.0.0.1            UH       21  74190  lo0


(3). DNS Client 설정 확인

[/]# cat /etc/nsswitch.conf
......(생략).....

[/]# cat /etc/resolv.conf
nameserver 168.126.63.1


(4). 네트워크 활동량 점검

# netstat -an | more
UDP: IPv4
   Local Address         Remote Address     State
-------------------- -------------------- -------
      *.111                                 Idle
      *.*                                   Unbound
      *.32771                               Idle
      *.37                                  Idle
      *.7                                   Idle
      *.9                                   Idle
      *.13                                  Idle
      *.19                                  Idle
      *.32772                               Idle
      *.32773                               Idle
      *.32774                               Idle
      *.512                                 Idle
      *.517                                 Idle
......


# netstat -s
RAWIP
        rawipInDatagrams    =     0     rawipInErrors       =     0
        rawipInCksumErrs    =     0     rawipOutDatagrams   =     0
        rawipOutErrors      =     0

UDP
        udpInDatagrams      =   349     udpInErrors         =     0
        udpOutDatagrams     =   431     udpOutErrors        =     0

TCP     tcpRtoAlgorithm     =     4     tcpRtoMin           =   400
        tcpRtoMax           = 60000     tcpMaxConn          =    -1
        tcpActiveOpens      =    49     tcpPassiveOpens     =    32
        tcpAttemptFails     =     0     tcpEstabResets      =     0
        tcpCurrEstab        =     7     tcpOutSegs          = 44111
        tcpOutDataSegs      = 38060     tcpOutDataBytes     =3921161
        tcpRetransSegs      =     0     tcpRetransBytes     =     0
        tcpOutAck           =  6050     tcpOutAckDelayed    =  2050
        tcpOutUrg           =     0     tcpOutWinUpdate     =     0
        tcpOutWinProbe      =     0     tcpOutControl       =   158
        tcpOutRsts          =     3     tcpOutFastRetrans   =     0
        tcpInSegs           = 44161
        tcpInAckSegs        = 33136     tcpInAckBytes       =3921213
        tcpInDupAck         =    51     tcpInAckUnsent      =     0
        tcpInInorderSegs    = 27773     tcpInInorderBytes   =1581770
.....


# netstat -m (# netstat -mv)
streams allocation:
                                         cumulative  allocation
                      current   maximum       total    failures
streams                   238       272        1794           0
queues                    674       740        3895           0
mblk                      791      1270       39888           0
dblk                      788      1271      230872           0
linkblk                     9       169          10           0
strevent                   12       169        7944           0
syncq                      18        36          54           0
qband                       2       127           2           0

496 Kbytes allocated for streams data


# netstat -i 2
    input   pcn0      output           input  (Total)    output
packets errs  packets errs  colls  packets errs  packets errs  colls
44725   0     44926   0     0      45538   0     45739   0     0    
11      0     11      0     0      11      0     11      0     0    
11      0     11      0     0      11      0     11      0     0    
11      0     11      0     0      11      0     11      0     0    
12      0     11      0     0      12      0     11      0     0


12. 사용자의 Disk 사용량에 대한 정보
______________________________________

[/]# quot -af
/dev/rdsk/c1d1s0 (/):
2866444 97724   root   
153291   6286   bin    
91117    1895   #10     
12778     118   #36413  
 2554      11   adm    
 1244       8   nobody 
  801      46   uucp   
  137      56   lp     
   48       3   #21782  
    5       5   daemon 
    2       2   smmsp  
    1       1   user01 
    1       1   mail02 
    1       1   mail03 
    1       1   team01 
    1       1   team02 
    1       1   hacker 
    1       1   #104    

/dev/rdsk/c1d1s7 (/export/home):
  650       6   root   
   14      21   #104    
    7       7   mail01 
    7       7   mail02 
    7       7   permuser
    7       7   user01 
    6       6   hacker 
    6       6   mail03 
    6       6   team01 
    6       6   team02


13. 서버의 모델 출력

# prtconf -vp | grep banner-name
    banner-name:  '5-slot Sun Enterprise E3500'


14. PROM Mode 현재 설정 정보 확인

(At E3500)
# eeprom
disabled-memory-list: data not available.
disabled-board-list: data not available.
memory-interleave=max
configuration-policy=component
scsi-initiator-id=7
keyboard-click?=false
keymap: data not available.
ttyb-rts-dtr-off=false
ttyb-ignore-cd=true
ttya-rts-dtr-off=false
ttya-ignore-cd=true
ttyb-mode=9600,8,n,1,-
ttya-mode=9600,8,n,1,-
sbus-specific-probe: data not available.
sbus-probe-default=d3120
mfg-mode=off
diag-level=max
powerfail-time=1202954960
#power-cycles=1426063608
fcode-debug?=false
output-device=screen
input-device=keyboard
load-base=16384
boot-command=boot
auto-boot?=false
watchdog-reboot?=false
diag-file: data not available.
diag-device=disk diskbrd diskisp disksoc net
boot-file=kernel/sparcv9/unix
boot-device=disk
local-mac-address?=true
ansi-terminal?=true
screen-#columns=80
screen-#rows=34
silent-mode?=false
use-nvramrc?=true
nvramrc=devalias andydisk /sbus@2,0/SUNW,socal@d,10000/sf@0,0/ssd@0,0

security-mode=none
security-password: data not available.
security-#badlogins=0
oem-logo: data not available.
oem-logo?=false
oem-banner: data not available.
oem-banner?=false
hardware-revision: data not available.
last-hardware-update=
diag-switch?=true

Posted by 1010
60.Unix2008. 12. 15. 15:50
반응형
 구축할 Ftp 서버 – vsftpd with openssl

A.     버전 vsftpd-2.0.7

B.      http://vsftpd.beasts.org/#download

C.      http://www.scary.beasts.org/security/   à 취약점에 대한 내용 (참고)

D.     http://vsftpd.beasts.org/vsftpd_conf.html  à On-Line 설명서


E.      * 지원 및 테스트된 OS


- Linux (Redhat, SuSE, Debian)

- Solaris (버전에 따라 IPv6 inet_aton함수때문에 설치가 잘 안될 수 있음)

- FreeBSD, OpenBSD

- HP-UX

- IRIX


F.      * 주요 기능


- 가상 IP별 별도의 환경 설정 기능 (설정파일의 listen_address= 이용)

- 가상 사용자 설정

- 전송 대역폭 지정

- PAM 지원 (버전 1.2.0부터는 PAM을 통한 wtmp에 로긴 로그를 남김)

- xferlog 표준 로그 파일보다 상세한 자체 로그 파일 형식 지원

- Standalone 방식과 inetd(xinetd)를 통한 운영 모두 지원

- IP별 다른 환경 파일 지정 기능 (tcp_wrappers와 함께 사용할 때)


1.     설치


Solaris10에서 일반적인 형태로 (ssl 와 익명접속 제외,  tcp_wrappers 포함) 설치하는 것을 정리해 볼까 합니다.


간단설명

VsFTPD Very Secure FTP Daemon의 약자이며, 이름에서 그대로 나오듯이 보안에 매우 신경을 쓴 데몬입니다. 레드햇, 데비안 등의 기본 패키지에 포함이 될 정도라고 하며 사이트에서도 그렇게 홍보하고 있군요. 제 개인적으로는 별다른 신경을 안써도 손쉽게 컴파일 및 설치가 된다는 장점이 가장 큰 것 같습니다.


http://vsftpd.beasts.org/ 에서 최신버전의 소스를 받아온다.

# gunzip vsftpd-1.2.0.tar.gz

# tar xf vsftpd-1.2.0.tar

# cd vsftpd-1.2.0


한글을 위한 소스 수정

기본적으로 UTF8같은 유니코드를 지원하지 않으므로 source 파일을 수정해 주어야 한글이 제대로 로그파일이나 전송처리가 됩니다. 그렇지 않으면 표준 ASCII 문자 외에는 모두 ?(물음표)로 처리해 버립니다.


logging.c 파일을 vi로 불러들여 아래 라인을 주석처리합니다. (157 라인입니다.)


원본 : str_replace_unprintable(p_str, '?');

변경 : /* str_replace_unprintable(p_str, '?'); */


postlogin.c 파일을 vi로 불러들여 아래 라인을 주석처리합니다. (121 라인입니다.)


원본 : str_replace_unprintable(&proctitle_str, '?');

변경 : /* str_replace_unprintable(&proctitle_str, '?'); */


또한 tcp_wrappers를 지원하기 위해서는 builddefs.h 파일을 불러서 아래와 같이 수정합니다.


원본 : #under VSF_BUILD_TCPWRAPPERS

변경 : #define VSF_BUILD_TCPWRAPPERS


그리고 solaris PAM을 지원하지 않으므로 바로 밑에 있는 PAM 지원부분을 무효화시켜줍니다.(이 부분을 설정하지 않으면 컴파일시 에러가 줄줄줄주루루루루루 뜹니다.)


원본 : #define VSF_BUILD_PAM

변경 : #undef VSF_BUILD_PAM


vsftpd 컴파일 및 설치

vsftpd는 기본적으로 configure 작업이 없습니다. 그냥 make 하시면 됩니다. 조심하실 것은 INSTALL 문서에 있는대로 make install 을 하시면 안됩니다. vsftpd는 리눅스 계열의 운영체제를 기본으로 만들어져 있으므로 xinetd 등을 이용하도록 설정되어 있는데, solaris에서는 해당 데몬이 존재하지 않습니다. 게다가 solaris10으로 올라오면서 서비스 관리를 svcs 또는 svcadm, inetadm 등 패키지로 분리되어 운영됩니다. 그러므로 make 만 실행하셔서 컴파일만 하시고 나머지 설치작업은 수동으로 하셔야 합니다.


[root@unknown vsftpd-2.0.7]# make

gcc -c prelogin.c -O2 -Wall -W -Wshadow  -idirafter dummyinc

gcc -c ftpcmdio.c -O2 -Wall -W -Wshadow  -idirafter dummyinc

gcc -c postlogin.c -O2 -Wall -W -Wshadow  -idirafter dummyinc

gcc -c privsock.c -O2 -Wall -W -Wshadow  -idirafter dummyinc

gcc -c tunables.c -O2 -Wall -W -Wshadow  -idirafter dummyinc

gcc -c ftpdataio.c -O2 -Wall -W -Wshadow  -idirafter dummyinc

gcc -c secbuf.c -O2 -Wall -W -Wshadow  -idirafter dummyinc

gcc -c ls.c -O2 -Wall -W -Wshadow  -idirafter dummyinc

gcc -c postprivparent.c -O2 -Wall -W -Wshadow  -idirafter dummyinc

gcc -c logging.c -O2 -Wall -W -Wshadow  -idirafter dummyinc

gcc -c str.c -O2 -Wall -W -Wshadow  -idirafter dummyinc

gcc -c netstr.c -O2 -Wall -W -Wshadow  -idirafter dummyinc

gcc -c sysstr.c -O2 -Wall -W -Wshadow  -idirafter dummyinc

gcc -c strlist.c -O2 -Wall -W -Wshadow  -idirafter dummyinc

gcc -c banner.c -O2 -Wall -W -Wshadow  -idirafter dummyinc

gcc -c filestr.c -O2 -Wall -W -Wshadow  -idirafter dummyinc

gcc -c parseconf.c -O2 -Wall -W -Wshadow  -idirafter dummyinc

gcc -c secutil.c -O2 -Wall -W -Wshadow  -idirafter dummyinc

gcc -c ascii.c -O2 -Wall -W -Wshadow  -idirafter dummyinc

gcc -c oneprocess.c -O2 -Wall -W -Wshadow  -idirafter dummyinc

gcc -c twoprocess.c -O2 -Wall -W -Wshadow  -idirafter dummyinc

gcc -c privops.c -O2 -Wall -W -Wshadow  -idirafter dummyinc

gcc -c standalone.c -O2 -Wall -W -Wshadow  -idirafter dummyinc

gcc -c hash.c -O2 -Wall -W -Wshadow  -idirafter dummyinc

gcc -c tcpwrap.c -O2 -Wall -W -Wshadow  -idirafter dummyinc

gcc -c ipaddrparse.c -O2 -Wall -W -Wshadow  -idirafter dummyinc

gcc -c access.c -O2 -Wall -W -Wshadow  -idirafter dummyinc

gcc -c features.c -O2 -Wall -W -Wshadow  -idirafter dummyinc

gcc -c readwrite.c -O2 -Wall -W -Wshadow  -idirafter dummyinc

gcc -c opts.c -O2 -Wall -W -Wshadow  -idirafter dummyinc

gcc -c ssl.c -O2 -Wall -W -Wshadow  -idirafter dummyinc

gcc -c sysutil.c -O2 -Wall -W -Wshadow  -idirafter dummyinc

gcc -c sysdeputil.c -O2 -Wall -W -Wshadow  -idirafter dummyinc

gcc -o vsftpd main.o utility.o prelogin.o ftpcmdio.o postlogin.o privsock.o tunables.o ftpdataio.o secbuf.o ls.o postprivparent.o logging.o str.o netstr.o sysstr.o strlist.o banner.o filestr.o parseconf.o secutil.o ascii.o oneprocess.o twoprocess.o privops.o standalone.o hash.o tcpwrap.o ipaddrparse.o access.o features.o readwrite.o opts.o ssl.o sysutil.o sysdeputil.o -Wl,-s `./vsf_findlibs.sh`

만일 위의 builddefs.h 부분에서 PAM 부분을 undeine 시켜주시기 않았다면 아래와 같은 경고가 뜨고 운영중에 로그인이 안되거나 에러가 발생하는 경우가 생깁니다.(PAM undefine 시키면 shadow 모드로 동작하는 듯 합니다.)


[root@unknown vsftpd-2.0.7]# ls -al vsftpd

-rwxr-xr-x 1 root root 105K 2008-12-12 01:29 vsftpd


컴파일이 무사히 넘어갔다면 vsftpd 파일이 생성되어있습니다.


vsftpd 파일의 생성을 확인하셨다면 아래와 같이 관련 파일들을 세팅합니다.


# mkdir /usr/local/sbin   ;; 없는 경우만 만들어 주시면 됩니다.

# cp vsftpd /usr/local/sbin

# chmod 755 /usr/local/sbin/vsftpd


# cp vsftpd.conf.5 /usr/share/man/man5   ;; vsftpd.conf 매뉴얼 복사

# cp vsftpd.8 /usr/share/man/man8          ;; vsftpd 매뉴얼 복사

# mkdir /usr/share/empty

# chown root:root /usr/share/empty

# chmod 755 /usr/share/empty

# cp vsftpd.conf /etc                 ;; 설정파일 복사


vsftpd Solaris 10 SMF에 연결

이젠 남은것은 실행하는 방법입니다.

solaris10 에서는 inetd 서비스가 SMF(Service Management Facility)로 통합운영되어 집니다. 모든 서비스 관리는 svcadm 명령으로 제어할 수 있는데, 네트워크 관련 서비스는 inetadm 이라는 명령을 이용하여 특별히 관리할 수 있습니다. vsftpd SMF 서비스로 등록하여 이용하면 편리하게 관리할 수 있도록 합니다. (자세한 기타 내용은 마지막에 참고사이트를 보세요.)


우선 첫번째로 /etc/services 파일 내용중 ftp 가 기술되어 있는지 확인합니다.

[root@unknown vsftpd-2.0.7]# grep ftp /etc/services

ftp-data        20/tcp

ftp             21/tcp

tftp            69/u


현재 디렉토리에 아래와 같은 내용을 inet.ftp 라는 내용으로 저장합니다.


ftp stream tcp nowait root /usr/sfw/sbin/tcpd /usr/local/sbin/vsftpd


※ 미리 tcp_wrappers 가 설치되어 있어야 합니다.


그리고 아래 명령을 수행하면 smf 관련 명령으로 확인하거나 관리하실 수 있습니다.


# inetconv -i inet.ftp

ftp -> /var/svc/manifest/network/ftp-tcp.xml

ftp-tcp.xml() 가져오는 중 ...완료

# svcs -a | grep ftp

online          21:02:07    svc:/network/ftp/tcp:default      <== vsftpd 데몬이 서비스로 등록된 모습


이후부터 서비스의 시작과 중지를 아래와 같이 수행할 수 있습니다.


# svcadm enable /network/ftp/tcp:default     ;; vsftpd 서비스 시작

# svcsadm disable /network/ftp/tcp:default  ;; vsftpd 서비스 중지


svcs 명령으로 보았을 때 online 은 동작중, offline은 중지된 상태, maintenance 는 문제가 있어서 작업이 필요하다는 의미입니다. online 상태로 서비스를 시작하고 localhost 로 접속하여 정상적으로 FTP 접속이 되는지 확인합니다. 현재는 제대로 설정이 되어 있지 않으므로 anonymous (익명)으로 접속하셔야 하며, 접속되더라도 OOPS! 라는 메세지가 보입니다.(웁스~)

[root@unknown vsftpd-2.0.7]# ftp localhost

Connected to localhost.

500 OOPS: vsftpd: cannot locate user specified in 'ftp_username':ftp

ftp> quit


vsftpd.conf 설정

구글링이나 기타 인터넷상에 올라온 자료들을 검색해 본 결과 예전 버젼이거나 linux 계열의 운영체제에 맞게 설정되어 있어서 제가 사용할려는 solaris 운영체제에는 전혀 맞지가 않더군요. 로그처리 부분도 마찬가집니다. 그래서 제가 사용하는 Solaris 10 환경에 맞게 나름대로 설정파일을 세팅하는 과정에서 겪은 시행착오을 줄이기 위해 vsftpd.conf 파일의 옵션을 정리해 보았습니다. SSL 은 사용하지 않으므로 자세한 설명은 생략하며 익명도 사용하지 않는 환경임을 미리 인지하시고 참고하여 주시면 되겠네요. (해당 환경과 관련된 옵션은 설명에서 몽땅 제외입니다. ~~~~)


또한 위에서 manpage 파일을 정상적으로 설치하셨다면 man vsftpd.conf 명령으로도 옵션들을 확인하실 수 있습니다.


옵션을 사용하기 전에 주의할 점 : 반드시 옵션명=값 으로 설정하셔야 합니다. =(equal) 좌우에 공백이 있어서는 절대 안됩니다. 반드시 옵션과 값사이에 =(equal)을 딱!!! 붙여서 주셔야 합니다.


anonymous_enable=NO ( 기본값 : YES )

  익명 사용자의 접속을 허용할 것인지를 결정합니다.


listen=YES ( 기본값 : NO )

background=YES ( 기본값 : NO )

listen_port=21 ( 기본값 : 21 )

listen_ipv6=NO ( 기본값 : NO )

  기본적으로 vsftpd inetd 또는 xinetd 또는 Solaris10의 서비스로 등록하여 사용이 가능하도록 설정되어있습니다. 위 옵션대로 설정하게 되면 standalone(proftpd standalone 동작과 동일) 모드로 동작합니다. Solaris10에서는 위에서 서비스로 등록해 놓았으므로 모두 주석처리합니다. 일반적으로 FTP 접속이 그리 많지가 않는 경우에는 기본 동작모드(inetd )가 유리하며 FTP 접속자가 많은 경우에는 standalone 모드가 유리하다고 합니다.


listen_address=none ( 기본값 : none )

listen_address6=none ( 기본값 : none )

  standalone 모드로 동작시 대기할 IP를 지정합니다.(멀티 IP 서버를 이용할때) address6 IPV6 상황에서 사용합니다.


pasv_address=none ( 기본값 : none )

  Use this option to override the IP address that vsftpd will advertise in response to the PASV command. Provide a  numeric IP address, unless pasv_addr_resolve is enabled, in which case you can provide a hostname which will be DNS resolved for you at startup. (해석불가)


nopriv_user=nobody ( 기본값 : nobody )

  vsftpd가 구동할 유저명을 지정합니다.


max_clients=50 ( 기본값 : 0 )

  최대 접속자수를 결정합니다. 0으로 두면 무제한입니다.


max_per_ip=5 ( 기본값 : 0 )

  하나의 IP에서 동시에 접속할 수 있는 수를 결정합니다.


local_max_rate=0 ( 기본값 : 0 )

  로컬 사용자의 접속시 업/다운로드 속도 제한을 지정합니다. 단위는 초당 Bytes 입니다.


trans_chunk_size=0 ( 기본값 : 0 )

  한번에 전송할 크기를 지정합니다. 단 일정단위로 묶어서 전송하게 되는데 이 항목은 전송량 조절 옵션인 rate 관련 옵션들과 연관성이 있습니다. 되도록이면 이 옵션은 수정하지 않는 것이 좋다고 제작자는 밝히고 있군요. 다만 8192로 하면 부드럽게 대역폭 제한이 가능하다고 하는데 당최 무슨 뜻인지;;;;;;


use_localtime=YES ( 기본값 : NO )

  파일의 시간을 보여줄 때 시스템의 Local time에 맞춰서 보여줍니다. 기본적으로 vsftpd GMT를 따르고 있습니다. 우리나라의 시간은 GMT + 9 입니다.


setproctitle_enable=YES ( 기본값 : NO )

  FTP의 현재 상황을 PS 로 볼 수 있도록 해줍니다. 즉 현재 세션의 상황을 ps 명령으로 나오는 값을 조작하여 접속자 등을 파악할 수 있습니다.


user_config_dir=none ( 기본값 : none )

  특정 사용자의 접속 환경을 vsftpd.conf 가 아닌 파일로 저장시켜 두고 적용시킬 수 있게 해줍니다. 여기서 지정하는 값은 디렉토리를 의미합니다. 예를 들어 /etc/vsftpd_user/chris 라는 파일을 생성한 후 파일속에 vsftpd.conf 와 같은 각종 지시어를 이용하여 환경을 구축해 놨을 때 chris라는 사용자가 접속하면 vsftpd.conf 가 아닌 /etc/vsftpd_user/chris 라는 파일의 환경에 적용을 받습니다. 물론 /etc/vsftpd_user/chirs 안에 없는 옵션은 vsftpd.conf 옵션에 적용을 받습니다. 다만 /etc/vsftpd_user/chris 파일내에 유저의 환경과는 관계가 없는 옵션들(banner_file, max_per_ip, max_clients, xferlog_file )은 무시됩니다.


local_enable=YES ( 기본값 : NO )

  시스템에 등록된 유저의 접속을 허용합니다.


userlist_enable=NO ( 기본값 : NO )

  유저 목록을 담고 있는 파일속의 내용에 있는 사용자만 접속을 허용합니다. 이 옵션은 userlist_deny 옵션이 비활성화된 상태에서만 효과가 있습니다.(userlist_deny 옵션과 반대역활입니다.)


userlist_deny=YES ( 기본값 : YES )

  유저 목록을 담고 있는 파일속의 내용에 있는 사용자만 접속을 불허합니다. userlist_enable 옵션과 반대 역활을 합니다. 특정 유저의 접속을 허용하지 않고자 할때 주로 사용합니다.


userlist_file=/etc/vsftpd.user_list ( 기본값 : /etc/vsftpd.user_list )

  userlist_enable 옵션과 userlist_deny 옵션에서 사용되는 유저 목록을 담고 있는 파일입니다.


text_userdb_names=YES ( 기본값 : NO )

  디렉토리 목록을 보여줄 때 유저명과 그룹명을 문자로 표시할 것인지를 결정합니다. 성능상과 보안문제상 NO로 되어 있는 듯 하며 개인적으로는 YES를 좋아라 합니다.


pam_service_name=vsftpd ( 기본값 : ftp )

  Solaris10과는 관계없는 옵션이며, pam 사용자 인증을 할때 사용할 인증파일을 지정합니다.


tcp_wrappers=YES ( 기본값 : NO )

  TCP wrappers에 의해서 FTP 접속을 제어할 것인지를 설정합니다. 미리 tcp_wrappers가 설치되어 있어야 하며, sunfreeware 에서는 현재날짜 기준으로(2008. 08. 04) 7.6 버젼이 공개되어 있으므로 vsftpd 설치전에 tcp_wrappers를 설치하시길 바랍니다. 참고로, solaris10 을 기본으로 설치할 경우 tcp_wrappers가 설치되어 있습니다만, 버젼이..... 7.6 버젼을 새로 설치하였습니다.


ssl_enable=NO ( 기본값 : NO )

  ssl 접속을 허용할 것인지를 결정합니다. 이 옵션을 사용할려면 컴파일 하기전에 builddefs.h 파일에서 SSL 옵션을 활성화시켜야 하며 관련 라이브러리 및 데몬들도 설치가 되어 있어야 합니다. 솔라리스에서는 SSL 연결이 좀 까탈스럽더군요. OTL;;;;;;


ssl_tlsv1=NO ( 기본값 : YES )

ssl_sslv2=NO ( 기본값 : NO )

ssl_sslv3=NO ( 기본값 : NO )

  ssl 접속시 어떤 프로토콜을 사용할 것인지를 결정합니다. 각각 TLS, V2, V3 를 의미하며 ssl_enable 옵션이 활성화되어 있을 때 기본 프로토콜은 SSL v1 프로토콜을 이용하여 접속합니다.


dsa_cert_file=none ( 기본값 : none - RSA certificate suffices 를 사용 )

  SSL의 암호화 접속시 사용할 DSA 인증서의 위치를 지정합니다.


dsa_private_key_file=none ( 기본값 : none )

  SSL의 암호화 접속시 사용된 DSA 개인키 파일의 위치를 지정합니다.


rsa_cert_file=/usr/share/ssl/certs/vsftpd.pem ( 기본값 : none )

  SSL 접속시 RSA 인증서를 지정합니다.


rsa_private_key_file=none ( 기본값 : none )

  SSL 접속시 RSA 인증에 사용할 RSA 개인키 값 파일을 지정합니다.


force_local_data_ssl=YES ( 기본값 : YES )

  ssl_enable 옵션이 활성화되어 있을때만 활성화되는 옵션이며, 로컬 사용자가 데이터를 전송시 SSL을 사용하도록 강제적으로 규정합니다.


force_local_logins_ssl=YES ( 기본값 : YES )

  ssl_enable 옵션이 활성화되어 있을때만 활성화되는 옵션이며, 로컬 사용자가 로그인시 강제적으로 SSL을 이용하도록 합니다.


connect_timeout=60 ( 기본값 : 60 )

  Port 모드로 접속시 사용자의 접속 허용 시간을 설정합니다. 지정된 시간내에 접속이 완료되지 않으면 접속이 끊어집니다.


accept_timeout=60 ( 기본값 : 60)

  Pasv 모드로 접속시 사용자의 접속 허용 시간을 설정합니다. connect_timeout 옵션과 동일하게 동작합니다.


data_connection_timeout=300 ( 기본값 : 300)

  데이타를 전송한 후 (/다운) 지정된 시간동안 아무런 동작이 없을 경우 접속을 끊습니다.


idle_session_timeout=300 ( 기본값 : 300)

  접속 완료 후 지정된 시간동안 아무런 동작을 하지 않으면 접속을 끊습니다.


banner_file=/etc/vsftpd.banner_file ( 기본값 : none )

  사용자가 접속했을 때 보여줄 환영 메세지를 가진 파일을 지정합니다.


ftpd_banner=Welcome to FTP Service ( 기본값 : none - vsftpd의 기본 메세지가 보입니다.)

  사용자가 접속했을 때 보여줄 안내 메세지를 지정합니다.


dirmessage_enable=NO ( 기본값 : NO )

  디렉토리로 접속할때 해당 디렉토리에 message_file 옵션에서 지정한 파일의 내용을 보여줄 것인지를 결정합니다.


message_file=.message ( 기본값 : .message )

  dirmessage_enable 옵션이 YES로 되어있다면 읽어서 보여줄 파일명을 지정합니다.


port_enable=YES ( 기본값 : YES )

  FTP Port 모드를 활성화홥니다. 일명 Active 모드라고도 합니다.


connect_from_port_20=YES ( 기본값 : NO )

  Port 모드로 동작시 데이터 전송의 기본 포트인 20번 포트의 사용 여부를 결정합니다.


ftp_data_port=20 ( 기본값 : 20 )

  Port 모드로 동작시 데이터 전송에 사용할 포트 번호를 지정합니다. 이 옵션은 connect_from_port_20 옵션이 활성화되어 있어야 정상적으로 작동합니다.


port_promiscuous=NO ( 기본값 : NO )

  Port 모드에서의 보안 체크 기능을 해제합니다. FXP(서버대 서버전송) 기능 사용시 활성화시켜줍니다.


pasv_enable=YES ( 기본값 : YES )

  Pasv 모드로 동작할 것인지를 결정합니다.


pasv_promiscuous=NO ( 기본값 : NO )

  동일한 IP에서 접속이 이루어질때 PASV 보안체크를 해제시켜 줍니다? 영어가 딸려서 해석이 꼬이네요. FXP (서버 대 서버 전송) 기능을 사용할 때나 SSH를 이용한 터널링 기능을 이용할 때 활성화시켜주는 옵션입니다.


pasv_min_port=0 ( 기본값 : 0 )

pasv_max_port=0 ( 기본값 : 0 )

  Pasv 모드로 접속시 할당할 최저(min) 포트번호와 최고(max) 포트번호를 지정합니다. 기본값인 0을 설정하게 되면 1024 이상 무작위로 할당합니다. 1024 이하의 포트번호는 일반적으로 well kown port 번호라고 하여 부르며 root 권한만 해당 포트를 제어할 수 있도록 되어있습니다. ( /etc/services 파일 참고 )


ascii_download_enable=NO ( 기본값 : NO )

ascii_upload_enable=NO ( 기본값 : NO )

  ASCII 모드로 전송을 허용할 것인지를 결정합니다. 일반적으로 UNIX 모드의 텍스트 파일과 PC(or Windows) 모드의 텍스트 파일은 LF/CR 처리부분에서 다르므로 이 옵션을 활성화(YES)시켜주면 전송시 자동으로 변환이 됩니다. 하지만 요즘 텍스트 에디터들은 자동으로 변환해주므로 크게 문제되지 않는다면 보안문제상 기본값으로 설정된 NO로 해주심을 권장합니다.


local_umask=022 ( 기본값 : 077 )

  파일 생성 umask 값을 지정합니다. 이 값을 보면 vsftpd가 보안에 까칠하다는게 확실히 알 수 있겠군요. 기본적으로 파일 생성시 할당되는 퍼미션은 최대퍼미션 - umask 의 값을 가집니다. 최대퍼미션은 디렉토리의 경우 0777, 파일인 경우 0666 으로 결정됩니다. 그러므로 디렉토리의 경우 vsftpd의 기본 umask를 적용하면 0700 ( 0777 - 077 = 0700 ) 으로 설정됩니다. 즉 올린 사람외에는 손대지마!!! 라는 것이 되죠. 다만 이렇게 된다면 웹서버를 운영할 경우 웹상에서 접근을 못하게 되는 사태가 벌어집니다. 일반적인 umask 옵션인 022 로 정해줍시다.


file_open_mode=0644 ( 기본값 : 0666 )

  업로드되는 파일의 기본 퍼미션을 지정합니다. 이 옵션은 반드시 local_umask 옵션보다 뒤에서 지정되어야 하며, 기본값을 주게 되면 업로드된 파일이 아무나 읽기쓰기로 되어버리기 떄문에 가능하면 0644 로 설정하는 것이 좋습니다.


dirlist_enable=YES ( 기본값 : YES )

  디렉토리 목록을 볼 수 있게 합니다. NO로 할 경우 목록을 볼 수가 없게 됩니다.


force_dot_files=NO ( 기본값 : NO )

  .(dot)로 시작하는 파일들의 표시 여부를 결정합니다. 보안관계상 기본 값은 NO로 되어있습니다.


tilde_user_enable=NO ( 기본값 : NO )

  일반적으로 사용하는 ~crhis/pics 와 같은 지정을 해석할 수 있도록 합니다. 사용자 계정명앞에 ~(틸드)가 오게 되면 해당 사용자 계정의 홈디렉토리를 의미하게 되는데 이것을 해석할 수 있도록 해주는 것입니다. 다만 이 옵션은 /etc/passwd 파일을 찾을 수 있을 경우에 정상적으로 작동합니다.


hide_ids=NO ( 기본값 : NO )

  이 옵션이 활성화되면 모든 파일의 사용자는 FTP로 표시됩니다. 보안에 도움이 될 수도 있는 옵션입니다.


write_enable=YES ( 기본값 : NO )

  사용자가 기록을 할 수 있도록 합니다. (STOR, DELE, RNFR, RNTO, MKD, RMD, APE, SITE 등의 명령이 실행가능해 집니다.)


download_enable=YES ( 기본값 : YES )

  파일을 다운로드할 수 있게 합니다.


chmod_enable=YES ( 기본값 : YES )

  로컬 사용자가 퍼미션을 변경할 수 있도록 합니다. 익명 접속 사용자는 불가능합니다.


use_sendfile=YES ( 기본값 : YES )

  서버 운영체제의플랫폼에서 sendfile() 시스템 호출을 허용합니다. 내부 세팅인것 같은데 그냥 YES~~~


cmds_allowed=none ( 기본값 : none )

  사용자에게 허용할 명령어를 지정합니다. 이 명령은 지정한 명령만 사용할 수 있도록 만드는 것입니다. 적용하지 않으면 모든 명령을 사용할 수 있으며 지정하게 되면 지정한 명령어만 사용가능합니다. 단 로그인 전의 명령어나 로그아웃 등의 명령어는 해당되지 않습니다. ( USER, PASS, QUIT )


deny_file=none ( 기본값 : none )

  업로드를 거부할 파일명을 지정합니다. { } 으로 묶으며, 와일드 카드 ( ? , * )를 사용할 수 있습니다. 각각의 파일은 ,(comma)로 구분하도록 되어있습니다. ) deny_file={*.mp3,*.mov,.private}


hide_file=none ( 기본값 : none )

  숨길 파일명을 지정합니다. 즉 존재는 하되 파일목록에서는 보이지 않습니다. deny_file 옵션과 동일한 형식으로 지정가능합니다.


async_abor_enable=NO ( 기본값 : NO )

  특정 클라이언트가 파일 전송중 취소했을 때 정상적으로 취소되지 않는 경우가 발생하는데 이때 이 옵션을 enable 하게 되면 이런 증상을 막을 수 있습니다. 제작자는 오직 ill adviced FTP clients가 이런 증상을 발생시킨다고 하며 보안관계상 NO를 권장하고 있습니다.


ls_recurse_enable=NO ( 기본값 : NO )

  ls 명령의 옵션중 하위 디렉토리의 구조까지 모두 읽어올 수 있는 -R 옵션 사용 여부를 결정합니다. 서버에 대한 부하가 크므로 기본적으로 NO 로 설정되어 있습니다.


chroot_local_user=YES ( 기본값 : NO )

  로컬 사용자가 접속하면 자신의 상위 디렉토리로 접근할 수 없도록 설정합니다.


passwd_chroot_enable=YES ( 기본값 : NO )

  If enabled, along with chroot_local_user,  then a chroot() jail location may be specified on a per-user basis. Each user's jail is derived from their home directory  string in /etc/passwd. The occurrence of /./ in the home directory string denotes that the jail is at that particular location in the path. (해석불가 -.-;;)


chroot_list_enable=NO ( 기본값 : NO )

  이 옵션을 활성화하면 명시된 사용자만이 자신의 홈상위 디렉토리에 접근할 수 없게 되어 있습니다. chroot_local_user 옵션이 비활성화되어 있어야 작동합니다.


chroot_list_file=/etc/vsftpd.chroot_list ( 기본값 : /etc/vsftpd.chroot_list )

  chroot_list_enable 옵션이 활성화되어 있다면 chroot() 기능을 적용시킬 사용자 목록을 가지게 되며, chroot_local_user 옵션이 활성화되어 있다면 chroot() 기능에서 제외할 사용자 목록을 가지게 됩니다.


secure_chroot_dir=/usr/share/empty ( 기본값 : /usr/share/empty )

  secure chroot()에서 사용될 디렉토리를 지정하며 반드시 비어있어야 합니다. 또한 ftp user에 대한 쓰기 권한이 없어야 합니다. (이게 왜 있는건지......) 참고로, 저 디렉토리는 반드시 생성되어 있어야 하며 조건에 맞지 않게 되어 있다면 vsftpd 실행시 에러가 발생합니다. 그냥 /usr/share/empty 디렉토리를 만들고 root:root 로 권한을 주고 755로 퍼미션 주시면 됩니다.


check_shell=YES ( 기본값 : YES )

  이 옵션은 non-PAM 시스템에서만 정상적으로 동작하며, 접속자의 Shell 체크 여부를 결정합니다.


delay_failed_logins=5 ( 기본값 : 1 )

  로그인이 실패하고 난 뒤 다음 로그인 시도까지의 딜레이 시간을 지정합니다.


delay_successful_logins=0 ( 기본값 : 0 )

  로그인이 성공하고 난 뒤 다음 과정으로 넘어가기 전까지의 딜레이 시간을 지정합니다.


max_login_fails=3 ( 기본값 : 3 )

  지정한 횟수만큼 연속적으로 로그인을 실패하면 연결을 끊어버립니다.


local_root=none ( 기본값 : none )

  로컬 사용자(익명 사용자가 아닌) 로그인을 하게 되면 해당 디렉토리로 이동시킵니다. 로그인을 실패한 경우에는 아무런 동작을 하지 않습니다.


lock_upload_files=NO ( 기본값 : NO )

  이 옵션을 활성화하면 모든 업로드되는 파일들은 기록 lock이 설정됩니다. 단 모든 다운로드 파일들은 공유 읽기 lock이 설정되는데 이 옵션을 활성화화면 악의적인 목적으로 업로드를 방해할 수 있으므로 주의해서 사용해야 합니다.


mdtm_write=YES ( 기본값 : YES )

  mdtm 기능을 사용할 수 있게 합니다. mdtm은 업로드되는 파일의 시간과 날짜를 변경할 수 있게 하는 기능힙니다.


pasv_addr_resolv=NO ( 기본값 : NO )

  이 옵션을 사용하게 되면 IP 주소가 아닌 호스트 네임을 pasv_address에서 사용할 수 있게 합니다.


vsftpd_log_file=/var/log/vsftpd.log ( 기본값 : /var/log/vsftpd.log )

  vsftpd의 로그파일을 지정합니다. xferlog_enable 옵션이 활성화되고 xferlog_std_format 옵션이 비활성화되어야 동작합니다. 또는 dual_log_enable 옵션아 활성화될 경우에도 동작합니다. 주의할 점은 syslog_enable 옵션이 활성화되면 모든 로그들은 system log로 보내어지므로 vsftpd_log_file 옵션에 기록된 파일에는 로그가 기록되지 않습니다.


dual_log_enable=YES ( 기본값 : NO )

  이 옵션이 활성화되면 /var/log/xferlog /var/log/vsftpd.log 파일 둘다 로그 기록에 사용합니다.


syslog_enable=NO ( 기본값 : NO )

  이 옵션이 활성화되면 모든 로그들은 system log(syslogd 데몬을 이용한)에 기록되며 /var/log/vsftpd.log 파일은 사용되지 않습니다.


xferlog_file=/var/log/xferlog ( 기본값 : /var/log/xferlog )

  이 옵션 wu-ftpd 형식의 로그들을 기록할 파일을 지정하는 것입니다. 반드시 xferlog_enable 옵션이 활성화되어야 정상적으로 동작하며 xferlog_std_format 옵션과 연관성이 있습니다. 또는 dual_log_enable 옵션이 활성화되어도 본 옵션이 동작합니다.


xferlog_enable=YES ( 기본값 : NO )

  상세한 파일의 전송상황을 로그파일에 기록할 것인지를 결정합니다. 기본값은 /var/log/vsftpd.log 에 기록하며, 이 파일의 위치는 xferlog_file 옵션에서 변경가능합니다.


xferlog_std_format=NO ( 기본값 : NO )

  xferlog_enable 옵션으로 기록되는 로그 형식을 표준으로 할 것인지를 결정합니다.


log_ftp_protocol=YES ( 기본값 : NO )

  아주 상세한 FTP 이용 상황을 로그에 기록할 지를 결정합니다.


no_log_lock=NO ( 기본값 : NO )

  로그 파일을 기록할 때 로그 파일에 lock 을 걸 것인지를 결정합니다. 일반적으로 걸지 않아도 되지만, 솔라리스 OS에서 베리타스(Veritas) 파일 시스템을 사용할 경우 문제점이 발생할 수 있으므로 해당 OS와 파일시스템을 사용하고 있을 경우 YES로 설정하시기 바랍니다.


session_support=YES ( 기본값 : NO )

  세션 기록을 wtmp 또는 utmp 에 남길것인지를 결정합니다. wtmp/utmp를 이용하게 되면 last 명령으로 접속여부를 확인할 수 있으므로 YES를 권장합니다.


one_process_model=NO ( 기본값 : NO )

  하나의 접속자에 하나의 프로세스 모델을 생성하여 할당합니다. 효율면에서는 좋으나 보안면에서는 조금 떨어질 수 있다고 제작자는 밝히고 있습니다. 단 리눅스 커널이 2.4 이상일때만 권장하는 것 같군요. 솔라리스10에서 서비스로 등록을 해 놓았으므로 이 옵션과는 무관하게 접속자별로 2개씩의 프로세스가 생성됩니다. OTL;;;;;;


기타 설명하지 않은 옵션들

  가상 사용자나 익명사용자에 대한 설정은 본인이 사용하지 않으므로 설명을 생략합니다. 인터넷상에 많이 알려져 있으므로 해당 문서를 검색하시거나 아래 참고사이트를 이용하시면 상세하게 설명되어 있습니다.

guest_enable=NO

guest_username=ftp

virtual_use_local_privs=NO

user_sub_token=none

allow_anon_ssl=NO

deny_email_enable=NO

banned_email_file=/etc/vsftpd.banned_emails

secure_email_list_enable=NO

email_password_file=/etc/vsftpd.email_passwords

ftp_username=ftp

no_anon_password=NO

anon_root=none

anon_max_rate=0

anon_upload_enable=NO

anon_world_readable_only=YES

anon_mkdir_write_enable=NO

anon_other_write_enable=NO

chown_uploads=NO

chown_username=root

anon_umask=077

force_anon_data_ssl=NO

force_anon_logins_ssl=NO


참고용 설정파일

제가 사용하고 있는 옵션들을 간단하게 옮겨봅니다. Solaris10에서 익명과 SSL을 사용하지 않으며, 웹서버 운영 용도로 사용하고 있는 서버입니다. 이중 로그파일을 한 이유는 xferlog.log 에서 전송량을 체크하기 위함이며, vsftpd.log 에서는 접속현황 및 계정 관리를 위해서 세팅하였습니다.


anonymous_enable=no

max_clients=50

max_per_ip=10

use_localtime=YES

setproctitle_enable=YES

local_enable=YES

ftpd_banner=Welcome to KYUNGSUNG University Web server......

port_enable=YES

max_login_fails=1

write_enable=YES

local_umask=022

file_open_mode=0644

xferlog_enable=YES

connect_from_port_20=YES

xferlog_file=/var/log/xferlog.log

session_support=YES

xferlog_std_format=NO

dual_log_enable=YES

vsftpd_log_file=/var/log/vsftpd.log

text_userdb_names=YES

tcp_wrappers=YES


참고사이트


기존 vsftpd 관련 자료들이 많긴 합니다만, 대부분 티니님의 자료를 옮겨 놓은 듯 하더군요. 다만 티니님의 자료는 1.0.1 버젼을 기준으로 하여 없는 옵션이나 내용이 조금 바뀐 옵션들이 있어서 따로 정리를 해봤습니다. 정말 항상 글을 쓸때마다 느끼는 것이지만, 글 제대로 쓰시는 분들 존경스럽네요. ;;;;;


- VsFTPD FTP 서버 설치 by 티니님 ( http://coffeenix.net/board_view.php?bd_code=1470 )

- FTP 설정하기 by 아햏햏님 ( http://blog.naver.com/ssanzing2?Redirect=Log&logNo=140025729151 )


2008.10.21 추가사항......................................


vsftp를 설치하고 난 뒤 아래의 메세지가 표시되면서 접속이 안되는 경우가 있다.


500 OOPS: tcp_wrappers is set to YES but no tcp wrapper support compiled in

: 위의 메세지는 sunfreeware.com 에서 다운받아서 pkgadd 로 설치했을 경우 tcp_wrapper가 지원되지 않도록 컴파일되어 있기 때문입니다. 결론은, 소스 받아서 컴파일 하세요~


500 OOPS: vsftpd: cannot locate user specified in 'ftp_username':ftp

: 위의 메세지는 ftp라는 그룹과 유저가 생성되어 있어야 합니다. 아래 명령으로 유저와 그룹을 생성하세요.

: groupadd -g 199 ftp

: useradd -u 199 -g 199 -s /bin/false -m ftp

Posted by 1010
98..Etc/C2008. 12. 15. 15:36
반응형
C 언어를 하면서 데이터베이스를 이용해야 할 경우가 있다.
이 때 부담없이 무료로 사용할 수 있는 mysql을 선택한다면!!
mysql은 www.mysql.com 에서 다운 받을 수 있다.

사이트에서 MySQL 5.1 Essentials를 다운 받도록 한다. (mysql-essential-5.1.30-win32.msi)
프로그래밍만을 할 것이라면 다운 받은 파일을 설치할 때 Custom 설치를 선택한 후, 아래와 같은 설치요소 선택화면에서 "C include Files / Lib Files"를 선택하도록 한다.


그리고 필요하다면 설치 경로를 마음껏 변경한다.
참고로 MySQL Server의 설치 경로를 변경하면 나머지 것들도 자동으로 바뀌지만, MySQL Server Datafiles의 경로는 변하지 않았다. 이 경로는 바꾸고 싶다면 따로 변경해야 하는 것 같다.

만약 데이터베이스는 설치하지 않고 외부의 MySQL Server를 이용하여 프로그래밍만 할 거라면 MySQL Server와 Client  Program은 설치할 필요가 없다.

MySQL Server를 설치한 경우는 아래의 추가적인 단계를 거쳐야 한다.
MySQL Server를 설정할 것인지 묻는 화면이 나온다. 서버의 설정은 여기서 하지 않아도 MySQL과 함께 설치된 configuration wizard를 실행하여 다시 설정할 수 있다. 나중에 하기 귀찮다면 바로 연이어 설정하도록 한다.
여기서는 거의 기본값을 이용하였다. 설치 과정은 아래의 그림을 참고한다.


설치 과정이 끝나면 프로그래밍 시 사용할 MySQL 관련 헤더 파일들과 라이브러리의 경로를 설정해야 한다.
Visual Studio 2005 를 사용하는 경우는 아래와 같이 프로젝트 경로를 설정하도록 한다.

"도구 -> 옵션 -> 프로젝트 및 솔루션 -> VC ++ 디렉터리" 에서 아래와 같이 설정한다.
먼저 Include 경로를 설정한다.


다음으로 library 의 경로를 설정한다.


프로젝트를 생성했다면, 메뉴에서 "프로젝트 -> 해당 프로젝트 속성 -> 구성 속성 -> 링커 -> 명령줄" 에 아래와 같이 추가한다.


이제 프로그래밍을 시작할 준비가 되었다!
이제 mysql.h 를 포함하여 프로그래밍을 하도록 한다.
마지막으로 주의할 것은 mysql.h 를 포함할 때 SOCKET 관련 에러가 발생하기도 한다. 이 때 SOCKET 을 아래와 같이 define 해주거나 관련 헤더를 포함하도록 한다.

#define SOCKET int

그럼 이제 MySQL 프로그래밍을 시작하자~


테이블 생성 등의 기본적인 MySQL 구문은 검색을 통해 금방 찾을 수 있다.
그러나 참고로... 무책임하게... 무단으로 링크를 하나 걸어두도록 한다..
마음에 드는 자료인데 잊어버릴까봐.. ㅠ_ㅠ


(혹시 문제가 되면 삭제 할께요 ㅠ_ㅠ)

IBM 에서 찾은 자료도 탭을 그냥 닫아 버릴 수가 없었다..;;;


찾은 자료들을 모두 즐겨찾기 해봐야 보지 않기도 하고, 극악의 카테고라이징 스킬로 나중에 알아보기 어려우므로...
자꾸 웹 브라우저의 탭을 닫지 않는다.. ㅠ_ㅠ
늘어만 가는 탭들...


그리고 이 자료보다 더 정리가 깔끔하게 되었다고 생각되는 참고 블로그는..


이 분의 블로그를 참고하여 직접 해보고, 캡처하며 이 글을 올린 것이므로... 카피는 아님을 밝힌다. ;


Posted by 1010
91..개발관련프로그램2008. 12. 15. 15:32
반응형
웹사이트를 통째로 다운로드 할 수 있는 무료 소프트웨어

웹사이트를 통째로 다운로드 할 수 있는 툴이 가끔 필요할 때가 있습니다. Website Copier 또는 Offline Browser 로 불리우는 3가지 무료 유틸리티를 소개합니다. 소스 코드까지 공개 되어 있는 오픈 소스 소프트웨어 HTTrack 과 Free Download Manager 도 있고 빌드된 바이너리만 있는 소프트웨어 BackStreet Browser 도 있습니다. 검색엔진에서 키워드를 "Offline Browser" 로 검색하면 다양한 유료, 무료 소프트웨어들을 찾을 수 있지만 지금 소개하는 3가지 유틸리티만 있어도 충분할 것 같습니다. 사용법은 그리 어렵지 않으니 직접 설치해서 사용할 수 있을 것입니다. 소스 코드를 수정할 수 있는 개발자라면 프로그램 소스 파일을 다운로드 받아 구미에 맞게 기능 개선을 해볼 수 있겠습니다. Offline Browser 로 느려서 답답했던 웹사이트나 해외 사이트를 다운로드 받아서 내 컴퓨터에서 브라우징 해보세요. 학습하거나 참조하기 위해 문서 형식의 웹사이트를 다운로드 받아서 휴대용 PC와 같은 인터넷 연결 없는 시스템에서 브라우징 하기에 유용합니다. 그리고 간단히 나의 블로그를 백업하는 용도로 사용해도 되겠군요.

[HTTrack]
홈페이지 : http://www.httrack.com/
다운로드 : http://www.httrack.com/httrack-3.43.exe

[Free Download Manager]
홈페이지 : http://www.freedownloadmanager.org/
다운로드 : http://files2.freedownloadmanager.org/fdminst3.exe

[BackStreet Browser]
홈페이지 : http://www.spadixbd.com/backstreet/
다운로드 : http://www.convertjunction.com/download/bs.exe

웹프로그래머의 홈페이지 정보 블로그 http://hompy.info
Posted by 1010
98..Etc/Etc...2008. 12. 15. 15:31
반응형
네이버 개발자 센터가 어제 11월 22일에 오픈했나봅니다. 오픈 소스와 오픈 API 로 분류 되고 있고 오픈 소스는 아래와 같은 프로젝트 들이 진행되고 있습니다. 오픈 소스 분류를 보면 제로보드로 많이 알려지고 이번에 개명된 Xpress Engine 과 개발자 들에게 어느 정도 알려진 국산 오픈소스 데이터베이스인 큐브리드 를 포함해 협업 개발 플렛폼 nFORGE, 서버 장비 모니터링 툴 Sysmon, 복수 서버 관리 쉘 Dist, 대형 분산 데이타 서버 관리 시스템 neptune, 분산 메모리 기반의 컴퓨팅 플랫폼 Coord, 네이버 카페와 블로그에 사용되고 있는 자바스크립트 WYSIWYG 에디터인 스마트 에디터로 구성되어 있고 앞으로 더 많은 오픈 소스 프로젝트가 추가된다고 하니 반가운 일 입니다. 이제 시작이지만 빠르게 활성화 되서 즐겁고 유익한 개발자들의 놀이터가 되길 바라며 국내 뿐만 아니라 해외 개발자들도 함께 할 수 있는 개발자 센터가 되길 바랍니다.

[큐브리드]
큐브리드는 엔터프라이즈급 오픈 소스 DBMS로서, 인터넷 서비스에 최적화된 DBMS를 지향하고 있습니다. 국내외 6,000 카피 이상의 현장 적용과 지난 2년간 3만건 이상의 제품 다운로드를 통해 미션 크리티컬 응용에서 요구하는 성능, 안정성, 확장성, 가용성을 보장하고 있으며, 제품의 간편한 설치 및 GUI 기반의 클라이언트 툴을 자체 제공함으로써 개발자 접근성 및 관리 편의성을 증대하고 있습니다.

CUBRID 2008은 참여, 개방, 공유의 가치를 기반으로 국내 개발자들과 함께 만들어가는 DBMS가 될 것이며, 특정 벤더에 종속적인 소프트웨어 생태계를 국내 ISV들과 협업하여 재편하고 궁극적으로 국산 DBMS가 많이 사용되는 세상을 만들어 가겠습니다.

[nFORGE]
nFORGE는 소프트웨어 개발에 필요한 기능들을 사용하기 편리하게 웹으로 묶은 협업 개발 플랫폼입니다. 버그나 문제점을 올리고 관리할 있는 이슈 트래커, 각종 문서와 정보를 간편하게 공유할 수 있는 위키, 소스코드의 변경내역을 편리하게 관리할 수 있는 형상관리 툴, 일반적인 용도의 게시판, 그리고 최종 작업 결과물을 공유하기 위한 파일 릴리즈 기능 등을 포함하고 있습니다.

nFORGE를 통해서 소프트웨어 개발자들이 개발 효율도 높이고 즐겁게 개발 작업이 이루어질 수 있도록 하고자 합니다. 이곳 네이버 개발자 사이트의 각종 프로젝트들도 모두 nFORGE 위에서 운영되고 있으니 부디 많이 가져다 쓰시고, 사용 도중 발생한 문제점이나 제안사항 등은 언제든지 nFORGE 프로젝트 사이트에 올려 주셔서 부디 nFORGE가 더 좋은 소프트웨어가 되어 함께 나눌 수 있도록 도와 주시면 감사하겠습니다.

[Xpress Engine]
컨텐츠의 생산과 유통을 극대화 하여 웹 생태계의 선순환에 기여하기 위해 Xpress Engine (XE) 오픈 소스 프로젝트는 시작되었습니다. Developer, Navigator, Explorer 라는 3개의 프로젝트 그룹의 멤버들 그리고 사용하고 참여해주시는 많은 분들의 노력과 정성으로 Xpress Engine 는 Content Management System으로 발전하고 있습니다. 그리고 차별없는 웹 세상을 만들기 위해 웹 표준화 / 웹 접근성을 준수하고자 노력하고 있습니다.

보다 쉽고 편하게 글을 작성하고 작성된 글을 보이도록 그리고 잘 사용되도록 함으로서 웹이라는 가상의 공간이 더욱 풍족해지고 쓸만한 곳이 될 수 있도록 많은 분들의 관심과 참여를 원합니다.

[Sysmon]
Sysmon은 대규모 리눅스/윈도우 서버 장비를 모니터링하기 위해 개발된 MySQL 기반의 웹 도구입니다. 5천 이상의 서버에 대해 한 대의 마스터 서버로 모니터링이 가능하며, 사용자가 간단한 조회를 통해 쉽게 장비의 종합적인 상태를 파악할 수 있습니다. 또한 다양한 요구사항을 만족시키기 위하여 기본적인 수집 항목 이외에 모니터링 대상 항목과 모니터링 뷰 화면을 사용자가 유연하게 추가, 변경할 수 있도록 설계되었습니다.

Sysmon은 현재 NHN의 서버 운영에 크게 기여하고 있으며 쉬운 설치와 강력한 기능을 바탕으로 점점 사용자 저변을 넓혀가고 있습니다. 보다 많은 사용자가 Sysmon을 접하고 보다 많은 개발자가 오픈소스 개발에 참여함으로써 Sysmon은 한층 더 좋은 소프트웨어로 발전해갈 수 있을 것입니다. 많은 관심과 참여를 부탁 드립니다.

[Dist]
Dist는 다수의 서버를 효율적으로 관리하기 위한 셸 명령어 수행 도구입니다. Dist를 사용하여 마스터 서버로 내려진 명령어는, 여러 서버에 동시 또는 순차적으로 실행되고 그 결과는 정리되어 마스터 서버에서 보여집니다. 각 서버의 상황에 맞는 명령어 커스터마이징, 출력 형태의 변경, 자유로운 명령어 수행, 서버 목록 구성, 향상된 에러 처리 능력 등의 강력한 기능을 가지고 있습니다. Python으로 만들어진 그리 크지 않은 간단한 프로그램이지만, 다수의 시스템을 효과적으로 신속하고 편리하게 운영하는데 큰 도움을 줄 것입니다.

Dist는 NHN 주요 서비스를 담당하는 다수의 서버(unix, linux, 윈도우 서버)를 효과적으로 운영하는데 탁월한 효용성을 보여주고 있습니다. 또한 지속적으로 기능을 추가하여 점점 더 사용하기 편리한 도구가 될 것입니다.

[neptune]
neptune은 수십 ~ 수백대의 분산된 서버에 수십 TB 이상 대규모의 구조화된 데이터를 저장, 서비스하는 데이터 관리 시스템입니다. neptune을 이용하면 실시간 데이터 서비스뿐만 아니라 Hadoop MapReduce와 같은 분산컴퓨팅 플랫폼과 유기적으로 동작하여 쉽고 빠르게 저장된 데이터를 분석할 수 있습니다. 심플한 데이터 모델, 수천대 규모의 확장성, 데이터의 신뢰성, 백업이 필요 없는 스토리지, 자동 복구 기능 등을 neptune에서 경험할 수 있습니다.

인터넷을 통해 수많은 정보가 쉽고 빠르게 생산되고 있지만 생산된 정보를 쉽고 안전하게 담을 있는 플랫폼은 많지 않습니다. neptune 프로젝트는 인터넷, 클라우드 컴퓨팅 시대에서 생산되는 무한대의 데이터를 저장하고 서비스하는 플랫폼을 만들기 위해 노력하겠습니다.

[Coord]
Coord는 분산 메모리 기반의 컴퓨팅 플랫폼입니다. 다수의 서버로부터 수집된 물리적 메모리 공간들은 Coord의 거대한 가상 메모리 공간으로 매핑됩니다. 이렇게 구성된 거대한 메모리 공간은 분산 환경을 위한 프로세스간 통신, 자원 공유, 동기화를 위하여 사용되고, 사용자는 단순한 API(read/write/take)만으로 다양한 분산 프로그래밍 모델(client-server, master-worker, scatter-gather, map-reduce)을 별도의 네트워크 관련 지식없이 쉽게 구현할 수 있습니다. 따라서 사용자는 일반적인 목적을 위한 분산 프로그래밍 뿐만 아니라 대규모 계산이나 대용량 데이터 처리를 필요로 하는 분산 프로그래밍에서도 Coord를 유용하게 사용할 있습니다.

현재 Coord는 C++을 기반으로 개발되었지만 다양한 프로그래밍 언어(Java, Python, PHP등)들을 함께 지원하고 있습니다. 이것은 기 개발된 데이터/텍스트 마이닝 알고리즘들과 기계학습 알고리즘들이 Coord와 함께 유연하게 연동될 수 있다는 가능성을 보여줍니다. 대부분의 알고리즘들이 단일 서버 환경에서 한정적인 메모리 기반으로 설계되었기 때문에 분산 환경에 적용하는 것이 쉽지만은 않습니다. 그러나 Coord를 사용하면 최소한의 코드 수정만으로 기 개발된 알고리즘들을 그대로 분산 환경에 적용할 수 있습니다. 이를 위하여 대규모 계산 문제나 대용량 데이터 처리에 관심있는 개발자들의 적극적인 참여가 필요합니다. Coord 기반의 분산 컴퓨팅의 세계로 여러분들을 초대합니다.

[스마트 에디터]
스마트 에디터는 Javascript로 구현된 웹 기반의 WYSIWYG 에디터입니다. 스마트 에디터는WYSIWYG 모드 및 HTML 편집 모드 제공, 자유로운 폰트 크기 설정 기능, 줄 간격 설정 기능, 단어 찾기/바꾸기 기능 등 편집에 필요한 다양한 기능을 제공하므로 사용자들은 스마트 에디터를 사용하여 쉽고 편리하게 원하는 글을 작성할 수 있습니다. 그리고 에디터의 구조가 쉽게 기능을 추가할 수 있는 구조로 되어 있어 스마트 에디터에 기능을 추가하기 위해서는 정해진 규칙에 따라 플러그 인을 만들어 추가하기만 하면 됩니다.

현재 스마트 에디터는 네이버, 한게임 등 NHN의 주요 서비스에 적용되어 있습니다. 그리고 Internet Explorer 6 이상, FireFox 2 이상, Safari 3, Opera 9, Chrome등 다양한 브라우저를 지원하고 있으며 지속적으로 지원 대상 브라우저를 넓혀 갈 예정입니다. 또한 지속적인 기능 추가를 통해 편리하고 강력한 에디터로 거듭날 것입니다.

웹프로그래머의 홈페이지 정보 블로그 http://hompy.info
Posted by 1010
91..개발관련프로그램2008. 12. 15. 15:28
반응형
훌륭한 무료 소프트웨어로 내 PC를 토핑해볼까?

무료라지만 유료로 써도 아깝지 않을 만큼 잘 만든 프리웨어 소프트웨어들이 생각보다 많고 이런 소프트웨어들만 가지고 내 PC를 토핑해도 불편하지 않을 정도입니다. 물론 새로운 소프트웨어의 사용법을 익히고 내 것으로 만드는 시간이 필요하긴 합니다. 무료 소프트웨어만으로 내 PC를 꾸미고 불편함 없이 PC를 사용하는 것이 가능할까요? 도전해 볼 만한 일입니다. 프리웨어 소프트웨어 중에는 소스 코드 또한 오픈 되어 있어 소프트웨어 개발에 관련된 분들에게 유익한 학습 자료가 될 수 있습니다.
아래 나열한 프리웨어 소프트웨어 리스트는 프로그램 이름, 홈페이지 주소, 프로그램 다운로드 링크 순으로 배치 되었습니다.

GIMP
   http://www.gimp.org/
   http://downloads.sourceforge.net/gimp-win/gimp-2.6.2-i686-setup.exe
3D Box Shot Maker
    http://www.bosseye.com/boxshot/
   http://www.bosseye.com/dlfree/boxshot_setup.exe
7-Zip
   http://www.7-zip.org/
   http://downloads.sourceforge.net/sevenzip/7z457.exe
바닥
   http://www.kipple.pe.kr/doc/badak/
   http://www.kipple.pe.kr/doc/badak/badak20081013.exe
빵집
   http://www.bkyang.com/
   http://www.bkyang.com/download/bz3setup.exe
칼무리
   http://kalmuri.kilho.net/
   http://www.kilho.net/bbs/download.php?bo_table=temppds&wr_id=270&KaMuRi.exe
AbiWord
   http://www.abisource.com/
   http://www.abisource.com/download/
Alch Icon Suite
    http://alch.info
   http://www.brothersoft.com/alch-icon-suite-download-94853.html
AmitySource Userbar Generator
   http://www.amitysource.com/userbar_maker.php
   http://www.amitysource.com/distfiles/UBarGen2.2_en.exe
AnimPixels
   http://www.animpixels.com/
   http://www.animpixels.com/download.html
Aptana
   http://www.aptana.com/
   http://www.aptana.com/studio/download
Aqua Data Studio
   http://www.aquafold.com/
   http://www.aquafold.com/downloads.html
Audacity
   http://audacity.sourceforge.net/
   http://audacity.sourceforge.net/download/windows
Blender
   http://www.blender.org/
   http://www.blender.org/download/get-blender/
   http://download.blender.org/release/Blender2.48a/blender-2.48a-windows.exe
CamStudio
   http://camstudio.org/
   http://www.camstudio.org/CamStudio20.exe
Code::Blocks
   http://www.codeblocks.org/
    http://www.codeblocks.org/downloads
Color Cop
   http://www.colorcop.net/
   http://www.colorcop.net/download
    http://www.colorcop.net/re/?download_colorcop
ColorPic
   http://iconico.com/colorpic/
   http://iconico.com/download.aspx?app=ColorPic
CPU-Z
    http://www.cpuid.com/cpuz.php
   http://www.cpuid.com/download/cpuz_148.zip
CutePDF Writer
   http://www.cutepdf.com/Products/CutePDF/writer.asp
    http://www.cutepdf.com/download/CuteWriter.exe
Cygwin
   http://www.cygwin.com/
   http://www.cygwin.com/setup.exe
Digital Image Tool
   http://www.digitalimagetool.com/
   http://www.digitalimagetool.com/tank/digitalimagetoolinstaller1.3.exe
DrawPlus
   http://www.freeserifsoftware.com/software/DrawPlus/
   http://www.freeserifsoftware.com/commence-download.asp?CommenceDownload=drawplus&navproduct=drawplus&Check=True
DTaskManager
   http://dimio.altervista.org/eng/
   http://dimio.altervista.org/stats/download.php?id=4
Easy Thumbnails
   http://www.fookes.com/ezthumbs/
   http://www.fookes.com/ftp/free/EzThmb_Setup.exe
Eclipse
   http://www.eclipse.org/
   http://www.eclipse.org/downloads/
eMule
   http://www.emule-project.net/
   http://www.emule-project.net/home/perl/general.cgi?l=1&rm=download
FastStone Image Viewer
   http://www.faststone.org/FSViewerDetail.htm
   http://www.faststone.org/FSViewerDownload.htm
FastStone Photo Resizer
   http://www.faststone.org/FSResizerDetail.htm
   http://www.faststone.org/FSResizerDownload.htm
   http://www.faststone.org/DN/FSResizerSetup27.exe
Fedora
    http://fedoraproject.org/
   http://fedoraproject.org/en/get-fedora
Filezilla
   http://sourceforge.net/projects/filezilla/
   http://sourceforge.net/project/showfiles.php?group_id=21558
Firefox
   http://www.mozilla.or.kr/ko/products/firefox/
Flash Slide Show Maker Professional
    http://www.flash-slideshow-maker.com/
   http://www.flash-slideshow-maker.com/setup_flash_slideshow_maker.exe
FontHit Font Tools
   http://www.download.com/FontHit-Font-Tools/3000-2316_4-10332216.html
   http://downloads.zdnet.com/abstract.aspx?docid=204056
FontInfo
   http://www.xlmsoft.de/fontinfo.php
   http://www.xlmsoft.de/download/fisetup.exe
FontRenamer
   http://www.neuber.com/free/fontrenamer/
   http://www.webattack.com/dlnow/rdir.dll?id=105070
Foobar2000
   http://www.foobar2000.org/
    http://www.foobar2000.org/?page=Download
FreeCommander
   http://www.freecommander.com/
   http://www.freecommander.com/fc_downl_en.htm
Gadwin PrintScreen
   http://www.gadwin.com/printscreen/
   http://www.gadwin.com/download/
GIMPShop
   http://thegimpshop.net/
    http://www.computerdefense.org/gimpshop/gimpshop_2.2.8_fix1_setup.exe
Google Chrome
   http://www.google.com/chrome/
   http://www.google.com/chrome/eula.html
Google Docs
   http://docs.google.com/
Google Talk
   http://www.google.com/talk/intl/ko/
Handbrake
    http://handbrake.fr/
   http://handbrake.fr/?article=download
HoverIP
   http://www.hoverdesk.net/freeware.htm
   http://www.hoverdesk.net/dl/en/HoverIP.zip
ImageDiff
   http://www.ionforge.com/products/
   http://www.ionforge.com/products/imagediff/imagediff.zip
ImageMagick
   http://www.imagemagick.org/script/
   http://www.imagemagick.org/script/download.php
Inkscape
   http://www.inkscape.org/
   http://downloads.sourceforge.net/inkscape/Inkscape-0.46.win32.exe
InsightPoint
   http://www.icytec.com/
   http://www.icytec.com/insightpoint/download/insightpoint-3.2.5.2-win.exe
IOBit Smart Defrag
    http://www.iobit.com/iobitsmartdefrag.html
   http://www.download.com/Smart-Defrag/3000-2094-10759533.html?part=dl-SmartDefr&subj=uo&tag=button
IrfanView
   http://www.irfanview.com/
    http://www.irfanview.com/main_download_engl.htm
Jahshanka
   http://jahshaka.org/
   http://jahshaka.org/Downloads
jEdit
    http://www.jedit.org/
   http://www.jedit.org/index.php?page=download
JR Screen Ruler
   http://www.spadixbd.com/freetools/jruler.htm
   http://www.convertjunction.com/download/jruler.zip
Juice
   http://juicereceiver.sourceforge.net/
   http://prdownloads.sourceforge.net/juicereceiver/Juice22Setup.exe?download
KompoZer
   http://kompozer.net/
   http://kompozer.net/download.php
LiveSwif Lite
   http://www.download.com/LiveSwif-Lite/3000-6676_4-10276527.html
   http://www.zdnet.com.au/downloads/0,139024478,10276528s,00.htm
LOOXIS Faceworx
   http://www.looxis.com/
   http://www.looxis.com/en/k75.Downloads_Bits-and-Bytes-to-download.htm
   http://www.looxis.com/download/LOOXIS_Faceworx_v1.exe
LS Screen Capture
   http://www.linos-software.com/capture.html
   http://www.linos-software.com/FileDownload/SetupCapture.msi
Magnifier
   http://iconico.com/magnifier/
   http://iconico.com/download.aspx?app=Magnifier
Media Coder
    http://mediacoder.sourceforge.net/
   http://mediacoder.sourceforge.net/download.htm
Media Player Classic
   http://sourceforge.net/projects/guliverkli/
   http://sourceforge.net/project/showfiles.php?group_id=82303
MPlayer
   http://www.mplayerhq.hu/
   http://www.mplayerhq.hu/MPlayer/releases/win32/MPlayer-1.0rc2-gui.zip
NetBeans
   http://www.netbeans.org/
   http://www.netbeans.org/downloads/index.html
Notepad++
   http://notepad-plus.sourceforge.net/
    http://notepad-plus.sourceforge.net/uk/download.php
Notepad2
   http://www.flos-freeware.ch/notepad2.html
   http://www.flos-freeware.ch/zip/notepad2.zip
nPOP
    http://www.nakka.com/soft/npop/index_eng.html
   http://www.nakka.com/soft/npop/download/npop109win32_EN.zip
ntop
   http://www.ntop.org/
   http://www.ntop.org/download.html
Open Capture
   http://openproject.nazzim.net/opencapture.htm
   http://openproject.nazzim.net/download/opencapture_v1.3.5.exe
OpenOffice.org
    http://www.openoffice.org/
   http://openoffice.or.kr/main/page.php?id=download
   ftp://ftp.daum.net/openoffice/localized/ko/3.0.0/OOo_3.0.0_Win32Intel_install_ko.exe
openSUSE
   http://www.opensuse.org/en/
   http://software.opensuse.org/
Opera
   http://www.opera.com/
   http://www.opera.com/download/get.pl?id=31867&thanks=true&sub=true
Paint.NET
   http://www.getpaint.net/
   http://www.dotpdn.com/files/Paint.NET.3.36.zip
   http://fileforum.betanews.com/download/PaintNET/1096481993/1
ParticleDraw
   http://www.anandavala.info/TASTMOTNOR/code/v5.1/ParticleDraw/SMNPD5_1.html
   http://www.anandavala.info/TASTMOTNOR/code/v5.1/ParticleDraw/SMN_v5.1_ParticleDraw.zip
PC Wizard
   http://www.cpuid.com/pcwizard.php
   http://www.cpuid.com/download/pcw2008_v187.exe
photoWORKS
   http://andojung.com/photoWORKS/
Picasa
   http://picasa.google.com/
   http://picasa.google.com/picasa_thanks.html
PicPick
   http://picpick.wiziple.net/
   http://picpick.wiziple.net/features
Pidgin
   http://www.pidgin.im/
   http://www.pidgin.im/download/
PrimoPDF
   http://www.primopdf.com/
   http://www.download.com/PrimoPDF/3000-10743_4-10264577.html?part=dl-10264577&subj=dl&tag=button
Project Dogwaffle
   http://www.thebest3d.com/dogwaffle/free/
   http://www.thebest3d.com/dogwaffle/free/Dogwaffle_Install_1_2_free.exe
PuTTY
   http://www.chiark.greenend.org.uk/~sgtatham/putty/
   http://www.chiark.greenend.org.uk/~sgtatham/putty/download.html
Safari
   http://www.apple.com/kr/safari/
   http://www.apple.com/kr/safari/download/
ScreenHunter
   http://wisdom-soft.com/products/screenhunter_free.htm
   http://www.wisdom-soft.com/downloads/setupscreenhunterfree.exe
SharpDevelop
   http://www.sharpdevelop.net/OpenSource/SD/
   http://www.sharpdevelop.net/OpenSource/SD/Download/
SketchUp
   http://sketchup.google.com/
   http://sketchup.google.com/download/
SmoothDraw NX
   http://www.smoothdraw.com/product/freeware.htm
   http://www.smoothdraw.com/sdnx/SmoothDrawNXSetup.exe
Sothink SWF Catcher
    http://www.sothink.com/product/swfcatcher/ie/
   http://www2.sothink.com/download/swfcatcher_IE.zip
SPRAY vector generator
   http://xaraxtv.at.tut.by/
   http://www.download.com/3001-2191_4-10623896.html
Spread32
   http://www.byedesign.co.uk/
   http://www.byedesign.co.uk/s32/spre32en.zip
SQLTools
   http://www.sqltools.net/
   http://www.sqltools.net/downloads.html
SQLTools for ORACLE
   http://heiya.webice.kr/
   http://heiya.webice.kr/PDS/SQLTools.zip
SQuirreL SQL Client
   http://www.squirrelsql.org/
    http://www.squirrelsql.org/#installation
Starter
   http://codestuff.tripod.com/products_starter.html
   http://codestuff.tripod.com/Starter_English.zip
Stickies
    http://www.zhornsoftware.co.uk/stickies/
   http://www.zhornsoftware.co.uk/stickies/download.html
Synfig Studio
   http://www.synfig.com/
    http://www.synfig.com/download/
Tail for Win32
   http://tailforwin32.sourceforge.net/
   http://sourceforge.net/projects/tailforwin32
Terragen
   http://www.planetside.co.uk/terragen/
   http://www.planetside.co.uk/terragen/win/downloadwin.shtml
The Font Thing
    http://members.ozemail.com.au/~scef/tft.html
   http://members.ozemail.com.au/~scef/tft/tftdownloadmain.html
The KMPlayer
   http://www.kmplayer.com/
    http://www.kmplayer.com/forums/showthread.php?t=4094
Thunderbird
   http://www.mozilla.com/en-US/thunderbird/
   http://www.mozilla.com/products/download.html?product=thunderbird-2.0.0.18&os=win&lang=ko
Tomahawk PDF+
   http://www.nativewinds.montana.com/software/tpdfplus.html
   http://www.nativewinds.montana.com/downloads/TPDFPlus.zip
TortoiseSVN
   http://tortoisesvn.tigris.org/
    http://tortoisesvn.net/downloads
TouchArt Sampler
   http://www.derivativeinc.com/TouchArt/TouchArtSampler.asp
   http://www.derivativeinc.com/Temp/TouchArtSampler017.exe
Ubuntu
   http://www.ubuntu.com/
   http://www.ubuntu.com/getubuntu/download
uMark Lite
   http://www.uconomix.com/Products/uMark/
   http://www.uconomix.com/Downloads.aspx
UnFREEz
   http://www.whitsoftdev.com/unfreez/
   http://www.whitsoftdev.com/files/unfreez.zip
uTorrent
   http://www.utorrent.com/
   http://www.utorrent.com/download.php
VirtualDub
   http://www.virtualdub.org/
    http://virtualdub.sourceforge.net/
VirtuaWin
   http://virtuawin.sourceforge.net/
   http://virtuawin.sourceforge.net/downloads.php
VLC Media Player
   http://www.videolan.org/vlc/
   http://www.videolan.org/vlc/download-windows.html
Winamp
   http://www.winamp.com/
   http://www.winamp.com/player
WinTail
   http://www.baremetalsoft.com/wintail/
   http://www.baremetalsoft.com/wintail/download.php?p=p
X-Chat
   http://silverex.info/
   http://silverex.info/download/
Xnews
   http://xnews.newsguy.com/
    http://xnews.newsguy.com/#download

웹프로그래머의 홈페이지 정보 블로그 http://hompy.info
Posted by 1010
01.JAVA/Java2008. 12. 15. 15:09
반응형
  RMI 원격 서비스(서버측 서비스)만들기

 1. 원격 인터페이스를 만든다

 : 원격 인터페이스(interface)는 쉽게말하면 서버와 클라이언트간의 규약을 만드는것이라 할 수 있다. 인터페이스를 만들어놓고, 서버측, 클라이언트측모두 이 인테페이스를 사용 하게 만든다면 효과적으로 메소드들을 연계시킬 수 있을 것이다.

<예제파일 : MyRemote.java>

1) java.rmi.Remote를 확장한 인터페이스를 만든다. 이때, Remote는 '표지' 인터페이스로서,  아무런 메소드도 가지고 있지 않다. 이 인터페이스를 확장해서 자신만의 인터페이스를 만든다


2) 서버측이 구현하고, 클라이언트측이 실행시킬 메소드를 만든다. 이때, 모든 메소드들이 RemoteException을 던지도록 선언해 주어야만 한다


* 여기서는 예제로 sayHello라는 메소드를 사용할것임을 알 수 있다.

2. 원격 인터페이스를 구현한 클래스를 만든다

: 서버측에서는 방금전에 만든 인터페이스를 확장한 클래스를 만들어야 하며, 이 클래스 내부에 우리가 서비스해줄 메소드가 들어있다.

<예제파일 : MyRemoteImpl.java>

1) 인터페이스와 메소드를 구현한다. 이때, 이 파일이 원격서비스 객체역할을 하려면 객체 자체에 원격으로 돌아가는 역할에 관한 내용을 포함하고 있어야 하며, 이를위해 Unicast-RemoteObject를 확장하게 된다.

* UnicastRemoteObject는 Java.rmi.server패키지 내부에 있다.
   
2) RemoteException을 선언하는 생성자를 만들어준다. 이는 이 클래스의 상위클래스인 Unicast-Remote의 생성자에서 Exception을 발생시키기 때문이며, MyRemoteImpl은 이를 구현한 클래스이므로 역시 생성자에서 동일한 작업을 실시해 주어야 한다.
   

3) 서비스를 RMI레지스트리에 등록 합니다. 반드시 서비스가 RMI레지스트리에 등록되어야 하는데 이를 위해서 java.rmi.Naming 클래스의 rebind() 메소드를 이용한다. 아래 그림은 서비스에 Remote_Hello라는 이름을 붙여주고, 이를 RMI레지스트리에 등록하는 작업을 나타낸다.


3. 두개의 파일을 컴파일하여 .class파일을 생성한다. 컴파일 과정은 생략하며 이번 예제에서는 패키지를 사용하지 않았다.
   

4. rmic를 이용해 stub, skelecton을 만든다

: 이제 서비스 보조객체인 스터브와 스켈렉톤을 생성한다. 이때 생성되는 스터브와 스켈렉톤은  MyRemoteImpl에 관한 것이므로 모든 작업은 클래스 파일을 접근할 수 있는 위치에서 이루어 져야 한다.


1) 명령행에서 MyRemoteImpl이 있는 폴더로 이동한다


2) rmic명령어를 실행시켜 스터브와 스켈렉톤을 만든다   


3) 만들어진 스터브와 스켈렉톤을 확인한다


5. RMI레지스트리를 시작한다
1) rmiregistry명령어를 이용해 RMI레지스트리를 실행시킨다.
   
* RMI레지스트리를 실행시키면 대기상태처럼 커서가 계속 깜박거리고있다.
   혹시, 아무런 반응이 없다고 끄지 마시길 바란다..
 
 
6. 원격 서비스를 시작한다
1) 다른창을 열고 평소처럼 java명령어를 이용해 원격 서비스를 실행한다


* 이때도 역시, 실행시키면 커서가 계속 깜박거리고있다. 절대로 끄면 안된다..

7. 주의사항

: 여기서 우리는 엄청난 사실을 발견하게 된다. 4-2)rmic실행시 stub는 생성되었으나 skelecton은 생성되지 않은것이다. 왜일까... rmic명령어에 관한걸 좀더 알아보기 위해서 명령어창에 rmic 만을 쳐보자. 그러면 아래와 같은 도움말 창이 뜨게된다.

1) 1.2버전으로 오면서 default값이 stub만 생성하는것으로 바뀐것을 알 수 있다. 즉, 1.2버전에서 skelecton은 필요가 없어졌다.

2) -v1.1옵션을 사용하면 1.1버전의 stub/skelecton을 만들 수 있는것을 알 수 있다.

3) -vcompat옵션을 사용하여 1.2에서 1.1호환버전의 skelecton을 생성할 수 있음을 알 수 있다.


Posted by 1010
01.JAVA/Java2008. 12. 15. 15:08
반응형

RMI(Remote Method Invocation)

 다형성 기본 개념 이해하고 있어야한다..

 다형성은 항상 상위(Super) 클래스의 멤버필드 사용할수 있다..

  (단 메서드는 상위 클래스의 메서드를 사용하나 재정의시에는 상속받은 클래스의 메서드를 사용한다..)

UnicastRemoteObject 같은 클래스에 이미 상속해 두었다..


가.원격 인터페이스 작성

1. 서버와 클라이언트에서 동시에 사용할 원격(Remote) 인터페이스를 생성한다...

 인터페이스 작성규칙..

  조건1. java.rmi.Remote상속받아야한다..

          -  이 인터페이스에 있는 메서드는 로컬이 아닌 원격에서 사용할수 있어야 한다는 것을 명시하기 위해서이다..

  조건2. 무조건 public 이어야한다..

          - 원격은 클래스 내부에서의 접근만 허용하는 private 지정도 안될 것이고 상속의 관계에서 사용하는 protected지정도

            안될것 이고 동일 package에서의 호출만 가능한 package지정도 안될 것이기 때문이다..

  조건3. 메서드는 무조건 RemoteException 처리를 하여야한다..(예외발생처리)


    ex)  import  java.rmi.*;

       public interface Ex01 extends Remote {

          public String Message() throws RemoteException//인터넷상의 예외를 위해 반드시 처리..

             //특정 메세지를 전송하기 위한 메서드..

          public void printData() thorws RemoteException;

            // 호출된 시간을 서버에 출력하는 메서드..


2. 서버에 바인딩될 클래스의 멤버 메서드를 재정의 한다..(클래스가 실제 요청이 있을경우 실행하는 부분..)

- 서버에서는 이 객체가 바인딩되어 있어야하고 클라이언트는 이 객체를 통해 서버의 내용을 실행할수 있다..

   이 클래스는 외부 요청을 받기 위해 자신의 객체를 바인딩하기 때문에 직렬화가 되어있어야 하고 이전 단계에서 작성한

   원격인터페이스를 구현해야한다..


나. 인터페이스를 구현한 실제 서버 클래스 작성

이 클래스는 인터페이스를 구현할 목적으로 만든 클래스로 원격으로 객체를 복사해서 통신할 수 있는 형태를 표현하기 위해

미리 만들어진 UnicastRemoteObject와 같은 계열의 클래스를 상속받아야 한다. 실제 서버 행동의 주체(동작되는)가 되는 클

래스이기도 하다..

 구현 클래스의 규칙

  조건1 : 무조건 public이어야 한다.

  조건2 : 앞에서 만든 인터페이스를 상속받아 구현해 주어야한다.

             (인터페이스를 상속받았으니 메서드를 재정의하는것은 당연..)

  조건3 : UnicastRemoteObject 계열의 통신 클래스를 상속받아야한다.

              (해당 통신의 하부 구조를 일부 구현해주고 객체의 직렬화를 만들어준다..)

  조건4 : 이 클래스의 디폴트 생성자는 반드시 정의해야 한다. 또한 그 생성자는 RemoteException 처리.

              (UnicastRemoteObject생성자에서 해당 예외를 발생시키기 때문)

ex)

import java.rmi.*;
import java.rmi.server.*;
import java.util.*;

public class Ex02 extends UnicastRemoteObject implements Ex01 {
  public Ex02() throws RemoteException {
   super();
  }

  public String Message() throws RemoteException {
   printDate();
   return "안녕하세요! 반갑습니다.";
  }

  public void printDate() throws RemoteException {
   Date d = new Date();
   System.out.println("Connect Date = " + d.toString());
  }
}


다. 객체를 바인딩하는 Run 클래스 작성

 이 클래스는 객체인 Ex02를 RMIRestry라는 데몬 서버에 바인딩시키는 역할을 한다. 여기에서 객체를 바인딩시키는

메서드는 Naming 클래스의 rebind()라는 매서드이다.. 객체의 이름은 임의로 apple로 정한다..


import java.rmi.*;
import java.net.*;

public class Ex03 {
 public static void main(String[] args) {
  try {
   Ex02 sr = new Ex02();
   System.out.println("Server Ready...");
   Naming.rebind("apple", sr);
  } catch (RemoteException ee) {
   ee.printStackTrace();
  } catch (MalformedURLException ee) {
   ee.printStackTrace();
}
 }
}


라. 클라이언트가 객체를 찾아 호출하는 클래스작성

클라이언트가 유일하게 작성하는 클래스를 서버의 객체를 복사해서 가지고 와서 사용할수 있도록한다.

이것의 실행조건은  당연히 1번에서 작성한 원격인터페이스가 동일한 폴더에 있어야 한다는 것이다.

그것을 통해 다형성의 개념으로 실행할 수 있기 때문이다. 객체를 찾는 방법으로 사용된 클래스는

Naming이라는 클래스의 static메서드인 lookup()이다.


import java.net.*;
import java.rmi.*;

public class Ex04 {
 public static void main(String[] args) {
    try {
     Ex01 fr = (Ex01) Naming.lookup("rmi://원격시키고자 하는 서버 ip주소값/apple"); // 다형성...
     String msg = fr.Message();
     System.out.println("Message = " + msg);
    } catch (RemoteException ee) {
     ee.printStackTrace();
    } catch (MalformedURLException ee) {
     ee.printStackTrace();
    } catch (NotBoundException ee) {
     ee.printStackTrace();
    }
    }
}

< RMI 실행방법 (Dos화면에서)>

  1. 네 개의 파일을 모두 컴파일한다..(시작->실행->cmd)

   -> 관련파일경로 > java -d . *.java


  2. 두번째 작성한 실제 서버 클래스를 RMI컴파일을 통해 스텁클래스(파일명_Stub.class)를 생성..

   ( 스텁클래스는 내부 통신의 통로 역할을 하게 된다..)

   ->관련파일경로 > rmic -d . Ex02


 3.자바폴더의 bin폴더안에 rmiregistry.exe 파일을 실행하여 RMI서버를 가동한다.(새창이 생성됨)

   ( 보안경고창이 뜨면 차단해제 클릭~!) - 서버를 실행할수 있는 상태를 만든다..


 4. 생성된 새창은 실행상태로 두고 기존에 컴파일시켰던 도스창으로 돌아와 세번쨰 예제인 서버 실행 클래스를

   실행시킨다. 이것으로 RMI 서버에 객체를 바인딩할수 있다. - 서버실행상태

  ->관련파일경로 > java Ex03

    (실행하면 "Server Ready..."라는 메세지가 뜬다.)


 5. 마지막으로 또 하나의 Dos창을 열어 네번째 작성된 클래스를 통해 실행을 확인한다. 네번째 클래스는 다른 컴퓨터에

  있어도 되지만 첫번째 예제로 작성된 Remote를 상속받은 interface와 함께 있어야 한다.
  ->
관련파일경로 > java Ex04

  (실행시 첫번째 도스창에 Date(날짜)값이 출력되고  입력창에는 "안녕하세요!반갑습니다"라는 메세지가 뜬다.)


출처 : http://shizuku.tistory.com/category/☆%20IT/JAVA

Posted by 1010
01.JAVA/Java2008. 12. 15. 15:08
반응형

[Calculator.java]

import java.rmi.*;

public interface Calculator extends Remote
{
 public int sum(int num1, int num2) throws RemoteException;
 public int sub(int num1, int num2) throws RemoteException;
 public int multy(int num1, int num2) throws RemoteException;
 public int division(int num1, int num2) throws RemoteException;
}


[CalculatorImpl.java]

import java.rmi.server.*;
import java.rmi.*;

public class CalculatorImpl extends UnicastRemoteObject implements Calculator
{
 public CalculatorImpl() throws RemoteException{

 }

  public int sum(int num1, int num2) {
   return num1+num2;
  }

  public int sub(int num1, int num2) {
   return num1-num2;
  }
 
  public int multy(int num1, int num2) {
   return num1*num2;
  }
 
  public int division(int num1, int num2) {
   return num1/num2;
  }

}


[Server.java]

import java.rmi.*;

public class Server
 {
  public static void main(String[] args) throws Exception
   {
    CalculatorImpl c = new CalculatorImpl();
    Naming.rebind("Calculator",c);
    System.out.println("server ready...");
   }
 }


[Client]

 public static void main(String[] args) throws Exception
 {
  Calculator c = (Calculator)Naming.lookup("Calculator");
  int num1 = Integer.parseInt(args[0]);
  int num2 = Integer.parseInt(args[1]);

  int result1 = 0, result2 = 0, result3 = 0, result4 = 0;
  result1 = c.sum(num1, num2);
  result2 = c.sub(num1, num2);
  result3 = c.multy(num1, num2);
  result4 = c.division(num1, num2);

  System.out.println("sum : " + result1);
  System.out.println("sub : " + result2);
  System.out.println("multy : " + result3);
  System.out.println("division : " + result4);
 }
}


출처 : http://shizuku.tistory.com/category/☆%20IT/JAVA


Posted by 1010
51.Struts22008. 12. 15. 15:07
반응형

<%@ page language="java" contentType="text/html; charset=EUC-KR"
    pageEncoding="EUC-KR"%>
<!DOCTYPE HTML PUBLIC "-//W3C//DTD HTML 4.01 Transitional//EN">
<html>
<head>
<meta http-equiv="Content-Type" content="text/html; charset=EUC-KR">
<title>Insert title here</title>
</head>
<body>

<form method="post" action="/strutsboard/insert.no">
 <table align="center">
  <tr>
   <td>작성자<input type="text" name="writer"></td>
  </tr>
  <tr>
   <td>제목<input type="text" name="title"></td>
  </tr>
  <tr>
   <td>내용<input type="text" name="content"></td>
  </tr>
  <tr>
   <td>패스워드<input type="password" name="password"></td>
  </tr>
  <tr>
   <td colspan=2 align="center"><input type="submit" value="save"></td>
   
  </tr>
 </table>
</form>
</body>
</html>


** info.jsp


<%@ page language="java" contentType="text/html; charset=EUC-KR"
    pageEncoding="EUC-KR"%>
   
    <%@page import="board.vo.VisitorVO" %>
   
    <%
     VisitorVO vo = (VisitorVO)request.getAttribute("info");
    %>
<!DOCTYPE HTML PUBLIC "-//W3C//DTD HTML 4.01 Transitional//EN">
<html>
<head>
<meta http-equiv="Content-Type" content="text/html; charset=EUC-KR">
<title>Insert title here</title>
<script>

 function goDelete(no){
  var dbpassword= document.getElementById("dbpassword").value;
  var userpassword= document.getElementById("password").value;
  if(dbpassword != userpassword){
   alert('비밀번호가 맞지않습니다');
  }else{
   location.href="/strutsboard/delete.no?=no="+no;
 }
 
 function goModify(no){
  var dbpassword= document.getElementById("dbpassword").value;
  var userpassword= document.getElementById("password").value;
  if(dbpassword != userpassword){
   alert('비밀번호가 맞지않습니다');
  }else{
   location.href="/strutsboard/modify.no?no="+no;
  }
 }


</script>


</head>
<body >

<table align="center" cellpadding="1" cellspacing="1" border="1" bordercolor="pink">
 <tr>
  <td bgcolor="pink">글번호</td>
  <td><%=vo.getNo() %>
  <td bgcolor="pink">작성날짜</td>
  <td><%=vo.getRegdate() %></td>
 </tr>
 <tr>
  <td bgcolor="pink">작성자</td>
  <td colspan=3><%=vo.getWriter() %></td>
 </tr>
 <tr>
  <td bgcolor="pink">제목</td>
  <td colspan=3><%=vo.getTitle() %></td>
 </tr>
 <tr>
  <td bgcolor="pink">내용</td>
  <td colspan=3 height="100"><%=vo.getContent() %></td>
 </tr>
 
 <tr>
  <td bgcolor="pink">패스워드</td>
  <td colspan=3><input type="password" id="password" ></td>
  <input type="hidden" id="dbpassword" value="<%=vo.getPassword() %>">
 </tr>
 
 <tr>
  <td colspan=4 align="center">
 <input type="button" value="수정" onclick="location='/strutsboard/modify.no?no=<%=vo.getNo() %>'">
 <input type="button" value="삭제" onclick="location='/strutsboard/delete.no?no=<%=vo.getNo() %>'">
 <input type="button" value="리스트" onclick="location='/strutsboard/list.no'">
 
  </td>
 
 </tr>
</table>
</body>
</html>


** list.jsp


<%@ page language="java" contentType="text/html; charset=EUC-KR"
    pageEncoding="EUC-KR"%>
   
   
  <%@page import="board.vo.VisitorVO,java.util.*" %>
 
  <%
   ArrayList list= (ArrayList)request.getAttribute("list");
  %>
<!DOCTYPE HTML PUBLIC "-//W3C//DTD HTML 4.01 Transitional//EN">
<html>
<head>
<meta http-equiv="Content-Type" content="text/html; charset=EUC-KR">
<title>Insert title here</title>
</head>
<body>

<table align="center" cellspacing="1" border="1" bordercolor="pink">
 <tr>
  <td>글번호</td>
  <td>작성자</td>
  <td>제목</td>
  <td>작성날짜</td>
 </tr>
 
  
 <%
  for(int i=0; i<list.size();i++){
   VisitorVO vo = (VisitorVO)list.get(i);  
 %>
 <tr>
  <td><%=vo.getNo() %></td>
  <td><%=vo.getWriter() %></td>
  <td width=40%><a href="/strutsboard/info.no?no=<%=vo.getNo() %>"><%=vo.getTitle() %></td>
  <td><%=vo.getRegdate() %></td>
 </tr>
 
 <% } %>
 
 <tr>
  <td align="center" colspan=4><input type="button" value="작성하기" onclick="location='/strutsboard/board/write.jsp'"></td>
 </tr>
 
</table>

</body>
</html>


** modifyForm.jsp


<%@ page language="java" contentType="text/html; charset=EUC-KR"
    pageEncoding="EUC-KR"%>
    <%@page import="board.vo.VisitorVO" %>
   
    <%
     VisitorVO vo = (VisitorVO)request.getAttribute("info");
    %>
<!DOCTYPE HTML PUBLIC "-//W3C//DTD HTML 4.01 Transitional//EN">
<html>
<head>
<meta http-equiv="Content-Type" content="text/html; charset=EUC-KR">
<title>Insert title here</title>
</head>
<body>

<table align="center" cellpadding="1" cellspacing="1" border="1" bordercolor="pink">
 
 <input type="hidden" name="no" value="<%=vo.getNo() %>">
 
 <tr>
  <td bgcolor="pink">글번호</td>
  <td><%=vo.getNo() %>
 
  <td bgcolor="pink">작성날짜</td>
  <td><%=vo.getRegdate() %></td>
 </tr>
 <tr>
  <td bgcolor="pink">작성자</td>
  <td colspan=3><input type="text" name="writer" value="<%=vo.getWriter() %>"></td>
 </tr>
 <tr>
  <td bgcolor="pink">제목</td>
  <td colspan=3><input type="text" name="title" value="<%=vo.getTitle() %>"></td>
 </tr>
 <tr>
  <td bgcolor="pink">내용</td>
  <td colspan=3 height="100"><textarea name="content" rows=10><%=vo.getContent() %></textarea></td>
 </tr>
 <tr>
  <td>새 비밀번호</td>
  <td colspan=3><input type="text" name="password"></td>
 </tr>


 <tr>
  <td><input type="button" value="수정" onclick="location='/strutsboard/update.no?no=<%=vo.getNo() %>'">
  <td><input type="button" value="리스트" onclick="location='/strutsboard/list.no'">
 </tr>

</table>
</body>
</html>

Posted by 1010
반응형
다음까페의 프로그래머자료 카페에서 참조 했습니다.
http://cafe251.daum.net/_c21_/bbs_search_read?grpid=19VVx&fldid=Ki0S&contentval=00008zzzzzzzzzzzzzzzzzzzzzzzzz&nenc=rZc2_1ntyEMM3NSIvBc.2w00&dataid=8&fenc=w5lwmbf1XmU0&docid=CDb9MIhS


AXIS에 대한 자료가 많지 않은데요.. 참 정리가 잘 된 문서인 것 같습니다. 시키는 대로 테스트를 하다 보니.. 웹서비스의 개념이 어느정도 잡히는 듯 합니다. 좋은 자료라 공유해봅니다. 참고하세요~~)

 
Apache AXIS를 이용한 웹서비스 강좌(팁)
개요 : 톰캣(자바)환경에서 axis를 이용한 웹서비스

Apache Axis is an implementation of the SOAP ("Simple Object! Access Protocol") submission to W3C.
아래의 내용은 중요하므로 기본 개념이 분명이 있어야 한다.
본 강좌(팁)은 사용법을 위주로 아주 기초적인 예제를 다룰것이므로 자세한 내용은 생략한다.
SOAP (Simple Object! Access Protocol)
WSDL (Web Service Description Langauge)
WSDD (Web Service Deployment Descriptor)
"웹서비스는 인터넷을 통해 제공되는 소프트웨어가 PC나 휴대폰과 같은 다중 기기에서 동일하게
작동하도록 해준다. 여기에는 데이터 교환의 표준이면서 경쟁 관계에 있는 기술들이 서로 통신하고
협동하도록 해주는 XML(Extensible Markup Language), 웹서비스 간에 어떻게 인터넷을 통해
교신하는지를 서술하는 SOAP(Simple Object! Access Protocol), 웹서비스가 무엇이고 또 어떻게
접근할 수 있는지를 기술하는 WSDL(Web Services Description Language), 그리고
온라인 전화번호부의 역할을 수행하면서 기업들로 하여금 웹서비스를 등록, 홍보, 검색할 수
있도록 하는 UDDI(Universal Description, Discovery andIntegration) 등이 포함된다."

1. Apache Tomcat 4.1 이상 , Full Version으로 설치
  • 톰캣 5.5.4 버젼을 사용하였다. (참고로 Windows환경이다.)
    설치후 http://localhost:8080으로 확인해서 동작이 되면 정상이다.
    이것이 톰캣설치의 전부이고, jsp 및 servlet이 동작이되면 준비는 되었다.
    필요에 따라 jdbc등 기타 드라이버를 c:\tomcat\common\lib\ 에 복사 한다.
  • set CATALINA_HOME=c:\tomcat

2. 자바 개발툴킷 설치 : JDK 1.4 버젼 이상이면 된다.

  • 참고로 jdk 1.5 버젼을 설치하였다.
  • 설치 후에 classpath를 설정한다.
    set CLASSPATH=.;c:\jdk15\lib\tools.jar;c:\tomcat\common\lib\servlet-api.jar;
    추가적으로 필요한 jdbc 및 기타 라이브러리들을 추가한다.
  • set JAVA_HOME=c:\jdk15
    set PATH=c:\jdk15\bin; 을 기존 PATH에 추가한다.

3. ANT 설치 (옵션) : ant에 대해서는 다른 문서나 커뮤니티 사이이트에서 참고할것.

  • http://ant.apache.org에서 ant 1.6.2 버젼을 받아서 설치한다.
    설치는 다운 받은 파일을 압축을 풀어서 일정한 디렉토리에 옮겨놓으면 된다.
  • set ANT_HOME=c:\ant
    set PATH=c:\ant\bin; 을 기존 PATH에 추가한다.
  • C:\tomcat\server\lib\catalina-ant.jar 파일을 c:\ant\lib\ 디렉토리로 복사한다.
  • 추가적으로 junit 이나 xml관련 라이브러리등을 c:\ant\lib\ 에 복사하여 사용하면 된다.

4. AXIS 설치 : http://ws.apache.org/axis/ , http://ws.apache.org/axis/releases.html

  • axis 사이트에서 최신 릴리즈를 다운받아서 압축을 푼후에, 원하는 디렉토리에 옮겨놓으면 된다.
    참고로 1.1 final version를 다운 받아서 사용중이다.
  • set AXIS_HOME=c:\axis
  • set AXIS_LIB=%AXIS_HOME%\lib
  • set AXISCLASSPATH=%AXIS_LIB%\axis.jar;%AXIS_LIB%\commons-discovery.jar;
    %AXIS_LIB%\commons-logging.jar;%AXIS_LIB%\jaxrpc.jar;%AXIS_LIB%\saaj.jar;
    %AXIS_LIB%\log4j-1.2.8.jar;%AXIS_LIB%\xml-apis.jar;%AXIS_LIB%\xercesImpl.jar;
    %AXIS_LIB%\wsdl4j.jar
  • set CLASSPATH=%CLASSPATH%;%AXISCLASSPATH% 으로 기존 CLASSPATH 에 추가한다.
  • 참고 :
    CLASSPATH에 있는 xml-apis.jar 파일과 xercesImpl.jar 파일은
    http://xml.apache.org/ 에서 받으면 된다.
    또한, 아래에서 보게 될 라이브러리 테스트를 통하여 추가 라이브러리를 확인할수 있고
    확인후에 필요한 다운 사이트 정보까지 나오게 되므로 정보를 확인후 다시 설정해주면 된다.

5. axis를 톰캣에 연동하기

  • 연동에 있어서 특별한 것은 없고 단지, c:\axis\webapps\axis\ 에서 axis디렉토리를
    c:\tomcat\webapps\axis로 복사하면 된다. 즉, 톰캣 webapps디렉토리에 axis 컨텍스트가
    추가 되었다고 이해해도 되겠다.

6. 테스트 해보기

  • 톰캣을 실행하고
  • 연결테스트를 해본다.
    http://localhost:8080/axis
  • 라이브러리 테스트
    http://localhost:8080/axis/happyaxis.jsp 에서 필요하거나 필수적인 추가 라이브러리를
    설치하라는 경고 메시지를 보여주기 때문에 이때 필요한 라이브러리를 다운받아서
    c:\tomcat\webapps\axis\lib\ 에 복사해주고 다시 테스트를 해본다.
    필요에 따라서 다운받은 라이브러리를 CLASSPATH에 설정해주어서 jdk로 컴파일할때 이용하자.

7. SOAP 테스트

  • http://localhost:8080/axis/services/Version?method=getVersion
    다음과 같이 출력되면 정상적으로 설치가 된것이다. (내용은 환경에 따라 약간 차이가 난다.)

    - xmlns:xsd="http://www.w3.org/2001/XMLSchema"
    xmlns:xsi="http://www.w3.org/2001/XMLSchema-instance">
    -
    -
    Apache Axis version: 1.1 Built on Jun 13, 2003 (09:19:43 EDT)


8. AdminClient 테스트

  • C:\axis\samples\stock 디렉토리로 이동하여 예제로 테스트해보자.
  • java org.apache.axis.client.AdminClient
    -lhttp://localhost:8080/axis/services/AdminService deploy.wsdd
  • deploy가 되었는지 확인하고, 에러가 나면 거의 대부분의 원인은 클래스패스에서 나온다.
  • deploy가 제대로 되었는지 확인해보자.
    http://localhost:8080/axis/servlet/AxisServlet
    아래처럼 추가된 부분이 웹에 보인다면 성공적으로 deploy된것이다.
    urn:xmltoday-delayed-quotes (wsdl)
    test
    getQuote

9. Client 수행 테스트

10. 프로그램 작성 순서

  • 서버 Interface와 구현 Class를 작성한후 컴파일 한다.
  • 구현 클래스로 부터 WSDL 파일을 생성한다.
  • WSDL 파일로 부터 deploy.wsdd 파일을 생성한다.
  • deploy.wsdd 파일을 이용해서 웹서비스를 deploy하고 server-config.wsdd 파일을 생성 수정한다.
  • 구현클래스로 부터 client-side 클래스를 생성한다.

11. 프로그램 작성 플로우


12. 예제 프로그램

  • 자바 Interface와 자바 Implement 클래스 작성
    c:\test\ 에 아래 2개의 파일을 생성한다.

    //begin - HelloIF.java
    package webservice.hello;
    public interface HelloIF extends java.rmi.Remote {
    public String hello(java.lang.String name) throws java.rmi.RemoteException;
    }
    //end - HelloIF.java

    //begin - HelloImpl.java
    package webservice.hello;
    public class HelloImpl implements HelloIF {
    public HelloImpl() {
    }
    public String hello(String name) {
    System.out.println(name);
    return "hi " + name;
    }
    }
    //end - HelloImpl.java

  • 컴파일

    javac -d . HelloImpl.java
    컴파일 후 c:\test\webservice/hello 디렉토리밑에 HelloImpl.class 와 HelloIF.class가 생성.
    생성된 class파일을 C:\Tomcat\webapps\axis\WEB-INF\classes
    디렉토리에 패키지 디렉토리를 포함해서 복사한다.
    참고: 컴파일이 되지 않을경우, HelloIF.java파일을 먼저 컴파일한후에 c:\test\webservice/hello
    디렉토리에 HelloIF.class파일을 복사해놓고 다시 컴파일 해본다.

  • 구현된 클래스로 부터 WSDL 생성 하기

    java org.apache.axis.wsdl.Java2WSDL -o c:\test\webservice\hello\Hello.wsdl
    -l http://localhost:8080/axis/services/Hello -n http://hello.webservice -pwebservice.hello
    http://hello.webservice webservice.hello.HelloIF

    Java2WSDL 인자 (http://ws.apache.org/axis/java/reference.html)
    인 자
    의 미
    -o 파일경로 wsdl 생성 위치
    -l URL client가 접속할 URL
    -n 네임스페이스 WSDL의 타켓 네임스페이스
    -p패키지 네임스페이스 네임스페이스와 네임스페이스 매핑
    Target 인터페이스 이름


    [생성된 Hello.wsdl 파일]


    ...
    ...생략...
    ...


  • WSDL 파일로 부터 deploy.wsdd 파일 생성 및 client-side 자바 클래스 생성

    java org.apache.axis.wsdl.WSDL2Java -o c:\test\webservice\hello\
    -d Application -s c:\test\webservice\hello\Hello.wsdl

    c:\test\webservice\hello 디렉토리 하위에 webservice/hello
    새로운 디렉토리가 생성된것을 확인 할수 있다.
    그 디렉토리에 deploy.wsdd 파일과 새롭게 생성된 자바 파일이 존재해야 한다.
    또한, undeploy.wsdd 파일도 생성 된 것을 볼수 있는데 이파일은 서비스를
    undeploy할때 사용한다.
    인 자
    의 미
    -o 디렉토리경로 wsdd 파일과 클래스파일이 생길 디렉토리
    -d scope 설치 영역 - Application, Request , Session
    -s wsdd 파일 생성
    Target wsdl 파일 경로

  • [deploy.wsdd 파일 수정]
    wsdd 파일은 wsdl 파일만 가지고 생성되었기 때문에 실제 구현클래스가 무엇인지 제대로
    설정이 안되어 있으므로 그부분을 수정해 주어야한다.
    붉은색 부분으로 해당 부분을 수정해주면 된다.

    xmlns="http://xml.apache.org/axis/wsdd/"
    xmlns:java="http://xml.apache.org/axis/wsdd/providers/java">
    ...
    ...생략...
    ...
    webservice.hello.HelloImpl"/>
    ...
    ...생략...
    ...


  • 서비스 디플로이먼트 하기

    java org.apache.axis.client.AdminClient -lhttp://localhost:8080/axis/services/AdminService deploy.wsdd    <== 포트번호를 80등으로 바꿀경우는 꼭 이와같은 행태로 -l옵션을 주어서 드플로이 해야만 한다.

    [디플로이먼트 확인하기]
    http://localhost:8080/axis/servlet/AxisServlet
    'Hello' 라는 서비스가 설치된것을 확인할 수 있다.

  • 서비스 언디플로이먼트 하기

    java org.apache.axis.client.AdminClient -lhttp://localhost:8080/axis/services/AdminService undeploy.wsdd

    [언디플로이먼트 확인하기]
    http://localhost:8080/axis/servlet/AxisServlet
    'Hello' 라는 서비스가 삭제 된것을 확인할 수 있다.

14. 클라이언트 구현하기

  • 이제 생성된 서비스에 클라이언트로 접근해보는 예제를 생성하고 테스트 해보자.
    아래와 같이 작성하고 c:\tomcat\webapps\axis\ 복사한다.

  • [HelloClient.jsp]
    <%@ page contentType="text/html; charset=euc-kr" language="java"
    import!="java.net.MalformedURLException,
    java.net.URL,
    java.rmi.RemoteException,
    javax.xml.namespace.QName,
    javax.xml.rpc.ServiceException,
    org.apache.axis.client.Call,
    org.apache.axis.client.Service" %>
    "http://www.w3.org/TR/xhtml1/DTD/xhtml1-transitional.dtd">


    <%
    Service service = new Service();
    Call call = (Call)service.createCall();
    call.setTargetEndpointAddress(new URL("http://localhost:8080/axis/services/Hello?wsdl"));
    call.setOperationName(new QName("http://soapinterop.org/", "hello"));
    String returnValue = (String)call.invoke(new Object![]{"! 안녕하세요.^^*"});
    out.println(returnValue);
    %>


  • http://localhost:8080/axis/hello.jsp

    hi ! 안녕하세요.^^*

  • 위에서 처럼 나오면 성공이다. HelloClient.jsp부분하고 차이가 없는것 같지만
    "! 안녕하세요" 와 "hi ! 안녕하세요" 차이가 크다.(구현하는 프로그램적으로...)
    즉, hi 라고 출력되어지는 String hello() 웹 메소드를 HelloImpl.class에서 가져와서 실행하는 것이다.

14. 두번째 예제

  • 첫번째 방법 외에 빠른 방법이 있다.
    자바 파일을 만들고 확장자를 java가 아닌 jws로 바꾸고 실행하는 방법이다.
    참고로 c:\tomcat\webapps\axis\WEB-INF\web.xml를 한번 검토해길 바란다.
  • [ HelloWorldService.jws]

    public class HelloWorldService
    {
    public String HelloWorld(String data)
    {
    return "Hello World! You sent the string '" + data + "'.";
    }
    }

  • 위의 파일을 c:\tomcat\webapps\axis\ 에 복사하고

    http://localhost:8080/axis/HelloWorldService.jws

    그 주소에 설치된 서비스가 있다는 HTML 페이지가 나온다. 여기서 더나가 HelloWorld 메서드를 호출해보자.

    http://localhost:8080/axis/HelloWorldService.jws?method=HelloWorld&data=Hi+my+name+is+okjsp

    메서드를 호출한 결과 XML을 받았다.

  • 자바로 클라이언트 구현 하기


    [ HelloWorldClient.java]

    import! java.net.MalformedURLException;
    import! java.net.URL;
    import! java.rmi.RemoteException;
    import! javax.xml.namespace.QName;
    import! javax.xml.rpc.ServiceException;
    import! org.apache.axis.client.Call;
    import! org.apache.axis.client.Service;

    public class HelloWorldClient
    {
    public static void main(String[] args) throws ServiceException, MalformedURLException, RemoteException
    {
    Service service = new Service();
    Call call = (Call)service.createCall();
    call.setTargetEndpointAddress(new URL("http://debianbox:8080/axis/HelloWorldService.jws"));
    call.setOperationName(new QName("http://soapinterop.org/", "HelloWorld"));
    String returnValue = (String)call.invoke(new Object![]{"My name is okjsp."});
    System.out.println(returnValue);
    }
    }

  • HelloWorldClient.java 파일을 컴파일 하고 실행 해서 결과를 확인해 본다.
    참고로 컴파일 에러가 나는 경우는 라이브러리등이 CLASSPATH에 잡혀있지 않아서 이다.
    본 문서의 처음 부분에 있는 설정 부분을 확인해 보고 다시 시도 해보자.

15. 다른 시스템과 연동하기

SOAP로 운영되고있는 서버 시스템과 연동을 한다고 하면 먼저 해당 시스템에 wsdl을 알아야만 한다.

SOAP서버 운영자로부터 wsdl을 볼수있는 url이나 .wsdl파일을 요청하도록한다.

그렇게 해서 받은 wsdl파일을  첨부된pdf 파일에서 언급된 WSDL2Java 명령을 이용하여 java파일들을 생성하게 된다.

이렇게 생성된 java파일들을 통해 바로 써버쪽에서 써비스와 연결할 수 있는 정보들을 알수있다.

즉,서버쪽에서 AxisServlet에 등록된 모듈에 대한 인터페이스 관련 파일들인것임.

이 java파일들을 이용해서 첨부파일 예제인 FactClientByWSDL.java파일과 같이 client 파일을 만들어 실행시키면 서버와  연결하여 데이터를 받을 수 있게된다.

물론 client 파일 실행시에는 해당 FactClientByWSDL.java 파일과 WSDL2Java 명령으로 생성된 자바파일이 패키지화 되어 있어야 참조하여 실행이 될것이고 axis관련된 jar파일들도 classpath에 참조가 되어야 할것이다.

Apache AXIS를 이용한 웹서비스 강좌
Posted by 1010
60.Unix2008. 12. 15. 14:04
반응형

순서


개요

이 테크 팁은 운용중인 솔라리스 시스템의 호스트 이름 혹은 IP 주소를 바꾸는 방법에 대해 설명합니다.

이 정보는 썬 InfoDoc 21252, "How to Change the hostname and/or IP Address Without Running the sys-unconfig Command" 를 기반으로 만들어 졌습니다. (좀 더 자세한 정보는 SunSolve 를 참고하시기 바랍니다; 컨텐츠는 썬 서비스 플랜을 계약 하신 분께 공개되어 있습니다.)


옵션 1: sys-unconfig 이용하기

sys-unconfig 를 사용하면 여러개의 파일들을 기본값으로 되돌릴 수 있고, 그 다음에 호스트를 셧다운 시킵니다. 재부팅에 관해서 멘 페이지에서 설명되지 않은 것은 이러한 파일들을 재생성하도록 설정에 관한 질문을 받는 다는 것입니다. 이러한 질문들은 서버가 처음 배달 됐을때 혹은 운영체제를 제일 처음 로딩 시켰을때 받는 질문과 동일 합니다.

이제 부팅 과정에서 다음과 같은 화면을 보게 될 것입니다:

 Select the language you want to use: <select your language>
 
 Select a Locale,
 Please make a choice (0 - 59), or press h or ? for help: 
<select your location>
 
 What type of terminal are you using?
 Type the number of your choice and press Return: 
<select your terminal type, I use a DEC VT100>
 
 F2 continue, F2 continue
 
 Network Connectivity
       Networked [X] Yes
 
 DHCP
       Use DHCP [X] No
 
 Primary Network Interface
       Primary network interface [X] eri0
 
 Host Name <hostname>
 
 IP Address <ipaddress>
 
 Subnets
       System part of a subnet [X] Yes
 
 Netmask
 <netmask>
 
 IPv6
       Enable IPv6 [X] No
 
 Set a default Route
       [X] Specify one
 Default Route IP Address
       Router IP Address: <defaultrouter>
 
 Confirm Information
       F2 continue
 
 Configure Security Policy:
       Configure Kerberos Security [X] No
 
 Confirm Information
       F2 continue
 
 Name Service
       Name service [X] DNS
 
 Domain Name
       <dnsdomain>
 
 DNS Server Address
       Servers IP Address: <nameserver1>
       Servers IP Address: <nameserver2>
       Servers IP Address:
 
 DNS Search List
       Search Domain: <dnsdomain>
       Search Domain:
       Search Domain:
       Search Domain:
       Search Domain:
 
 Confirm Information
       F2 continue
 
 Time Zone
       Regions [X] <select your region>
 
 Time Zone
       Time zones [X] <select your time zone>
 
 Date and Time
   > Accept the default date and time or enter new values.

옵션 2: 파일 수정하기

호스트 이름 변경

솔라리스7 이전 버전은 다음의 파일들을 수정합니다:

/etc/inet/hosts
/etc/nodename
/etc/hostname.<interface>

여기서 <interface> 는 프라이머리 인터페이스의 이름입니다, 예를 들어 bge0.

/etc/net/ticlts/hosts
/etc/net/ticots/hosts
/etc/net/ticotsord/hosts

이제 시스템을 재부팅 합니다.

솔라리스7 에서 9 버전은 다음의 파일들을 수정합니다:

/etc/inet/hosts
/etc/nodename
/etc/hostname.<interface>

여기서 <interface> 는 프라이머리 인터페이스의 이름입니다, 예를 들어 bge0.

/etc/net/ticlts/hosts
/etc/net/ticots/hosts
/etc/net/ticotsord/hosts
/etc/inet/ipnodes

이제 시스템을 재부팅 합니다.

솔라리스10 버전은 다음의 파일들을 수정합니다:

/etc/inet/hosts
/etc/nodename
/etc/hostname.<interface>

여기서 <interface> 는 프라이머리 인터페이스의 이름입니다, 예를 들어 bge0.

/etc/inet/ipnodes

이제 시스템을 재부팅 합니다.

IP 주소 변경

솔라리스7 이전 버전은 다음의 파일들을 수정합니다:

/etc/inet/hosts
/etc/hostname.<interfaces>

여기서 <interfaces> 는 인터페이스의 이름들 입니다, 예를 들어 bge0, bge1, eri0.

/etc/net/ticlts/hosts
/etc/net/ticots/hosts
/etc/net/ticotsord/hosts

만약 새로운 서브넷으로 이동하려 한다면 다음의 파일들을 수정합니다:

/etc/inet/netmasks
/etc/defaultrouter
/etc/resolv.conf

이제 시스템을 재부팅 합니다.

솔라리스7 에서 9 버전은 다음의 파일들을 수정합니다:

/etc/inet/hosts
/etc/hostname.<interfaces>

여기서 <interfaces> 는 인터페이스의 이름들 입니다, 예를 들어 bge0, bge1, eri0.

/etc/net/ticlts/hosts
/etc/net/ticots/hosts
/etc/net/ticotsord/hosts
/etc/inet/ipnodes

만약 새로운 서브넷으로 이동하려 한다면 다음의 파일들을 수정합니다:

/etc/inet/netmasks
/etc/defaultrouter
/etc/resolv.conf

이제 시스템을 재부팅 합니다.

솔라리스10 버전은 다음의 파일들을 수정합니다:

/etc/inet/hosts
/etc/hostname.<interfaces>

여기서 <interfaces> 는 인터페이스의 이름들 입니다, 예를 들어 bge0, bge1, eri0.

/etc/inet/ipnodes

만약 새로운 서브넷으로 이동하려 한다면 다음의 파일들을 수정합니다:

/etc/inet/netmasks
/etc/defaultrouter
/etc/resolv.conf

이제 시스템을 재부팅 합니다.


저자에 관하여

Ross Moffatt 은 10년 이상 UNIX 시스템 관리자로 실한 경험이 있습니다. ross.stuff [at] telstra.com 로 연락 가능합니다.


이 아티클의 영문 원본은
http://www.sun.com/bigadmin/content/submitted/change_hostname.jsp

에서 볼수 있습니다.

"관리자코너" 카테고리의 다른 글

Posted by 1010
60.Unix2008. 12. 15. 12:08
반응형
----------------------------------------------------------------------------
                        시스템 디스크 교체 후 E3500 부팅 절차
----------------------------------------------------------------------------
시스템 디스크 교체 후 E3500 부팅

개요: 시스템 디스크 교체 후 E3500 부팅
상세 설명:

E3500의 내부 부트 디스크 교체 지침(광채널 디스크)
이 지침은 A5000으로도 알려진 SENA(Solstice Enterprise Network Array)의 부트 디스크에도 적용됩니다.
그러나 SEVM 또는 SDS에 의해 미러링된 부트 디스크에는 적용되지 않습니다
(Solstice Enterprise Volume Manager 또는 Solstice Disk Suite).
Ultra Enterprise 3500의 내부 부트 디스크에 문제가 발생하여 다른 드라이브로 교체했습니다.
새 드라이브는 newfs가 수행되었으며 원본 디스크의 덤프 테이프로부터 복원되었습니다.
새 디스크의 월드 와이드 번호(WWN)를 반영하기 위해 Open Boot Prom의 부트 디바이스 변수를 변경했습니다.

STOP + A

boot cdrom -sw

일반적인 절차에 따라 새 디스크에 적합한 디스크 파티션과 파일 시스템을 생성하고 백업 덤프를 복원합니다.
그런 다음, 아래와 같은 명령을 수행합니다.
이제, 새 디스크로 시스템을 부팅할 수 있도록 교체 디스크의 WWN이 적절한 경로에 생성됩니다.


기존 생성된 디바이스 정보를 삭제한다.

/a/devices/.... <-- 파일 삭제
/a/dev/....  <-- 파일 삭제

drvconfig -r /a/devices -p /a/etc/path_to_inst
disks -r /a
devlinks -r /a

버그 ID 4161768로 인해 다음과 같은 두 명령이 필요합니다.
cd /devices
find . -print | cpio -pduvm /a/devices

(cdrom의 /device 트리를 마운트된 파일시스템으로 복사)
마지막으로, 부트 디스크를 설치합니다.

installboot /usr/platform/`uname -i`/lib/fs/ufs/bootblk /dev/rdsk/cXtXdXsX

#installboot /usr/platform/sun4u/lib/fs/ufs/bootblk /dev/rdsk/cXtXdXs0
# ls -l /dev/rdsk/cXtXdXsX

lrwxrwxrwx 1 root root 50 Aug 1 10:48 /dev/rdsk/cXtXdXsX -> ../../devices/pci@1f,0/pci@1,1/ide@3/dad@1,0:a,raw

여기서 주의 : 윗라인의 pci@1f,0/pci@1,1/ide@3/dad@1,0:a,raw 부분을 꼭 기억 하세요.

--부팅 디스크 앨리어스 지정하기
STOP + A (prom mode)

OK prompt

ok nvalias mirror /pci@1f,0/pci@1,1/ide@3/dad@1,0:a,raw ; --앨리어스 지정함.

ok boot mirror --새로구성된 디스크로 부팅함.


--A5000으로 구성된 경우
마운트된 파일시스템을 해제합니다.모든 파일시스템에 최종 fsck 검사를 수행합니다.
luxadm 명령을 사용하여 부트 디바이스를 생성합니다.
luxadm -v set_boot_dev -y /dev/dsk/cXtXdXs0
시스템이 정지되고 부팅이 제대로 수행되어야 합니다.


----------------------------------------------------------------------------
              기존 디스크 / 에서 새 디스크 / dd copy
----------------------------------------------------------------------------
boot_disk 만들기

1)root 장치 확인
#df -k /

2)디스크 정보 확인
#format  --파일 크기가 동일해야 한다.
0.c1t0d0  <-- 원본
1.c1t1d0  <-- 백업
--원본디스크 와 백업디스크 확인하기

3)백업 디스크 확인
#fdisk /dev/rdsk/c1t1d0p0

y <-- 선택

#dd if=/dev/rdsk/c1t0d0p0 of=/dev/rdsk/c1t1d0p0 bs=8192k


4)백업 디스크에 boot 환경 설정

어떤 디스크로 booting 하는지 부팅패스 확인
#eeprom | grep bootpath
bootpath=/pci@1,0/pci1014,8f@3/sd@0,0:a

두번째 디스크 물리 장치명 확인
#ls -l /dev/rdsk/c1t1d0s0
--경로명확인


5)모든 파일 시스템 체크함

#fsck -y /dev/rdsk/c1t1d0s0
#fsck -y /dev/rdsk/c1t1d0sX --기존 파일시스템 모두 체크함


6)두번째 디스크를 root를 마운트 한다.

#mount /dev/dsk/c1t1d0s0 /mnt

7)boot path 설정

#vi /mnt/boot/solaris/bootenv.rc
--기존 셋팅
setprop bootpath=/pci@1,0/pci1014,8f@3/sd@0,0:a
--변경 셋팅
setprop bootpath=/pci@1,0/pci1014,8f@3/sd@1,0:a

8)자동 마운트 포이트 수정
#vi /mnt/etc/vfstab
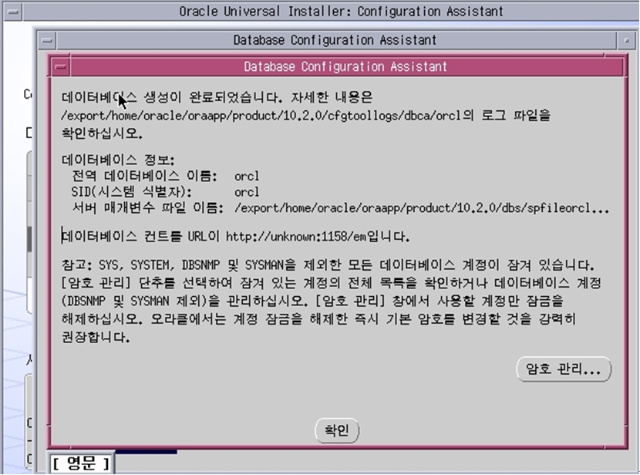
--기존 마운트 포인터 수정함

--------------------------------------------------------------------------
                      슬라이스  dd로 copy test
--------------------------------------------------------------------------
# format
Searching for disks...done


AVAILABLE DISK SELECTIONS:
      0. c1t0d0 <DEFAULT cyl 1302 alt 2 hd 255 sec 63>
          /pci@0,0/pci1000,30@10/sd@0,0
      1. c1t1d0 <DEFAULT cyl 1788 alt 2 hd 128 sec 32>
          /pci@0,0/pci1000,30@10/sd@1,0
      2. c1t2d0 <DEFAULT cyl 1020 alt 2 hd 64 sec 32>
          /pci@0,0/pci1000,30@10/sd@2,0
      3. c1t3d0 <DEFAULT cyl 1020 alt 2 hd 64 sec 32>
          /pci@0,0/pci1000,30@10/sd@3,0
      4. c1t4d0 <DEFAULT cyl 1020 alt 2 hd 64 sec 32>
          /pci@0,0/pci1000,30@10/sd@4,0
      5. c1t5d0 <DEFAULT cyl 1020 alt 2 hd 64 sec 32>
          /pci@0,0/pci1000,30@10/sd@5,0
      6. c2t0d0 <DEFAULT cyl 1020 alt 2 hd 64 sec 32>
          /pci@0,0/pci1000,30@11/sd@0,0
      7. c2t1d0 <DEFAULT cyl 1020 alt 2 hd 64 sec 32>
          /pci@0,0/pci1000,30@11/sd@1,0
Specify disk (enter its number): 2
selecting c1t2d0
[disk formatted]


FORMAT MENU:
        disk      - select a disk
        type      - select (define) a disk type
        partition  - select (define) a partition table
        current    - describe the current disk
        format    - format and analyze the disk
        fdisk      - run the fdisk program
        repair    - repair a defective sector
        label      - write label to the disk
        analyze    - surface analysis
        defect    - defect list management
        backup    - search for backup labels
        verify    - read and display labels
        save      - save new disk/partition definitions
        inquiry    - show vendor, product and revision
        volname    - set 8-character volume name
        !<cmd>    - execute <cmd>, then return
        quit
format> p


PARTITION MENU:
        0      - change `0' partition
        1      - change `1' partition
        2      - change `2' partition
        3      - change `3' partition
        4      - change `4' partition
        5      - change `5' partition
        6      - change `6' partition
        7      - change `7' partition
        select - select a predefined table
        modify - modify a predefined partition table
        name  - name the current table
        print  - display the current table
        label  - write partition map and label to the disk
        !<cmd> - execute <cmd>, then return
        quit
partition> p
Current partition table (original):
Total disk cylinders available: 1020 + 2 (reserved cylinders)

Part      Tag    Flag    Cylinders        Size            Blocks
  0 unassigned    wm      0              0        (0/0/0)          0
  1 unassigned    wm      0              0        (0/0/0)          0
  2    backup    wu      0 - 1019    1020.00MB    (1020/0/0) 2088960
  3 unassigned    wm      0              0        (0/0/0)          0
  4 unassigned    wm      0              0        (0/0/0)          0
  5 unassigned    wm      0              0        (0/0/0)          0
  6 unassigned    wm      0              0        (0/0/0)          0
  7 unassigned    wm      0              0        (0/0/0)          0
  8      boot    wu      0 -    0        1.00MB    (1/0/0)      2048
  9 unassigned    wm      0              0        (0/0/0)          0

partition> 0
Part      Tag    Flag    Cylinders        Size            Blocks
  0 unassigned    wm      0              0        (0/0/0)          0

Enter partition id tag[unassigned]:
Enter partition permission flags[wm]:
Enter new starting cyl[0]:
Enter partition size[0b, 0c, 0e, 0.00mb, 0.00gb]: $
partition>
partition>
partition> p
Current partition table (unnamed):
Total disk cylinders available: 1020 + 2 (reserved cylinders)

Part      Tag    Flag    Cylinders        Size            Blocks
  0 unassigned    wm      0 - 1019    1020.00MB    (1020/0/0) 2088960
  1 unassigned    wm      0              0        (0/0/0)          0
  2    backup    wu      0 - 1019    1020.00MB    (1020/0/0) 2088960
  3 unassigned    wm      0              0        (0/0/0)          0
  4 unassigned    wm      0              0        (0/0/0)          0
  5 unassigned    wm      0              0        (0/0/0)          0
  6 unassigned    wm      0              0        (0/0/0)          0
  7 unassigned    wm      0              0        (0/0/0)          0
  8      boot    wu      0 -    0        1.00MB    (1/0/0)      2048
  9 unassigned    wm      0              0        (0/0/0)          0

partition> q

# prtvtoc /dev/rdsk/c1t2d0s2 | fmthard -s - /dev/rdsk/c1t3d0s2
fmthard:  New volume table of contents now in place.
#
#
#
# newfs /dev/rdsk/c1t2d0s0
newfs: construct a new file system /dev/rdsk/c1t2d0s0: (y/n)? y
/dev/rdsk/c1t2d0s0:    2088960 sectors in 1020 cylinders of 64 tracks, 32 sectors
        1020.0MB in 64 cyl groups (16 c/g, 16.00MB/g, 7680 i/g)
super-block backups (for fsck -F ufs -o b=#) at:
 32, 32832, 65632, 98432, 131232, 164032, 196832, 229632, 262432, 295232,
 1771232, 1804032, 1836832, 1869632, 1902432, 1935232, 1968032, 2000832,
 2033632, 2066432,
#
#
# newfs /dev/rdsk/c1t3d0s0
newfs: construct a new file system /dev/rdsk/c1t3d0s0: (y/n)? y
/dev/rdsk/c1t3d0s0:    2088960 sectors in 1020 cylinders of 64 tracks, 32 sectors
        1020.0MB in 64 cyl groups (16 c/g, 16.00MB/g, 7680 i/g)
super-block backups (for fsck -F ufs -o b=#) at:
 32, 32832, 65632, 98432, 131232, 164032, 196832, 229632, 262432, 295232,
 1771232, 1804032, 1836832, 1869632, 1902432, 1935232, 1968032, 2000832,
 2033632, 2066432,
#
#
#

#
# mkdir backup1
# mkdir backup2
#
#
# mount /dev/dsk/c1t2d0s0 /backup1
# mount /dev/dsk/c1t3d0s0 /backup2
#
#
# df -k 
Filesystem            kbytes    used  avail capacity  Mounted on
/dev/dsk/c1t0d0s0    9524711 1348982 8080482    15%    /
/proc                      0      0      0    0%    /proc
mnttab                    0      0      0    0%    /etc/mnttab
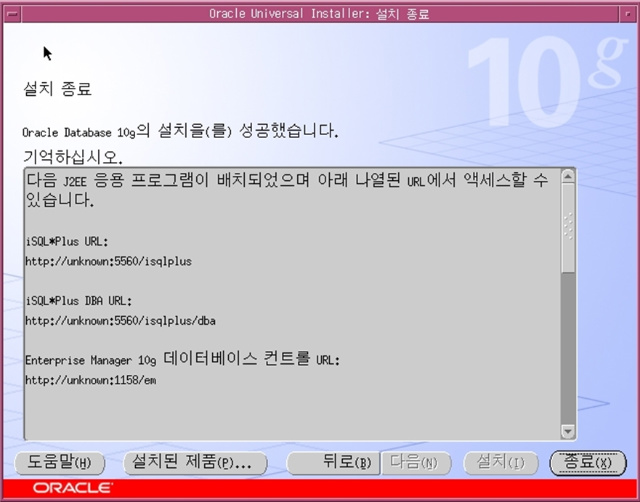
fd                        0      0      0    0%    /dev/fd
swap                  316836      20  316816    1%    /var/run
swap                  317116    300  316816    1%    /tmp
/dev/dsk/c1t0d0s7    483151    1048  433788    1%    /export/home
/dev/dsk/c1t2d0s0    981999    1041  922039    1%    /backup1
/dev/dsk/c1t3d0s0    981999    1041  922039    1%    /backup2
# cd /backup1
# pwd   
/backup1
# mkdir folder
#
# mkfile 100m ddfiletest
#
# dd if=/dev/rdsk/c1t2d0s0 of=/dev/rdsk/c1t3d0s0 bs=8192k
127+1 records in
127+1 records out
#
# fsck -y /dev/rdsk/c1t3d0s0

FILE SYSTEM IS CURRENTLY MOUNTED.  CONTINUE?  yes

** /dev/rdsk/c1t3d0s0
** Currently Mounted on /backup2
** Phase 1 - Check Blocks and Sizes
** Phase 2 - Check Pathnames
** Phase 3 - Check Connectivity
** Phase 4 - Check Reference Counts
** Phase 5 - Check Cyl groups
FREE BLK COUNT(S) WRONG IN SUPERBLK
SALVAGE?  yes

4 files, 102474 used, 980957 free (13 frags, 122618 blocks, 0.0% fragmentation)

***** FILE SYSTEM WAS MODIFIED *****

# cd /backup2
# ls -l
total 204946
-rw------T  1 root    other    104857600 Mar  3 17:32 ddfiletest
drwxr-xr-x  2 root    other        512 Mar  3 17:28 folder
drwx------  2 root    root        8192 Mar  3 16:44 lost+found
# pwd
/backup2
#

--dd copy 됨


----------------------------------------------------------------------------
                        테이프 명령어
----------------------------------------------------------------------------

테이프 명령어
명령:mt - 자기 테이프 용도:테이프 상태 확인, 되감기, 지우기 등 경로:/usr/bin/mt

구문:mt [ -f 테이프 장치 이름 ] 명령 [ 반복 횟수] 여기서 테이프 장치 이름은 보통
   /dev/rmt/0입니다.

   명령은 다음과 같습니다.

   status  -테이프 드라이브의 상태 정보를 표시합니다
   rewind  -테이프를 되감습니다.
   retension  -테이프를 팽팽한 상태로 만듭니다.
   erase  -테이프 전체를 지웁니다.
   fsf   -지정된 반복 횟수만큼 파일을 앞으로 건너뜁니다.
   bsf   -지정된 반복 횟수 만큼 파일을 뒤로 건너뜁니다.
   eom   -기록된 미디어의 끝부분으로 건너 뜁니다.

   반복 횟수는 요청된 작업을 수행하는 횟수를 말합니다.
   기본적으로 mt는 명령을 한 번 수행합니다.
   하나의 명령을 두 번 이상 반복하려면 반복 횟수를 지정하면 됩니다.

   예:mt -f /dev/rmt/0 status ---> 테이프의 상태를 표시합니다.
   mt -f /dev/rmt/0 rewind ---> 테이프를 되감습니다.
   mt -f /dev/rmt/0n fsf 2 ---> 첫 번째 두 개의 파일을 건너뜁니다.
   mt -f /dev/rmt/0n bsf 2 ---> 두 개의 파일만큼 뒤로 건너뜁니다.

명령: tar - 테이프 아카이브
용도: 테이프 아카이브를 만들거나 복원합니다.
    디렉토리 구조를 유지하면서 하나 또는 여러 개의 파일을 백업하는데 사용합니다.
경로: /usr/bin/tar
구문: tar [옵션] [장치 이름] [파일 이름]

   옵션은 다음과 같습니다.
   c    tar 파일을 새로 만듭니다.
   r    기존 tar 파일을 대체합니다.
   t    테이프 아카이브의 목차를 표시합니다.
   u    업데이트합니다.
       업데이트할 파일이 tar 파일에 없거나 마지막으로 tar 파일을 쓴 후
       수정된 경우에는 tar 파일의 끝에 씁니다. 업데이트 수행은 다소
       느릴 수 있습니다. 5.x 시스템에서 만든 tar 파일은 4.x 시스템에서
       업데이트할 수 없습니다.
   x    추출하거나 복원합니다.
      추출하거나 복원할 파일은 tar 파일에서 추출하고 현재 디렉토리에서
      tar 파일에 지정된 디렉토리에 씁니다. 추출할 파일 및 디렉토리에
      대해 상대 경로 이름을 사용하십시오.
   v    자세한 정보를 표시합니다.
      기능 문자 다음에 각 파일의 이름을 출력합니다.

여기서 장치 이름은 대개 /dev/rmt/0입니다. 또는 파일 이름일 수도 있습니다. 파일
이름은 아카이브로 만들 파일 이름입니다.

예:
tar cvf /dev/rmt/0 /export/home/user1 --> /dev/rmt/0 테이프에 /export/home/user1의
테이프 아카이브를 만듭니다.
tar tvf /dev/rmt/0 ---> /dev/rmt/0의 목차를 표시합니다.
tar xvf /dev/rmt/0 ---> /dev/rmt/0에서 데이터를 복원합니다.

참고: 위의 명령에서 /dev/rmt/0 대신 /dev/rmt/0n을 사용할 수 있습니다.
/dev/rmt/0n을 사용하면 백업 수행 후 테이프를 되감지 않습니다.
명령: ufsdump
용도: 파일 시스템, 파일 또는 디렉토리를 백업하는데 사용합니다.
   전체 백업이나 증분 백업을 수행할 수 있습니다.
경로: /usr/sbin/ufsdump
구문: ufsdump [옵션] [장치 이름] [덤프할 파일]

옵션은 다음과 같습니다.

0 ~ 9 덤프 레벨 옵션을 지정합니다.
    레벨 0은 가장 낮은 수준으로 전체 백업을 수행합니다. 레벨 1 ~ 9는 증분
    백업을 수행합니다.
u   현재 백업의 날짜와 덤프 레벨을 /etc/dumpdates 덤프 기록에 업데이트합니다.
f   파일이 쓰여질 장치를 지정합니다.이 옵션은 장치 이름이 필요합니다.
v   테이프에 있는 데이터를 파일 시스템에 있는 데이터와 비교하고 검사합니다.

여기서 장치 이름은 /dev/rmt/0입니다.
덤프할 파일은 초기 파일 시스템 /dev/rdsk/c0t2d0s0이나 블록 파일 시스템
/dev/dsk/c0t2d0s0입니다. 또한 /export/home과 같이 파일 시스템 이름이나
/export/home/user1과 같이 파일 이름 또는 디렉토리 이름을 사용할 수도 있습니다.

예:
ufsdump 0uf /dev/rmt/0 /export/home ---> /export/home 파일 시스템을 /dev/rmt/0
으로 덤프하고 전체 백업을 수행합니다.

ufsdump 1uf /dev/rmt/0 /dev/dsk/c0t2d0s4 --> /dev/dsk/c0t2d0s4 파일 시스템을
/dev/rmt/0로 덤프합니다. 이 명령은 레벨 1의 증분 백업을 수행합니다.

ufsdump 4uf dbserver:/dev/rmt/0 /export/home/user1 --> /export/home/user1에 대한
레벨 4의 증분 백업을 Remote Box dbserver에 마운트된 dev/rmt/0 테이프 장치에 덤프
합니다.   여기서 테이프 장치는 로컬 시스템이 아니라원격 시스템인 dbserver에 있는
장치입니다.

명령: ufsrestore
용도: ufsdump 명령으로 만들어진 백업본에서 파일을 복구하거나 추출하는데 사용합니다.
경로: /usr/sbin/ufsrestore
구문: ufsrestore [옵션] [장치 이름] [복원할 파일]

옵션은 다음과 같습니다.
i    대화형 모드로 파일을 복원합니다.
r    백업 전체를 복원합니다.
t    백업의 목차를 표시합니다.
x    명령행에서 지정한 파일을 복원합니다.
f    /dev/rmt/0과 같이 장치 이름을 지정합니다.
v    파일을 복원하고 있는 경로 이름을 표시합니다(세부 정보 표시 모드).

참고: 이 옵션은 ufsdump 명령에서 사용하는 v(verify) 옵션과 다릅니다.

예:
ufsrestore xvf /dev/rmt/0 ./etc/hosts ---> /etc/hosts 파일을 현재 디렉토리로
                   복원합니다.   
ufsrestore ivf /dev/rmt/0 ---> 복원될 파일을 선택합니다.
ufsrestore rvf /dev/rmt/0 ./opt ---> /opt 파일 시스템을 현재 디렉토리로 복원합니다.
ufsrestore tvf /dev/rmt/0 ---> /dev/rmt/0의 목차를 표시합니다.


----------------------------------------------------------------------------
                        ufsdump & ufsrestore & tape 응용편
----------------------------------------------------------------------------
#sync;sync;sync;
#shutdown -i0 -y -g0

stop + A
ok setenv auto-boot? false

ok boot cdrom -sw

#ufsdump 0uf /dev/rmt/0 /dev//rdsk/c0t0d0s0
--백업 완료후..
#poweroff (파워를 내리고 디스크 교체)

또는 새 디스크 교체후

ok boot probe-scsi  -scsi disk 정보 인식시킴 (prom mode)
ok boot probe-ide  -ide disk 정보인식시킴
format  --디스크 인식여부 확인후 작업
ok reset  (or)
ok reset-all


운영중에 인식시키기
#drvconfig;disks;devlinks;
#devfsadm;


#shutdown -i5 -y -g0
ok setenv auto-boot? true

ok boot cdrom -sw

#format

#newfs /dev/rdsk/c0t0d0s0

--(y/n)?  y

#fsck -y /dev/rdsk/c0t0d0s0
--파일 시스템 이상여부 체크함


#mount /dev/dsk/c0t0d0s0 /a

#cd /a

#ufsrestore rvf /dev/rmt/0

--복원시킴


#rm restoresymtable

#installboot /usr/platform/'uname -m'/lib/fs/ufs/bootblk /dev/rdsk/c0t0d0s0

#cd /

#umount /a

#shutdown -g0 -y -i6

--shutdown command
종료 shutdown -y -i0 -g0
-y (yes or no)
-i (default run level S를 다른 레벨로 지정가능함)
-g (default 60초 -g0 바로 셧다운)
리붓 shutdown -y -i6 -g0


----------------------------------------------------------------------------
                백업 4가지 방법 간단히 마무리 정리
----------------------------------------------------------------------------

1. tar
2. cpio
3. dd
4. ufsdump/ufsrestore

1. tar

tar를 화일 또는 디렉토리 전체를 백업 받는데 사용된다.

1.1 화일 시스템에서 테이프로 백업 받기

# tar cvf /dev/rmt/0 .

1.2 테이프에서 화일 시스템로 백업 받기

# tar xvf /dev/rmt/0

1.3 테이프 내용 보기

# tar tvf /dev/rmt/0


2. cpio

2.1 화일 시스템에서 테이프로 백업 받기

# find . -print | cpio -ocvB -O /dev/rmt/0

2.2 테이프에서 화일 시스템로 백업 받기

# cpio -icvBmd -I /dev/rmt/0

2.3 테이프 내용 보기

# cpio -ict -I /dev/rmt/0


3. dd

3.1 화일을 테이프로 백업 받기

# dd if=file1 of=/dev/rmt/0 bs=4096k

3.2 테이프에서 화일로 백업 받기

# dd if=/dev/rmt/0 of=file1 bs=4096k


4. ufsdump/ufsrestore

4.1 화일시스템에서 테이프로 백업 받기

# ufsdump 0cuf /dev/rmt/0 /

4.2 테이프에서 화일 시스템으로 백업 받기

# ufsrestore rvf /dev/rmt/0

4.3 테이프 내용 보기

# ufsrestore tvf /dev/rmt/0

4.4 Interactive restore

# ufsrestore ivf /dev/rmt/0
[이 게시물은 아쿠아님에 의해 2007-05-05 21:24:07 시스템자료실에서 이동 됨]
Posted by 1010
60.Unix2008. 12. 15. 12:04
반응형
arp
arp(1M) 명령을 사용하면 주소 확인 프로토콜에 사용되는 인터넷 대 이더넷 변환 표를 표시하고 수정할 수 있습니다. arp 명령의 Trusted Solaris 버전을 -d, -s, -f 등의 옵션과 함께 실행하려면 sys_net_config 특권을 상속해야 합니다. -a 옵션은 유효 UID 0을 사용해서 ADMIN_HIGH로 실행되어야 합니다. file_mac_read 특권과 file_dac_read 특권은 이 제한에 우선합니다.

ifconfig
ifconfig(1M) 명령을 사용하면 네트워크 매개변수를 구성하고 네트워크 인터페이스에 주소를 할당할 수 있습니다. ifconfig 명령의 Trusted Solaris 버전을 사용하려면 sys_net_config 특권이 필요합니다. ether, auto-revarp, plumb 등의 옵션으로 루트만이 읽을 수 있는 ADMIN_HIGH 네트워크 장치를 열어야 합니다. 이 옵션들은 유효 사용자 ID 0을 사용해서 ADMIN_HIGH로 호출될 수 있고, file_dac_read 특권과 file_mac_read 특권을 사용해서 이 옵션에 대한 제한을 무시할 수 있습니다.

ndd
드라이버 매개변수를 설정하기 위해서는 ndd(1M) 명령에 대한 -set 옵션은 sys_net_config 특권을 상속해야 합니다.

netstat
netstat(1M) 명령을 사용하면 소켓, 라우팅 테이블 및 기타 구조를 포함하여 네트워크 관련 데이터 구조의 내용이 여러 가지 형식으로 표시됩니다. 다른 네트워크에 있는 호스트와 통신을 할 때 netstat -rn 명령을 사용하면 게이트웨이가 구성되었는지 확인할 수 있습니다. netstat 명령의 Trusted Solaris 버전을 사용하려면 ADMIN_HIGH 민감도 레이블을 사용해야 커널 및 네트워크 구성 정보에 액세스할 수 있습니다. file_mac_read 특권을 사용하면 이 제한을 무시할 수 있습니다.

-R 옵션을 사용하여 동적 라우팅 테이블에서 각 경로의 메트릭 정보는 물론 보안 정보를 얻을 수 있습니다. -R 옵션에는 net_rawaccess 특권이 추가로 필요합니다. 예제는 "라우팅 명령 사용"을 참조하십시오.

rdate
rdate(1M) 명령이 제대로 실행되려면 sys_config 특권이 필요합니다.

route
route(1M) 명령을 사용하면 emetrics(보안 정보)의 추가 및 삭제를 포함하여 네트워크 라우팅 테이블에 대한 관리 작업을 수행할 수 있습니다. route 명령의 Trusted Solaris 버전이 제대로 실행되려면 sys_net_config 특권을 상속해야 합니다. Trusted Solaris 환경에서는 다음과 같은 세 가지 추가 옵션이 있습니다.

-m - 확장 메트릭 정보를 명령줄에 지정합니다.

-e - 확장 메트릭 정보를 포함하는 파일을 지정합니다.

-t - 추가할 경로(단순 또는 확장 메트릭 포함)를 포함하는 파일을 지정합니다.

경로를 추가하거나 삭제하기 위해 IP 장치를 열려면 이 프로그램이 sys_net_config 특권을 상속받아 ADMIN_HIGH의 민감도 레이블과 유효 사용자 ID 0 또는 sys 그룹에서 실행되어야 합니다. file_mac_read 특권은 ADMIN_HIGH MAC 정책을 무시할 수 있습니다. file_dac_read 특권은 UID 0 또는 sys 그룹 DAC 요구 사항을 무시할 수 있습니다. "Trusted Solaris에서의 라우팅"을 참조하십시오.

snoop
snoop(1M) 명령을 사용하면 네트워크로부터 패킷을 포착해서 그 내용을 표시할 수 있습니다. 네트워크 장치를 열 때 snoop 명령의 Trusted Solaris 버전은 민감도 레이블 ADMIN_HIGH와 유효 UID 0을 사용하여 실행되어야 합니다. 단, 프로세스에 file_mac_read 특권과 file_dac_read 특권이 있는 경우 이들 두 가지 요건이 필요 없습니다. snoop 명령을 사용하려면 sys_net_config 특권을 상속해야 합니다. -i 옵션을 사용하면 네트워크 장치를 열지 않고 파일을 열기 때문에 요건이 위와 동일하지는 않습니다.

snoop 명령은 패킷의 SAMP 보안 속성과 IP 옵션을 표시할 수 있습니다.

spray
spray(1M) 명령은 RPC를 사용하는 지정된 호스트로 단방향 패킷 흐름을 전송하고 수신된 패킷 수를 전송 속도와 함께 보고합니다. 호스트가 브로드캐스트 주소인 경우 이 프로그램이 제대로 실행되려면 net_broadcast 특권을 상속해야 합니다.
ping 같은 경우에는 호스트가 제대로 작동하지 않더라도 반응한다.
하지만 spray는 좀더 자세한 반응을 점검하는데 사용할 수 있다.

root@ntech # ping v440 (hostname)
v440 is alive
root@ntech #
root@ntech #
root@ntech # ping -s v440
PING v440: 56 data bytes
64 bytes from v440 (192.168.0.180): icmp_seq=0. time=0.430 ms
64 bytes from v440 (192.168.0.180): icmp_seq=1. time=0.282 ms
^C
----v440 PING Statistics----
2 packets transmitted, 2 packets received, 0% packet loss
round-trip (ms)  min/avg/max/stddev = 0.282/0.356/0.430/0.10
root@ntech #
root@ntech #
root@ntech # spray v440
sending 1162 packets of length 86 to v440 ...
        no packets dropped by v440
        56241 packets/sec, 4836745 bytes/sec
root@ntech #

root@ntech # spray -d 20 -c 100 -l 2048 v440
sending 100 packets of length 2048 to v440 ...
        no packets dropped by v440
        5640 packets/sec, 11552346 bytes/sec
root@ntech #
Posted by 1010
60.Unix2008. 12. 15. 11:40
반응형
1) 현재 ip-address 확인 방법
  # ifocnfig -a     (모든 interface 확인)
  # ifconfig  eri0   (eri0 네트웍 카드만 확인 )
  # man eri         (eri 네트웍 카드를 알 수 있음.)
2) 현재 eri 네트웍 카드의 ip-address 변환 방법
  # ifconfig eri0 inet 10.1.1.60
3) ethernet address 변환 방법
  # ifconfig eri0 ether 0:3:ba:4e:3c:4c
4) netmask 변경
  # ifconfig eri0 netmask 255.255.0.0 broadcast +
5) 네트웍 카드 enable /disable
  # ifconfig eri0 down      <== disable
  # ifconfig eri0 up        <== enable
6) 네트웍 카드 plumb /unplumb
  # ifconfig eri0  unplumb    <== 네트웍 카드 제거
  # ifconfig eri0  plumb      <== 네트웍 카드 설정
7) 네트웍 카드 초기화
  # ifconfig eri0 plumb 203.234.247.60 netmask 255.255.255.0 broadcast + up
8) rebooting 후에도 계속 사용하고자 할 때 설정하는 파일
  # vi /etc/hostname.eri0     <== 네트웍 카드 이름으로된 파일을 생성
   203.234.247.60      
   또는
  sun60
9) 만일 'sun60' 처럼 host이름으로 사용시 hosts 파일에 기록
  # vi  /etc/hosts
   203.234.247.60   sun60
10) 가상 interface 설정 방법 (복수의 ip-address 설정)
  # ifconfig  eri0  addif 10.1.1.10  up
  # ifconfig  eri0  addif 10.1.1.11  up
11) 가상 interface 제거 방법
  # ifconfig  eri0:1 unplumb
   또는
  # ifconfig eri0 removeif  10.1.1.11
12) booting 시 자동으로 가상 Interface 설정 방법
  # vi  /etc/hostname.eri0
   sun60 up
   addif  10.1.1.1 netmask 255.255.255.0 broadcast + up
   addif  10.1.1.2 netmask 255.255.255.0 broadcast + up
  # init 6
2)default gateway 설정
#netstat -nr   //현재 라우팅 테이블을 보여줌
#route flush
#route add default  gateway ip(부여된 게이트웨이 주소)
#netstat -nr   //재확인
===========================================
#cat /etc/defaultrouter  <-- 확인하여 내용이 안나오면 추가 합니다. 나오면 됐음
#vi /etc/defaultrouter
~~ 게이트웨이 아이피~~
저장후 나오시면 됩니다.
#vi /etc/nsswitch.conf
또는

default router를 설정한다.
default router는 외부 네트워크를 사용하기 위해서는 필수로
필요한 것으로 설정하는 방법은 두가지다.
우선 /etc/defaultrouter 파일을 만들어 그안에 라우터의 IP Address를
적어 주는 것이고 두번째는 /etc/rc.local 파일에 /usr/etc/route 명령을
사용하여 직접 써주는 방법이다. 다음과 같이 하면된다.

/usr/etc/route add default 210.108.179.254 1
Posted by 1010
60.Unix2008. 12. 15. 10:21
반응형
LAN 카드 설정, /dev/hme

스팍 플랫폼에서 솔라리스는 100Mbps 고속 이더넷 인터페이스 카드를 /dev/hme로
정의한다. 그런데 이 인터페이스는 자동으로 10/ 100Mbps를 맞추는 오토
센싱(auto-sensing) 기능을 지원하지만 이것이 잘 안 될 때가 종종 있다. 특히
스위치가 풀 듀플렉스를 지원하는데 하프 듀플렉스로 맞춰지는 일이 비일비재한데
이럴 때는 수동으로 설정해줘야만 한다. hme를 100Mbps 풀 듀플렉스로 설정하는
방법은 ndd 커맨드를 이용하는 방법과 /etc/system에 파라미터 값을 넣어주는 두 가지
방법이 있는데, 그중 ndd를 이용하는 방법은 다음과 같다.

# ndd -set /dev/hme adv_autoneg_cap 0 (오토 센싱 기능 off)
# ndd -set /dev/hme adv_100fdx_cap 1 (100Mbps 풀 듀플렉스 기능 on)
# ndd -set /dev/hme adv_100hdx_cap 0
# ndd -set /dev/hme adv_100T4_cap 0

이는 재부팅시에는 설정 값이 지워진다. 이를 방지하기 위해서는
/etc/init.d/inetsvc에 다음과 같은 명령문을 넣어주면 된다.

/usr/sbin/ndd -set /dev/hme adv_100fdx_cap 1

또 다른 방법은 /etc/system에 커널 파라미터 값을 넣어 주는 것인데, /etc/system
끝에 다음과 같은 줄을 넣어주고 재부팅하면 된다.

set hme:hme_adv_autoneg_cap=0
set hme:hme_adv_100hdx_cap=0
set hme:hme_adv_100fdx_cap=1
Posted by 1010
60.Unix2008. 12. 15. 10:20
반응형
[출처] http://maso.zdnet.co.kr/maso/2000/10/11/014004,971241222,178.html

Novice] 진정한 엔터프라이즈급 운영체제, 솔라리스 매력탐구

웹 서버를 위한 솔라리스 튜닝

그동안 웹 서버 최적화라고 하면 아파치 설정 파일의 파리미터 값의 최적화나 컴파일
전에 소스의 HARD_SERVER_LIMIT 값을 변경하는 정도 의 애플리케이션 내에서의 작업이
주류를 이뤘다. 하지만 그동안 이런 애플리케이션 튜닝 외에 운영체제(솔라리스)
레벨에서 웹 서버 최적화를 위해 제공할 수 있는 성능 개선책에 대해서는 튜닝법은
고사하고 실제로 운영체제의 어느 부분을 튜닝해야 성능을 개선할 수 있는지에 대한
것조차도 관련 자료를 구하기 힘들었다. 그래서 이번호에서는 그동안 우리가 웹 서버
환경을 설계할 때 오해하기 쉬운 여러 가지 환경적 요소에 대해 하나씩 짚어가면서,
실제 운영 경험을 토대로 웹 환경에서의 솔라리스의 특징과 튜닝법에 대해 소개하고자
한다.

김민형 한국외대 전산소

연재 순서
1회(2000. 09): 솔라리스엔 뭔가 특별한 것이 있다
2회:(2000. 10): 웹 서버를 위한 솔라리스 튜닝
3회: 엔터프라이즈 환경의 오라클을 위한 솔라리스 튜닝

--------------------------------------------------------------------------------

실제 웹 서버 튜닝에 들어가기 전에 반드시 다시 짚고 넘어가야 할 세 가지가 있다.
먼저 네트워크에 대한 실전 감각을 다져야 한다는 것이다. 제아무리 웹 서버가
최적화돼 있다 하더라도 라우터의 라우팅 경로가 잘못돼 있거나, 자기가 속한
네트워크의 특성을 파악하지 못하고 있다면, 심하게 말하면 웹 서버 튜닝은 헛수고가
되고 만다. 필자의 경험에 비춰볼 때 심지어 복수 회선을 쓰고 있음에도 그에 대한
trunking 에러 등으로 한 회선을 아예 쓰지 못하는 사이트도 있었다. 이 사이트
운영자는 서버가 느리기 때문이라고 생각하고 있었다.

그 다음으로 최적화(튜닝)에 대한 우선 순위의 기초를 정리해야 한다. 일반적으로
시스템 튜닝 과정에서 OS 튜닝은 가장 나중에 하는 영역이다. 예를 들어 초기 CERN 웹
서버를 이용하면 OS 파라미터들이 튜닝돼 있다고 해도 최근에 나온 아파치 웹 서버의
1/10에도 미치지 못하는 성능을 낸다. 또한 최근에 나온 웹 엔진들 역시 퍼포먼스를
고려하지 않은 것을 이용하게 되면 마찬가지 결과를 가져온다. 예를 들어 HP-UX에서
OSDK(Oracle Servlet development kit) 웹 엔진을 이용할 때 원하는 퍼포먼스가
나오지 않는다고 제아무리 전문가들을 불러 OS를 최적화한다 해도 앞서 말한 CERN
서버의 경우처럼 성능 개선의 여지는 좁다.

끝으로 OS 튜닝을 하기 전 염두해 둬야 할 것이 있는데, 우리는 지금 솔라리스8을
이용한다는 것이다. 솔라리스8은 이전의 SunOS 4.X나 솔라리스 2.5.1 이전의 버전처럼
이용자가 반드시 튜닝해야 할 파라미터들이 극히 줄었다. 한 마디로 초기 설정이 점차
최적화돼 나오고 있다는 것이다(퍼포먼스 분석가/튜닝 전문가에게는 상당히 아쉬운
일이 아닐 수 없지만). 그와 더불어 하드웨어 드라이버에 있어서도 최신의 드라이버를
사용함으로써 하드웨어적인 성능 개선을 얻을 수 있을 뿐 아니라 솔라리스8에는
SUNWncar, SUNWncarx, SUNWncau라는 Solaris Network and Cache Accelerator가 포함돼
있어 네트워크와 관련해서는 그 이전의 어떤 버전보다 나은 환경을 제공하고 있다.
기존의 솔라리스를 이용하는 환경에서 퍼포먼스를 생각한다면 반드시 최신의 버전을
이용해야 하며, 필자의 주관적인 견해로는 현재 나온 HP-UX, AIX, 디지털
유닉스(OSF1) 등 상용 유닉스 중에서 웹 환경에 있어서는 솔라리스가 그 자체만으로도
가장 나은 성능을 얻을 수 있다고 생각한다.

대역폭과 속도는 정비례하지 않는다

먼저 http 환경은 무엇보다도 네트워크 같은 환경적인 요소에 가장 큰 영향을 받는다.
그러므로 네트워크에 관련해 오해의 소지가 많은 부분에 대해 설명하면서 웹 환경의
특성을 살펴본 후 튜닝법에 들어가기로 하겠다.

먼저 웹 환경의 컨텐츠는 크게 두 가지로 분류할 수 있다. 그 중 하나는 html
파일같은 작은 조각에서부터 100~200KB 단위까지의 웹 링크를 간단히 하기 위한
이미지맵 gif, jpg 파일이 중심이 되는 부류이고, 다른 하나는 요사이 멀티미디어 웹
컨텐츠라고도 불리는 ASF나 리얼 비디오, mpeg, avi 같은 동영상 자료, 리얼 오디오
같은 음악 자료나 200KB∼1MB 미만의 gif, jpeg 파일 같은 대용량 파일이 중심이 되는
부류이다. 이 두 가지 부류는 단순히 파일 크기만 다른 것이 아니라, http 환경에서
서로 다른 특징을 가지고 있다.

먼저 가장 중요한 것은 대부분의 사이트가 해당되는 작은 크기의 파일이 중심이 되는
http 환경에서 브라우징 속도는 기본적으로 네트워크 대역폭과는 ‘별다른’ 관련이
없다는 점이다. 이에 대해 실제로 간단한 실험을 한 번 해보자. 아파치만 기본 설치한
두 서버를 가진 환경에서 한 서버는 10Mbps 스위치에, 다른 하나는 100Mbps 스위치에
연결한 후 두 서버의 아파치 초기 화면을 띄워보자. 물론 한 서버에 접속하고 나서
로컬 캐시를 삭제한 후 다른 서버에 접속해야 한다는 점을 잊지 말자. 이 두 가지
경우에서 브라우징 속도에 차이가 있을까?

결과를 살펴보면 거의 느낄 수 없다. 이렇게 작은 사이즈 파일 위주의 환경에서는
서비스 제공자 입장에서 볼 때 자신의 네트워크의 부하가 적고 이용자의 네트워크가
일정 수준 이상의 대역폭을 확보하고 있다면, 이용자들의 브라우징 속도를 빠르게
해주기 위해서는 엄청난 규모의 확장이 아니고서는 큰 대역폭의 회선을 얻는 것은 별
도움이 되지 않는다.

아직까지 이에 익숙하지 않기 때문에 상당히 생소하게 들릴 수도 있는데 실제 속도를
계산해보면 쉽게 이해가 갈 것이다. 예를 들어, 우리가 관리하는 곳이 어느 증권회사
지사로 이 곳은 내부 전용선(T1)으로 객장 고객에게 본사의 정보를 웹으로 제공한다고
가정하자.

그런데 주가 정보는 돈을 다루면서 리얼타임으로 변하므로 직접 연결로 접속을 하는데
요새 들어 객장 고객들에게 느리다는 불평을 받아 우리는 대책을 강구해야 한다.
그런데 회선 증설을 하기 전에 얼마나 실효가 있는지 수치를 계산해 보면, 일반적으로
html 웹페이지는 대개 평균 5KB 정도의 크기이므로 한 페이지를 보여줄 때 현재는 5KB
/ 1.5Mbps(T1) = 2.5ms 정도의 시간이 걸린다. 이 수치는 라우터마다 다르지만,
라우터를 거칠 때마다 대략 1.5ms 정도의 지연이 발생하므로 6개 정도를 지난다면 총
11.5ms의 지연이 발생한다. 그런데 이를 T3(45Mbps)로 증설하면 0.83ms + 9ms(라우터)
= 9.83ms로 전체 네트워크 지연시간을 줄일 수 있다.

하지만 이 수치는 T1과 비교해서는 대략 20% 정도 밖에 속도 개선을 가져오지 못한다.
필자가 알기로 국내에서 일반적으로 T3 라인의 연이용료는 대형 통신업체는 정가가
1억을 호가하는 것으로 알고 있다(KREN 자료 인용). 게다가 특별한 경우가 아니면
회선 업체에서 T3를 연결해주지도 않지만 말이다.

이 정도로는 아직 감이 안 오는 독자들도 있을텐데 잠시 필자의 경험을 예로 들면,
필자는 얼마 전 친분이 있는 업체의 썬 장비에 KIDC에서 운영하고 있는 DB 서버를
복제하는 일을 하기 위해 인도네시아에 다녀온 적이 있다. 그 곳 역시 이제 막 웹
서비스를 시작하려고 준비하는 회사여서 전용회선 선정을 놓고 고심하고 있었다.
인도네시아의 경우 한국과 비교해 통신 환경, 특히 인터넷 환경이 극도로 열악해
INDOSAT이라는 최대 회선 제공 업체의 128K 라인 운영료가 국내 E1급의 가격과 맞먹을
정도였다. 낮은 회선 속도를 감수할지, 아니면 코로케이션 서비스를 받을 건지
고민하는 상황에서 갑자기 혜성처럼(?) 등장한 PSN이라는 통신업체가 512k를 약간
비싼 가격에 제공한다고 해 한번 테스트하기로 했다. 테스트 결과 512K의 대역폭은
맞았지만, 우리는 그 업체의 상품을 포기하고 INDOSAT의 256K를 이용하기로 했는데,
왜 그랬을까?

PSN의 경우 연결 방식을 마이크로웨이브를 통해 주변 오피스까지 연결한 다음, 몇
군데 마이크로웨이브 릴레이를 거쳐 중앙과 연결한 다음 인공위성을 통해 인터넷을
이용하는 방식이었는데, 문제는 마이크로웨이브 연결 방식의 특성 때문에 엄청난
네트워크 지연 시간을 감수해야 하는데다, 오히려 회선의 대역폭이 커질수록 지연
시간이 길어졌다. 이로 인해 홈페이지 첫 화면 로딩 시간이 128K와 비교해 오히려
길어지는 결과를 가져왔기 때문에 우리는 과감히 포기한 것이다.

그럼 이에 대한 대안은 무엇일까? 고급 라우터와 인텔리전트 스위칭 장비, 그리고
IDC에 서버 입주 등이 바로 그것이다. 중대형 사이트에서 고급 장비를 쓰는 이유는
비단 돈이 많아서가 아니다. 앞서 본대로 라우터를 거칠 때마다 생겨나는 지연 시간을
최소화하기 위함이고, IDC에 장비를 입주시키는 것은 관리의 편리함이나 네트워크
대역폭의 확보뿐만 아니라 서버를 가장 빠르게 접속할 수 있는 통신사업자의 백본에
바로 붙임으로서 라우팅 홉수를 줄이기 위함이기도 하다.

그렇다고 웹 환경에서는 대역폭을 고려하지 않아도 될까? 물론 그것도 아니다. 최근
새롭게 등장한 멀티미디어 컨텐츠를 가진 웹 환경의 경우와 httpop/s이 높은 사이트의
경우엔 사정이 약간 다르다. 멀티미디어 컨텐츠의 경우 요새는 ASF나 리얼
오디오/비디오처럼 조각화(fragmentation)해 연결 기간 동안 적은 패킷량이
오고가도록 하지만 이용자의 수가 어느 정도에 이를 경우, 더 이상 다른 이용자가
접속하지 못할 뿐만 아니라 이더넷의 특성상 대역폭의 한계에 다다르면 느려져 서비스
품질이 극도로 떨어진다. 이 특성은 이런 멀티미디어 컨텐츠 뿐만 아니라 엄청나게
붐비는 사이트의 경우도 마찬가지이므로 최대한의 대역폭을 확보해줘야 서비스 품질을
일정하게 해준다.

솔라리스 네트워크 튜닝

지금까지 환경적 장애 요인에 대해 충분히 설명했으니 이제 본론인 솔라리스 네트워크
튜닝으로 들어가겠다.

물론 웹 서버 튜닝에는 네트워크 튜닝만이 포함되는 것은 아니다. 모든 시스템 튜닝은
CPU, 메모리, I/O(디스크와 네트워크)가 유기적으로 얽혀 있기 때문에 모든 부분에서
골고루 설명해야 하는데, 지면 관계상 주요 부분만 살펴본다.

하지만 달리 생각하면, 요사이 컴퓨팅 환경에서는 네트워크 튜닝시 네트워크 그
자체의 튜닝 부분을 제외하고는 CPU나 디스크 I/O같은 다른 환경적 요소를 덜 받게
됐다는 점도 간과할 수 없다. CPU의 경우, 예전의 SunOS 4.X 대역에서는 TCP/IP
프로토콜 통신도 커다란 CPU - bound 프로세스였다. 하지만 솔라리스가 날로 발전하고
CPU 성능의 급성장으로 인해 이젠 아무리 바쁜 사이트라도 서버 사이징(Server
Sizing)만 잘해놓으면, CPU가 네트워크에 대해 문제를 일으키지 않는다. 참고로
솔라리스 2.5.1까지만 해도 초당 수백 건의 접속만 감당할 수 있었다가 2.6에
이르면서 초당 수천 건의 접속을 감당하게 됐으며, 이 수치는 날로 늘어나고 있다.
물론 단순 웹 서버가 아닌 자바 서블릿이나, CGI 같은 서버 사이드 프로세싱 요소가
있긴 하지만, 이는 엄밀히 말하지만 웹 서버 자체의 기능이 아니라, 웸 서버와 연동된
다른 애플리케이션의 퍼포먼스와 관련된 문제이다. 참고로 필자가 속한 기관의 웹
전용 시스템은 운영이나 기타 다른 업체의 웹 서버 중, 아직까지 CPU 부하로 인해
지연된 적은 거의 없었다.

또한 메모리 역시 GB 급으로 가고 있고, 웹 컨텐츠 전체를 물리적 메모리나 스왑으로
올릴 정도로 메모리가 커짐에 따라, Disk-bound 프로세스에서도 벗어나게 됐다.
그러므로 우리는 일반적인 웹 서버 환경에서는 이제 네트워크 튜닝에만 전념할 수
있게 됐다.

우선 솔라리스에서 네트워크 튜닝은 기본적으로 거의 모든 플랫폼에서 공통적으로
적용할 수 있다는 특징이 있다. 달리 표현하자면, 그만큼 적다는 말이 된다. 앞서
말한 것처럼 솔라리스가 최신판으로 올라갈수록 OS 자체가 점차 최적화돼가고 있기
때문에 몇 가지 고정된 파라미터 값을 제외하고는 손댈 영역이 점점 없어지고 있는
것이다.

LAN 카드 설정, /dev/hme

스팍 플랫폼에서 솔라리스는 100Mbps 고속 이더넷 인터페이스 카드를 /dev/hme로
정의한다. 그런데 이 인터페이스는 자동으로 10/ 100Mbps를 맞추는 오토
센싱(auto-sensing) 기능을 지원하지만 이것이 잘 안 될 때가 종종 있다. 특히
스위치가 풀 듀플렉스를 지원하는데 하프 듀플렉스로 맞춰지는 일이 비일비재한데
이럴 때는 수동으로 설정해줘야만 한다. hme를 100Mbps 풀 듀플렉스로 설정하는
방법은 ndd 커맨드를 이용하는 방법과 /etc/system에 파라미터 값을 넣어주는 두 가지
방법이 있는데, 그중 ndd를 이용하는 방법은 다음과 같다.

# ndd -set /dev/hme adv_autoneg_cap 0 (오토 센싱 기능 off)
# ndd -set /dev/hme adv_100fdx_cap 1 (100Mbps 풀 듀플렉스 기능 on)
# ndd -set /dev/hme adv_100hdx_cap 0
# ndd -set /dev/hme adv_100T4_cap 0

이는 재부팅시에는 설정 값이 지워진다. 이를 방지하기 위해서는
/etc/init.d/inetsvc에 다음과 같은 명령문을 넣어주면 된다.

/usr/sbin/ndd -set /dev/hme adv_100fdx_cap 1

또 다른 방법은 /etc/system에 커널 파라미터 값을 넣어 주는 것인데, /etc/system
끝에 다음과 같은 줄을 넣어주고 재부팅하면 된다.

set hme:hme_adv_autoneg_cap=0
set hme:hme_adv_100hdx_cap=0
set hme:hme_adv_100fdx_cap=1

웹 환경에 맞는 TCP 튜닝 파라미터

이제 우리는 TCP 튜닝 파라미터 값을 웹 서버 환경의 특성에 맞게 변경해 OS의 TCP
환경을 웹 서버에 최적화하는 작업을 하겠다. 먼저 솔라리스에서는 네트워크
드라이버나 TCP 프로토콜의 파라미터 값을 보여주거나 변경할 때 ndd를 사용한다. ndd
커맨드는 물론 HP-UX 등과 마찬가지로 파라미터를 보는 것은 누구나 이용할 수
있지만(#ndd [-get] /dev/OOO), 파라미터 값 변경은 오직 root만이 할 수 있다(#ndd
-set /dev/OOO OOOO 형태). 영구히 변경할 때는 이 ndd 커맨드를 앞서 LAN 카드
설정에서 말한 대로 /etc/init.d/inetsvc에 다음과 같은 형태로 넣어준다.

/usr/sbin/ndd -set /dev/tcp tcp_time_wait_interval 60000

또는 /etc/system에 약간 변형된 형태(set ip:ip_forwarding =0)로 파라미터 값을
등록하면 된다. 단 /etc/system에 등록할 때 주의할 점은 이 파일을 편집할 때 잘못된
변수 값이나, 잘못된 형식 등으로 인해 부팅이 되지 않는 경우가 종종 있는데, 이럴
때는 스팍 플랫폼의 경우엔 ok prom 프롬프트에서 ‘boot -i’으로 인터페이스 부팅을
한 다음 [/etc/system]을 참조하겠느냐는 부분에 /dev/null을 참조한다고 하면 된다.
이는 출시 설정에는 /etc/ system은 거의 모두 주석 처리돼 있어 이 파일을 참조하지
않으면 OS는 일단 무리 없이 부팅되기 때문이다. 솔라리스 x86 역시 부트 옵션에서
boot -i 하면 가능하다.

그리고 TCP 프로토콜도 hme(100Mbps 인터페이스, 스팍 플랫폼)와 마찬가지로
/dev/tcp이다. 먼저 /dev/tcp에서 튜닝이 가능한 파라미터들의 정보를 확인하는
명령은 다음과 같다.

#ndd [-get] /dev/tcp ?

[ ]안의 내용은 솔라리스에서는 언제나 생략할 수 있는 옵션이다. 이 옵션을 치면
다음과 같은 tcp 튜닝 파라미터들의 리스트가 출력된다.

<리스트 1>에 나온 수많은 TCP 파라미터 중 우리가 주로 이용할 수 있는 것은
몇 가지가 있는데 하나씩 알아보자.

tcp_time_wait_interval(솔라리스 2.6 이전까지는 tcp_close_wait_inter val이었음) :
메모리에서 TCP 연결이 끊어져도 tcp가 쓰던 소켓 정보를 일정 기간 대기 상태로
가지고 있고, 이를 가지고 있는 시간인데 기본값은 240,000ms(4분)이지만, 이는 tcp
소켓을 많이 요구하는 서버, 즉 웹 서버에서는 너무 길게 waiting하는 것이 메모리
낭비이므로 60,000ms(1분)정도로 줄이는 것이 좋다. 그러나 이를 너무 줄일 경우,
커넥션 품질 자체가 불안할 수 있으므로 더 이상 줄이지 않는 것이 바람직하다.
tcp_conn_req_max_q0 : TCP/IP 프로토콜 통신에서 half-open connection 상태, 즉
마지막 ACK를 받지 못한 상태의 커넥션을 몇 개까지 가지고 있을지에 대한 파라미터
값이다. 기본값은 1024인데 이 파리미터는 뒤에 설명할 tcp_conn_req_max_q와 형태가
비슷하다고 무조건 늘리는 경우가 있는데 불필요하며, 이 파라미터는 completed
connection마저도 listen queue에 들어가지 못하는 경우를 제외하고는 변경할 필요가
없다.
tcp_conn_req_max_q : 바로 웹 서버 튜닝에서 가장 많이 사용하는 파라미터이다.
기본값은 128인데, 1024 이하 정도로 늘려주는 것이 바람직하다. 이는 completed
connection이 실제 처리되기까지 받아주는 큐 크기로 너무 부족하면 상당히 바쁜 웹
서버의 경우, 사용자의 요청을 놓치는 경우가 발생할 수 있기 때문이다.
tcp_slow_start_initial : TCP 프로토콜 통신에서 처음에 테스트용으로 보내는 초기화
패킷 수를 말한다. 썬의 기본값은 1인데 다른 벤더들(특히 MS)이 2개를 사용하므로
이를 2로 변경해주는 것이 바람직하다. 솔라리스 8의 경우 가끔 4인 사례를 발견할 수
있었다.
네트워크 모니터링

#netstat -s -Ptcp 커맨드를 이용하면 모든 프로토콜의 정보를 출력하는데 -Ptcp라는
옵션을 추가하면 우리가 TCP 프로토콜의 파라미터를 변경하기 전 TCP와 관련한 정보만
출력해준다.

여기서 우리가 주목해 봐야 할 것은 tcpListenDropQ0와 tcpList enDrop인데,
tcpListenDropQ0는 accept() system call시 drop된 것의 카운트(갯수)이고
tcpListenDrop(Q)은 three-way handsha ke라고도 불리는 처음 두번째 ACK를 받기 전
incompleted connection이 큐에 들어가지 못한 카운트다.

글을 맺으며

지난호의 솔라리스 기사를 보고 격려의 메일을 보내온 독자들께 감사드린다. 사실
국내외에서 엔터프라이즈급 환경이건 중소규모 환경이건 간에 가릴 것 없이 상당히
많은 환경에서 썬 기종을 사용하고 있고, 거의 예외 없이 솔라리스를 기본 운영체제로
사용하고 있음에도 불구하고 이에 대한 자료를 찾기가 힘들었다.

이번 연재가 부족하나마 그동안 솔라리스에 관한 자료에 목말라하던 여러 솔라리스
이용자들에게 조금이나마 보탬이 됐으면 한다.

필자 연락처 : security@hufs.ac.kr, http://security.hufs.ac.kr
정리 : 송우일 wooil@sbmedia.co.kr

김민형
Posted by 1010